Author Topic: 1/32 Handley Page V/1500 scratch build (slowgress report)  (Read 29591 times)

Offline gbrivio

  • Hero Member
  • *****
  • Posts: 1681
Re: Handley Page V/1500 scratch build (slowgress report)
« Reply #90 on: December 28, 2020, 02:23:07 AM »
Pity for the kitchen table, but I think almost everyone of us sooner or later managed to spoil a piece of furniture  ::)
Very nice punch concept and making of tiny pieces.
Ciao
Giuseppe

Offline Rookie

  • Hero Member
  • *****
  • Posts: 925
  • No guts, no glory...
Re: Handley Page V/1500 scratch build (slowgress report)
« Reply #91 on: May 21, 2021, 02:08:58 AM »
It's been quiet for some time on this blog, due to personal matters and a loss off gusto. There are a lot of beautiful builds on this forum, both scratch and kits, and I sometimes find the level of quality quite intimidating, making me unsure of the quality of my own messing around. Nevertheless, I have not been sitting on my hands. I have done a lot of experimenting to improve my skills. I’ve tested different glues, fillers, materials and construction methods. Also I’ve been busy making sketches of the layout of the cockpit and the IP, the struts and the rigging. And I have a few wild ideas for the wings…

As you may know, I’ve had problems with the control horns. I just couldn't get them right. There are 8 on the elevators, and 8 on the ailerons.

This aircraft has a lot of (complicated) rigging, and the control horns are part of that. Because they catch the eye, I want them to look good, and the same. After struggling for a few weeks, I decided to have them photoetched by a third party. For that, the manufacturer needs CAD drawings in .dwg format, so I had to find someone who can do this for me. I can draw up a pretty good dimensional drawing by hand, but not in a CAD program and the learning curve of these programs is pretty steep. David Hall (Jaysena) has offered me kindly to do this step for me.


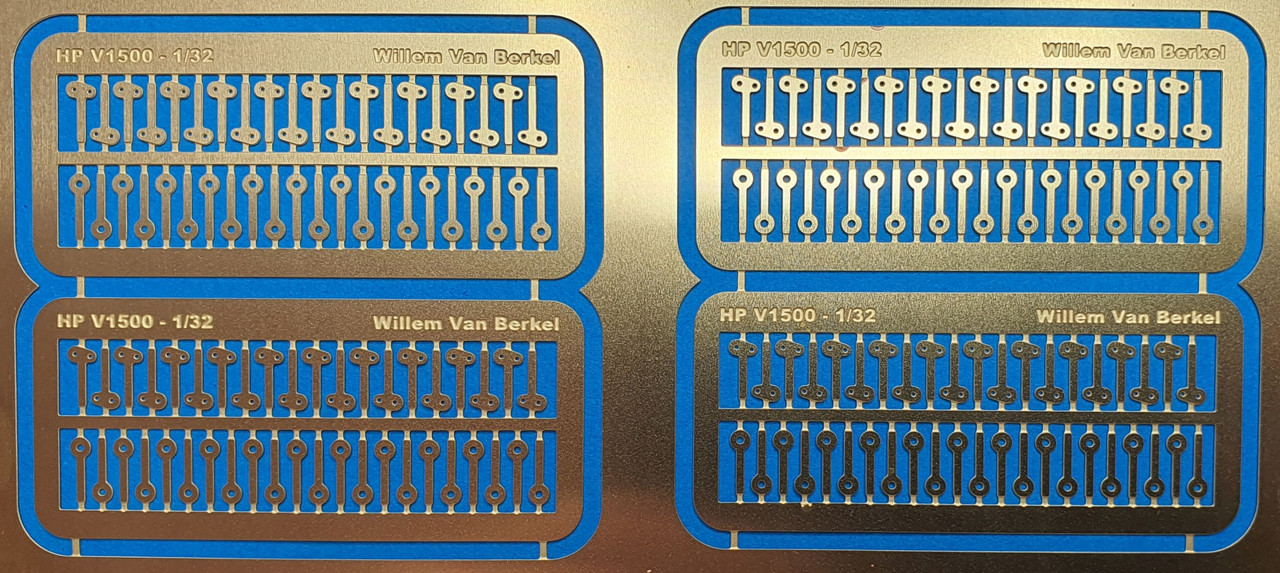
PE fret control horns for ailerons and elevators

Furthermore I have started anew with the tailplane, because I wasn’t happy with the results. The surfaces were not the right size, sometimes of by 2mm, the rounding at the tips didn’t have the same radius, the thickness was uneven and the rib simulation was not as I had hoped. I had to use a lot of filler to correct this problem. Long story short: it looks very sloppy.

The fins and rudders:

The four rudders that Ron Kootje cast for me were all wrong. That was my own fault entirely (sorry Ron). I overlooked the fact that the rudders (in contrast to the rudders of the O/100 and O/400) were balanced although it clearly says so in the article in Aircraft Pictorial April 1962 “Handley Page V/1500” by Jack Bruce.
Marty Digmayer sent me a sketch with details of the fin and rudder. Each rudder has an extra control horn that slides through a slot in the fin.
 

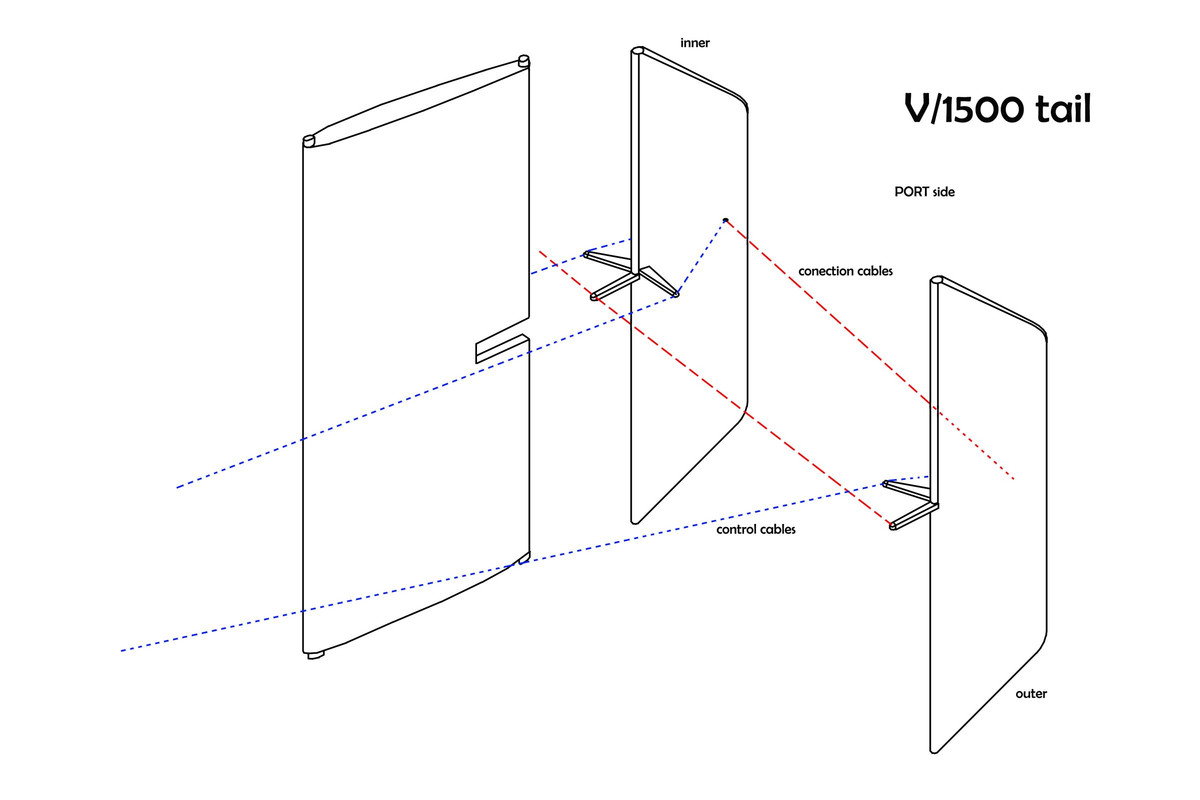
Copyright:Marty Digmayer

In the datafile picture no. 55 shows the tail of the machine in full view. Unfortunately it’s not very sharp, but Rob Mulder, author of ‘The First Aviation Exhibition Amsterdam – 1919’ sent me this high-res photograph which shows tons of details.


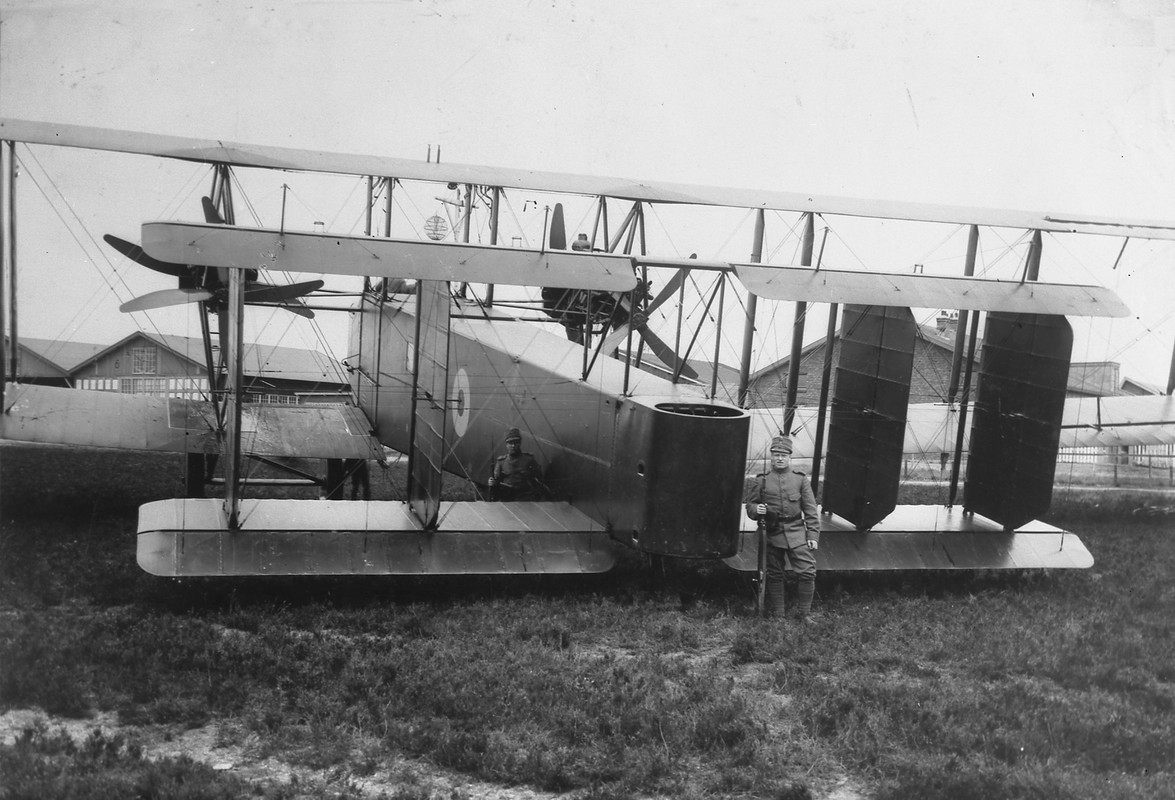
Handley Page V/1500 on the ELTA exhibition, guarded by Dutch sentries
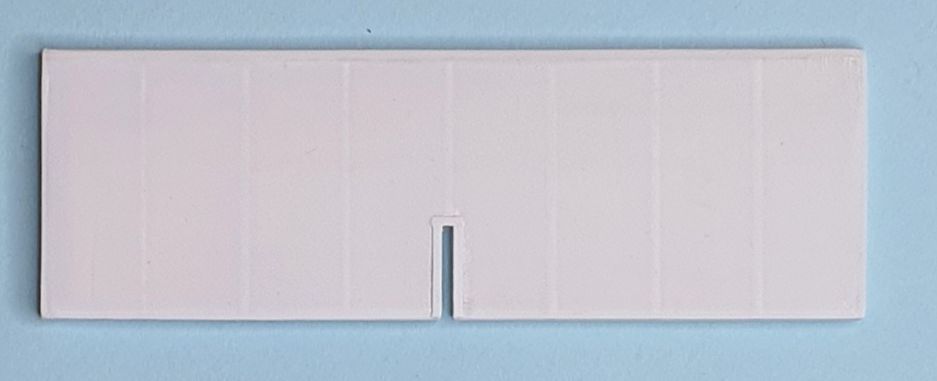
The fins:
Each fin has 4 brackets to secure them between the upper and lower stabilizer. Each fin has a slot  in the trailing edge to accommodate the movement of the rudder control horn.

The fin parts before assembly…


…and assembled


The rudders:

The rudders turn on pivots (1mm brass rod) that are embedded in the leading edge of the stabilizers. The two outside rudders have control horns with two arms, the inner two have three arms. Apart from the control cables, a reinforcement cable runs through the hole of each control arm and is connected to the top and the bottom rudder.
All four rudders are interconnected via a connection cable that runs through the fuselage just forward of the tail gunner’s cockpit.

The horns are made of 0.5 x 1.0 mm brass strip. and will not be installed until the final assembly of the tailplane.


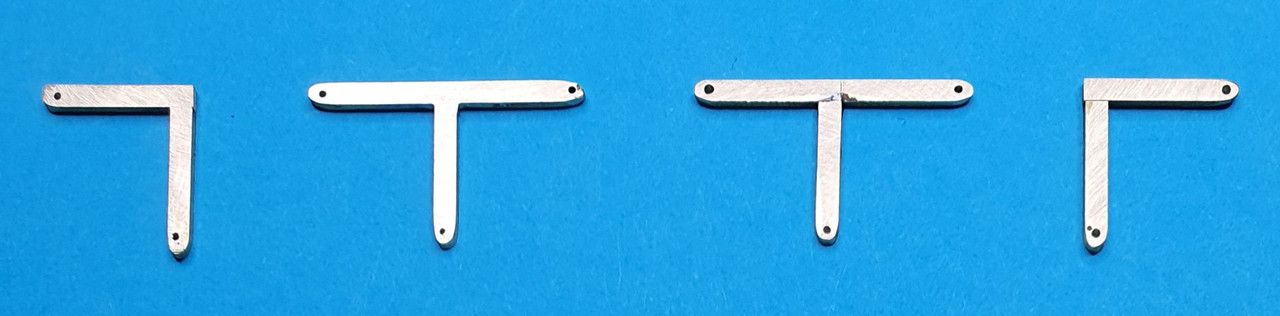
Soldered rudder control horns

The rudder parts before assembly…
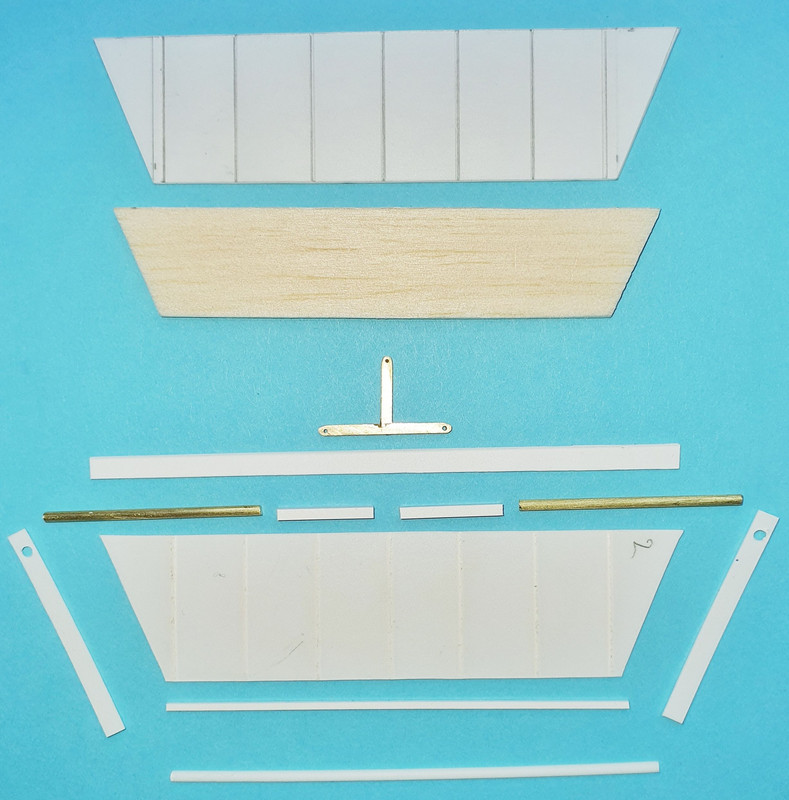

 …and after.


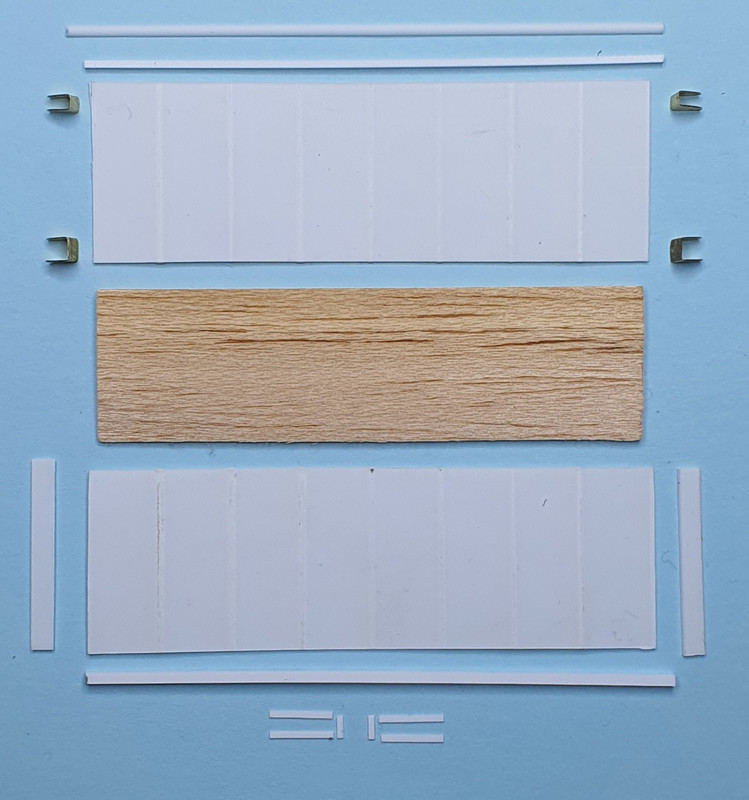
I made a little jig to make sure every part has the same length and to help me to get the rib simulations (0,25 x 1 mm plastic strip) aligned. The strips are laid out over both the fin and the rudder and glued. When al were placed they were separated and cut to the right length.


Alignment jig


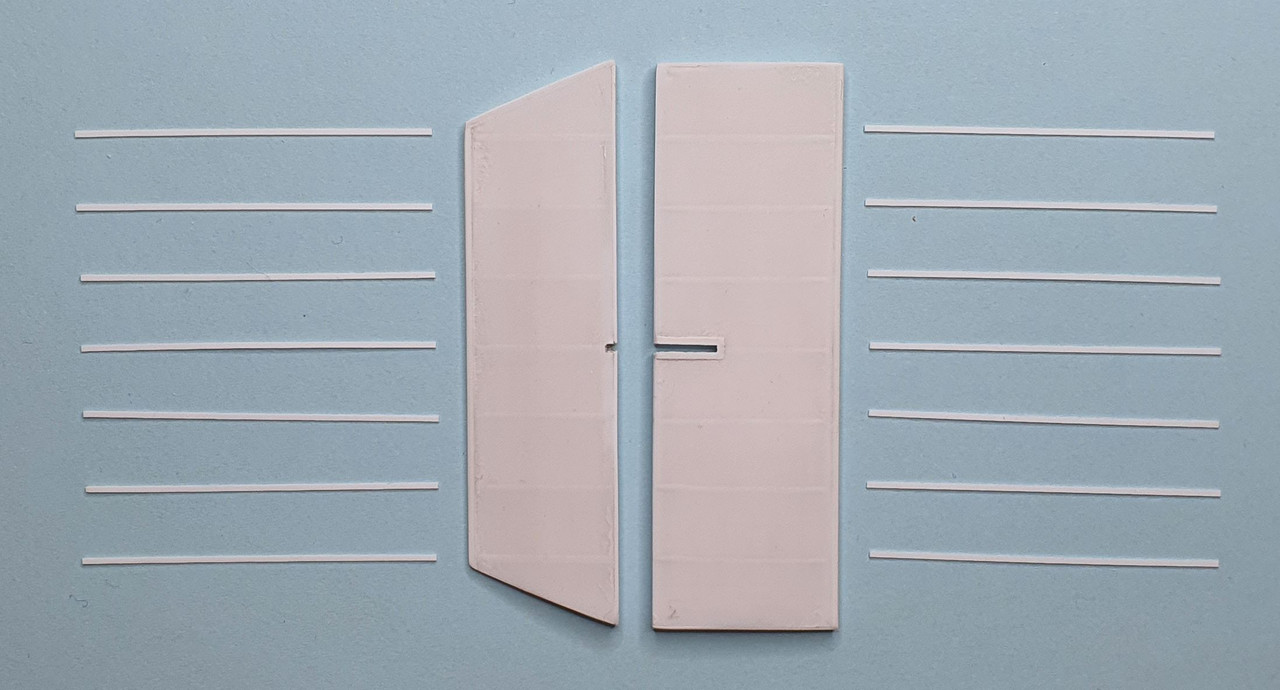
Rudder, fin + strips

I’ll be back.

Willem

Offline RichieW

  • Hero Member
  • *****
  • Posts: 1966
Re: Handley Page V/1500 scratch build (slowgress report)
« Reply #92 on: May 21, 2021, 07:47:09 AM »
Great to see you back Willem, in fine form too. The tailplane looks very impressive and precise. We're both on a steep learning curve with scratch building but will clamber our way up in the end.

What you are doing does not in any way look like messing around to me. I'm quite intimidated in fact!

Richie

Offline Alexis

  • Hero Member
  • *****
  • Posts: 7947
  • Love the self
Re: Handley Page V/1500 scratch build (slowgress report)
« Reply #93 on: May 21, 2021, 09:53:42 PM »
Hi Willem ,

The tail parts are looking really good , rudders are super ! I still wonder on where you are going to display this beast when completed  :o


Alexis
Hurra ! , Ich Leben Noch
Body and life is a vessel we use to travel the planet . Femininity is the gift , The miracle comes from what we do with it .

Offline RAGIII

  • Hero Member
  • *****
  • Posts: 18793
Re: Handley Page V/1500 scratch build (slowgress report)
« Reply #94 on: May 21, 2021, 10:53:06 PM »
Hi Willem ,

The tail parts are looking really good , rudders are super ! I still wonder on where you are going to display this beast when completed  :o


Alexis

I agree completely with Alexis! Looking fantastic!
RAGIII
"A man has to know his limitations": Harry Callahan

"Don't slop it on" Lynda Geisler

Offline Manni

  • Hero Member
  • *****
  • Posts: 1768
    • Der Militärmodellbauer
Re: Handley Page V/1500 scratch build (slowgress report)
« Reply #95 on: May 22, 2021, 12:30:04 AM »
Slowgress but progress. I am so excited how it will turn out. Great work up to now.
Bye Manni
"Ich hab' da mal was vorbereitet.": Jean Pütz
"Warum noch mehr Bausätze?!?": meine Frau

Offline lone modeller

  • Hero Member
  • *****
  • Posts: 5300
Re: Handley Page V/1500 scratch build (slowgress report)
« Reply #96 on: May 22, 2021, 01:15:14 AM »
One of the things we all do in scratch building (long after we have done quite a lot), is look back at what we have recently done and decide that it is not good enough! However there comes a stage when we have to recognise that perfection is either impossible or will take so long to achieve that the model will never be finished! The tail surfaces which you show us here are very impressive indeed - as near to perfection as anyone will ever get. One good thing is that the more you do the fewer errors you tend to make so believe it or not, things might speed up a bit in future.

This is going to be a real monster when finished, so perhaps taking your time might not be a bad idea after all as it will give you time to clear the garage to store it when finished!!!

Stephen.

Offline Rookie

  • Hero Member
  • *****
  • Posts: 925
  • No guts, no glory...
Re: Handley Page V/1500 scratch build (slowgress report)
« Reply #97 on: May 22, 2021, 05:36:25 PM »
Thank you Richie, Alexis, Rick, Manni and Stephen for your kind and encouraging comments.

Great to see you back Willem, in fine form too. The tailplane looks very impressive and precise. We're both on a steep learning curve with scratch building but will clamber our way up in the end.
What you are doing does not in any way look like messing around to me. I'm quite intimidated in fact!
Richie

It IS a steep learning curve indeed Richie. Because this is my first scratch build, I thought it would be smart to start with something simple. Well, there is nothing simple about this section, but I hope my skills are improving, and I learn a lot of the “hidden” features of this aircraft.

Hi Willem ,
The tail parts are looking really good , rudders are super ! I still wonder on where you are going to display this beast when completed  :o
Alexis

Well, so am I Alexis!  ;)
 
Hi Willem ,
The tail parts are looking really good , rudders are super ! I still wonder on where you are going to display this beast when completed  :o
Alexis
I agree completely with Alexis! Looking fantastic!
RAGIII

Thank you Rick. There is a lot to be learned from your stamina when it comes to setbacks, and I’ve had some of my own.

Slowgress but progress. I am so excited how it will turn out. Great work up to now.
Bye Manni

I got a little more tempo into this build now I feel I’m on the right track.

One of the things we all do in scratch building (long after we have done quite a lot), is look back at what we have recently done and decide that it is not good enough! However there comes a stage when we have to recognise that perfection is either impossible or will take so long to achieve that the model will never be finished! The tail surfaces which you show us here are very impressive indeed - as near to perfection as anyone will ever get. One good thing is that the more you do the fewer errors you tend to make so believe it or not, things might speed up a bit in future.
This is going to be a real monster when finished, so perhaps taking your time might not be a bad idea after all as it will give you time to clear the garage to store it when finished!!!
Stephen.

You are right Stephen. I tend to dwell on miniscule details and imperfections that (probably) no one will notice in the end. But I always feel I can to better. Right now I have more scrap styrene than finished parts! But I see it as an adventurous journey and a valuable learning process. I’ve learned a lot about tools, techniques and materials, and as a reward I now I finally have something descent to show to you guys and galls.

Scratch building is fun!

Yesterday I made good progress. The jig I made turned out to be very useful. The strips are on nicely aligned and I’m quite happy with the results.  So now I have 4 sets of fins and rudders. Today I’ll trim the excess styrene, do a little cleaning up and then it’s off to the spray booth for priming.


I’ll be back.

Willem


Offline RichieW

  • Hero Member
  • *****
  • Posts: 1966
Re: Handley Page V/1500 scratch build (slowgress report)
« Reply #98 on: May 22, 2021, 10:17:04 PM »
Excellent work Willem, your jig worked perfectly. Those strips are perfectly spaced. I am very inspired by this update, keep up the great work!

Richie

Offline RAGIII

  • Hero Member
  • *****
  • Posts: 18793
Re: Handley Page V/1500 scratch build (slowgress report)
« Reply #99 on: May 23, 2021, 01:00:20 AM »
Outstanding results. Your jig worked perfectly!
RAGIII
"A man has to know his limitations": Harry Callahan

"Don't slop it on" Lynda Geisler

Offline kensar

  • Hero Member
  • *****
  • Posts: 2503
  • Reshaping the world - one piece at a time.
Re: Handley Page V/1500 scratch build (slowgress report)
« Reply #100 on: May 23, 2021, 03:10:22 AM »
I agree with the others - excellent progress and results.  You did not choose an easy subject for your first scratchbuild!  In the end, you will be lightyears ahead of where you were at the beginning.  Having the control horns custom made is over the top!

Offline lone modeller

  • Hero Member
  • *****
  • Posts: 5300
Re: Handley Page V/1500 scratch build (slowgress report)
« Reply #101 on: May 23, 2021, 03:48:40 AM »
What a super set of tail surfaces. Yes there is much to learn in scratch building, but most of the time it is straightforward, just time consuming. You are an excellent student: you learn quickly and well.

I will be waiting for when you come back....

Stephen.

Offline Rookie

  • Hero Member
  • *****
  • Posts: 925
  • No guts, no glory...
Re: Handley Page V/1500 scratch build (slowgress report)
« Reply #102 on: May 24, 2021, 10:00:19 PM »
Thanks Ken and Stephen for the kind words. Yes, it’s not an easy subject, but I like a challenge…

I trimmed the excess and faired the strips towards the trailing and leading edge.

To get this far I used Tamiya super thin glue, Vallejo plastic putty, 240, 600 and 1200 grain sanding paper and Tamiya polishing paste.
Before putting on the primer, all the parts were blown free of dust (with compressor air) and cleaned with 97% alcohol.


This is how they look after a first layer of primer. As expected, they need a little touching up and a little more fairing.


I used Mr. Surfacer 500 from a rattle can, and although it doesn’t really show on this picture, the result is rather grainy.

The 500 grain I used, did not build up a little "ridge" to make the edges of the ribs a little smoother, but maybe that's because this is only one thin layer. I do have a compressor with a pressure tank and a single action and a double action airbrush, but I haven’t used it yet.

What do you, my fellow modelers, generally use to airbrush primer on, and with what psi?

Any advice is welcome.

Willem

Offline RichieW

  • Hero Member
  • *****
  • Posts: 1966
Re: Handley Page V/1500 scratch build (slowgress report)
« Reply #103 on: May 24, 2021, 10:31:45 PM »
Looks good Willem, I'm going to try Hycote Filler Primer from the can. It's cheap and meant for the car industry, I read about it in a new scratch building book. Mine just arrived so haven't used it yet.

I have airbrushed Mr Surfacer 1500 with success but nothing thicker yet, I think it was at 25psi but very thinned down with Mr Levelling thinner. I stripped and cleaned my airbrush afterwards as a precaution.

Richie

Offline Rookie

  • Hero Member
  • *****
  • Posts: 925
  • No guts, no glory...
Re: Handley Page V/1500 scratch build (slowgress report)
« Reply #104 on: May 25, 2021, 01:50:04 AM »
Thanks Richie.

I have some (::)) scrap styrene in my box. I'll do some testing.

And afterwards clean my airbrush REAL good.

Willem