Author Topic: Roden Fokker D.VI 1:32  (Read 16882 times)

Offline RAGIII

  • Hero Member
  • *****
  • Posts: 18964
Re: Roden Fokker D.VI 1:32
« Reply #45 on: January 02, 2021, 02:15:52 AM »
Nice work on the Spandaus even if they were the wrong ones  8) I am sure when you get the correct ones they will be equally well done!
RAGIII
"A man has to know his limitations": Harry Callahan

"Don't slop it on" Lynda Geisler

Offline Fvdm

  • Sr. Member
  • ****
  • Posts: 326
Re: Roden Fokker D.VI 1:32
« Reply #46 on: January 09, 2021, 08:07:45 PM »
Thanks Rick.

The new parts arrived so finally I could continue with the MG's. First thing I noticed was that the back part must be used from the kitpart.


The differences are obvious, the cooling jacket and the nozzle at the end of the barrel are totally different. For the first one I used CA-glue. For the second however I used my soldering iron and that went very well. I prefer soldering above glue for strenght. When the first part is ready and the backend of the kitpart is separated from the barrel we have the following parts


When these parts are glued together it's time for the visor can be placed.


When I was working on the second visor the part suddenly jumped out of the tweezers and is eaten by the carpetmonster. I decided to use the visor from the 08 despite the very small difference in diameter. At the front of the jacket there was a bracket to be placed. You can see the parts in the middle.


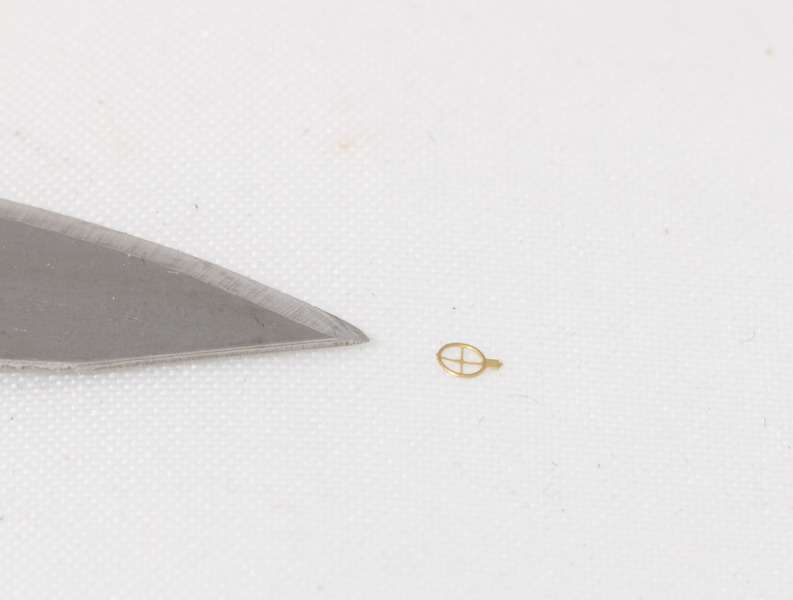
I think these are very small but the artists who are modelling in 1:72 or 1:144 would laugh at this I reckon. As you can see there are two foldinglines and when the part is folded this is the result


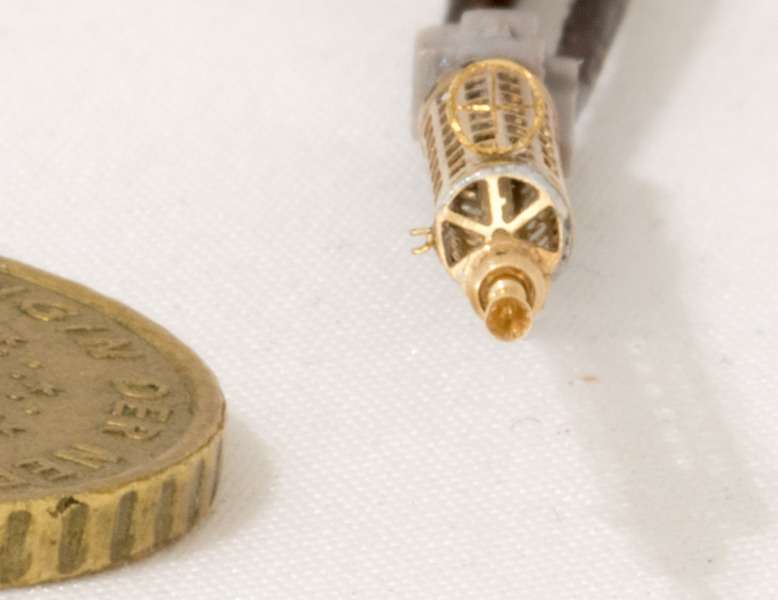
I used a 10 cent coin so you can see the bracket, and yes, this one is folded twice.Last the mounting bracket had to be placed


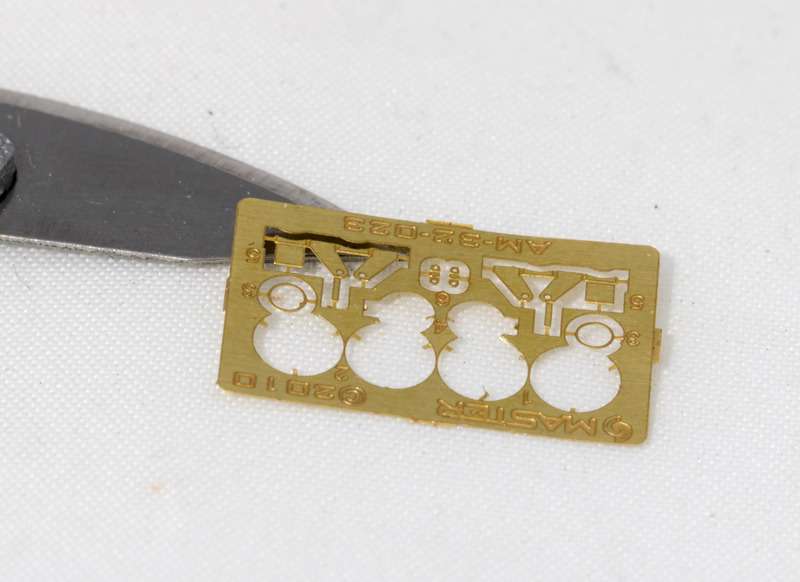
I'm not even going to try to bend the bracket because 'll certainly break it. O, the large chunk of Non-ferro is the 10 cent coin

And finally an overal shot


Thanks for watching.
Ferry

Offline rhwinter

  • Hero Member
  • *****
  • Posts: 1136
Re: Roden Fokker D.VI 1:32
« Reply #47 on: January 09, 2021, 08:54:05 PM »
😳 GOSH! Tiny, tiny bits...

Offline Alexis

  • Hero Member
  • *****
  • Posts: 7947
  • Love the self
Re: Roden Fokker D.VI 1:32
« Reply #48 on: January 09, 2021, 11:20:49 PM »
Nice work on the guns parts  :)


Alexis
Hurra ! , Ich Leben Noch
Body and life is a vessel we use to travel the planet . Femininity is the gift , The miracle comes from what we do with it .

Bughunter

  • Guest
Re: Roden Fokker D.VI 1:32
« Reply #49 on: January 10, 2021, 12:19:14 AM »
Your parts are huge ;D ;D in 1/48 the Master pieces are much smaller 8) The side clamp is really crazy.
The nice thing on 1/48 is, that the PE has spares.
I can recommend to black oxide finishing the parts, it keeps the details better then paint. But it has the disadvantage, that you cannot solder them (the solder will not get black).
See here (and two postings below): https://forum.ww1aircraftmodels.com/index.php?topic=10717.msg208208#msg208208

Cheers,
Frank

Offline RAGIII

  • Hero Member
  • *****
  • Posts: 18964
Re: Roden Fokker D.VI 1:32
« Reply #50 on: January 10, 2021, 01:00:14 AM »
Your Spandaus' came out great! I am looking forward to seeing them blackened!
RAGIII
"A man has to know his limitations": Harry Callahan

"Don't slop it on" Lynda Geisler

Offline Fvdm

  • Sr. Member
  • ****
  • Posts: 326
Re: Roden Fokker D.VI 1:32
« Reply #51 on: January 10, 2021, 06:59:51 PM »
Thank you all.

Your parts are huge ;D ;D in 1/48 the Master pieces are much smaller 8) The side clamp is really crazy.
The nice thing on 1/48 is, that the PE has spares.
I can recommend to black oxide finishing the parts, it keeps the details better then paint. But it has the disadvantage, that you cannot solder them (the solder will not get black).
See here (and two postings below): https://forum.ww1aircraftmodels.com/index.php?topic=10717.msg208208#msg208208

Cheers,
Frank

If I understand correctly the burnishing needs to be done before assembling. That means that I'm a bit late now but I'll sure order some burnishing fluid for next time.

This kind of tips and tricks are why I like the forum so much!

Bughunter

  • Guest
Re: Roden Fokker D.VI 1:32
« Reply #52 on: January 10, 2021, 10:40:16 PM »
Yes, the (my) fluid will only attack the brass, so the color of the solder stays unchanged.
Same with already glued with CA - the fluid cannot reach the glue points (like masking) ;)

Cheers,
Frank

Offline FAf

  • Hero Member
  • *****
  • Posts: 1101
Re: Roden Fokker D.VI 1:32
« Reply #53 on: January 11, 2021, 07:18:27 AM »
Great work on the guns... both times! 😉
Very clean modelling!
/Fredrik

Offline Borsos

  • Hero Member
  • *****
  • Posts: 3328
Re: Roden Fokker D.VI 1:32
« Reply #54 on: January 13, 2021, 08:49:57 AM »
Great work on the guns. And another reminder for me, how much I love Gaspatch ready made guns...  :)
Andreas
"Deux armées aux prises, c'est une grande armée qui se suicide."
Barbusse.
"Ein Berg in Deutschland kann doch einen Berg in Frankreich nicht beleidigen. Oder ein Fluß oder ein Wald oder ein Weizenfeld."
Remarque.

Offline fredjocko

  • Sr. Member
  • ****
  • Posts: 436
Re: Roden Fokker D.VI 1:32
« Reply #55 on: January 14, 2021, 02:36:09 AM »
The guns look amazing! I cannot wait to see the finished product.

Offline Fvdm

  • Sr. Member
  • ****
  • Posts: 326
Re: Roden Fokker D.VI 1:32
« Reply #56 on: January 15, 2021, 06:45:06 PM »
Thank you all.

Last week I was working on the landinggear and I started decalling the underside of the wings. I don't understand these decals from Roden because there where not enough for the topwing?? I wouldn't buy to much AM for this kit but I decided to buy the Aviattic decals afterall. I hope they are in sone but you never know with the Brexit. We'll see.

So, the landinggear. Th ekit parts are real weak so I binned it en toke the some brass rod 0,8mm en brass tube 1,6mm od x 1,4mm id.


It has to be a streamlined profile. I put the rod in the tube, the tube in the vise en closed the vise. When ready you get this ( I know this is probally already known but I just describe the method for the WIP)


For now I like it. The rod can be provided with flux and put in the rod again together with some solder. A quick heating with the torch and voila.


When I got 4 tubes I put them in the small wing and glued it with 2 components glue............


For sure this is real sturdy. Now I can make the struts for the wings.

Thanks for watching.

Ferry

Offline RAGIII

  • Hero Member
  • *****
  • Posts: 18964
Re: Roden Fokker D.VI 1:32
« Reply #57 on: January 16, 2021, 01:30:59 AM »
Impressive work on the gear! This is something I need to learn soon  ::) Looking forward to more!
RAGIII
"A man has to know his limitations": Harry Callahan

"Don't slop it on" Lynda Geisler

Bughunter

  • Guest
Re: Roden Fokker D.VI 1:32
« Reply #58 on: January 16, 2021, 04:36:57 AM »
Metal struts are always a good option in my opinion, well done!

If you like a more aerofoil shape: for scale 1/32 our member Flugzeugwerke offers a tool on shapeways.com:
https://www.shapeways.com/product/N6N2WG6JA/1-32-fokker-d-vii-quot-strut-smasher-quot-tool

In 1/48 it is not so easy, but a colleague with a 3D-printer helped me.

Cheers,
Frank

Offline Fvdm

  • Sr. Member
  • ****
  • Posts: 326
Re: Roden Fokker D.VI 1:32
« Reply #59 on: January 16, 2021, 09:13:51 PM »
That's a real nice tool Frank. I only wonder if the plastic is durable enough. I'll order one nevertheless and give it a try.

Impressive work on the gear! This is something I need to learn soon  ::) Looking forward to more!
RAGIII

Everyone can do this Rick. You only need some tube and a vise.