Author Topic: ANSALDO SVA 5 - 1/48 Fly - Ten. Aldo Finzi  (Read 23404 times)

Offline Dal Gavan

  • Sr. Member
  • ****
  • Posts: 469
Re: ANSALDO SVA 5 - 1/48 Fly - Ten. Aldo Finzi
« Reply #30 on: May 16, 2013, 07:53:51 AM »
G'day, Antonio.

Happy birthday for yesterday, mate.  This is another aircraft I didn't know existed and I'm enjoying learning about it, via your build.  It's looking good, mate.

I wonder if WNW or Roden would consider doing one of these in 1/32?

Dal. 

Offline DaveM

  • Jr. Member
  • **
  • Posts: 82
Re: ANSALDO SVA 5 - 1/48 Fly - Ten. Aldo Finzi
« Reply #31 on: May 16, 2013, 06:23:55 PM »
Happy birthday Antonio,and hope you have a great time in Paris.Just returned from a very enjoyable (and bloody expensive!!!) few days in Venice,have come over all Italian,so enjoying your build,how will I cope without updates for several days????Lol!

Dave.

Offline andonio64

  • Hero Member
  • *****
  • Posts: 1685
  • There's no hurry
Re: ANSALDO SVA 5 - 1/48 Fly - Ten. Aldo Finzi
« Reply #32 on: May 22, 2013, 06:47:38 PM »
Thanks mates,
I have come back yesterday evening, the trip was fantastic and how could it be different, for me Paris is like my second home, I go there every time I can.
One time I will go to pay a tribute to the Lafayette Escadrille Monument.

OK, I think I'll get back to the workbench on this weekend, and hope to share with all of you new material...

Ciao

Antonio

Offline uncletony

  • Hero Member
  • *****
  • Posts: 4349
    • Aircraft In Pixels
Re: ANSALDO SVA 5 - 1/48 Fly - Ten. Aldo Finzi
« Reply #33 on: May 22, 2013, 09:43:22 PM »
Welcome back, Antonio!

Offline andonio64

  • Hero Member
  • *****
  • Posts: 1685
  • There's no hurry
Re: ANSALDO SVA 5 - 1/48 Fly - Ten. Aldo Finzi
« Reply #34 on: May 29, 2013, 05:01:15 PM »
Thanks Bo, here is some new work done:

Woodgrain painted on the vertical panels of the fuselage.


...oops an unexpected visitor wanted to check...
 ^_^


Waiting for the paint to dry I printed on paper the self made decals to see if their size fits.
I am reusing the design made for the other SVA I did a couple of years ago.

Before closing the fuselage I want to put the decals on, in particular I need to lay down the big flag and pierce it to let the tail planes / rudder control cables peep out from the fuselage.

The big flag decals provided by the kit are too big, also because I had to cut away a piece of the tail, but they also are too big with respect to the fuselage surface and on the port side they would cover the access steps to the cockpit, I didn't like the color either, too bright.


I fixed 2 thin plasticard rods on top of the top wing to make the guides holding in place the gravity tank.
The tank in the photo is just laid on the wing to check the distance between rails.


Some work is shown below: I needed to drill the pieces where control horns will go (I took them from a generic "PARTS" ww1 elements photoetched fret)

Rudder


Horizontal tail planes


Top wing

Left aileron


Right aileron


Yesterday night I started preshading the wing to enhance the ribs (using my usual India ink technique) before laying the CDL colour


That's all for now, things proceed smoothly enough so far.

Thanks for looking!

AnDonio

Offline rhallinger

  • Hero Member
  • *****
  • Posts: 1976
Re: ANSALDO SVA 5 - 1/48 Fly - Ten. Aldo Finzi
« Reply #35 on: May 29, 2013, 08:36:03 PM »
Great work Antonio!  She's shaping up to be a beautiful and elegant bird.  Your craftsmanship and attention to detail are impressive.  Well done!

Regards,

Bob

Offline GAJouette

  • Hero Member
  • *****
  • Posts: 3579
  • " Beware of the Spanish Inquisition"
Re: ANSALDO SVA 5 - 1/48 Fly - Ten. Aldo Finzi
« Reply #36 on: May 29, 2013, 09:32:13 PM »
  Antonio,
Welcome back my old friend. As always beautiful work and I believe Bob's term "Elegant" best describes this work in progress. Keep up the outstanding progress.
Highest Regards,
Gregory Jouette
" What Me Worry"

Offline pepperman42

  • Hero Member
  • *****
  • Posts: 4443
  • Sergeant, my brown pants.......
Re: ANSALDO SVA 5 - 1/48 Fly - Ten. Aldo Finzi
« Reply #37 on: May 30, 2013, 02:18:25 PM »
Nice work. The deep wood tones are excellent!!

Steve

Offline IFF1418

  • Hero Member
  • *****
  • Posts: 1541
Re: ANSALDO SVA 5 - 1/48 Fly - Ten. Aldo Finzi
« Reply #38 on: June 01, 2013, 04:55:31 PM »
I like the woodwork very much Antonio. Great work. I like the cat too!

Kind regards

Patrick

Offline Ernie

  • Hero Member
  • *****
  • Posts: 3961
  • "Once more into the breach"
Re: ANSALDO SVA 5 - 1/48 Fly - Ten. Aldo Finzi
« Reply #39 on: June 01, 2013, 08:18:21 PM »
This is shaping up to be a beautiful model, Antonio.  I like the
rich woodwork.  Well done with your scratch-building.
Thanks for sharing your work with us.

Best Regards,
Ernie
The new old guy, take two...

Offline andonio64

  • Hero Member
  • *****
  • Posts: 1685
  • There's no hurry
Re: ANSALDO SVA 5 - 1/48 Fly - Ten. Aldo Finzi
« Reply #40 on: June 17, 2013, 05:25:21 AM »
Hallo folks,
here is the state of the art:


I shaded the wings and the tail planes and removed the masking tape.
The red dots are tiny slices of electric wire coating (see zoom top left) I cut and glued to the wing to simulate the rim of the hole where the control cables come out
In yellow the masking tape for the roundels on the upper wing: I decided to apply the decals over the shading so that the shading itself will be visible from below. If I had painted the roundel place with CDL it would have dimmed the effect.
On the port lower wing (appearing on the right in the picture) there was one rib more (13) than on the starboard side (12)!  When I realized that I had nearly completed the work so I decided to leave it as it is...


Here are the lower surfaces. I left blank the reference points for the struts.


Here the CDL work is complete on the top surfaces...


and on the bottom ones

I left blank the surfaces where the tricolore (red / green) will be painted for the same reason I masked the decal places: the color has to show the shading.


This is a detail on the fin/rudder: same idea of leaving blank the parts where the fabric was overpainted with the tricolore.
The "white" stripe between red and green was not painted white but left in the raw fabric colour.

Next step is painting the red / green areas then print the decals and apply them to wings tail and fuselage.

Ciao

Antonio

Offline GAJouette

  • Hero Member
  • *****
  • Posts: 3579
  • " Beware of the Spanish Inquisition"
Re: ANSALDO SVA 5 - 1/48 Fly - Ten. Aldo Finzi
« Reply #41 on: June 19, 2013, 03:28:08 AM »
  Antonio,
As always my old friend excellent and outstanding works.
Highest Regards,
Gregory Jouette
" What Me Worry"

Offline RAGIII

  • Hero Member
  • *****
  • Posts: 18859
Re: ANSALDO SVA 5 - 1/48 Fly - Ten. Aldo Finzi
« Reply #42 on: June 19, 2013, 05:16:23 AM »
Antonio,
Beautiful work! The wood grain is stunning!
RAGIII
"A man has to know his limitations": Harry Callahan

"Don't slop it on" Lynda Geisler

Offline andonio64

  • Hero Member
  • *****
  • Posts: 1685
  • There's no hurry
Re: ANSALDO SVA 5 - 1/48 Fly - Ten. Aldo Finzi
« Reply #43 on: July 08, 2013, 06:27:59 AM »
Thank you Gregory, RagIII and everybody,

I can show here some more work done since last update:

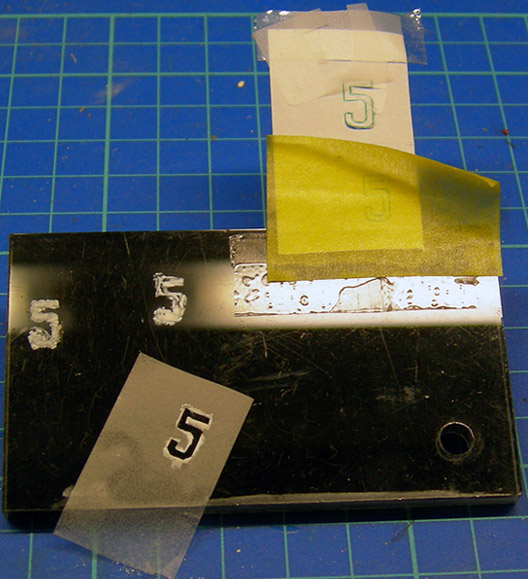
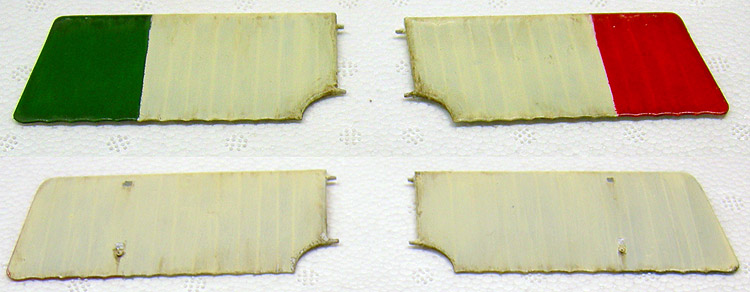
Printed the home made decals:

First sheet is a "clear" one


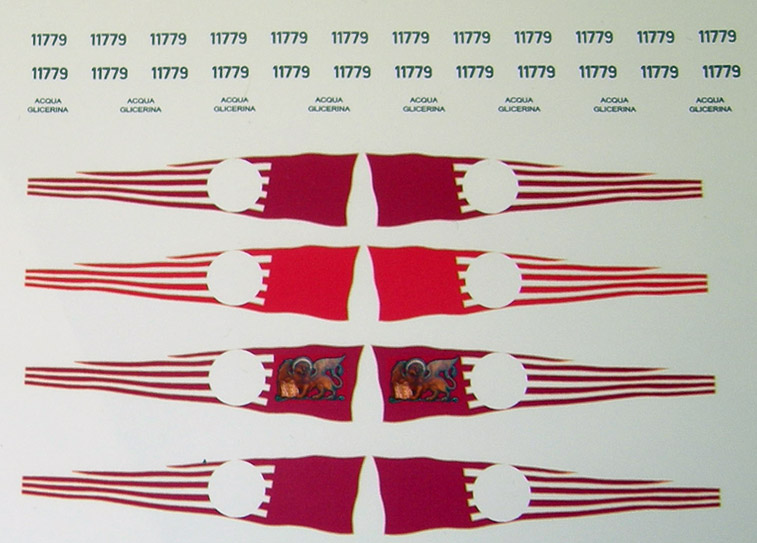
and is a white sheet


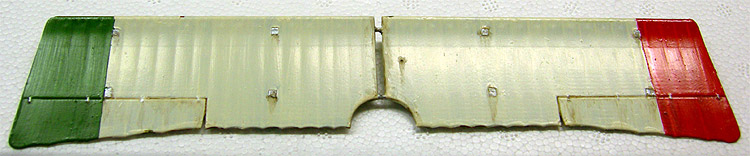
I'll made my first try with the big flag painted on the fuselage printed on the clear sheet.
On my previous SVA 5 I used the white one and had to cut each of the pieces... really tiresome and I discovered I have a low level of cutting capabilities 
:-)

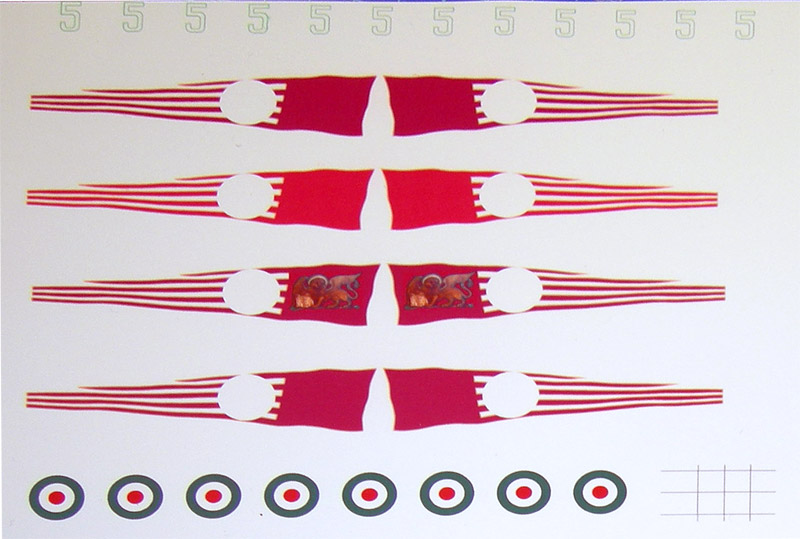
The long "5" row outlined in green is a try  to get the white "5" on the fin and tailplanes, I wanted to cut them with a lancet.

Then I found these markers with white ink in a stationery shop:


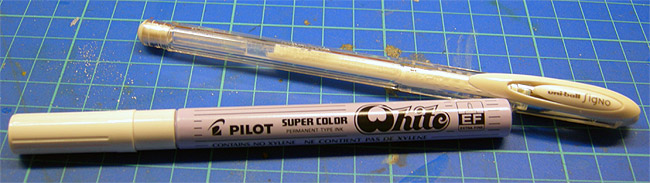
Here are their tips:


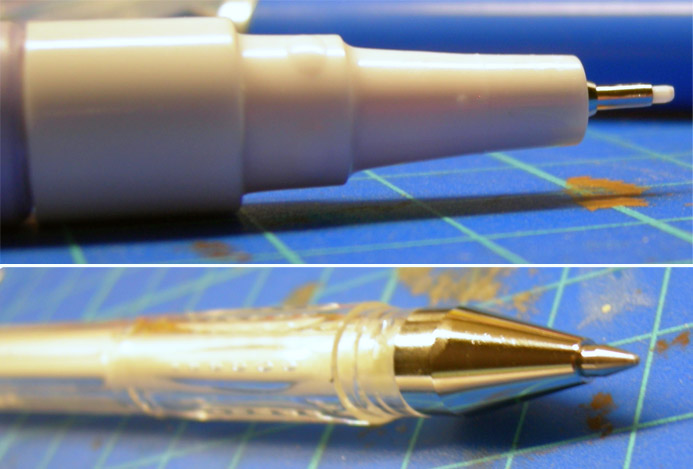
On top the Pilot, below the Uniball Signo (which is nothing else than a gel ink Pen)

So I decided to try the, and I cut a clear "scotch" removable tape and paint the 5 with those markers.
Here are the terible results of some tries made on a black Plexiglas piece:


The arrow point at a try done with the Pilot marker on  a piece of clear decal sheet coated with transparent opaque finish, too liquid and uncontrollable...


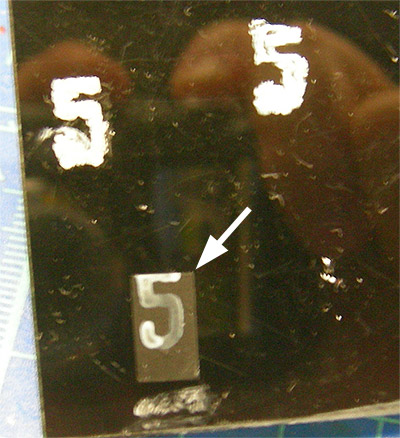
The ink gel pen makes a thick mark on the surface where it writes, so that it appears as a relief mark so it can't work in my case.

So in the end I decided to let everything down and go by freehand: I fixed a printed paper sheet on the piece and tried to slightly carve the angle points with this iron point.


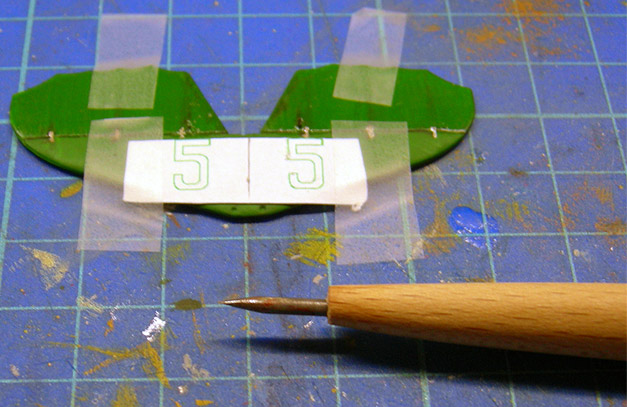
Then I joined the points and drew the 5 myself: this is an intermediate stage, I proceeded scratchimg off the green paint and letting the white primer coating appear from below


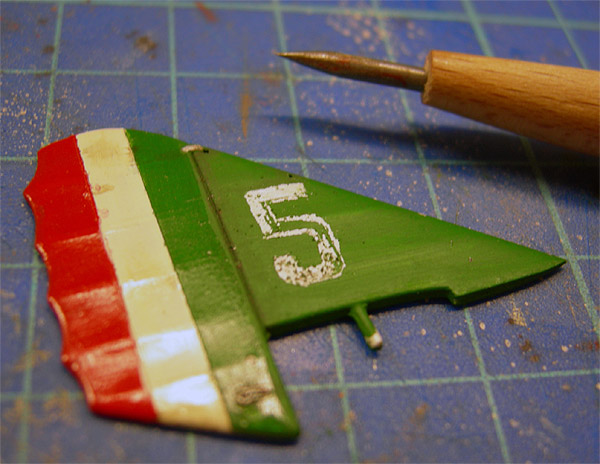
Then I touched it up paintting over with a off white colour.

This is the final result:

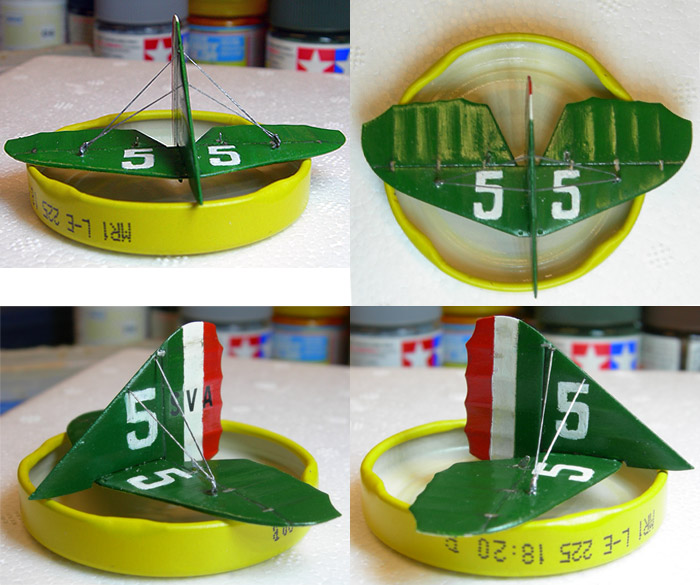
I am pretty satisfied with it

Here you can see the current state of the lower wings: painted and weathered


This is the work done on the upper wing:

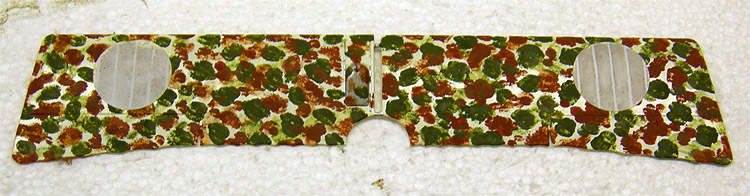
Camouflage and preshading appearing on the roundels' spot


Roundels in place

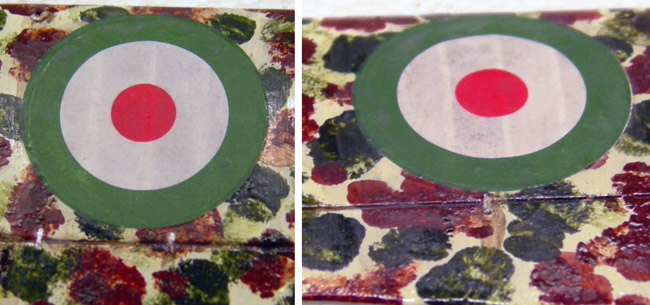
the roundels were shiny and glossy, the colours were too bright, so I coated them with matt varnish and washed the surface with a _very_ diluted medium gray.


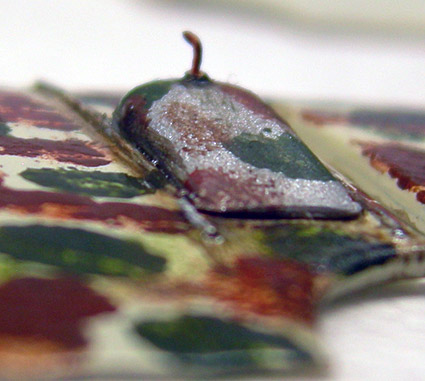
Detail of the gravity tank


Lower surface of the top wing.

That's all for today.

Thanks for stopping by!.

Antonio

PS what would you have done to paint the 5 on the tail surfaces?????

Offline mc65

  • Full Member
  • ***
  • Posts: 216
Re: ANSALDO SVA 5 - 1/48 Fly - Ten. Aldo Finzi
« Reply #44 on: July 09, 2013, 07:41:24 AM »
bello, anto'! ;)

really a nice work!
to paint the 5s, probably I would have used the 5s cut in the tape protecting the white base. after painting the final finish, I would have removed the tape. easy easy! ;)