Author Topic: 1/32 Royal Aircraft Factory BE 2a  (Read 13478 times)

Offline Beto

  • Full Member
  • ***
  • Posts: 179
Re: 1/32 Royal Aircraft Factory BE 2a
« Reply #60 on: May 18, 2022, 08:30:00 AM »
Hi Stephen,

I've only just come across your BE.2a WIP and its great to see it taking shape.
I have a set of 45 Royal Aircraft factory manufacturing drawings dated 1913 for the BE.2a.
I would be pleased to send you copies if you could provide me with your email address.

David

Hi David, by chance could you also have manufacturing drawings for the early BE2c? I have searched high and low with pretty bad luck and I REALLY am in need of them. (I'm building a 1/8th scale static, uncovered model)

Offline Jaysena

  • Newbie
  • *
  • Posts: 18
Re: 1/32 Royal Aircraft Factory BE 2a
« Reply #61 on: May 18, 2022, 08:29:52 PM »
Hi Beto, Unfortunately not. However, many of the original Royal Aircraft Establishment (R.A.E) factory drawings are held at the National Archive in Kew, London, including those for the BE2c. These haven't been digitized and probably never will be but I believe you can personally visit and take photos by prior arrangement. Here's a link that will take you to the specific location for the BE2c.

https://discovery.nationalarchives.gov.uk/results/r/5?_q=Royal%20Aircraft%20Factory%20BE%202c

All the best

David

Offline lone modeller

  • Hero Member
  • *****
  • Posts: 5316
Re: 1/32 Royal Aircraft Factory BE 2a
« Reply #62 on: May 21, 2022, 03:47:35 AM »
David,

My apologies for the slow reply - I have not been on top form over the past few days - better now thank goodness. I would be very interested in your kind offer - pm sent.

Stephen.

Offline Jaysena

  • Newbie
  • *
  • Posts: 18
Re: 1/32 Royal Aircraft Factory BE 2a
« Reply #63 on: May 21, 2022, 11:00:58 PM »
No problem Stephen,

I'll send them across to you right now.

David

Offline lone modeller

  • Hero Member
  • *****
  • Posts: 5316
Re: 1/32 Royal Aircraft Factory BE 2a
« Reply #64 on: August 01, 2022, 08:05:08 AM »
Evening All,

After a long delay in which I have made three unsuccessful attempts to mould an upper wing section I decided to change tack and start on another part of the model. I have painted the lower wing half in a mixture of Revell acrylics: beige and white. Lots of very thin coats to build up the paint and get a smooth finish. The rigging wires can also be seen - I had to paint around them:


The plastic bag was to protect the fuselage frame while I painted the wing but now it is protecting the wing while I paint and work on the fuselage frame. The frame was first primed with Halfords' rattle can white and then painted in Revell acrylics - a mixture of Okre, Braun and just a small amount of red to give a reddish hue to the wood. Rigging of the frame followed:


I am experimenting with materials with this model so I decided to use real wood for the upper and lower fuselage surfaces as they were wood on the original machines. I used some laminate from a pack of assorted wood and I do not know from which species of tree the wood was taken, but after it had been given a coat of varnish it looked fine to me. I have cut an upper and lower decking:


The lower decking has been super-glued into place:


The next stage will be to add the cockpit details: seats, fuel tank under the observer seat and flying controls and wires before I add the upper decking. This sequence should allow me access to the fuselage so that I can insert the small parts - on the completed model I intend to leave the fuselage sides open.

Thanks for looking.

Stephen.
« Last Edit: August 01, 2022, 08:14:20 AM by lone modeller »

Offline Rookie

  • Hero Member
  • *****
  • Posts: 927
  • No guts, no glory...
Re: 1/32 Royal Aircraft Factory BE 2a
« Reply #65 on: August 01, 2022, 08:19:51 AM »
Stephen, good to see you back working on the BE 2a. I'm sorry to hear of your trouble with the upper wing. Can you tell us what the problem is?

Still, you are making good progress. The  wings   look spot on, they have a beautiful finish.

I think the wood looks very convincing!

Willem

Offline KiwiZac

  • Global Moderator
  • Hero Member
  • *****
  • Posts: 2623
    • My Linktree
Re: 1/32 Royal Aircraft Factory BE 2a
« Reply #66 on: August 01, 2022, 09:26:58 AM »
Another beauty in the works. I'm glad you've moved on to other parts in the meantime - hopefully they'll allow the lightning bolt of fixingness to strike!
Zac in NZ

Offline DaveB

  • Hero Member
  • *****
  • Posts: 1005
Re: 1/32 Royal Aircraft Factory BE 2a
« Reply #67 on: August 02, 2022, 02:27:49 AM »
Good to see you are back on this one again, Steve -

Nice progress and I really like the real wood strip used for the underside of the fuselage.

Regards

Dave
As we say in fencing, what's the point!

Offline FAf

  • Hero Member
  • *****
  • Posts: 1071
Re: 1/32 Royal Aircraft Factory BE 2a
« Reply #68 on: August 03, 2022, 09:33:13 PM »
I just read through the thread and as always I'm blown away by what you do. It looks really good, but it doesn't look easy at all! I struggle to see myself do something like this. 😀
/Fredrik

Offline ondra

  • Hero Member
  • *****
  • Posts: 910
Re: 1/32 Royal Aircraft Factory BE 2a
« Reply #69 on: August 03, 2022, 10:27:03 PM »
A brilliant exhibition of your scratchbuilding skills, Stephen, chapeau!

Cheers

Ondra

Offline lone modeller

  • Hero Member
  • *****
  • Posts: 5316
Re: 1/32 Royal Aircraft Factory BE 2a
« Reply #70 on: August 04, 2022, 06:19:37 AM »
Thank you all for the positive remarks - I really appreciate them, especially at the moment when I am having difficulty concentrating and keep running into problems.

Willem: the problem with the wing is that I am making it in two sections - an upper and lower. I am push moulding the parts and these are large for the method which I use. I cannot get the plastic to soften sufficiently for me to be able to push through two even parts to make a sensible wing section. I have made one section for the lower wing on the second attempt, but this upper wing section is proving to be more tricky. I will make one eventually - I just have to keep trying....

Stephen.

Online RAGIII

  • Hero Member
  • *****
  • Posts: 18839
Re: 1/32 Royal Aircraft Factory BE 2a
« Reply #71 on: August 04, 2022, 07:52:03 AM »
First, it is great to see you back on this project! The fuselage is looking awesome as is the lower wing and rigging attachments! I am certain that you will figure out the upper wing molding, You Always Do!!
RAGIII
"A man has to know his limitations": Harry Callahan

"Don't slop it on" Lynda Geisler

Offline lone modeller

  • Hero Member
  • *****
  • Posts: 5316
Re: 1/32 Royal Aircraft Factory BE 2a
« Reply #72 on: August 05, 2022, 06:23:30 AM »
Thank you Rick for the comment and your certainty about my ability. Just recently I have had my doubts, but I will continue to try - it may just take a little longer than usual.

Stephen.

Offline RichieW

  • Hero Member
  • *****
  • Posts: 1966
Re: 1/32 Royal Aircraft Factory BE 2a
« Reply #73 on: October 22, 2022, 03:29:53 AM »
Sorry to hear this has stalled for now, what you have done so far looks really wonderful. When you feel ready to pick it up again I am certain you will complete a truly spectacular model of this elegant biplane.

Richie

Offline lone modeller

  • Hero Member
  • *****
  • Posts: 5316
Re: 1/32 Royal Aircraft Factory BE 2a
« Reply #74 on: November 03, 2022, 07:55:11 AM »
Evening All,

Thanks for your encouraging comment Richie - you will be pleased to read that after a long absence I am able to post some more on this build. In fact I have done more than I realised until I came to post this material!

The BE 2 was a two seat reconnaissance machine, so two wicker seats were needed. I have tried scratch building them but decided that life is too short when there is a high quality option available: step in Barracuda with their resin seats. Some may argue that the Baraccuda pattern is wrong, (wicker seats varied considerably), but photos do not show the real things in any detail so I have gone with these:


The seats were mounted on frames and the frames held with wires which were fixed to corners of the fuselage frame. I made the wood frames for the seats with 10 x 20 thou plastic strip and the lap belts from paper. The belts are based on photos of originals which were posted on Britmodeller some years ago.

Other interior details include the control column and rudder bar. The former was made from plastic rod, the latter from scrap plastic. Both have been rigged with EZ line to represent the control wires which will extend to the rudder and elevators later:


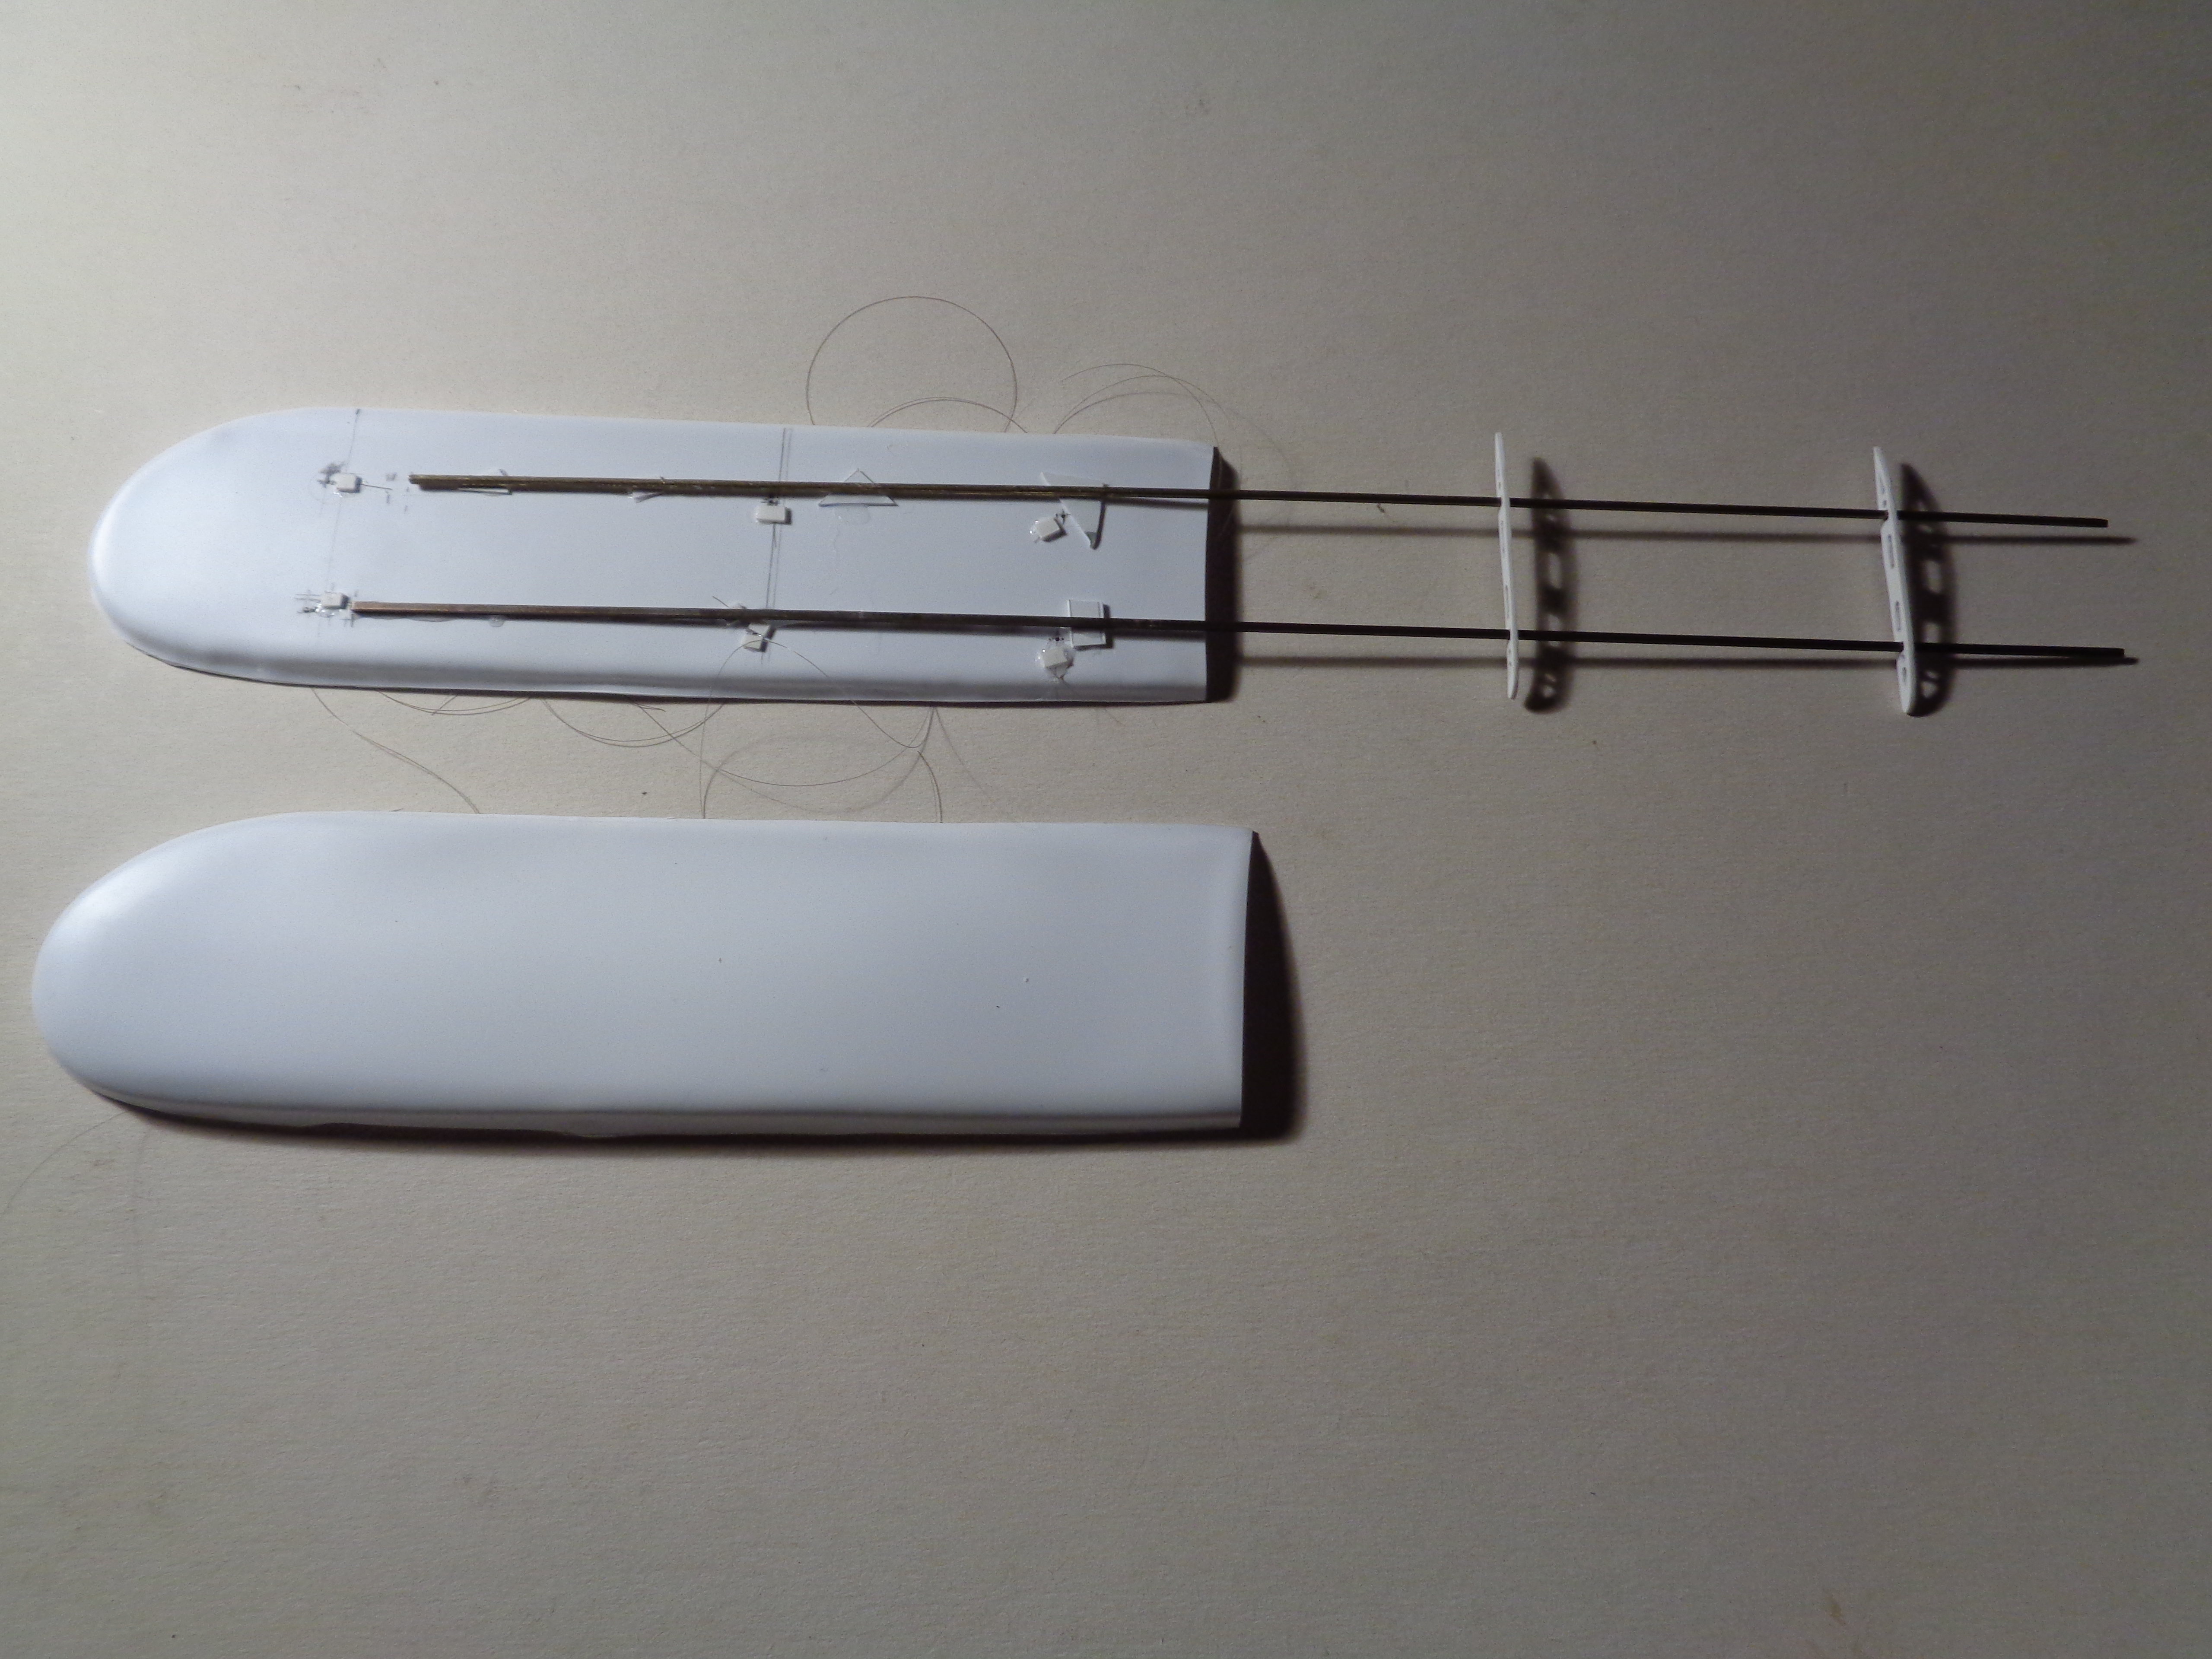
The lower wing which has the structure exposed has had the centre spar added. This was made up from 40 x 60 thou Evergreen strip with small holes made at the points were they join the ribs and where a rigging wire will pass later:


This is still not ready for paint because I still need to add the leading and trailing edge parts and the leading edge strengthening ribs, but I am avoiding them at the moment as they will only get damaged while I handle the model to add other parts.

I have at last got the top wing sandwich sorted out. I moulded the upper and lower parts successfully, drilled the lower half and added the rigging wires, and joined the two parts:


Note the advanced clamps used to hold things while they dried out. The joint was as usual best described as an ugly mess, but filing and sanding and the use of card filler and putty soon sorted out those problems on the underside.

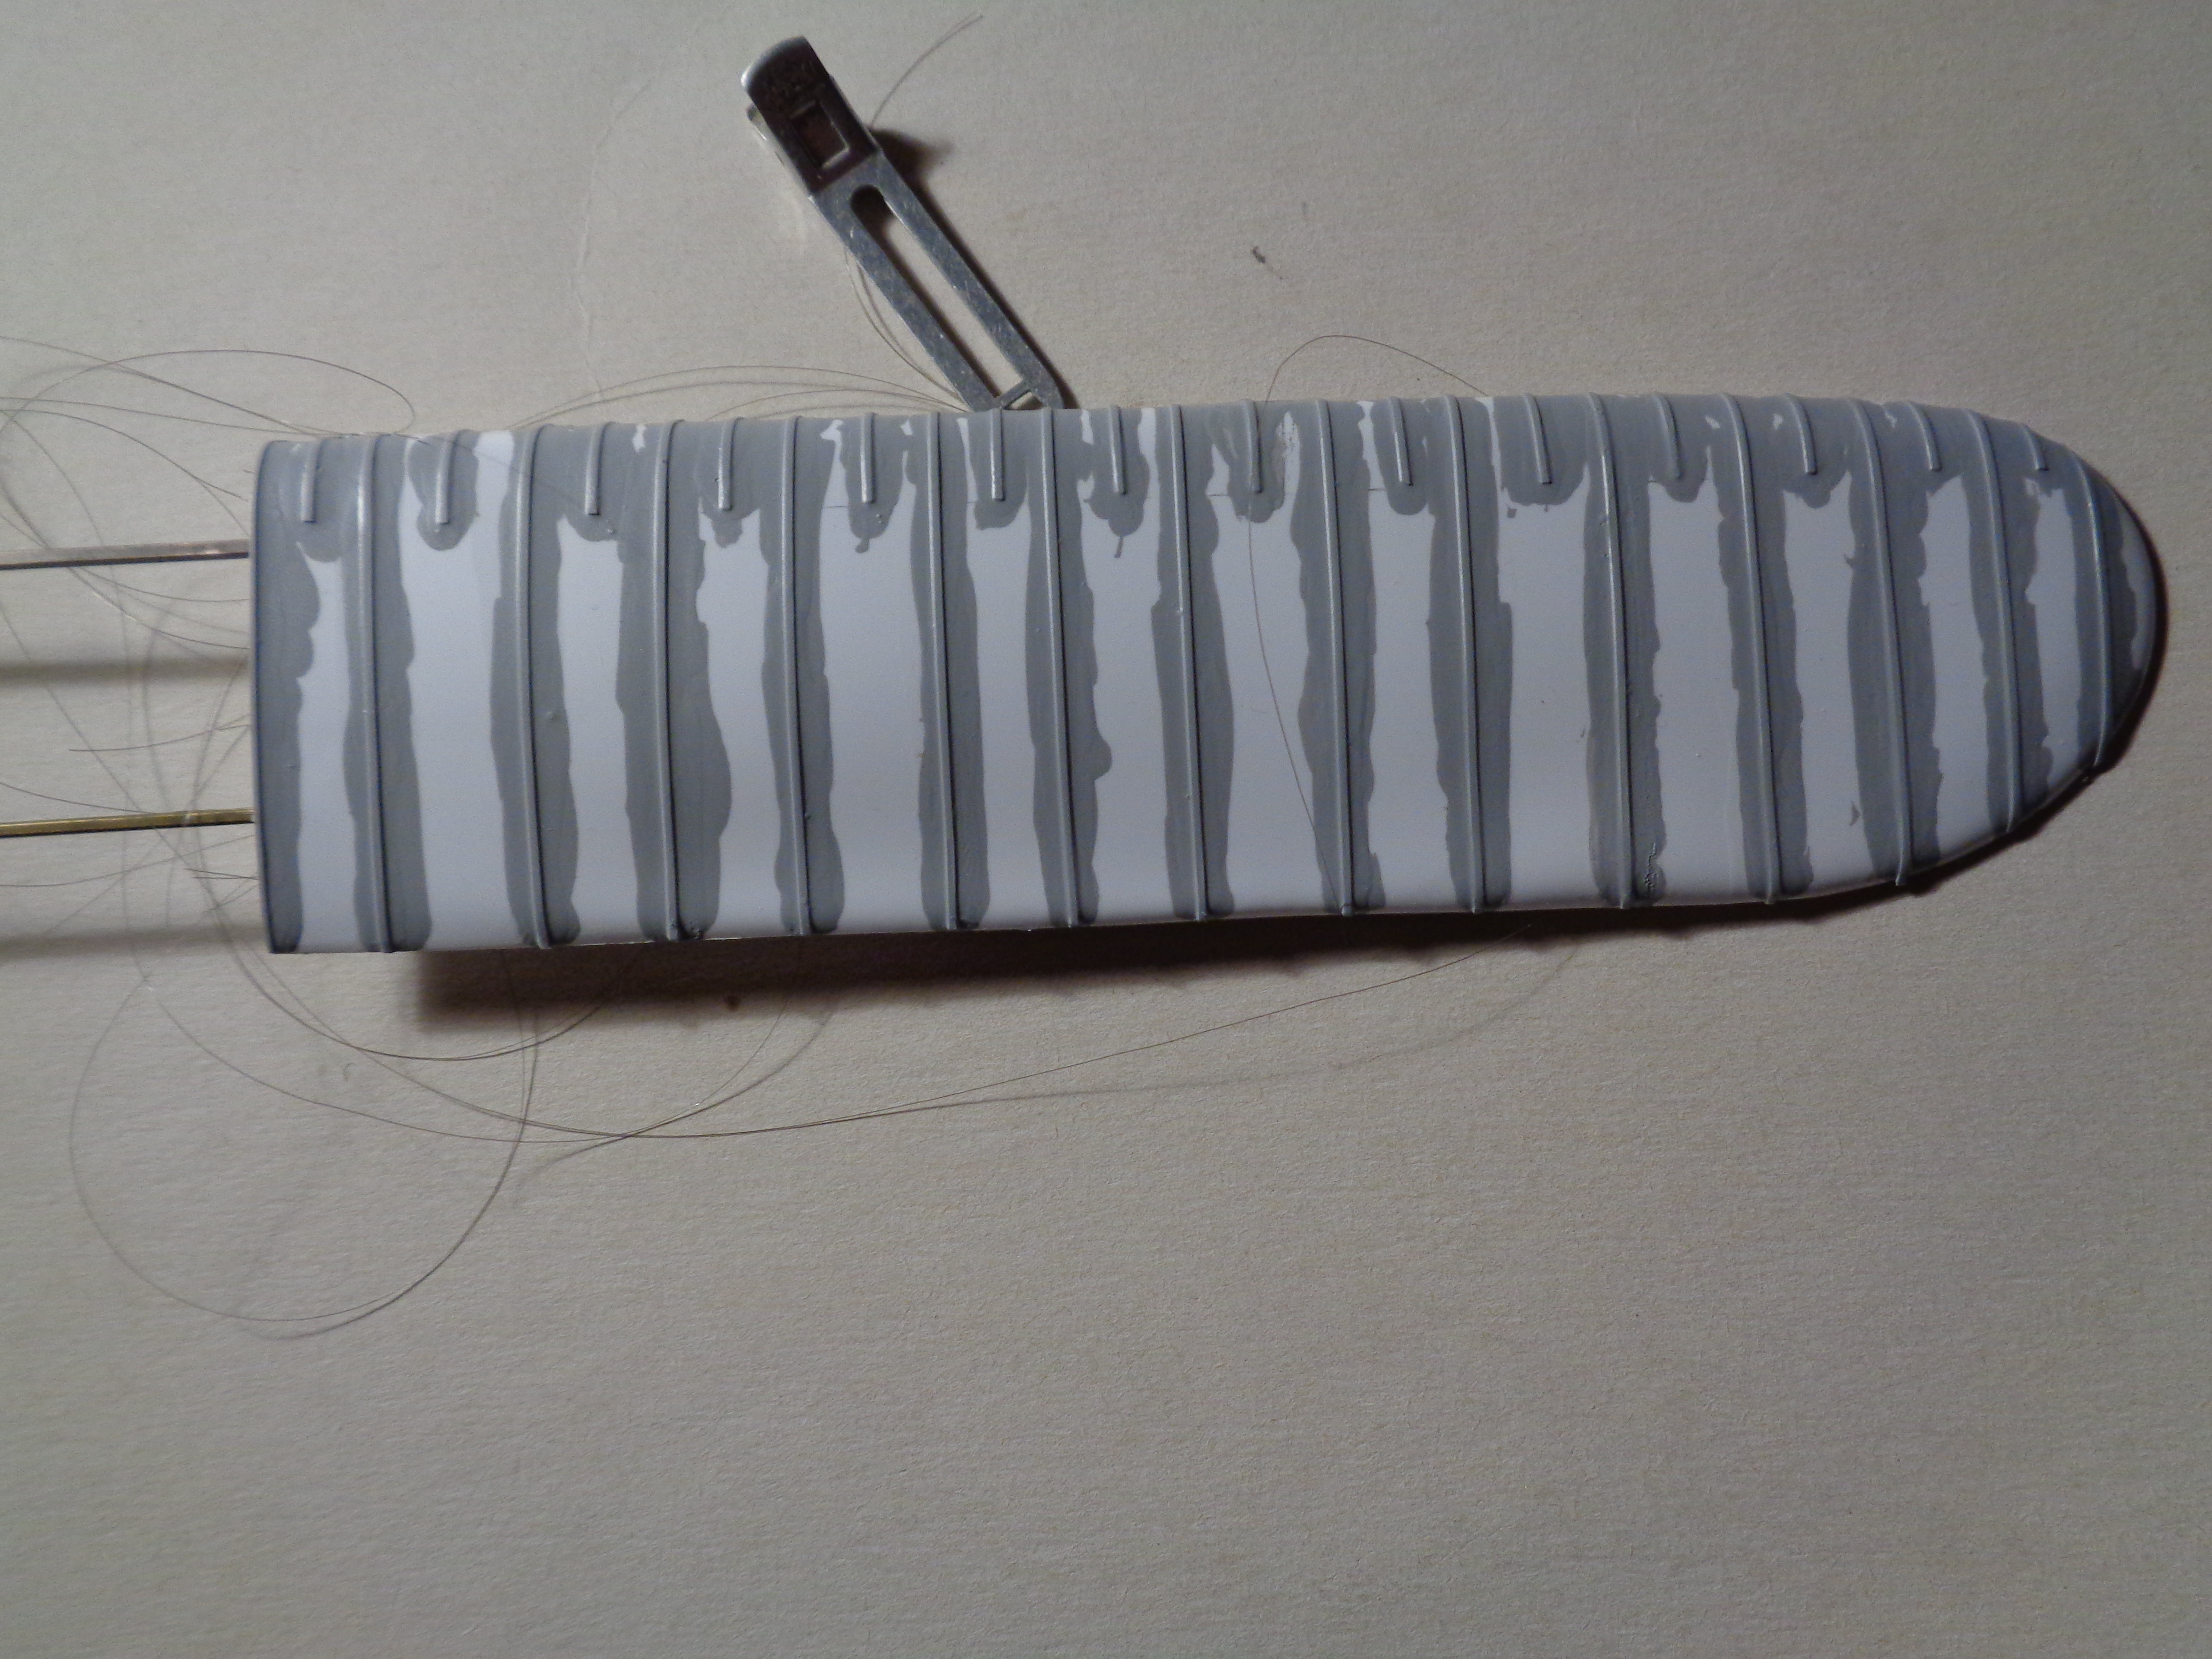
The ribs are 10 x 30 thou Evergreen strip with a liberal coating of Surfacer 500. I have not sanded the ribs down yet - probably two or three sessions will be needed with an application of Surfacer between each coat, followed by a Surfacer 1000 to finish them off. At least this part is now well on the way to completion at last. (The clip is holding rigging wires):


I have decided to make the wooden parts of the fuselage from wood for two reasons: first I am a hopeless artist and painting plastic to look like wood is not at all easy for me. Secondly the most realistic wood effect is obtained by using real wood. I have already shown the lower fuselage surface in place: I cut a second piece for the upper decking. The cockpit curvature was cut out with a craft knife and finshed with a round file and glasspaper wrapped around a piece of dowel. The fuselage immediately behind the pilot was raised and consisted of a piece of curved wood which was supported by small triangular braces. I cut the vertical face from the same marquetry wood as the fuselage panels, and shaped the top with a craft knife and sanded it smooth. I carefully curved it to fit the shape of the cockpit opening: this was a delicate operation as the wood is so thin it would easily break, so I superglued one end of the curve to the top of the fuselage panel. When this had set I glued a short length to the panel, gently bending the wood as I did so, and held it in place while the glue set. I repeated this operation several times until I had worked my way around the rear of the cockpit opening. Finally I cut the three triangular braces and superglued them into place. The image shows the finished part - the panel is resting on the fuselage frame at the moment as I still have to add the controls and other internal details:


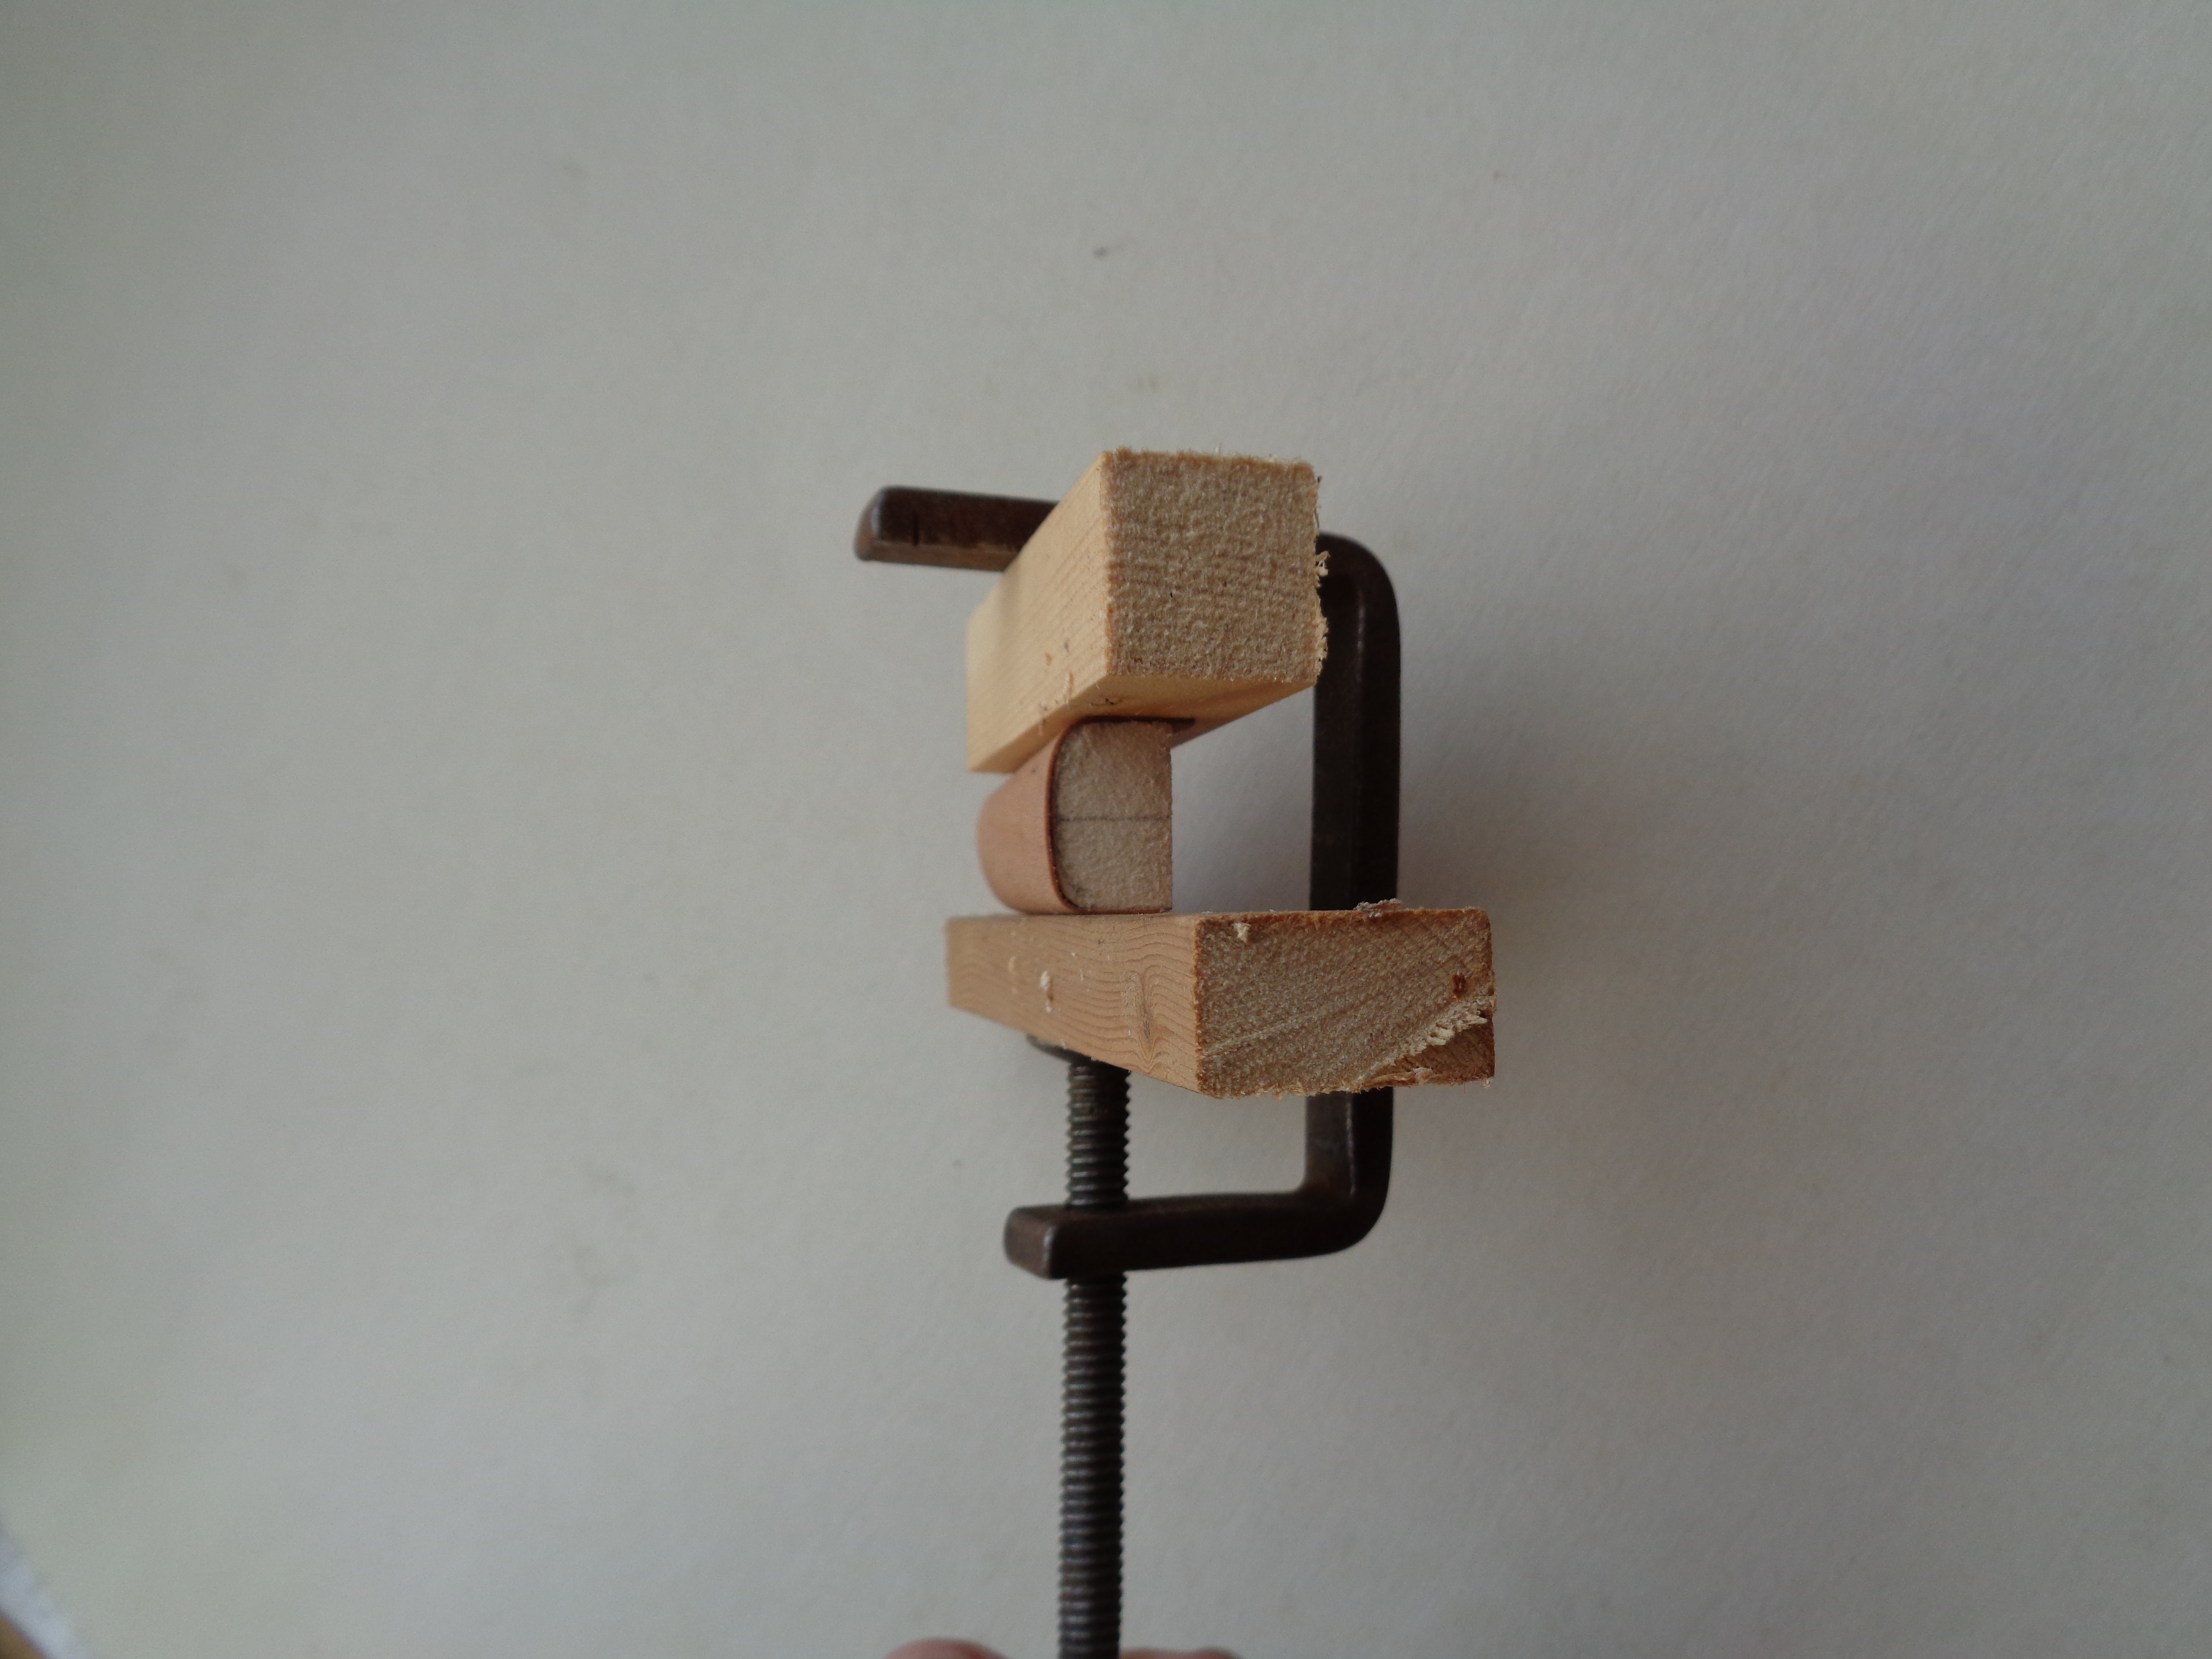
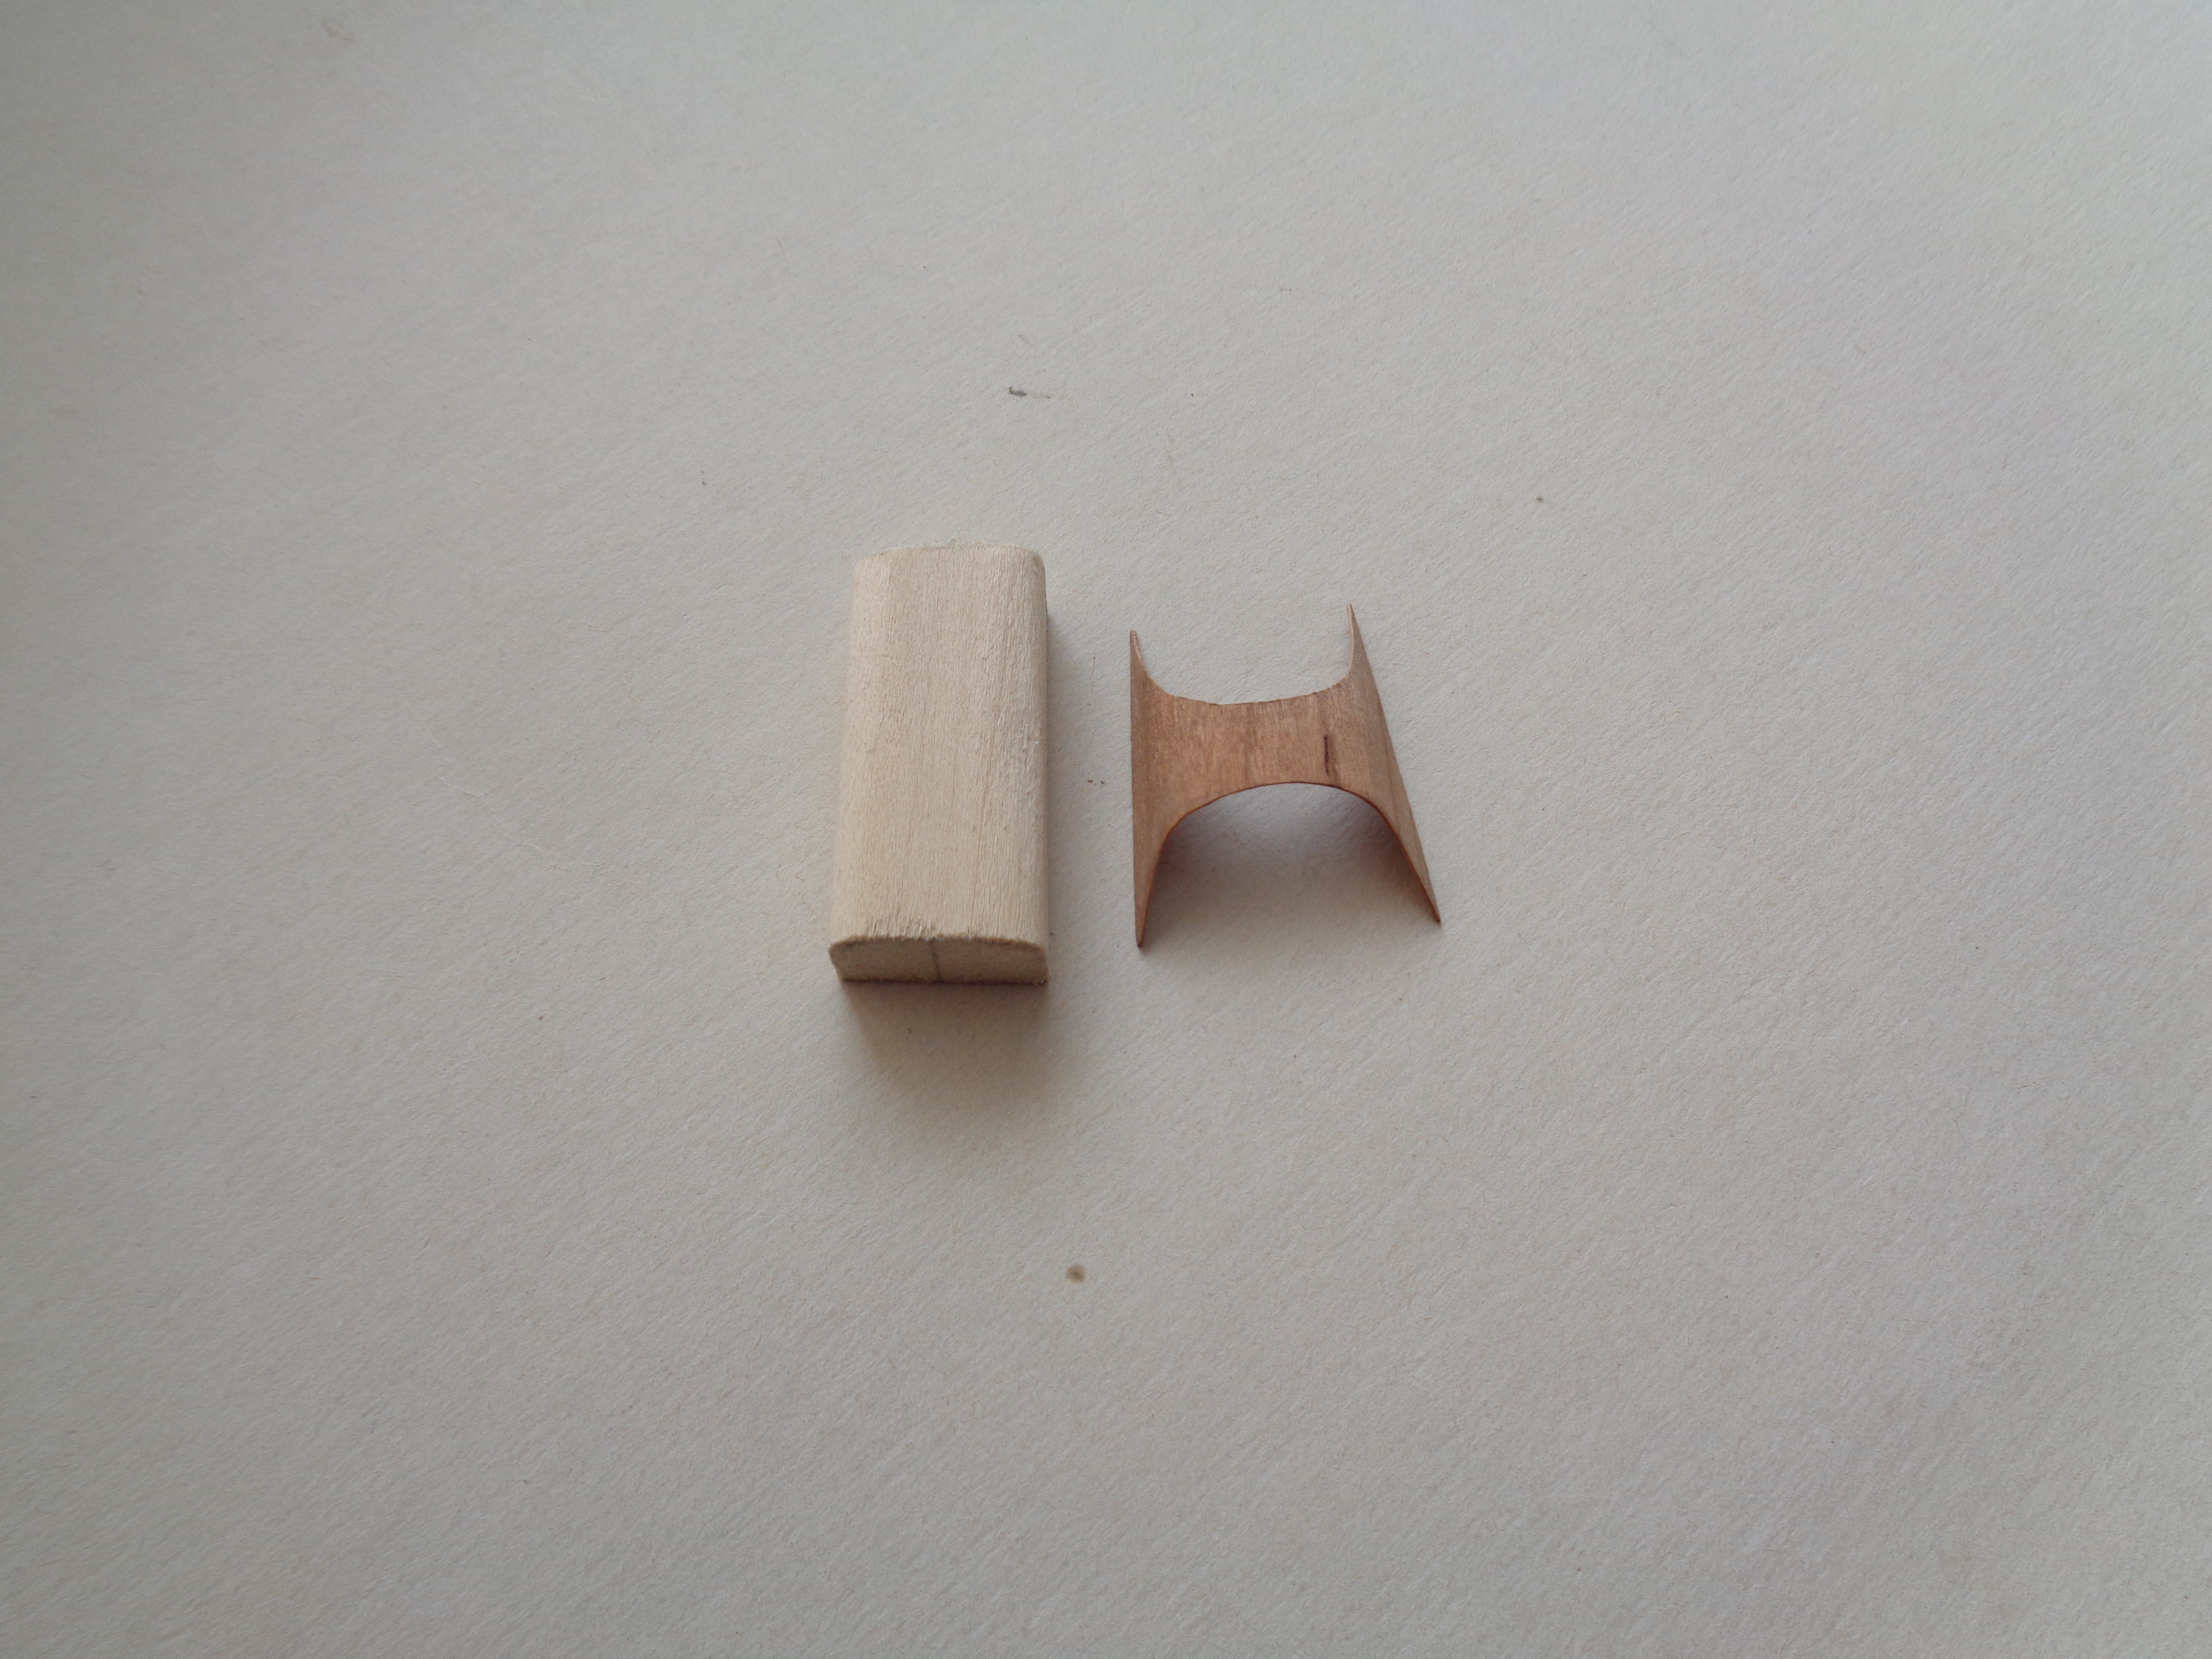
The other part which I have made from wood was the decking between the pilot and observer's cockpits. On the original this was made from plywood which had been steamed and bent to shape, and has a marked forward slope. The curve of the decking was such that I could not bend the marquetry wood unaided, so I resorted to steaming it too. I have never used the steam bending method before, but a quick search on the net provided me with useful tutorial videos and I worked out a method. I made a mould from basswood in the same way as i would have done to make a part from plastic. This had a sufficiently large curve to allow the wood to be bent over it without breaking. A piece of wood which was larger than the final piece was cut and bent over the mould and held in place with a simple clamp and wood buffers:

[


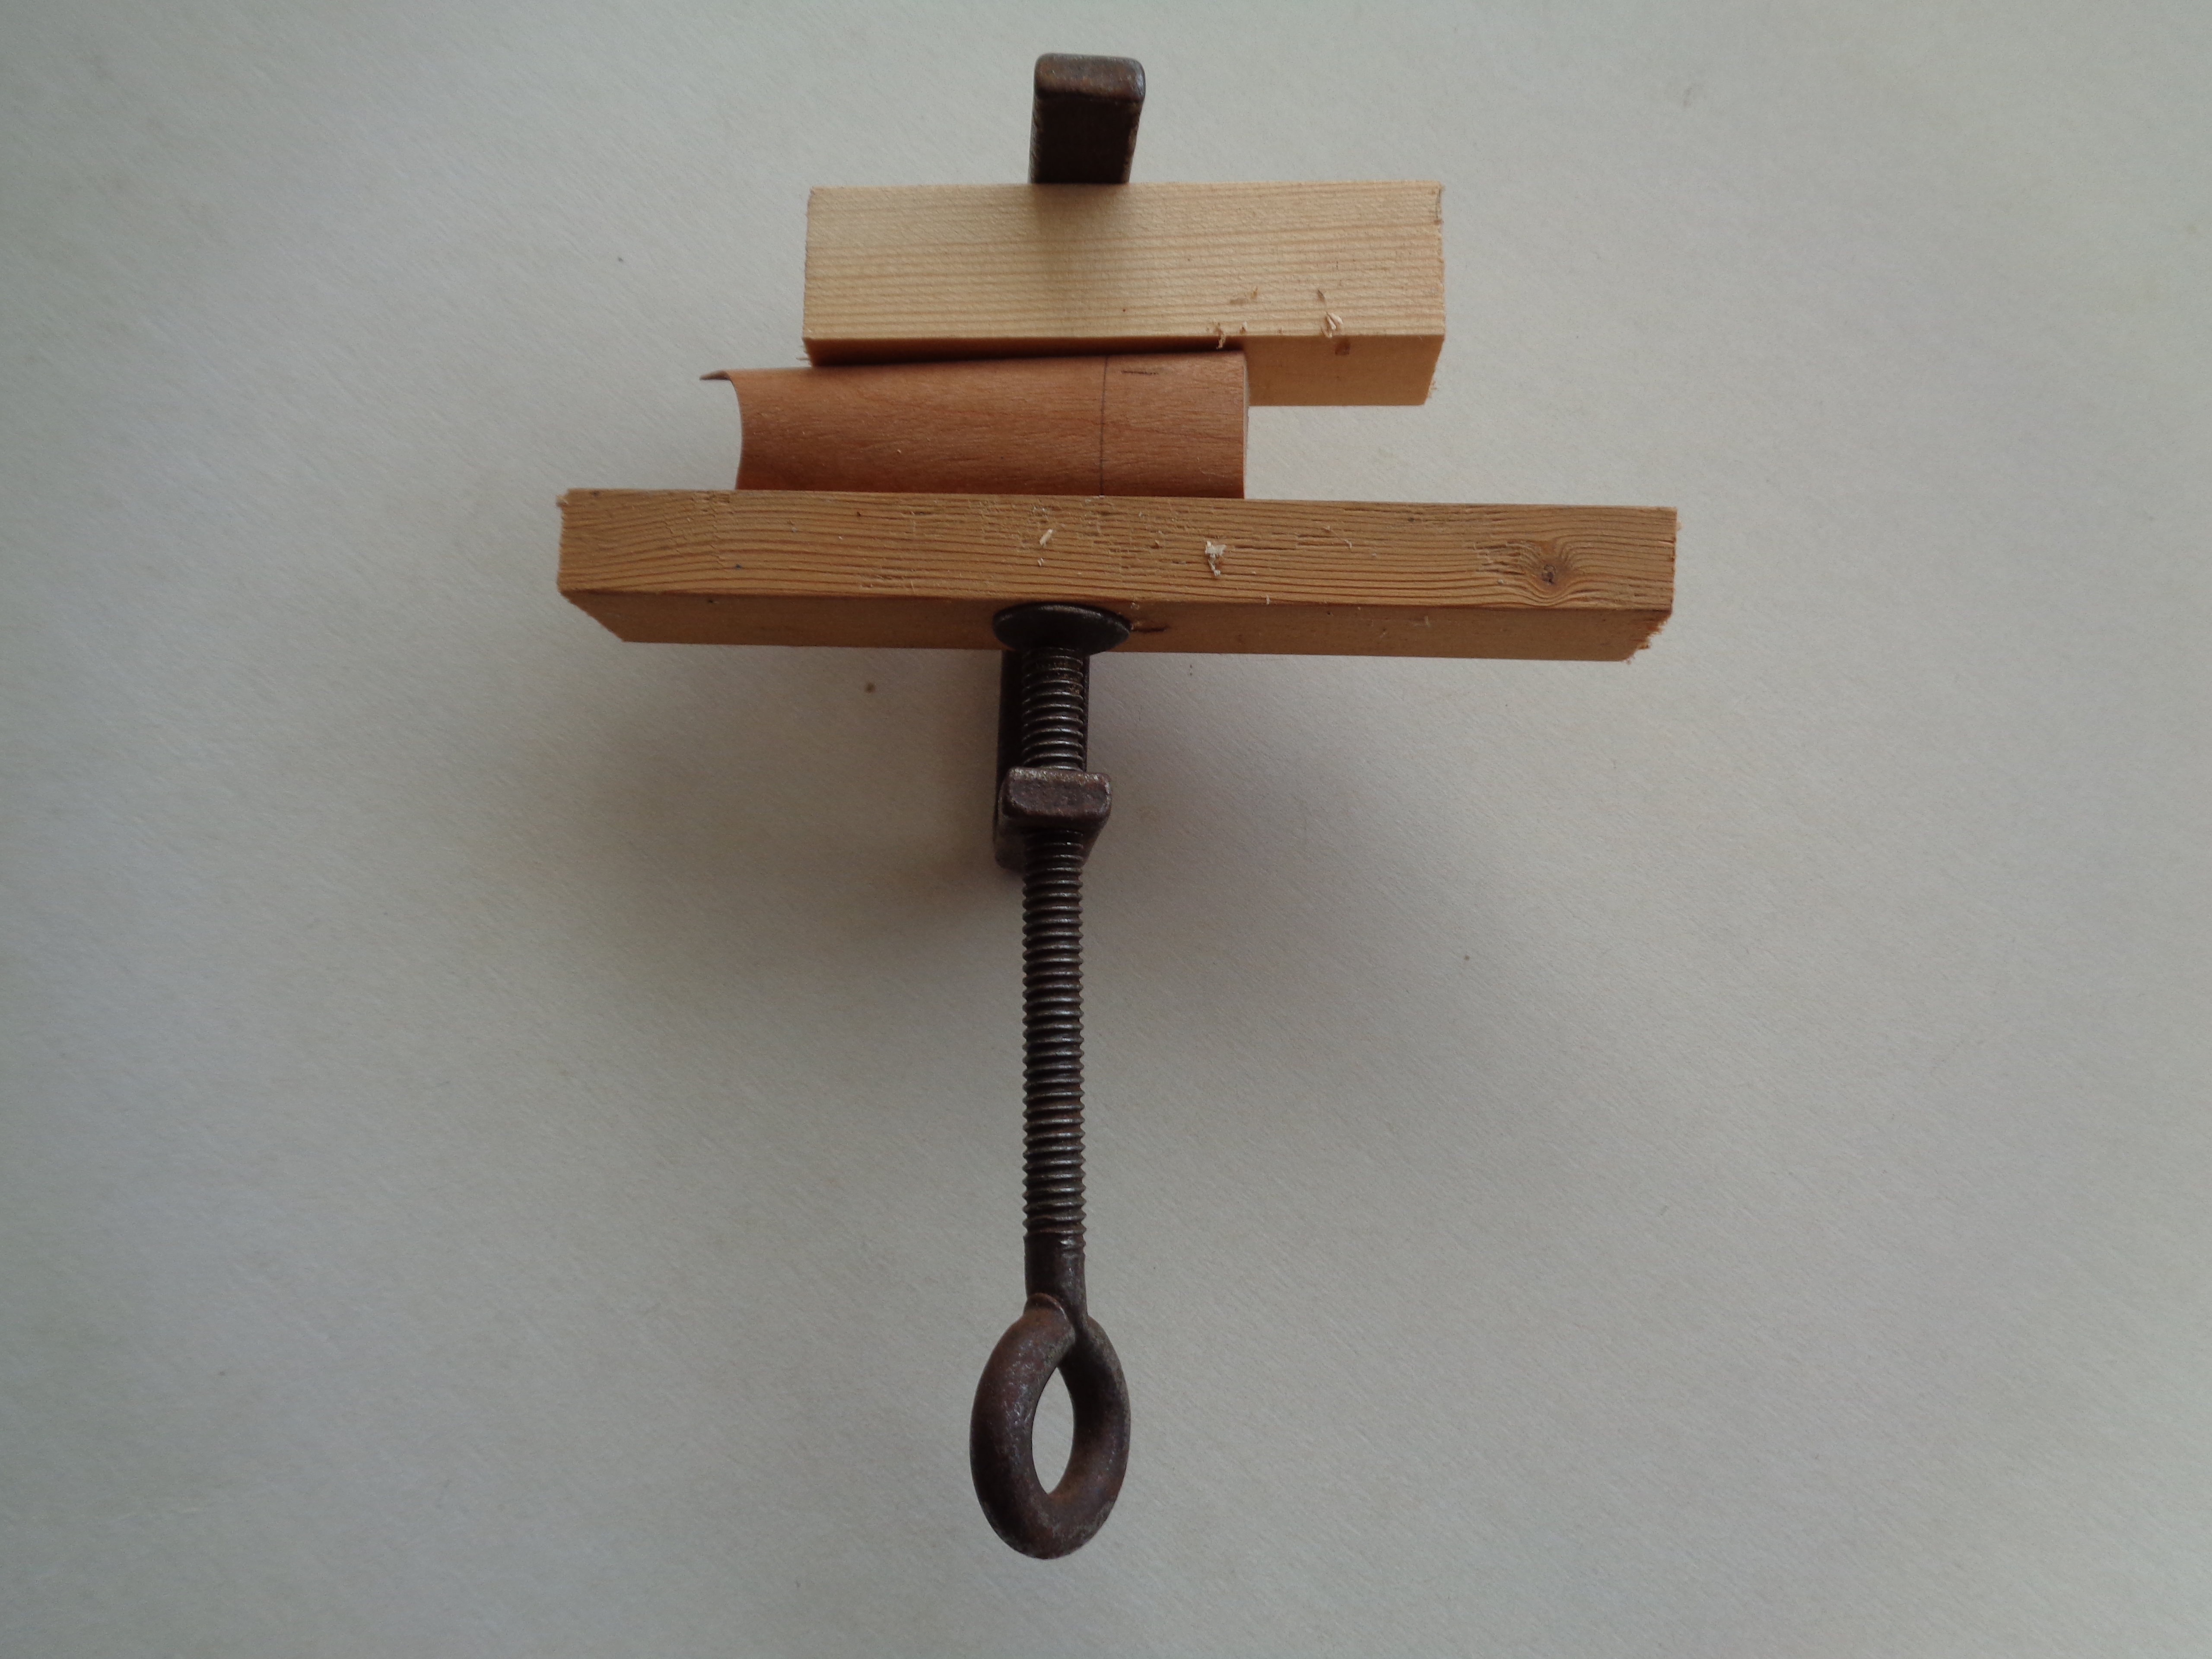
Steaming the wood was achieved by holding the sample over the mouth of a steaming kettle and the kettle kept boiling for about 15 seconds. The sample was allowed to cool and released to produce a nicely shaped piece of wood:


from which I was able to cut the required size and shape for the model:


The instrument board will fit inside the wood panel and help to strengthen it when it is fixed to the fuselage frame.

The next step will be to finish the upper wing including adding the ribs and centre spar. After that I need to have a long think about what to do next as the model is going to become rather delicate to handle.

Thanks for looking.

Stephen.