Author Topic: 1/32 Royal Aircraft Factory BE 2a  (Read 13257 times)

Online FAf

  • Hero Member
  • *****
  • Posts: 1057
Re: 1/32 Royal Aircraft Factory BE 2a
« Reply #90 on: January 18, 2023, 04:58:04 PM »
Great work! I am very impressed by the neatness of your work. Not a thing out of place!
/Fredrik

Offline lone modeller

  • Hero Member
  • *****
  • Posts: 5300
Re: 1/32 Royal Aircraft Factory BE 2a
« Reply #91 on: January 19, 2023, 05:28:05 AM »
Thank you gentlemen for the very kind comments: they are much appreciated.

Yes I am modelling Samson's machine. I am going to depict it as it was in March/April 1914 at Eastchurch, (which is close to me and now has a small museum), and therefore in pre-war markings ie only the number on the rudder. He flew the machine until December 1915, flying a lot of hours in the Mediterranean theatre. It was depicted on the cover and main picture in the old Profile No 133 - see my opening page of this thread. I will provide more details when it is finished and I publish photos of the completed model.

Offline RAGIII

  • Hero Member
  • *****
  • Posts: 18793
Re: 1/32 Royal Aircraft Factory BE 2a
« Reply #92 on: January 23, 2023, 10:03:38 AM »
That is some absolutely incredible Od School Modeling!! Lovely results all around!
RAGIII
"A man has to know his limitations": Harry Callahan

"Don't slop it on" Lynda Geisler

Offline Borsos

  • Hero Member
  • *****
  • Posts: 3315
Re: 1/32 Royal Aircraft Factory BE 2a
« Reply #93 on: January 24, 2023, 07:25:41 AM »
Very very cool! I am absolutely impressed by such a scratch building talent.
Andreas
"Deux armées aux prises, c'est une grande armée qui se suicide."
Barbusse.
"Ein Berg in Deutschland kann doch einen Berg in Frankreich nicht beleidigen. Oder ein Fluß oder ein Wald oder ein Weizenfeld."
Remarque.

Offline Rookie

  • Hero Member
  • *****
  • Posts: 925
  • No guts, no glory...
Re: 1/32 Royal Aircraft Factory BE 2a
« Reply #94 on: January 28, 2023, 06:47:14 PM »
Excellent results on wings with the tension wires and rudder Stephen. This is top notch scratch building!

Willem
« Last Edit: February 26, 2023, 04:41:13 PM by Rookie »

Offline lone modeller

  • Hero Member
  • *****
  • Posts: 5300
Re: 1/32 Royal Aircraft Factory BE 2a
« Reply #95 on: February 04, 2023, 09:20:03 AM »
Evening All,

Thank you Rick, Andreas and Willem for the very kind comments - they are much appreciated.

Recently I have been working on the fuselage innards and engine - all fiddly and time consuming but not particularly difficult, but I hope the results will be worth looking at. I will describe in detail what I have done so that readers will see that most steps were relatively simple.

The controls and cables were the first items to add to the fuselage. I started with the rudder bar and the control cables which run the length of the fuselage: the cables are EZ line and were threaded through the rudder bar. View from front:
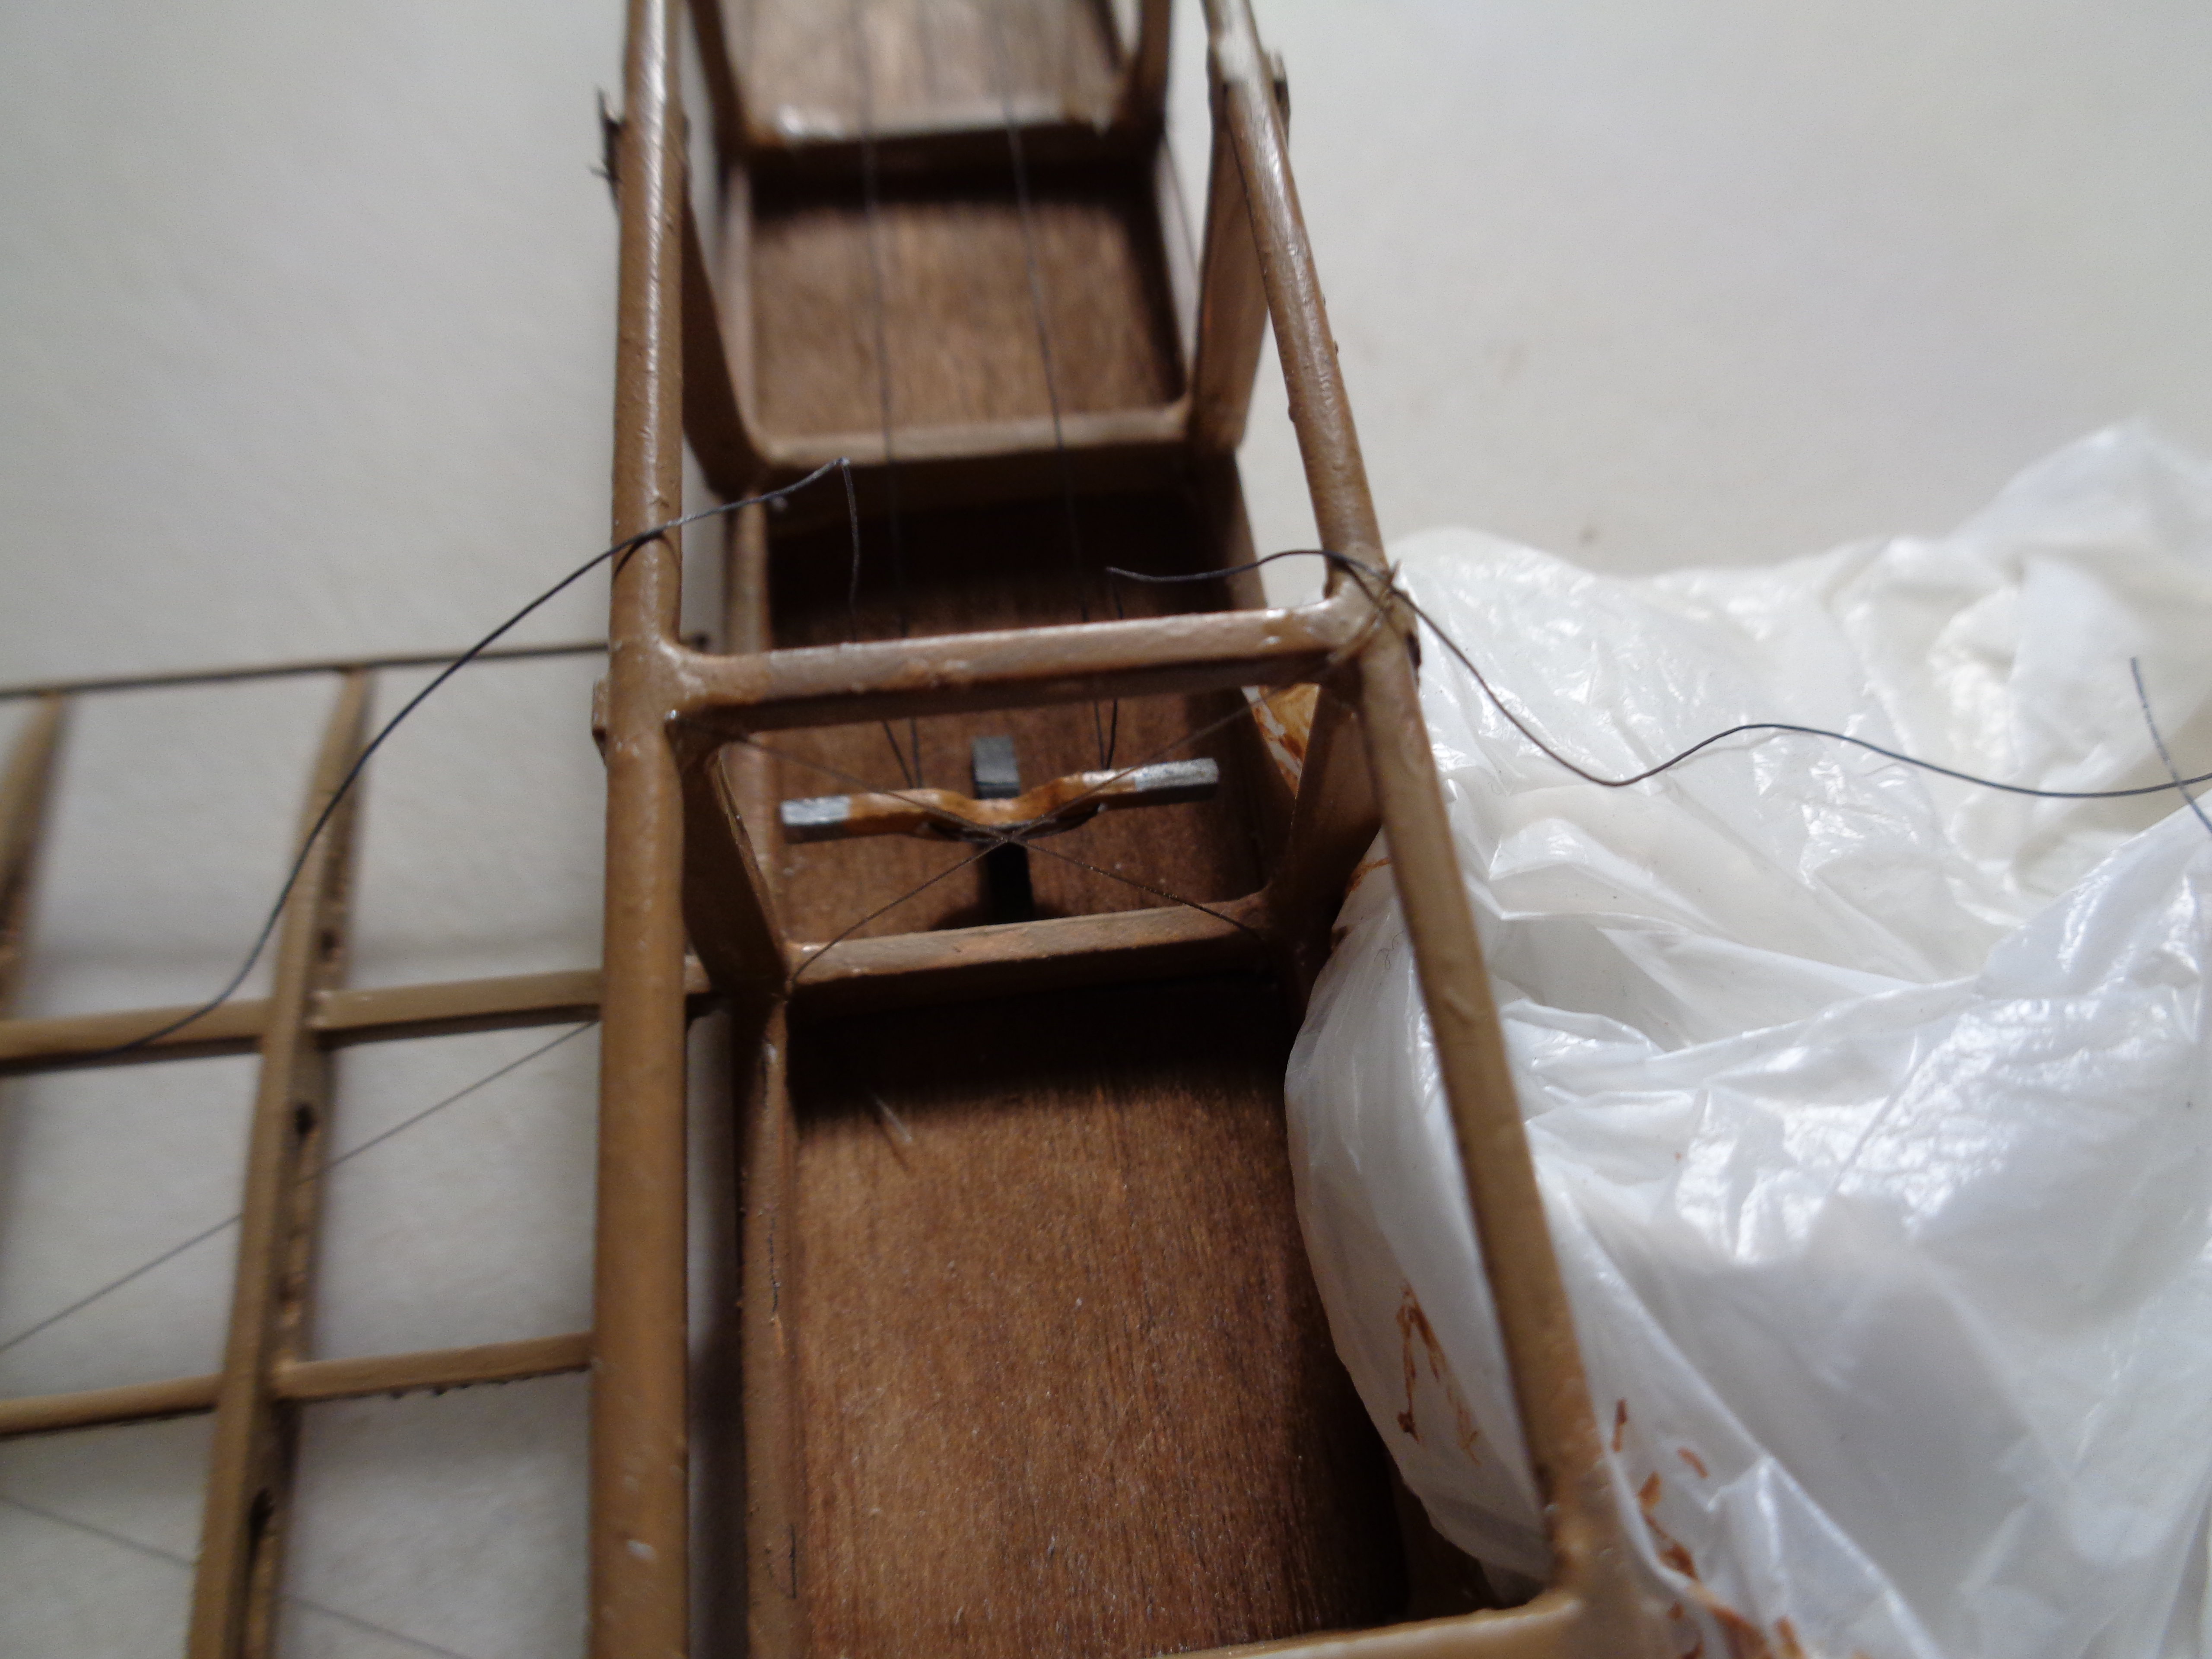


and rear:


Next in was the control column and rod actuator:


The elevator cables run rearwards from the cockpit: at the front end of the actuator rod there is a rounded piece - that was a mechanism which pulled on the wing wires which caused the outer trailing edges of the wings to flex as ailerons were not fitted to these early machines. Later I will add two springs, one on each side of the control column: they were to help the pilot keep the control column upright in level flight. The pilot's seat was next. I had added the lap belts and had glued the seat to a wooden frame (made from plastic strip). The seat frame was suspended by wires to the corners of the fuselage uprights and longerons:


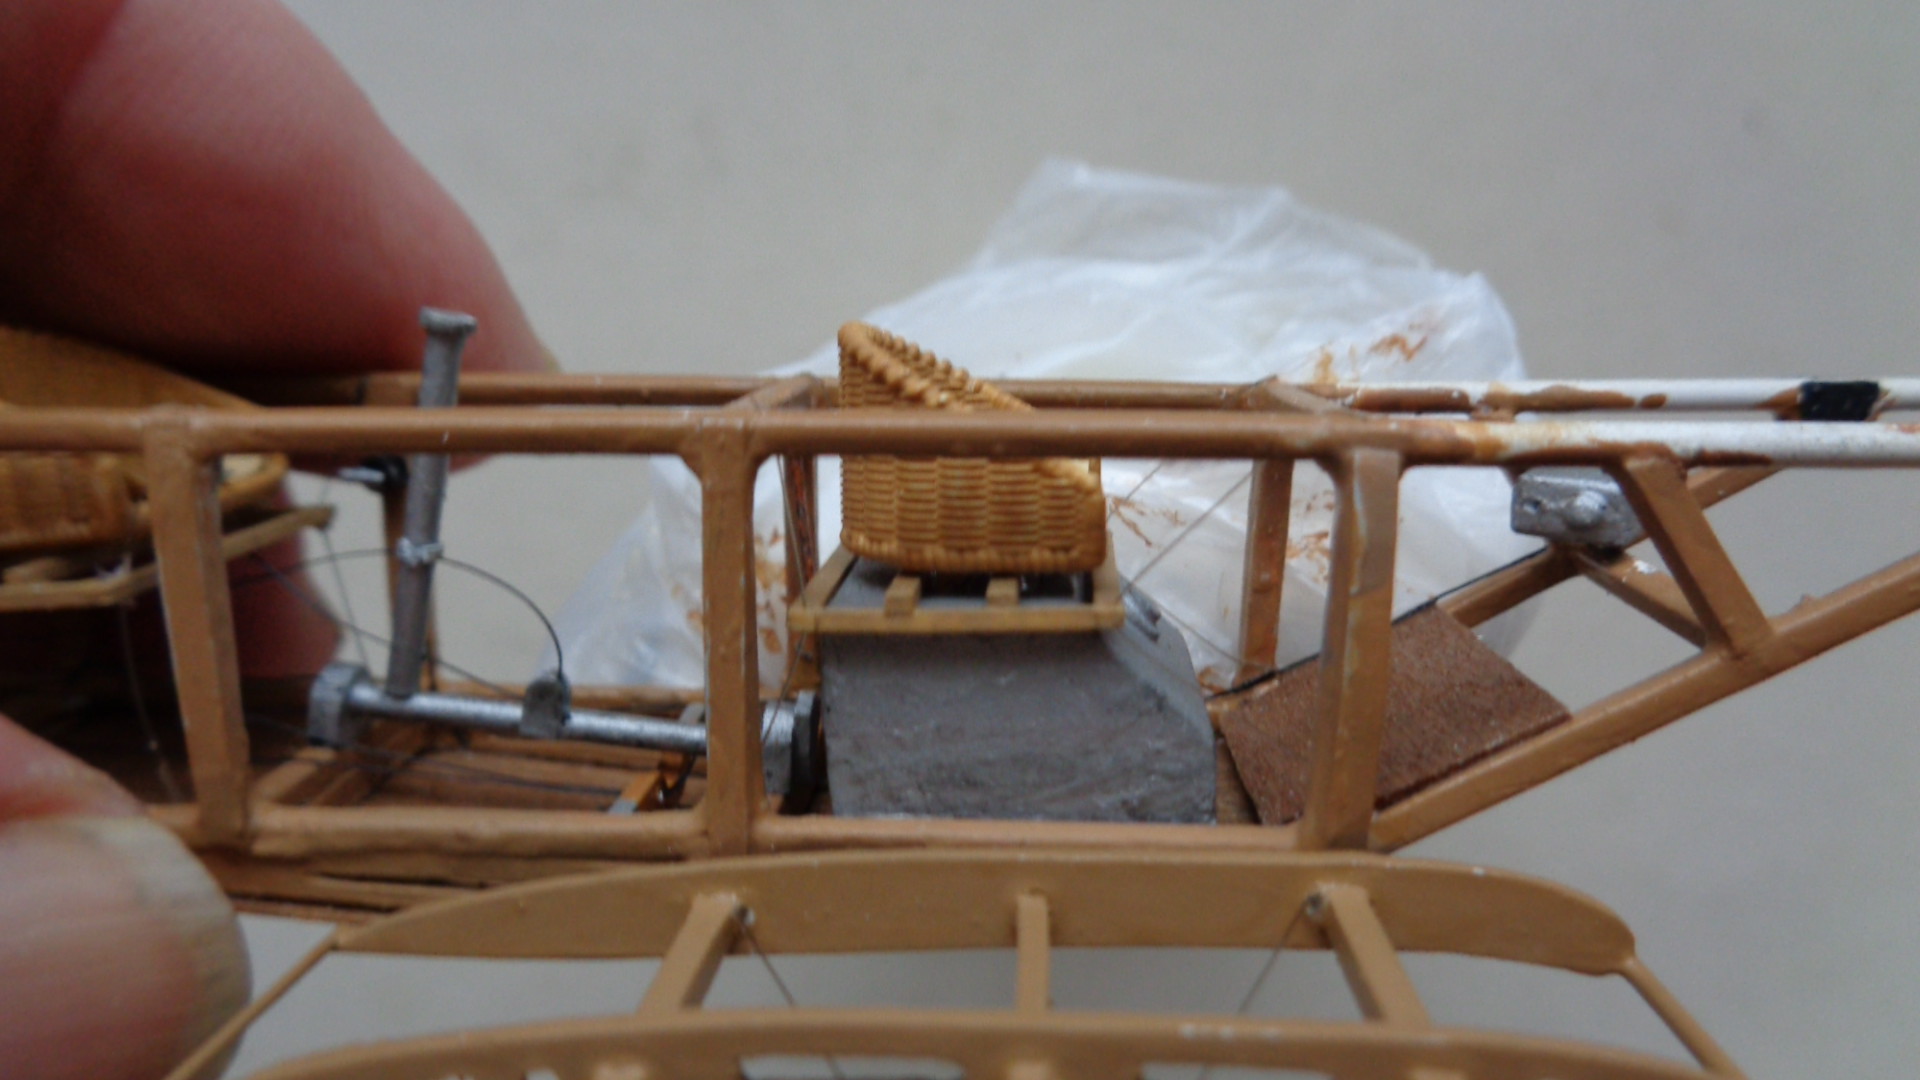
The wires on the model are part EZ line and part monofilament thread. The observer sat over the main fuel tank and had a board to rest his feet on: the latter was made from wood and CA'd into place first, followed by the fuel tank:


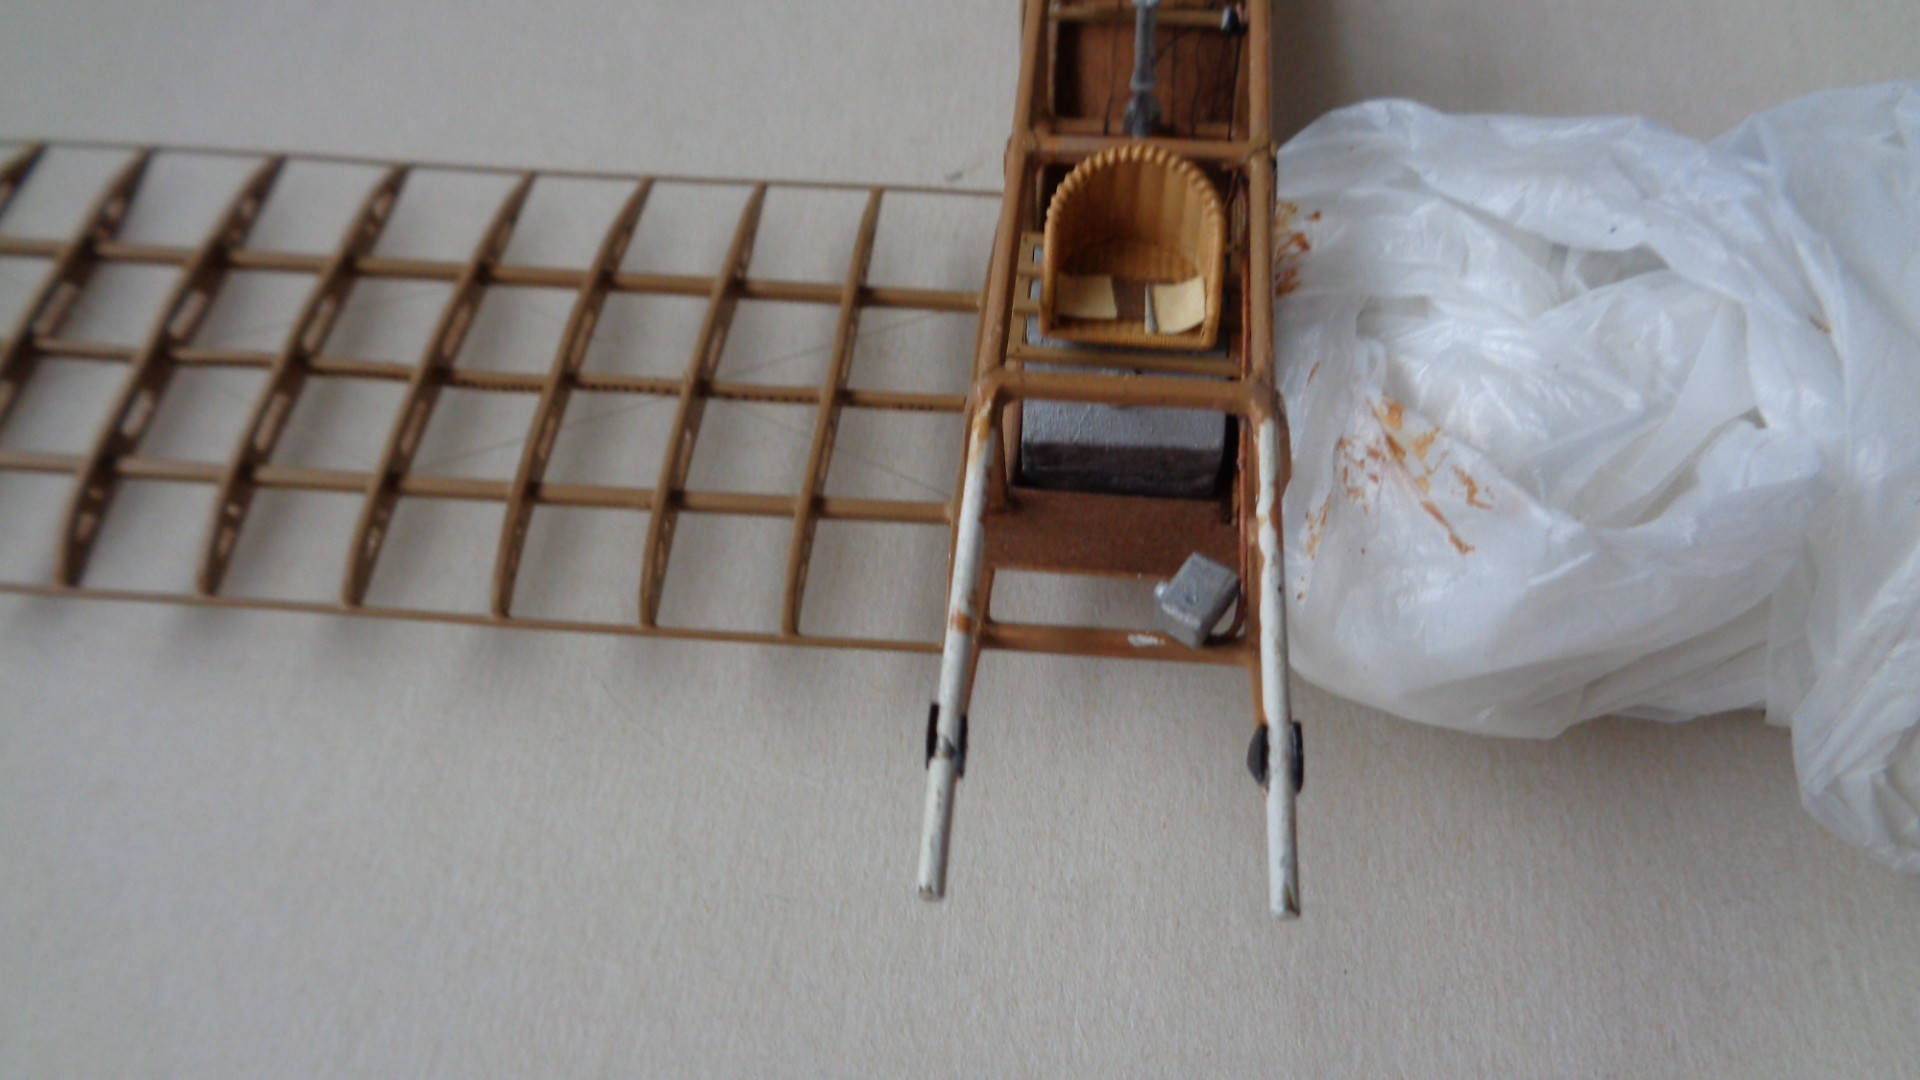
The observer's seat followed and this too was suspended by wires. In this case I simply glued the seat frame to the top of the fuel tank and used monofilament thread for the support wires:


The fuel pipe and throttle control from the pilot's cockpit were made from thin rod and wire respectively. These were bent to shape and fixed to the carburetor which was located on the cross member just behind the engine:


I took some time deciding the order of construction for these sub-assemblies and considered that completing the engine would be a sensible next stage. First I drilled lots of holes into the cylinders to take the additional details, and then added the engine back plate (with holes for the inlet pipes from the carburetor), and spark plugs:


I put in the inlet pipes after I had painted them but forgot to take a photo of that stage. The ignition wires from the magneto to the spark plugs were made from thin copper wire. The exhaust valve gear was very prominent on these engines so I had to make up some valve springs. I tried using what I thought was thin copper wire but when I tried them on the model I decided that they were out of scale so I made some more from 44 SWG wire. The difference in size of the two attempts can be seen here:
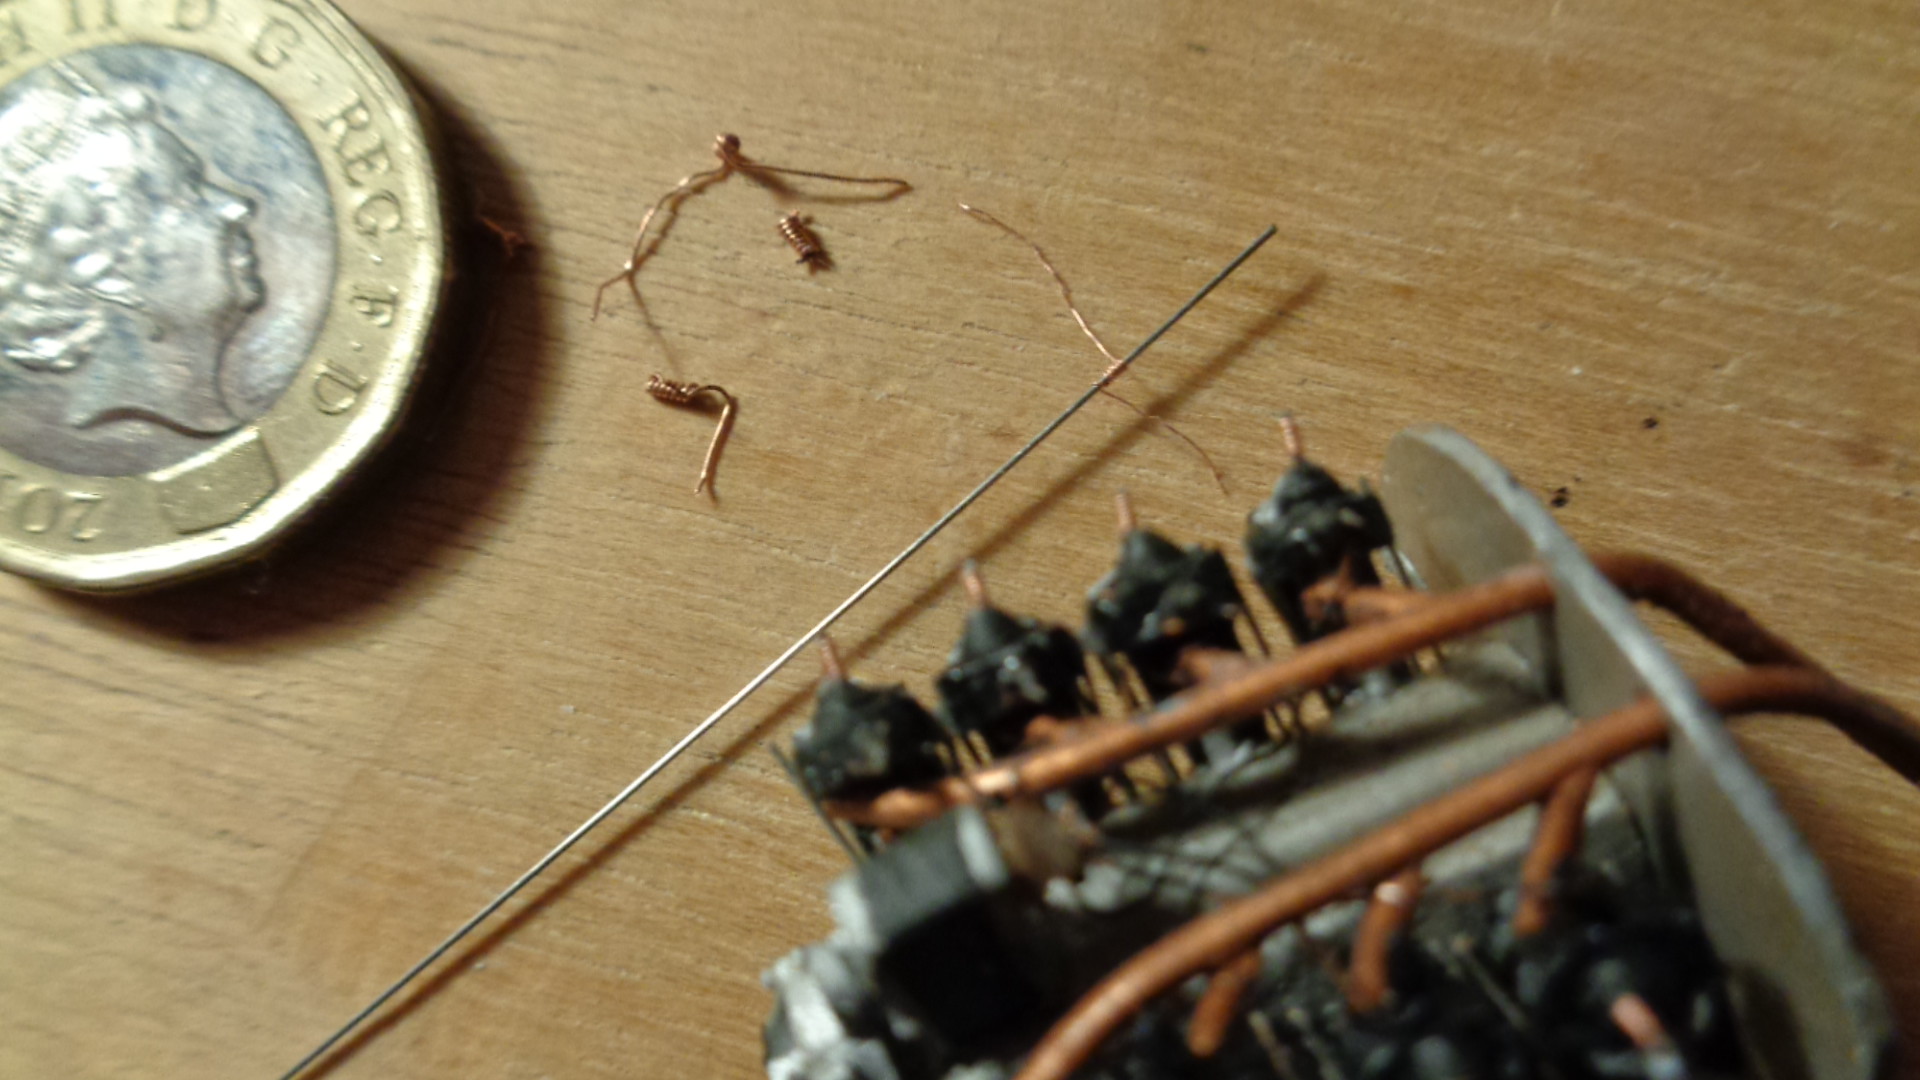


The springs were made by twisting the copper wire around a thin guitar string and cutting the guitar wire slightly longer than the spring: this left a short pice to CA into the top of the engine cylinder. The wire of the spring was trimmed with a knife before I added the springs to the model. The tappets were cut from guitar wire and CA'd on to the sides of the cylinder tops, and the rocker post and arm were cut from rod and cemented in place. The results were not quite as tidy as I had wished, but they pass the one foot rule so that is good enough. Finally I added the exhaust outlet pipes to the heads of the cylinders and the larger horizontal pipes to the outlets:


Apart from some touching in of the inlet pipes at the rear of the engine, and adding the flywheel this sub-assembly is now ready to be fixed to the model. However I have decided that it will certainly be damaged if not knocked off completely while I continue with construction of the fuselage and upper wing, so the engine has been put on one side for the time being:

[


Now I will start working on adding the fuselage upper decking and horizontal tail unit and completing the control wires to the rear.

Thanks for looking.

Stephen.

Offline DaveB

  • Hero Member
  • *****
  • Posts: 986
Re: 1/32 Royal Aircraft Factory BE 2a
« Reply #96 on: February 05, 2023, 04:28:26 AM »
Brilliant work on constructing this engine, Steve -

I know you have been pondering on how to do this one for some time so you can breath a sigh of relief and move on to the next stage of the build.

Regards

Dave
As we say in fencing, what's the point!

Offline RichieW

  • Hero Member
  • *****
  • Posts: 1966
Re: 1/32 Royal Aircraft Factory BE 2a
« Reply #97 on: February 07, 2023, 06:25:27 AM »
Wow Stephen, I have been so excited to see your next update and you have not disappointed! The controls and cables look terrific. I keep looking at the use of real wood and wishing I had done the same.

The engine is a little scratch building masterpiece. That must have taken many hours, especially the research and planning stages. Definitely time well spent, it is the work of a seasoned campaigner on top of his game.

Richie

Offline Rookie

  • Hero Member
  • *****
  • Posts: 925
  • No guts, no glory...
Re: 1/32 Royal Aircraft Factory BE 2a
« Reply #98 on: February 07, 2023, 09:29:14 PM »
Incredible detailing work on the engine Stephen, more so because it is so small!

It only make me more curious to your next post, and I know we will not be disappointed.

Willem

Offline Borsos

  • Hero Member
  • *****
  • Posts: 3315
Re: 1/32 Royal Aircraft Factory BE 2a
« Reply #99 on: February 08, 2023, 03:55:45 AM »
Absolutely first rate what goes on here!
Andreas
"Deux armées aux prises, c'est une grande armée qui se suicide."
Barbusse.
"Ein Berg in Deutschland kann doch einen Berg in Frankreich nicht beleidigen. Oder ein Fluß oder ein Wald oder ein Weizenfeld."
Remarque.

Offline KiwiZac

  • Global Moderator
  • Hero Member
  • *****
  • Posts: 2589
    • My Linktree
Re: 1/32 Royal Aircraft Factory BE 2a
« Reply #100 on: February 08, 2023, 06:26:27 AM »
Beautiful work. I'm always excited to see your latest updates.

Offline lone modeller

  • Hero Member
  • *****
  • Posts: 5300
Re: 1/32 Royal Aircraft Factory BE 2a
« Reply #101 on: February 26, 2023, 08:49:01 AM »
Evening All,

Thank you Dave, Richie, Willem, Andreas and Zac for dropping by and leaving encouraging comments: all are much appreciated.

Progress has been slow but I am nearly ready to start detailed planning for mounting the top wing. In the meantime more details have been added to the fuselage frame.

The fuselage was made of a conventional (for the time), wire braced box structure so I have had to add the rigging to the sides as this will be very visible:


There were longerons along the cockpit sides - these were added from 20 x 30 thou plastic strip after the rigging was complete. The rear fuselage side bays were wood covered - small pieces of marquetry were cut and CA'd in place to represent the wood:


When I was rigging the sides I found that I had somehow managed to tangle the control cables in the rear fuselage which meant drawing one of the elevator threads out of its brass ferrule, untangling it and re-inserting. Later I had to adjust the lower elevator cables: much interesting language was used to help relieve stress during those protracted operations......

The undercarriage skids were made from two narrow strips of marquetry wood with a third short strip at the rear end. These were allowed to dry overnight and then sanded and filed to shape:


Sometimes it is nice to make a simple and quick piece and have something to show for the effort in a short time.

I have placed the engine on the nose just to see what it will look like when the model is finished and to help get the correct dimensions for the various pieces of the exhaust system:


Next I will mount the upper fuselage decking betweeen the pilot and observer and drill the slots for the cabane struts. Hopefully the model will then be ready to take on the upper wing.

Thanks for looking.

Stephen.

Offline RichieW

  • Hero Member
  • *****
  • Posts: 1966
Re: 1/32 Royal Aircraft Factory BE 2a
« Reply #102 on: February 26, 2023, 10:05:25 AM »
Progress may be slow but it is getting close to the finish line and looking great. You have matched the wood colour on painted brass frame perfectly with the real wood. The engine has a real wow factor, I like it more every time I see it. Especially as I see it resting in place here. Looking forward to seeing the top wing mounted.

Richie

Offline DaveB

  • Hero Member
  • *****
  • Posts: 986
Re: 1/32 Royal Aircraft Factory BE 2a
« Reply #103 on: February 26, 2023, 08:30:47 PM »
I agree with Richie, Steve -

Seeing thing in place now I'm starting to get a sense of what this machine will look like. 

Also, feel your pain regarding the tangled cables - and know what you mean by the 'interesting language'!!

Regards

Dave
As we say in fencing, what's the point!

Offline KiwiZac

  • Global Moderator
  • Hero Member
  • *****
  • Posts: 2589
    • My Linktree
Re: 1/32 Royal Aircraft Factory BE 2a
« Reply #104 on: February 28, 2023, 07:52:18 AM »
Any progress is good progress, and this is great progress! I'm sorry to hear about your troubles but very glad you persevered.