Looking great! I'm in absolute awe of your work!
/Fredrik
Ah Fredrik, that's so kind. You've just moved even higher up my list of favourite modellers!

It's a bit of a war of attrition for me, there are so many casualties for every step forward I take as my work is often messy and approximate while I learn how to make things as I will illustrate shortly!
Although I have not updated for a couple of weeks I have spent many hours working at this in that time with,as usual, very little to show for my efforts .I was so pleased with the propeller boss I showed last time but unfortunately I made a big measurement error so had to make another. This went quite smoothly as I had spent hours making one before. Again I used washers and punched discs of aluminium sheet. for the retaining bolts I used my hex punch and die set which I had completely forgotten about. All the parts were just positioned by eye with no measuring and stuck with extra thin CA. The new one is on the left, it will do, I am pleased!
 BE2c Prop boss
 by
Richard Williams, on Flickr
Next up I had to make the rest of the tail feathers. The ribs were cut on my cricut cutting machine, lined up with the plan and glued with B7000 glue. I also use this glue for skinning as it gives me working time and clumsy smudges can be cleaned up with Mr levelling thinner.
 Tailplane under construction.
 by
Richard Williams, on Flickr
So far so good, now onto the elevators. I tried using the cricut again but it was not able to produce the accuracy I wanted so I had to try old school model making. Using my beloved precision ruler (thanks for the recommendation Willem!) I marked out little rectangles with drilling points. Not so bad.
 BE2c elevator
 by
Richard Williams, on Flickr
The central hole is for a spar the other is simply to help line things up so I could thread the pieces ontp brass rod before block filing them into shape.
 BE2c elevator
 by
Richard Williams, on Flickr
A 1x1.5mm styrene strip was tacked onto an engineering square with CA gel and taped to the plan, the ribs were slid into place and glued.
 20221124_205453
 by
Richard Williams, on Flickr
All going well so far. Styrene rod was bent into shape and glued making sure to keep everything square. The idea is file down the trailing edge later.
 BE2c elevator
 by
Richard Williams, on Flickr
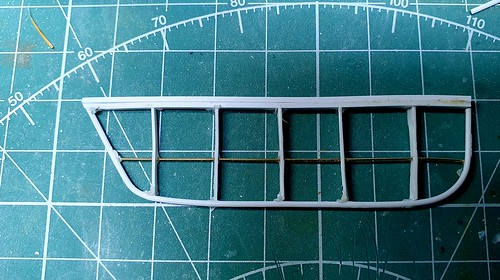
Sadly whilst filing the trailing edge I managed to wrestle everything out of square, bend some of the ribs and the observant of you will have noticed that I missed out a rib. Arghhhhh!
 elevator
 by
Richard Williams, on Flickr
Another lot of styrene casualties for no forward movement. The upside is that I actually had great fun messing about with it and learned a lot about scratch building and the importance of patience. I will have another bash at it over the weekend, I have a cunning plan!

Thanks for dropping by
Richie