Suprb detail Richie. Your instrument bezel is certainly better than the AM offerings. Frank will no doubt be taking notes and will be producing his own in future...!
Stephen.
Many Thanks Stephen, there is however only one Bughunter!

A little piece by little piece into the direction of a full scratched BE2c! Nice work!
@Stephen in 1/48 I'm satified with my PE by HGW, Part and Eduard. Enough is enough 
Cheers,
Frank
Thanks Frank, I'm having fun so far. I don't think I would be if I tried making the instruments in 1/48th though!

That is fantastic progress. I love the instrument panel. That made my day! 
Thank you so much William, that kind comment has made my day too!

I still think you're a mad genius though!

Fantastic work! It’s getting better and better! This instrument panel is a piece of art.
Andreas
Hey Andreas, thanks so much for the encouragement. I don't feel quite so terrified by scratch building now, mistakes are much cheaper to make than when I mucked up the WNW Camel last year!
Well I finally had an entire day free for the firs time in ages and cracked on with the instrument panel. Here is one of James Fahey's brilliant photographs of the real thing;
 TVAL BE2c instrument panel, PHOTO BY JAMES FAHEY.
 by
Richard Williams, on Flickr
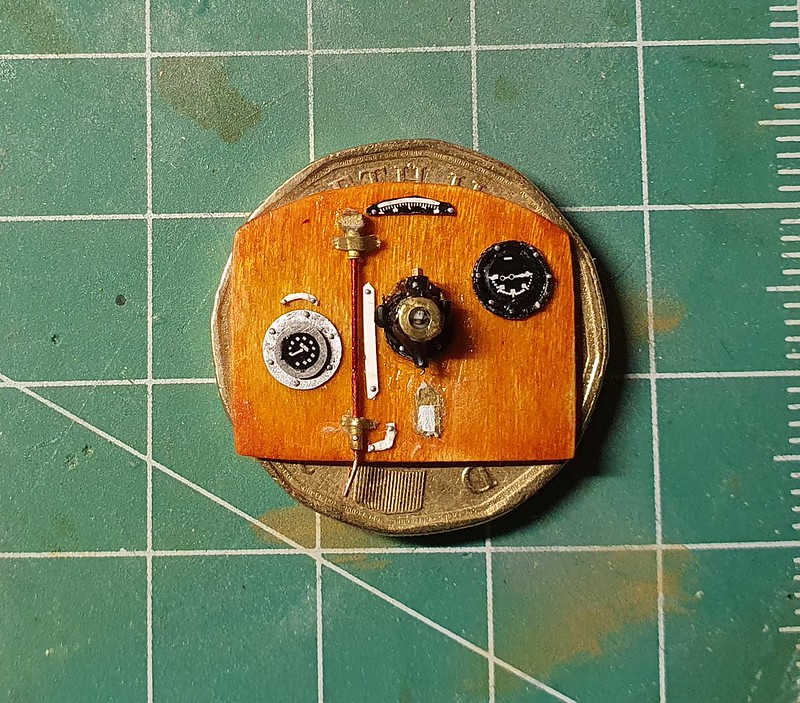
I made the compass next from bits of styrene rod and brass tube. It was a fiddly business but nothing complicated, the compass face is just a miniature brass washer.
 Scratch built BE2c Instrument panel
 by
Richard Williams, on Flickr
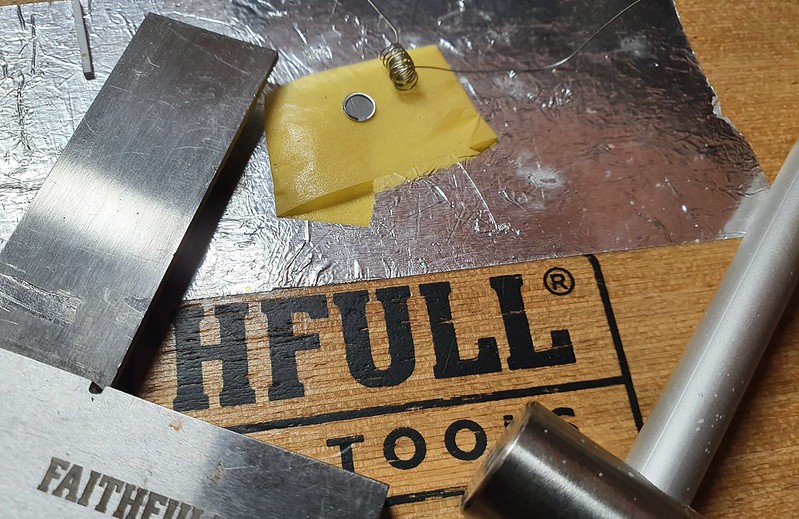
The last two bezels were made differently from the first. This time I made wire rings by winding 0.25mm tinned copper wire round a 3mm tube and cut them off with a scalpel. One of the rings had to be flattened so I used my engineers square as an anvil and bashed it with the hammer from my punch and die set. The rings were then stuck down with Future Floor Wax so I had time to position them correctly. The instruments were then finished off with black paint, an Airscale decal and 0.25mm rivets.
Airscale instrument decals and other after market parts are great and I have nothing against them but I want to do a 100% scratch build one day so will need to print my own from now on.
 Scratch built BE2c Instrument panel
 by
Richard Williams, on Flickr
The original has a beautiful dark stain by the fuel gauge but after spending a few days on making this I just can't bring myself to make it look filthy.

 Scratch built BE2c Instrument panel
 by
Richard Williams, on Flickr
I am really chuffed with it, it's close enough to the original but most importantly I think I had more fun with this part of the build than anything I have done before. Next I need to make the pilot's seat, thankfully it isn't wicker, the observer's seat is though. Looks like I might be using another aftermarket part then...
Many thanks for stopping by and reading. If anybody has ever scratched a wicker seat before I would love some tips please!
Richie