Part 3 - Finding The ColorsNow I tried to find the right colors for all the handpainted parts which are the complete fuselage, the middle-section of the upper wings and the lower elevators.
This step was the most important, and it took a lot of time.
At first I did a bit of research and collected some facts:
On historic pictures I can clearly see five different shades (colors) on the upper side and on the lower side, so I assume they tried to match the colors of the printed fabric.
Also I can see that the colors are not 100% the same as the fabric-colors.
So I have to find a total of ten colors that are more or less close to the printed fabric, but not exactly the fabric colors. Of course all the colors together should have a coherent appearance.
Since I like the illustrations of Ronny Bar, my first idea was to keep my color-scheme very close to his colors. When I realized that the decals of the kit are very far away from his colors I dismissed this idea, the color-style of the Wingnut-Decals (which I think are very authentic) wouldn't match with the color-style of Ronny Bar.
So I decided to use some color-style between the decals and Ronny Bar, that would be close to the fabric but not exactly the same. Just like on the historic pictures.
To do this I had to work with this colors to became a sense for them. So I finally had a plan:
1. Find mixing-recipes that meet the Wingnut-Decals as close as possible (they also would be later useful if I had to repair damage of the decals).
2. Find mixing-recipes that meet the Ronny Bar style as close as possible.
3. Find a mix between 1. and 2. as my color-scheme that I will use.
So I started to work on my plan, mixing lots of colors over many hours...


...mixing more hours...


...until I finally had a result that I was satisfied with, and most important recipes that I could repeat.
Here my attempt to match the Wingnut-Colors:


The Ronny Bar Style was a bit more difficult, but I found also mixes that were okay for me:

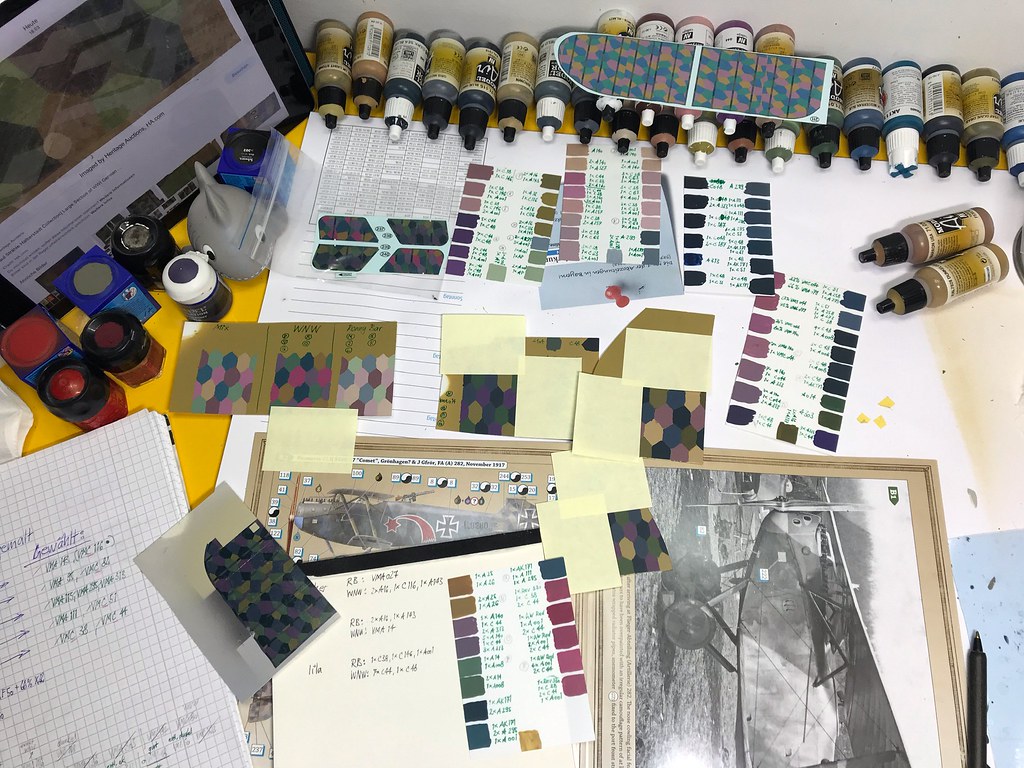
And the result after my mixing-marathon:

On the right side Ronny Bar, in the middle WNW, and on the left my mix of both styles. Later I slightly changes my mixes a bit, the exact mixes I used were:
Upper Sidebeige - 1x Vallejo Model Air 025 + 1x Vallejo Model Air 027
green - 3x Vallejo Model Air 014 + 2x Vallejo Model Air 143 + 1x Vallejo Model Air 001
dark blue - 2x Vallejo Model Color 048 + 1x AK Acrylic 171 (turquoise)
grey blue - 1x Vallejo Model Air 111 + 1x Vallejo Model Air 295
mauve - 7x Vallejo Model Color 044 + 1x Vallejo Model Color 048 + 2x Vallejo Model Color 038 + 2x Vallejo Model Color 146 + 3x Vallejo Model Air 001
Lower Sideochre - Vallejo Model Air 291
pale green - 2x Vallejo Model Air 008 + 1x Vallejo Model Air 014
blue - 1x Vallejo Model Air 299 + 1x Vallejo Model Air 111 + 1x AK Acrylic 171 (turquoise)
violet - 5x Vallejo Model Air 140 + 3x Vallejo Model Air 313 + 1x Vallejo Model Color 044
pink - 1x Vallejo Model Air 085 + 3x Vallejo Model Color 044 + 2x Vallejo Model Color 136 + 16x Vallejo Model Air 001
Ready for the first attempts (
now this will be hard to explain in english). I first basecoated all the parts with my beige-mix (1x Vallejo Model Air 025 + 1x Vallejo Model Air 027).
Then I made a copy of the Wingnut Decals of the Wings middle section and the elevator, and pinned holes in those copies on all the corners of the lozenges.
With masking tapes i fixed the holed copies on the wing and elevator and with a really soft pencil (8B) I made a small dot in every hole to transfer the corners of the lozenge to the kit parts.


Now it was just a matter of time
to mask the lozenge one after another and airbrush one color after another...very meditative...


Huh...there are some mistakes...but they were easy to mask again and to be repaired...

By the way, the stripes on the bottom of the fuselage I sprayed at the same time as the wing and elevator...

That's enough for today, next time we will comtinue with the fuselage and the overspray of the fuselage...
As usual I apprecciate every comment and will answer every question
Have a nice time.

