Evening All,
Many thanks Richie, Rick and Terri for dropping by and leaving your comments - I really appreciate your encouragement.
I had hoped that making the tail and control surfaces would be relatively straightforward and quick. Well I was right about the former but wrong with the latter. Hot weather and a loss of mojo have contributed to the long time taken to complete these parts. However they are now done and ready for paint before being fixed into place.
The ailerons were made using 40 x 60 thou Evergreen strip for the leading edge: the ribs were the rear parts of the ribs from the wings. These were glued at the correct intervals using the wings as templates to ensure correct alignment. The small spars were cut from 30 thou card scrap. The trailing edges are 10 x 20 thou Evergreen strip, bent in the usual way by pulling it through the end of an old pair of tweezers until the curve is nearly right, and then glueing into place and making the last bend fit the plans:

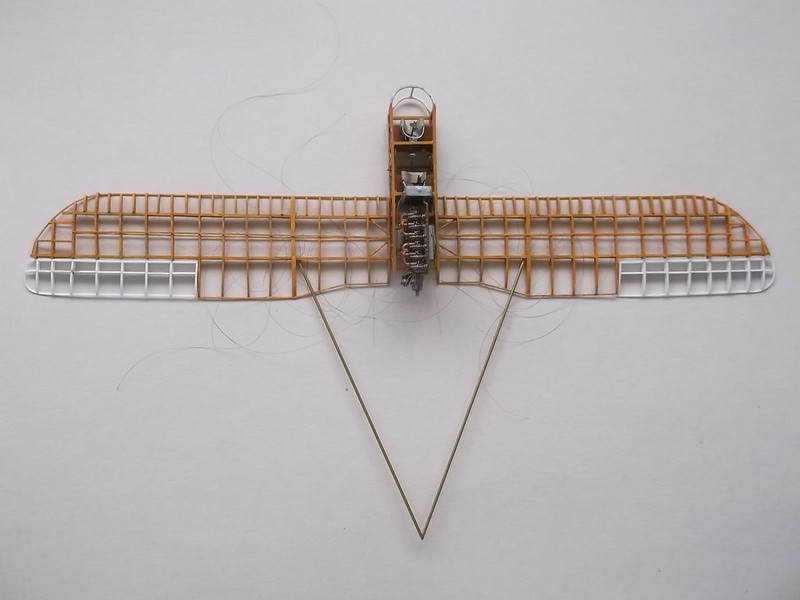
Test fitting of the ailerons to the wings showed that they fit properly:

The tailplane presented a slightly different problem because for a start half of the spar which I had originally threaded to the boom broke off and had to be re-attached with superglue. The leading edge ribs were made first and glued into place - the unit was laid over the plan to get the correct positions. The trailing edge of the tailplane is two pieces of 30 x 40 Evergreen strip, one on each side of the rudder post. I attached the inner ribs first as these had to have a slot cut into them to allow the boom to pass through. The end of this rib was glued to the rear spar of the tailplane and this was followed by the outermost rib so that the rear spar was held properly. The remaining ribs could then be glued in place. The ribs were cut from 40 x 60 Evergreen strip and filed to size. When all of the ribs were in place the leading edge was glued in place (10 x 20 thou Evergreen strip again).
Finally the elevators were made following the method described above:

The photo shows how I first bent the strip which will make the trailing edge of the elevator: by gluing the ends of the ribs to the strip first and waiting for them to dry, I was able to easily bend the ends of the strip to fit to the ends of the hinge. A simple check to make sure that the elevators fit to the tailplane:

The rudder will be made later when I have worked out whether to make it before fixing to the boom structure or afterwards when the rudder post is fixed to the booms. The new control surfaces::

While all of this was going on I have also been adding some small details to the engine and nacelle assembly. The radiator had two supports from 30 thou rod added - one to each side. I also added the small bracket and wires for the magnetos on the rear of the port side. Some small pipes which run from the carburretors down to somewhere in the lower regions of the engine compartment were put in place using copper wire. I have still to add two longerons to the fuselage sides but I am leaving these until later because I need to handle the nacelle when I fix the top wing and I do not fancy replacing parts later.
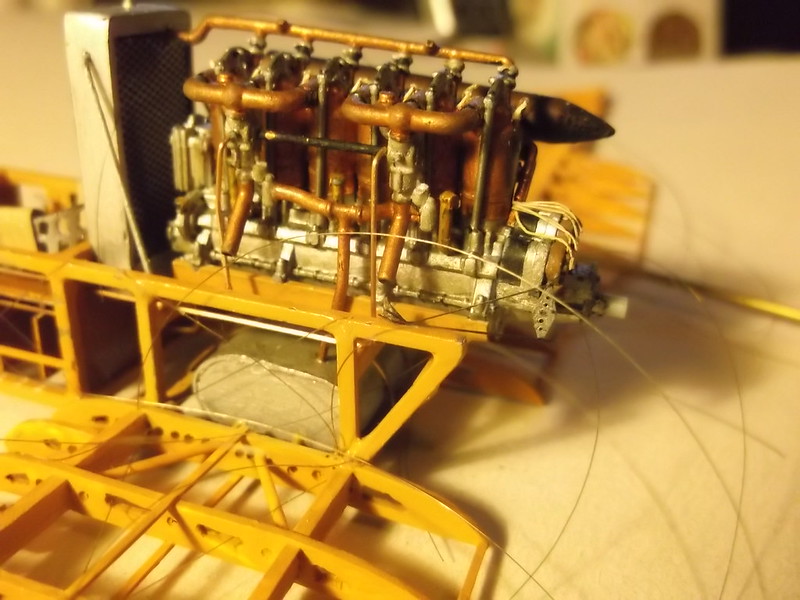
The right hand pipe had moved from the carburretor when I took the photo....that has now been put into the correct position! On the starboard side the home-made exhaust has been put in place:

Now on to painting the top wing, tailplane and control surfaces, and booms. I will also start to make up the undercarriage legs and axle and varnish the struts and add the manufacturers transfers to them so that I can start to seriously think about how to put the top wing into place.
Thanks for looking.
Stephen.

