Evening All,
Many thanks Dan and Prez for your kind remarks - I much appreciate them.
Roberto: I intend to leave the nose and markings as they are and will assume that this model represents a post-war machine as trying to make alterations at this stage would be very difficult. Indeed it would probably be easier to start again! However I am very grateful for the information which you have provided, especially about the markings of aircraft, because I for one know very little about this aspect of the subject. I have another Italian aircraft on my to do list and have a DataFile as a source but I may contact you for further advice if/when I get around to making it.
Well I have been rigging more of the wings - almost finished now, so once again a lot of time taken but little of photographic interest so we will move on to the items added which are more photogenic.
The radiators for the engine in the nacelle were mounted in the nose of the nacelle and on the forward cabane struts. Those on the struts have been fitted while I was rigging in this area:
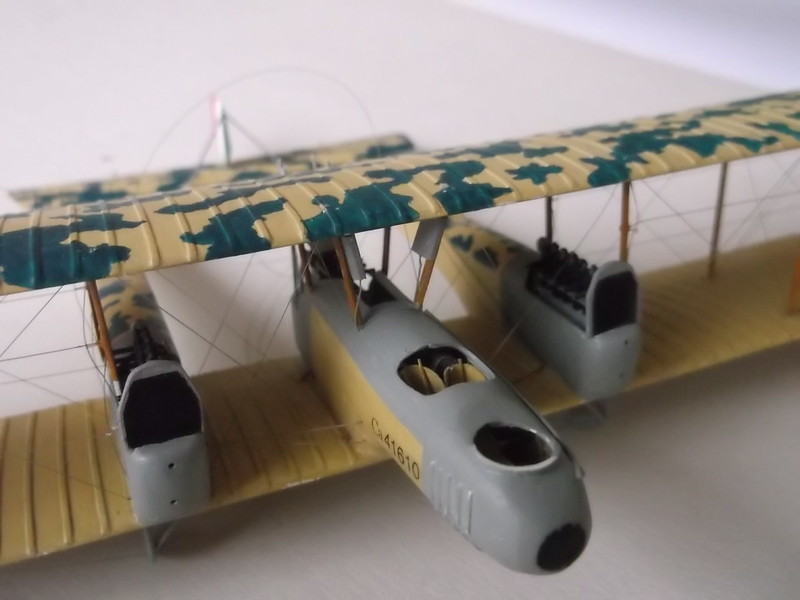
In the above view you can also see the ends of the rigging wires which ran horizontally across the front struts with a second wire running vertically up the end struts. I drilled all of the struts so that I could pass a thread through them and inserted this first. Then I threaded a vertical wire starting at the top, passing it though the hole in the wing with the other bracing wire and exiting via the second hole down in the strut. I repeated this procedure for the lower of the vertical wires, in this case the upper strut hole was the starting point. To make the shallow V shape and represent the reinforced ends of the horizontal wires I pushed through a small piece of thin stretched sprue which sits alongside the horizontal wire: this was glued to the vertical wire and the strut. When the sprue - strut joint was dry I could gently pull the vertical wires taught and CA the ends before trimming them. In all a complex procedure which is difficult to explain and not much easier to accomplish! I just hope that this makes sense. A sane modeller would not have bothered because only anoraks would know about this arrangement anyway!
The second fiddly bit was the gun platform at the rear of the upper wing. Assembly was straightforward - fixing it to the model was rather less so, but I managed in the end:

NB the gun ring has not been added yet - that will be put on later.
Finally I started to put on the rudders. There were three of these so I put the middle one on first because it is easier to work thet way - leaves more finger/tweezer room for the outer ones:


Those pesky threads in the last photo will eventually become control wires - and I will be very happy indeed to put them in place as they are rarely under control at the moment, indeed it seems that much of the time they are out of control!
So if you have been, thanks for looking.
Stephen.

