Author Topic: Completed: 1/72 scratch build Caproni Ca 5 Group Build After Build  (Read 12334 times)

Offline lone modeller

  • Hero Member
  • *****
  • Posts: 5300
Re: 1/72 scratch build Caproni Ca 5
« Reply #30 on: July 07, 2019, 06:39:26 AM »
Evening All,

Thanks Terri, Rick, Ken and Roberto for your kind comments - I much appreciate them.

Ken: I used a scissor blade because my wife uses the same to make wrapping ribbons curl, and my late mother used to do the same. I had not thought of using the table edge but the principle is the same of course.

Roberto: thank you for the photo - never mind the size I can still see the details to which you refer. I will not be making the torpedo carrier variant as this model is already taking much longer than planned. I have another aircraft in mind based on an illustration in Munson's Bombers 1914-1919, but your photos and other details have been of great help and I really appreciate them.

The difference between scratch building and kit building is that for the former the modeller has to make the parts - after that it is just another assembly job. Making the parts can take a little while though and usually I make them as I need them so that they do not lie around and get lost or damaged. For this model I seem to have made most of the parts before I start any major assemblies (fuselage nacelle, booms and engines excepted). This seems to have come about because I have simply not had the time to sit and do some modelling for more than one or two isolated sessions recently: making/shaping parts has been the only sensible thing to do.

I assembled the two remaining engines, and carved three propellors from wood (at the rate of one per evening - no more time at the moment!)


I also made up the eight wheels from discs of 60 thou card with 80 thou rod. I wound the rod around a large paintbrush handle and held one end with a pair of pliers and the other with my fingers. Then I plunged the rod into boiling water for a few seconds. The diameter of the paintbrush handle was slightly smaller than the rim of the disc: this means that the rod has to be pulled outwards to sit tightly around the disc - a small amout of liquid cement holds the tyre in place and any small gaps can be easily filled. Painted they will easily pass muster:


I have also added the curved tops to the booms and made some other odds and ends including struts so the parts are beginning to look like a conventional kit:


The next step will be to start assembling the nacelle and booms to the lower wing, adding the fronts of the booms and then fitting the boom engines and radiators (they are still to be made), so hopefully I can start to see an aeroplane beginning to emerge. Until next time....

Thanks for looking.

Stephen.
« Last Edit: July 07, 2019, 06:53:15 AM by lone modeller »

Offline coyotemagic

  • Hero Member
  • *****
  • Posts: 7710
  • "Here's to not buggering it up." -Winston Chuchill
    • My Models
Re: 1/72 scratch build Caproni Ca 5
« Reply #31 on: July 07, 2019, 06:55:24 AM »
Stephen, as always, I am utterly blown away by your artistry and craftsmanship!  You are a true master and this is going to be another one of your masterpieces.  I have to say, I am envious of your talents.
Cheers,
Bud
"All men dream: but not equally. Those who dream in the dark recesses of the night awake in the day to find all was vanity. But the dreamers of day are dangerous men, for they may act their dreams with open eyes, and make it possible." -T. E. Lawrence

Bughunter

  • Guest
Re: 1/72 scratch build Caproni Ca 5
« Reply #32 on: July 07, 2019, 07:50:25 AM »
Stephen, you made a great progress! The prepared parts are looking very promising :-*
I hope you will manage to colorize all and plug it together in time 8)

Good luck!

Cheers,
Frank

Offline kensar

  • Hero Member
  • *****
  • Posts: 2503
  • Reshaping the world - one piece at a time.
Re: 1/72 scratch build Caproni Ca 5
« Reply #33 on: July 07, 2019, 08:10:34 AM »
Significant progress, Stephen!  Lookin' good.
I am finding that the major parts are needed early because they fit together themselves and the other details are just hung on them.  Alignment of these parts is important.

Though this is small scale, it is an ambitious project.


Offline Ronkootje

  • Full Member
  • ***
  • Posts: 229
Re: 1/72 scratch build Caproni Ca 5
« Reply #34 on: July 07, 2019, 06:40:08 PM »
Looks good, one question is it the picture or does the top wing have a bow in the leading edge? This could present problems when assembling the parts. Or is it meant to be bowed?

Regards Ron 

Online RAGIII

  • Hero Member
  • *****
  • Posts: 18793
Re: 1/72 scratch build Caproni Ca 5
« Reply #35 on: July 07, 2019, 10:02:55 PM »
Stephen, as always, I am utterly blown away by your artistry and craftsmanship!  You are a true master and this is going to be another one of your masterpieces.  I have to say, I am envious of your talents.
Cheers,
Bud

My Amigo has said it all Stephen!
RAGIII
"A man has to know his limitations": Harry Callahan

"Don't slop it on" Lynda Geisler

Offline Alexis

  • Hero Member
  • *****
  • Posts: 7947
  • Love the self
Re: 1/72 scratch build Caproni Ca 5
« Reply #36 on: July 08, 2019, 09:42:53 AM »
Moving along well so far and she is starting to take shape wonderfully  :)


Terri
Hurra ! , Ich Leben Noch
Body and life is a vessel we use to travel the planet . Femininity is the gift , The miracle comes from what we do with it .

Offline AndRoby67

  • Sr. Member
  • ****
  • Posts: 278
Re: 1/72 scratch build Caproni Ca 5
« Reply #37 on: July 08, 2019, 11:49:06 PM »
Hi Stephen!
Your forward steps are really beautiful!
I have only a doubt: from my pc it seems that the three handcarved props had same direction of blade. If I'm right, take care by the fact that the central one is for a pusher engine and needs reversed blade. This is a common mistake of everyone try to build three engined Capronis. The old Meikraft 1/72nd scale of the Ca. 3 had three identical airscrews...wrong.
Congrats for the rest!
Roberto

Offline gbrivio

  • Hero Member
  • *****
  • Posts: 1681
Re: 1/72 scratch build Caproni Ca 5
« Reply #38 on: July 10, 2019, 06:20:57 AM »
Great progress, as almost all the main components look ready. Following along.
Ciao
Giuseppe

Offline lone modeller

  • Hero Member
  • *****
  • Posts: 5300
Re: 1/72 scratch build Caproni Ca 5
« Reply #39 on: July 14, 2019, 06:57:56 AM »
Evening All,

My sincere thanks to all who have dropped by and looked in and especially to those who have left such encouraging comments: Bud, Frank, p9o1rische, Ron, Rick, Terri, Roberto and Giuseppe, they are very much appreciated.

Roberto - many thanks for pointing out that the pusher propellor should be reversed from the tractors: I have not corrected it yet but will do so later!

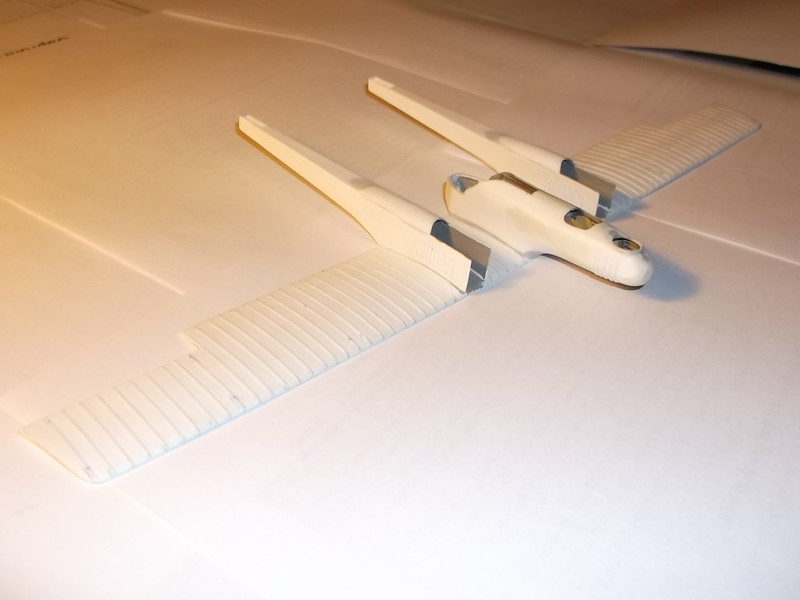
Following on from the last build post I have manged to put the nacelle and booms on to the lower wing and add some other details. In a week this has started to look like an aeroplane.

First up was to cement the fuselage nacelle to the lower wing. The alignment laterally and horizontally needs to be accurate, so to get the former right I laid the wing on a plan and then adjusted the nacelle sideways until it was true. To get the horizontal line correct I resorted to one of my master jigs: in this case a piece of sprue with which I stir my enamel paints placed on some lengths of plastic card: simple, cheap and completely effective - and the bonus is that the parts are ready to hand and easily stored!


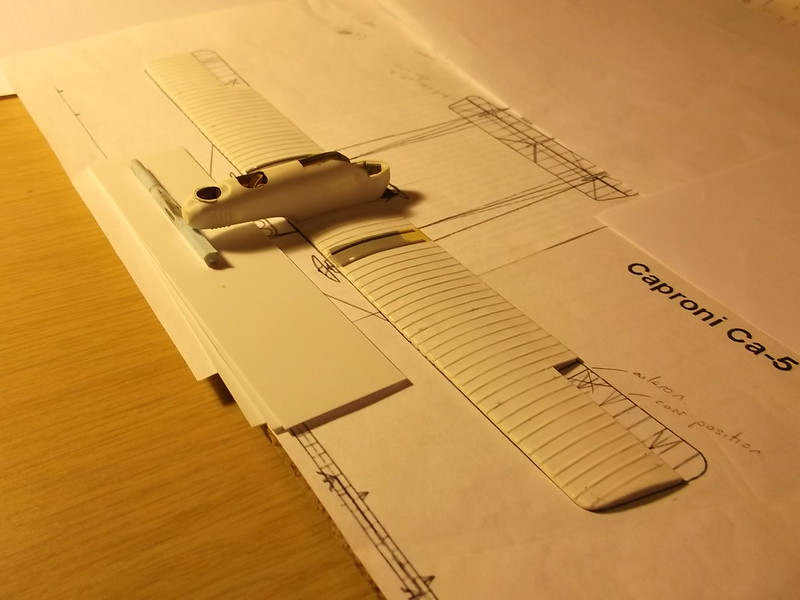
A small amount of filler was used along the joint but I was very pleased with how little was needed in the end. With the nacelle in place the booms could follow: I used the same method as per the nacelle by laying the wing over the plans and aligning the booms on the plan. I cemented both booms at the same time and to ensure that they were properly parallel I employed another jig at the rear - also from simple flexible materials! To stop the open ends at the front splaying outwards I used a pair of hair clips to keep them correctly aligned:


Once again a little filler was required to clean up the joints but as these images show, not very much was required:


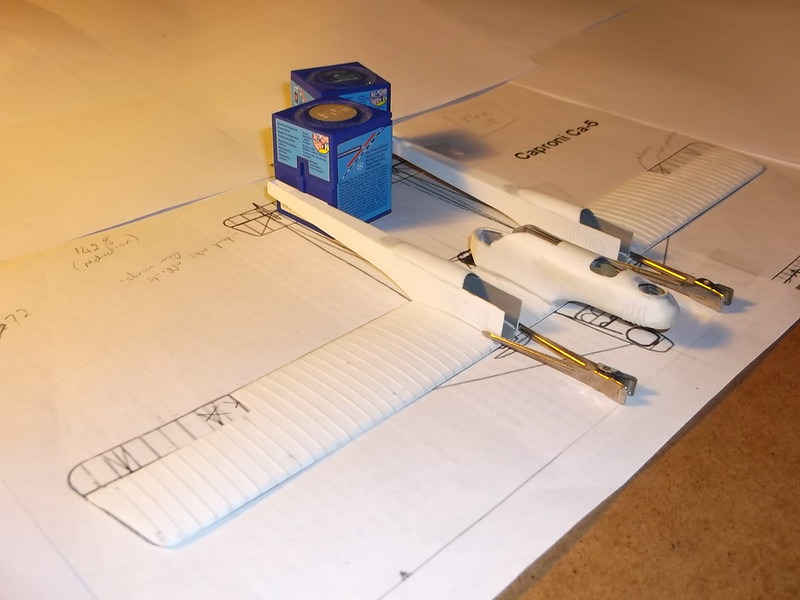
Now I could put the front panels which I had already moulded on to the booms, followed by the radiators (cut from 60 thou card and scribed), and finally the engines. The latter are mounted on pieces of 60thou card to hold them at the correct level in the nacelle:


When I had installed the engine in the rear of the nacelle, I put the rear horizontal tail surface into place as this helps to keep the entire structure rigid. It will also make painting easier. The white strip in front of the assembly is the top wing::


Next painting and decorating.

Thanks for looking.

Stephen.
« Last Edit: July 14, 2019, 07:06:13 AM by lone modeller »

Online RAGIII

  • Hero Member
  • *****
  • Posts: 18793
Re: 1/72 scratch build Caproni Ca 5
« Reply #40 on: July 14, 2019, 07:49:02 AM »
Terrific progress Stephen! It is looking More awesome with each update!
RAGIII
"A man has to know his limitations": Harry Callahan

"Don't slop it on" Lynda Geisler

Offline Alexis

  • Hero Member
  • *****
  • Posts: 7947
  • Love the self
Re: 1/72 scratch build Caproni Ca 5
« Reply #41 on: July 14, 2019, 10:20:41 AM »
Man , that is looking mighty fine so far  :)


Terri
Hurra ! , Ich Leben Noch
Body and life is a vessel we use to travel the planet . Femininity is the gift , The miracle comes from what we do with it .

Offline kensar

  • Hero Member
  • *****
  • Posts: 2503
  • Reshaping the world - one piece at a time.
Re: 1/72 scratch build Caproni Ca 5
« Reply #42 on: July 14, 2019, 11:25:39 PM »
Lots of progress made, Terri.  It's coming together nicely.

Offline Juan

  • Hero Member
  • *****
  • Posts: 2455
  • All gave some, some gave all.
Re: 1/72 scratch build Caproni Ca 5
« Reply #43 on: July 14, 2019, 11:58:07 PM »
Looks amazing Stephen, very big even at this scale.

Offline AndRoby67

  • Sr. Member
  • ****
  • Posts: 278
Re: 1/72 scratch build Caproni Ca 5
« Reply #44 on: July 15, 2019, 03:44:30 AM »
Really amazing!
Simple system to made general alignement but really effective!
The plans that you used for alignement comes from?
I'm really curious too for the original example that you choose to represent!
Many compliments!
Roberto