update ...
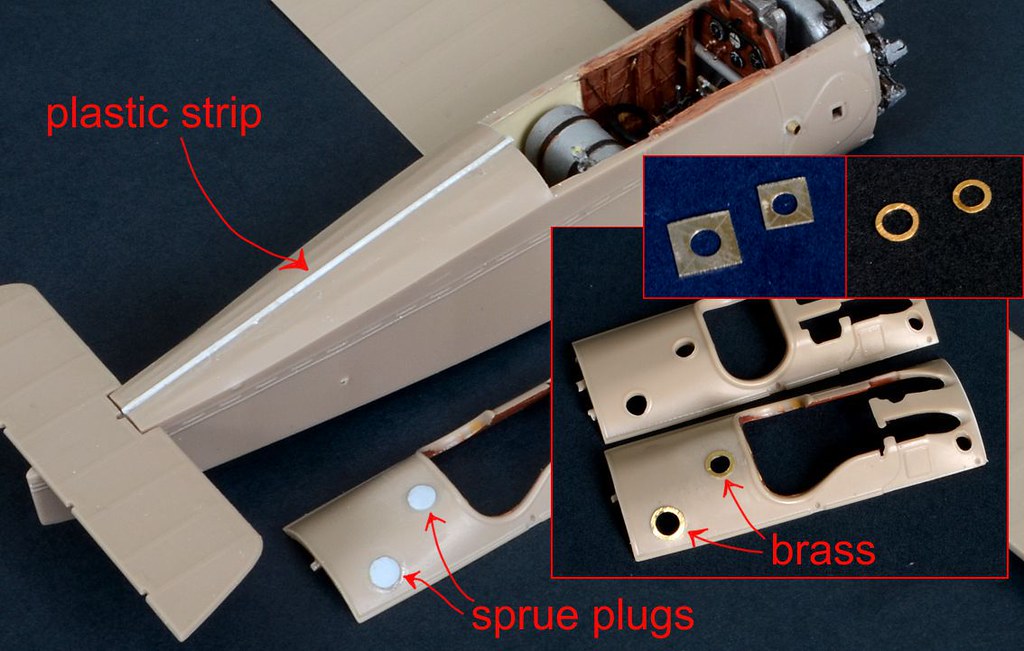
Once the fuselage halves were together, work was needed on both top and bottom seams. A length of sprue was added on top to represent the detail of the uppermost dorsal stringer. That was further sanded down.
The decking behind the cockpit has two openings for access to the fuel tanks. The raised detail was kind of weak here, and at first tried filling with just some plugs from sprue and boring those out, but did not like how that looked. So ended up fashioning the replacement 'collars' by cutting and filing down brass sheet.
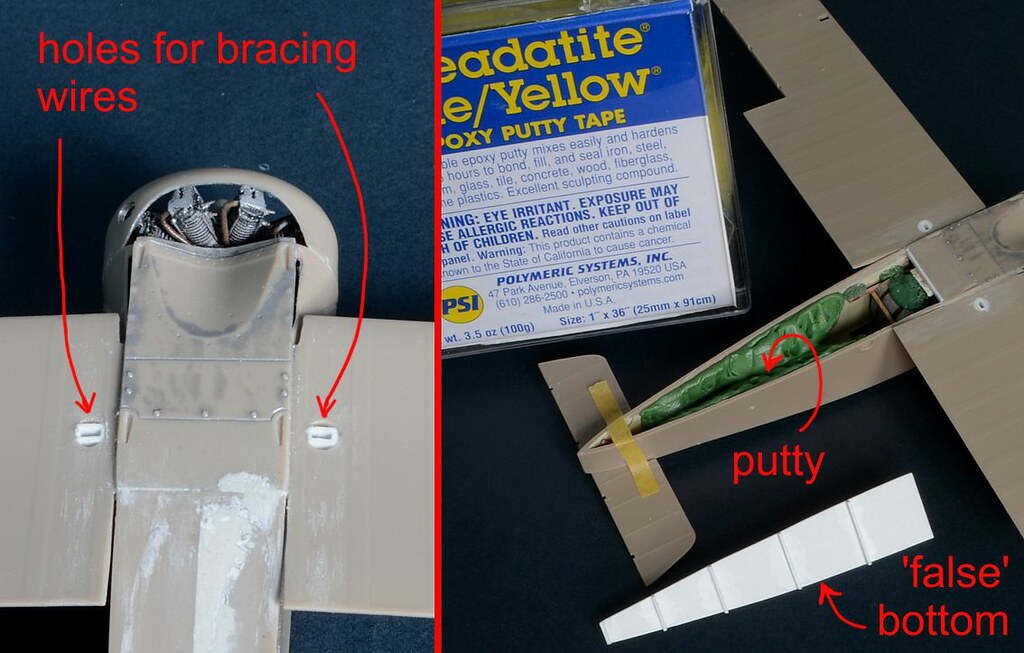
The bottom wing requires a hole near the wing roots. This is for the bracing wires as they pass through the wings and attach to the landing gear struts.
The fuselage underside was completely flat, but should have some subtle cloth effects between the wooden frames, just like the sides have. Thought I could just slightly carve out the centers, but the pressure undid the glued joint. So out came the razor saw to remove the whole bottom.
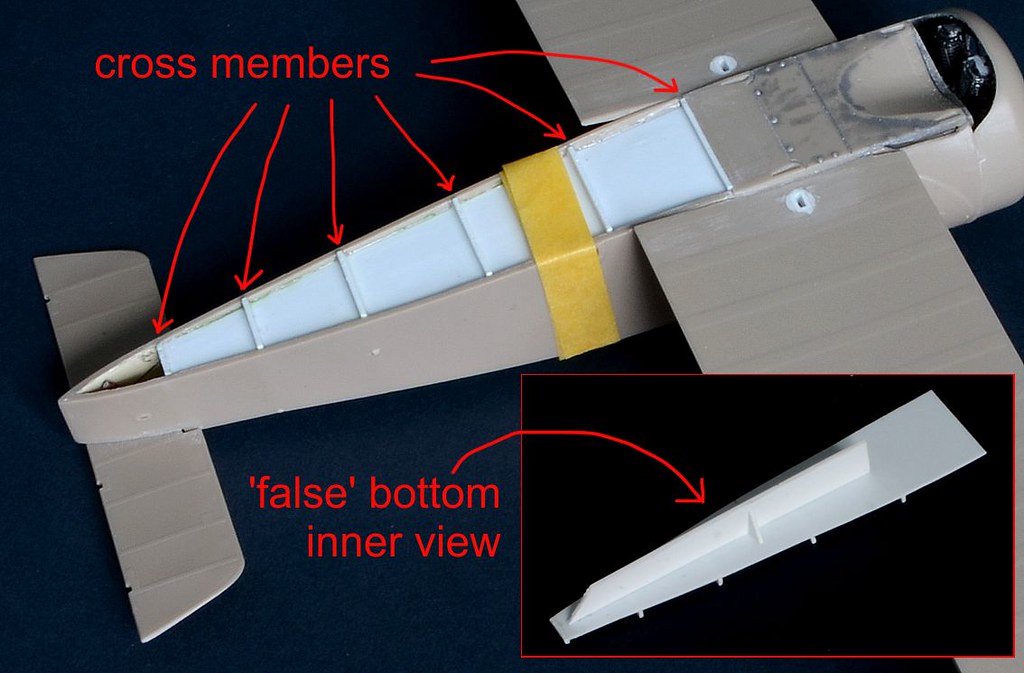
Plastic sheet was used to fashion a false bottom,and once that is fixed in place, some further putty will be applied to create the subtle fabric effects.
------------------------------------------
Happy to report that the putty work on the underside came out like I had hoped it would:
After passing a sanding stick on the underside to ensure all the cross members were flush with with fuselage sides, the putty was made ready. Mixed in with the kneadatite was 50% Apoxie Sculpt - this combination makes for better surface for sanding if required after the putty has cured.
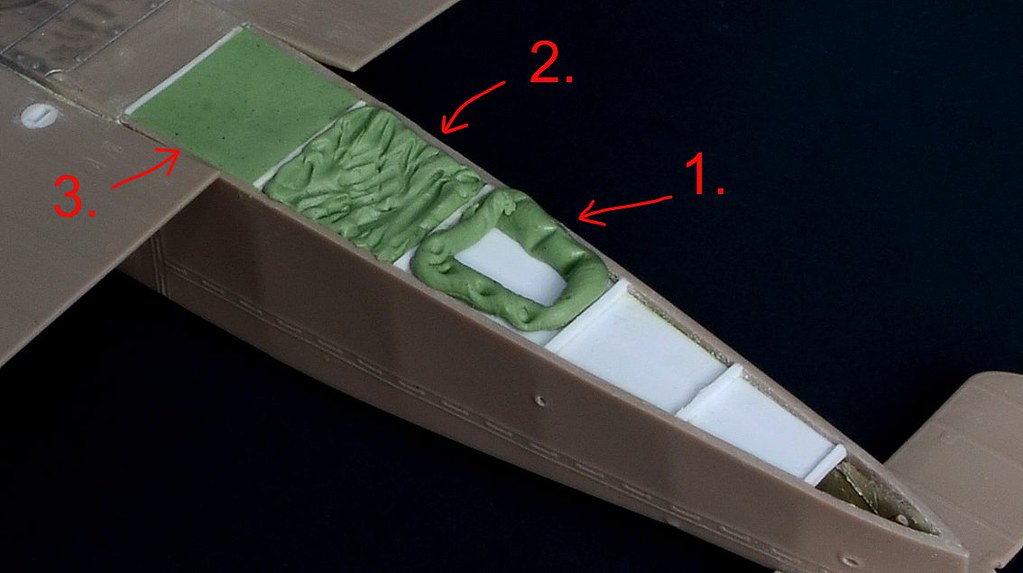
1. - putty is rolled into worm lenghts and pressed around the framework.
2. - it is then further spread out towards the center with a metal tool
3. - further smoothed out with a fingertip
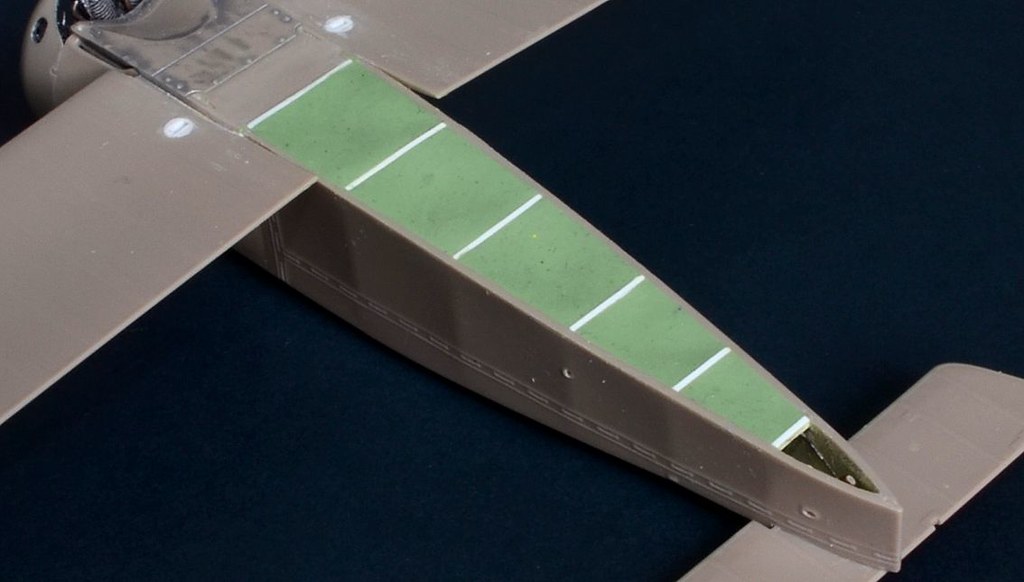
Above, the finished results.
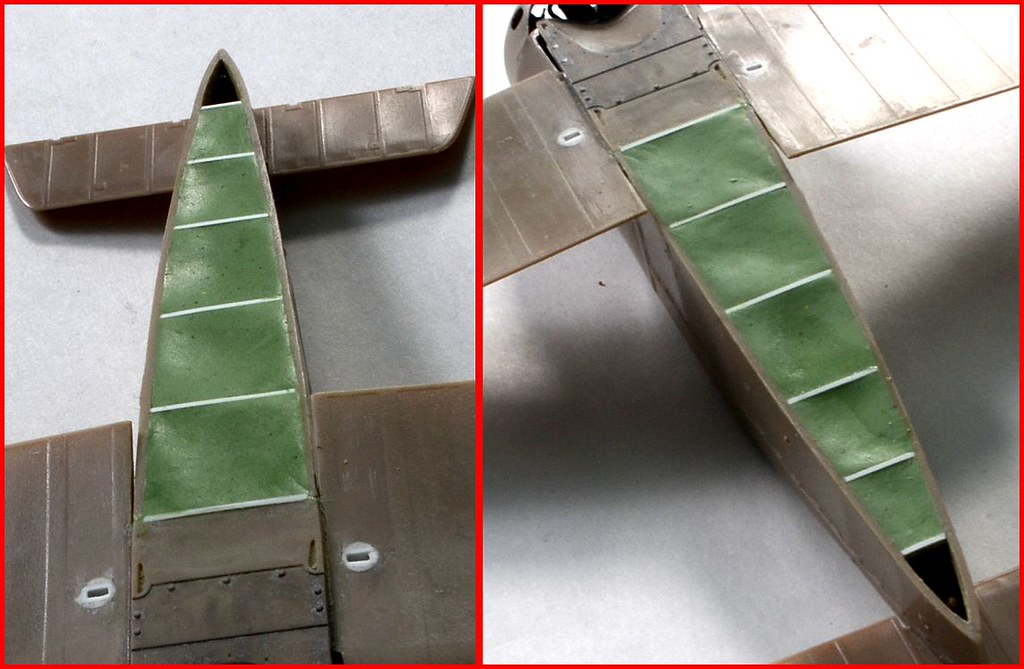
The subtle fabric effects are most visible at extreme angle and favourable lighting.
regards,
Jack

