Author Topic: 1/72 Zeppelin-Lindau (Dornier) Rs II  (Read 28572 times)

Offline RLWP

  • Hero Member
  • *****
  • Posts: 1494
  • Bodger
Re: 1/72 Zeppelin-Lindau (Dornier) Rs II
« Reply #75 on: November 19, 2017, 09:37:46 AM »
Looking really, really good

Not necessarily aeroplane shaped yet, still good

Richard
Hendon for flying - the fastest way to the ground!

Offline IanB

  • Hero Member
  • *****
  • Posts: 2441
Re: 1/72 Zeppelin-Lindau (Dornier) Rs II
« Reply #76 on: November 19, 2017, 11:09:07 AM »
Very nice! A little colour always starts to bring things to life. I need to try metal primer, I'm tired of having the paint come off while trying to fit brass rod.

Ian

Offline lone modeller

  • Hero Member
  • *****
  • Posts: 5322
Re: 1/72 Zeppelin-Lindau (Dornier) Rs II
« Reply #77 on: November 20, 2017, 04:25:13 AM »
Ian, If you do use primer be careful because it can be very thick, but if you add too much thinner it does not work either! On the booms the thicker paint matters less than it would have done on very thin metal.

Stephen.

Offline gbrivio

  • Hero Member
  • *****
  • Posts: 1682
Re: 1/72 Zeppelin-Lindau (Dornier) Rs II
« Reply #78 on: November 20, 2017, 05:04:40 AM »
A great scratchbuilding tutorial. Thank you for sharing.
Giuseppe.

Offline RAGIII

  • Hero Member
  • *****
  • Posts: 18847
Re: 1/72 Zeppelin-Lindau (Dornier) Rs II
« Reply #79 on: November 20, 2017, 09:17:25 AM »
Absolutely beautiful work! The crosses came out beautifully!
RAGIII
"A man has to know his limitations": Harry Callahan

"Don't slop it on" Lynda Geisler

Offline Manni

  • Hero Member
  • *****
  • Posts: 1768
    • Der Militärmodellbauer
Re: 1/72 Zeppelin-Lindau (Dornier) Rs II
« Reply #80 on: November 20, 2017, 04:42:48 PM »
Wow, the seaplane looks just great! Now with paint on it it looks mindblowing, so retro and so futuristic at the same time.
Manni
"Ich hab' da mal was vorbereitet.": Jean Pütz
"Warum noch mehr Bausätze?!?": meine Frau

Offline Borsos

  • Hero Member
  • *****
  • Posts: 3324
Re: 1/72 Zeppelin-Lindau (Dornier) Rs II
« Reply #81 on: November 21, 2017, 04:54:37 AM »
What a beast she is - but a pretty one. Very nice scratchbuild!
Borsos
"Deux armées aux prises, c'est une grande armée qui se suicide."
Barbusse.
"Ein Berg in Deutschland kann doch einen Berg in Frankreich nicht beleidigen. Oder ein Fluß oder ein Wald oder ein Weizenfeld."
Remarque.

Offline Des

  • Administrator
  • Hero Member
  • ******
  • Posts: 9325
    • ww1aircraftmodels.com
Re: 1/72 Zeppelin-Lindau (Dornier) Rs II
« Reply #82 on: November 21, 2017, 04:59:16 AM »
She is taking shape beautifully Stephen, you are doing a superb job.

Des.
Late Founder of ww1aircraftmodels.com and forum.ww1aircraftmodels.com

Offline Whiteknuckles

  • Hero Member
  • *****
  • Posts: 1334
Re: 1/72 Zeppelin-Lindau (Dornier) Rs II
« Reply #83 on: November 21, 2017, 09:35:51 AM »
What a wonderful piece of modelling Stephen, or should I say art!! :)
Very inspiring!!

Andrew
Eternal Apprentice

Offline lone modeller

  • Hero Member
  • *****
  • Posts: 5322
Re: 1/72 Zeppelin-Lindau (Dornier) Rs II
« Reply #84 on: November 24, 2017, 05:12:45 AM »
Evening All,

My thanks to Guiseppe, Rick, Manni, Andreas, Des and Andrew for your very kind and positive comments - I really appreciate them all and am pleased that this build is of such interest to so many.

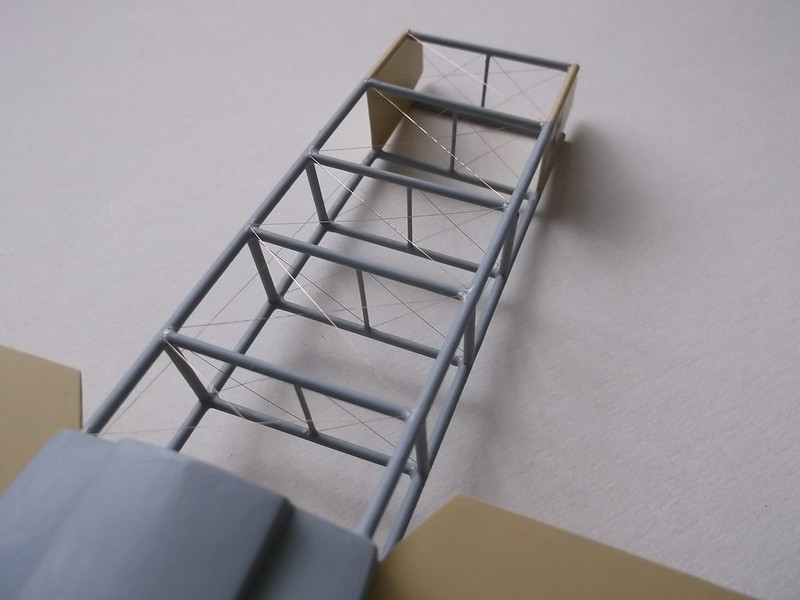
I have rigged the lower part of the tail boom together with the vertical sections as shown in the photos. Experience has taught me that rigging parts of a model like this is strongly advised as they become much less accessible later when there are large parts such as wings etc to catch on when one is trying to get the tweezers and wire into tiny spaces. I use rolled 40 SWG copper wire: I measure the length needed directly from the model using a pair of dividers. l then cut a piece of wire which is slightly longer than needed and roll it flat with a piece of brass strip on a hardwood base. The wire is offered to the space where it is supposed to fit and by the use of Mk 1 eyeball I estimate how much needs to be trimmed. A second, and if necessary third, attempt is made until the wire is the correct length. A tiny blob of CA is added to the model at both ends where the wire is to be attached and the wire carefully placed in position. The CA usually grabs the wire and holds it firm. Sometimes I will put one end on and then use tweezers or a knife blade to gently ease the other end of the wire into place if it is difficult to get to. By using wire I do not have to drill and fill lots of holes, and in the case of this boom structure which is made from brass, I do not have to drill into metal which would be extremely difficult and time consuming. The results look like this:


Whilst I was in rigging mode I decided to complete the elevator so that I could store it where it cannot be damaged. This will be one of the very last parts to be added to the model so I need to keep it safe in the meantime.


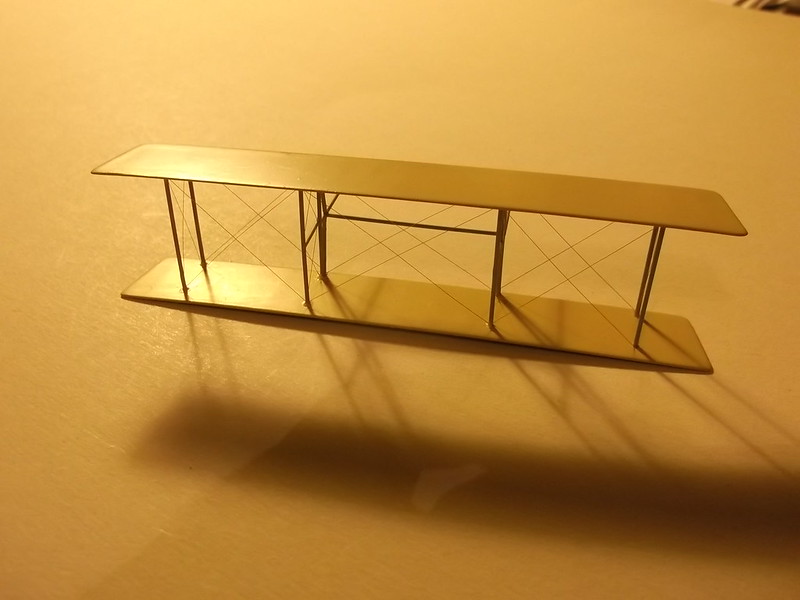
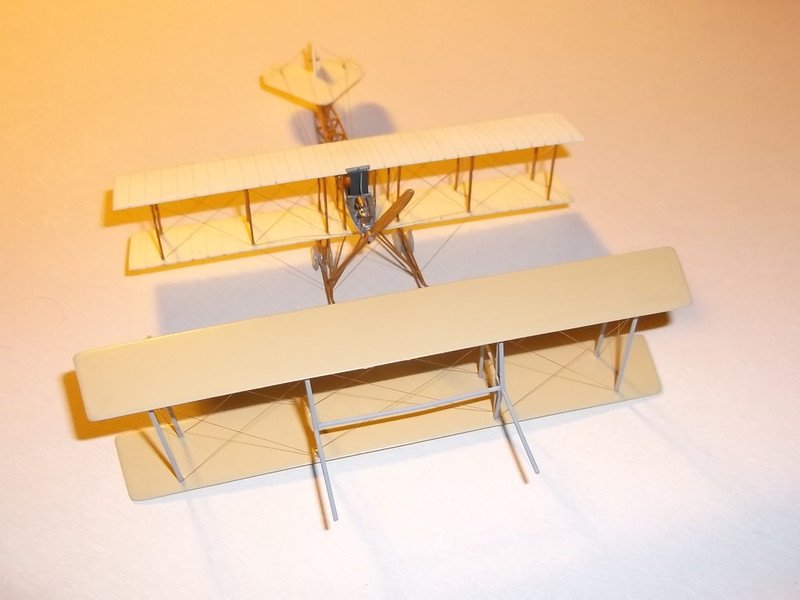
Just a reminder of size and how much rigging there is on this aeroplane, here again is the Avro biplane with the rigged and painted elevator: remember this will be at the very rear of the flying boat and is a relatively small part of it!


I have been thinking hard about how I am going to attach the large V struts under the wings to the hull sides. On the original aircraft they came to a common joint and were attached to the hull side and probably to a large piece of frame inside the hull. I do not think that it will be practical to make the ends of 4 pieces of plastic come together and simultaneously be able to fix them to the hull sides, so I have decided to make two small attachment pieces from 60 thou card, drill holes in them and the hull and attach them with wire and CA. However I needed to make the attachment pieces the correct size: the struts will be made from 120 thou x 30 thou Evergreen strip shaped to aerofiol section, (the original struts were huge as the photos show). So I cut two small pieces of strip and made a tapered joint so that they would come together with a combined width of 60 thou. I could then cut the attachment pieces to fit exactly the strut ends:


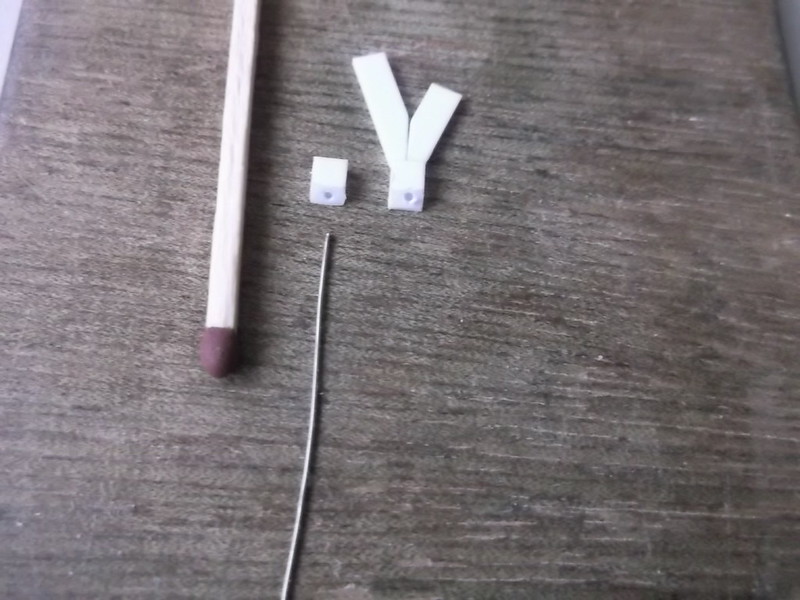
The hull attachment parts have an angled face which will be glued to the hull side and be reinforced with a piece of wire which I took from a piece of telephone cable. The opposite side will then be angled upwards so that the ends of the struts will fit directly on to it and will form a butt joint. The wing is completely rigid so the V struts should not be carrying any weight. The completed attachment lugs look like this:


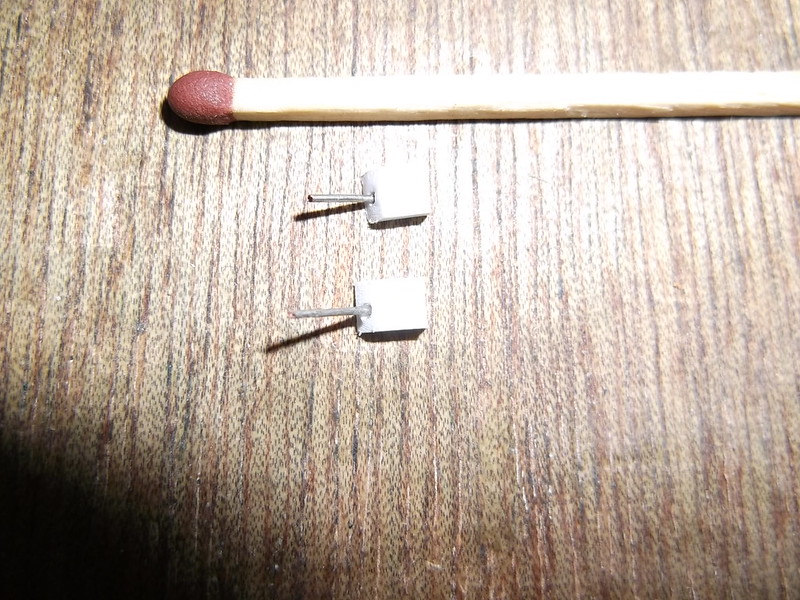
These have been CA'd to the hull.

I have also done some work on the engine nacelles: by the use of a file and glass paper I have shaped them to match the drawings and then I drilled out two slots, one at each end on the top, into which I am going to insert some short pieces of 60 thou rod to represent the cylinder ends. I have called this a retro model for good reasons: I am not intending to add a huge amount of cockpit and engine detail only to cover it all up - this model will resemble some of the early Frog and Airfix models from the 1950's where there were no wheel wells, cockpit openings, or other recesses! I have also resorted to talcum powder and dope as a filler - another 1960's, pre-resin aftermarket solution to a modelling problem! The engine tops will have some detail which will hopefully disguise to all but the most serious onlooker the small liberties that I am taking with this model. The rear engines will be nearly hidden under the wing anyway and all will have radiators mounted above them which will also help to obscure the view!


There is some tidying up to do around the edges of the slots but that will be easy to do and when paint is on they should pass muster. Various holes have been drilled in the sides and front and rear which represent various orifices on the originals, but I have no idea why they were there, they are just clearly visible in the photos

Thanks for looking.

Stephen.

Offline RLWP

  • Hero Member
  • *****
  • Posts: 1494
  • Bodger
Re: 1/72 Zeppelin-Lindau (Dornier) Rs II
« Reply #85 on: November 24, 2017, 05:39:16 AM »
and am pleased that this build is of such interest to so many.

Are you kidding?! A large and unusual prototype, interesting techniques, well executed and brilliantly and honestly described

Doesn't get much better than this, Stephen

Richard

Still doesn't look much like an aeroplane yet...
Hendon for flying - the fastest way to the ground!

Bughunter

  • Guest
Re: 1/72 Zeppelin-Lindau (Dornier) Rs II
« Reply #86 on: November 24, 2017, 04:30:22 PM »
Beside all the fine work on rigging and plane I really like the engines - cool!

Cheers,
Frank

Offline davec

  • Full Member
  • ***
  • Posts: 179
Re: 1/72 Zeppelin-Lindau (Dornier) Rs II
« Reply #87 on: November 24, 2017, 09:58:33 PM »
amazing rigging!

Online lcarroll

  • Administrator
  • Hero Member
  • ******
  • Posts: 8554
Re: 1/72 Zeppelin-Lindau (Dornier) Rs II
« Reply #88 on: November 25, 2017, 12:32:13 AM »
Stephen,
    Your solution to attaching the struts to the hull is pure genius, great scratch building skills on your part....... again! The rear boom rigging is beautifully clean and the elevator assembly as well. This is shaping up to be your best work yet, it's a real pleasure to follow your progress! 8) 8) 8)
Cheers,
Lance

Offline IanB

  • Hero Member
  • *****
  • Posts: 2441
Re: 1/72 Zeppelin-Lindau (Dornier) Rs II
« Reply #89 on: November 26, 2017, 01:31:07 AM »
Stephen,
    Your solution to attaching the struts to the hull is pure genius, great scratch building skills on your part....... again! The rear boom rigging is beautifully clean and the elevator assembly as well. This is shaping up to be your best work yet, it's a real pleasure to follow your progress! 8) 8) 8)
Cheers,
Lance

I'll second that. Beautiful, clean, work throughout. The only possible problem I can see is where to put it when it's finished!

Ian