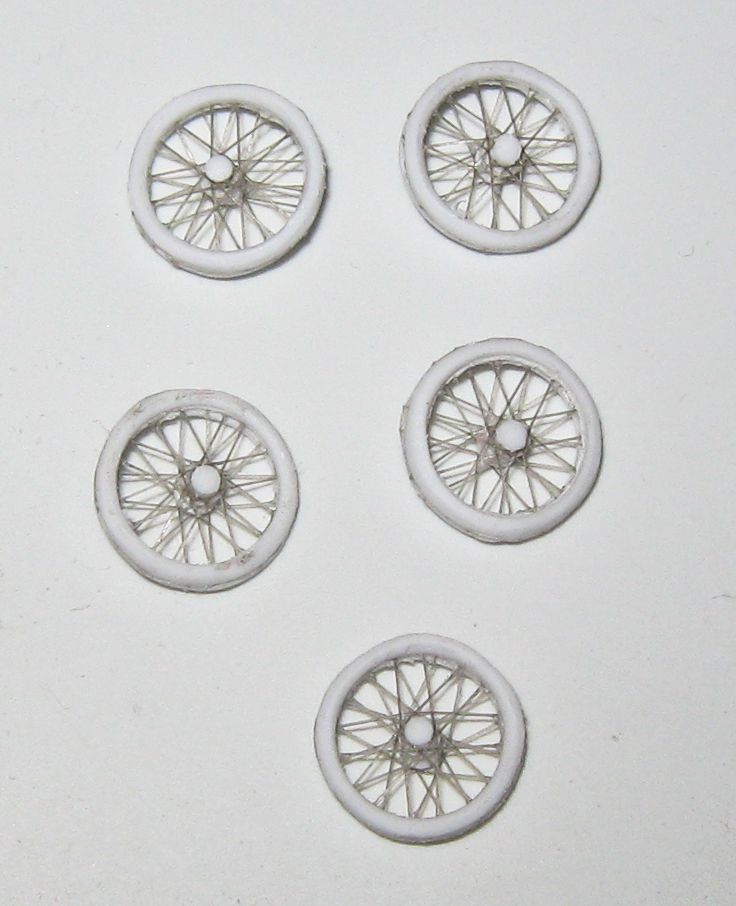
Author Topic: 'El Sonora' in 1/72  (Read 16675 times)

Offline sobrien

  • Full Member
  • ***
  • Posts: 128
Re: 'El Sonora' in 1/72
« Reply #15 on: May 17, 2017, 08:49:11 PM »
Senora was a Glenn Martin built Curtiss copy.

Offline KiwiZac

  • Global Moderator
  • Hero Member
  • *****
  • Posts: 2589
    • My Linktree
Re: 'El Sonora' in 1/72
« Reply #16 on: May 18, 2017, 01:55:06 PM »
It's one thing to scratch these early birds at all, let alone the bravery/madness needed to do it in 1/72! My hat's off to you, sir. Beautiful work so far!

Offline stevehed

  • Jr. Member
  • **
  • Posts: 85
Re: 'El Sonora' in 1/72
« Reply #17 on: May 20, 2017, 09:55:14 AM »
Well done, Sir. Will be watching with great interest as always.

Regards, Steve

Offline Old Man

  • Hero Member
  • *****
  • Posts: 600
Re: 'El Sonora' in 1/72
« Reply #18 on: June 19, 2017, 09:34:12 AM »
We have wheels, amigos!

I don't mind confessing this step nearly bounced me off the project, and even now I am still considering improvements that might make the contriving of spoke wheels a more regular process with a smaller ratio of failures to acceptable outcomes. But I have got enough of the bugs out to present a method which can produce acceptable results.

The method is derived from routines presented by the late Harry Woodman, master scratch-builder, whose book is available on-line, and highly recommended....

http://rclibrary.co.uk/files_titles/1216/ScaleModelAircraft_Woodman.pdf

But his method was meant for 1/48 scale work, and probably (though this is not clearly stated) employed waxed sewing thread for spokes. Adjustments have to be made for work at a smaller scale, and employing monofilament ('invisible thread') for the spokes.

The basics remain the same: two circles pressed together to make a wheel, sandwiching between them a spacer representing the axle, and a pattern of spokes attached separately to each circle and, in their centers, to each end of the spacer/axle. This crowns the spokes out as the unit is assembled.

Alignments of various sorts are essential, and have to be got at least more or less right.

Alignment of the spokes with one another I refer to as internal alignment: Half the spokes are attached to one end of the spacer/axle, and to the mating surface of one of the wheel halves, and the other half of the spokes to the other end of the spacer/axle and other wheel half's mating surface. When the mating surfaces of the wheel halves are brought together, the spoke patterns must be offset from one another, as this provides an optical illusion of more spokes than there actually are which is essential.

Alignment of the wheel halve's mating surfaces with one another I refer to as external alignment. Ideally the things should go together precisely --- a small off-set can be made good, but too great a mis-alignment here will show, particularly at the inside where the spokes sprout, a place where the eye will be drawn.

Alignment of the spacer/axle also has to be right, or at least to look right. If it is very crooked, and this can happen even if the external alignment is acceptable, the wheel will not look right.

Three factors complicate the matter further. First, there is not a lot of 'give' in the monofilament. It must be very strongly attached, both at the rims and the center, and will only stretch a little. Second, the wheel halves are pretty insubstantial. In 1/72 scale they ought not be more than a half millimeter thick, and there should not be more than two millimeters difference between outer and inner diameters, in fact it really ought to be a bit less. This makes bringing them together against the strain of the monofilament crowning out at the ends of the spacer/axle difficult. Third, when cleaning up, after the wheel halves have been attached, care must be taken to keep sanding sticks and knife edges away from the spokes, and the assembly should be held only by the rims, never by the center. Nothing really can be done on the inside seam at all.

It is made no easier by the fact that the wheels for 'El Sonora' are much smaller than standard. Wheels of Great War types generally run about 10mm outside diameter in 1/72 scale (or 15mm in 1/48), but the wheels on 'El Sonora' were only 20" in diameter, scaling out to an outside diameter of 7mm.

After a good deal of trial and error, which exposed various problems in succession, I finally reached a point where I have been able to produce this weekend a five reasonably usable wheels for 'El Sonora' (which needs three).


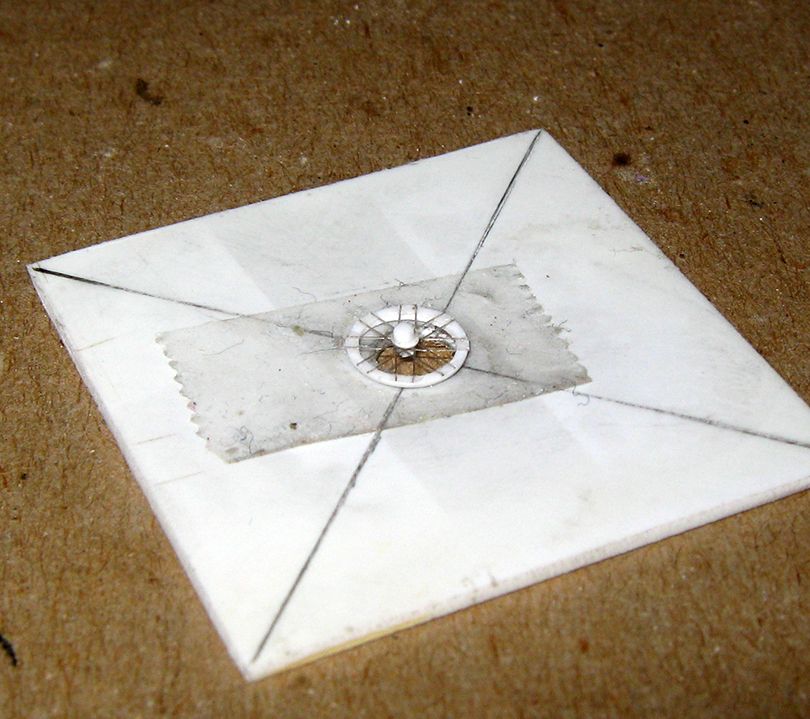
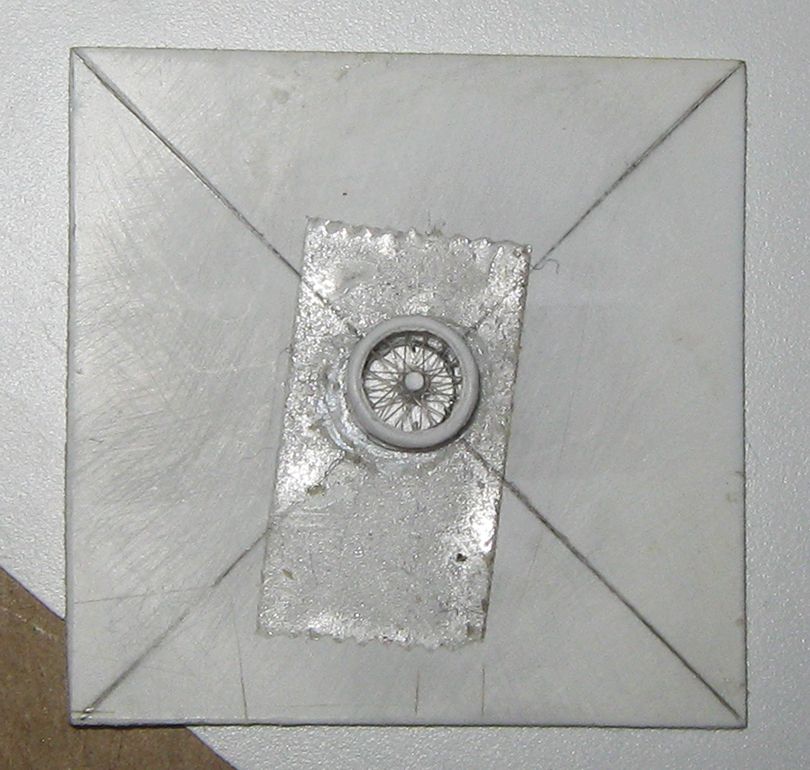
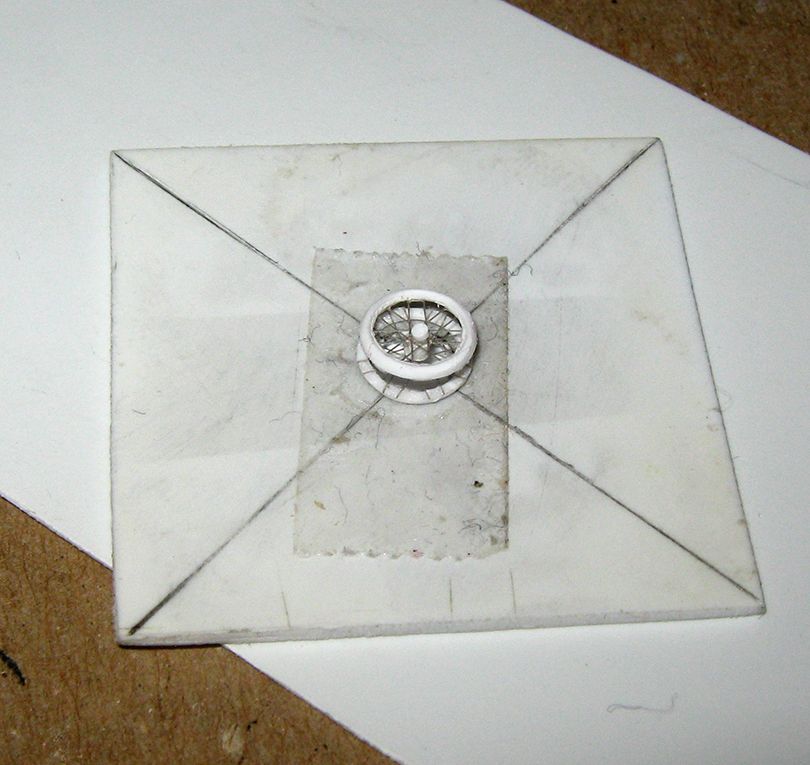
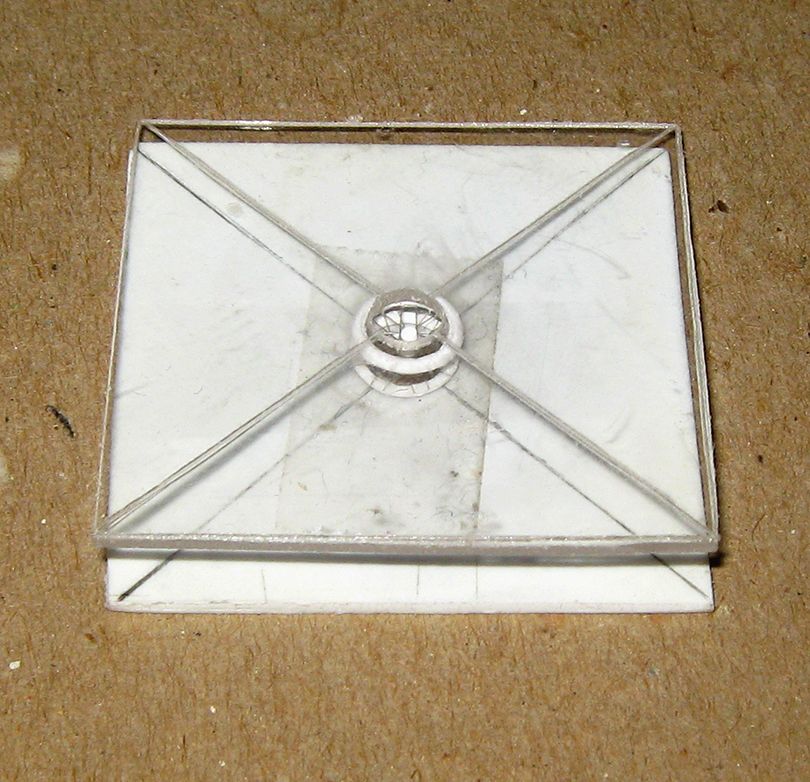
Here is what is needed for a wheel:


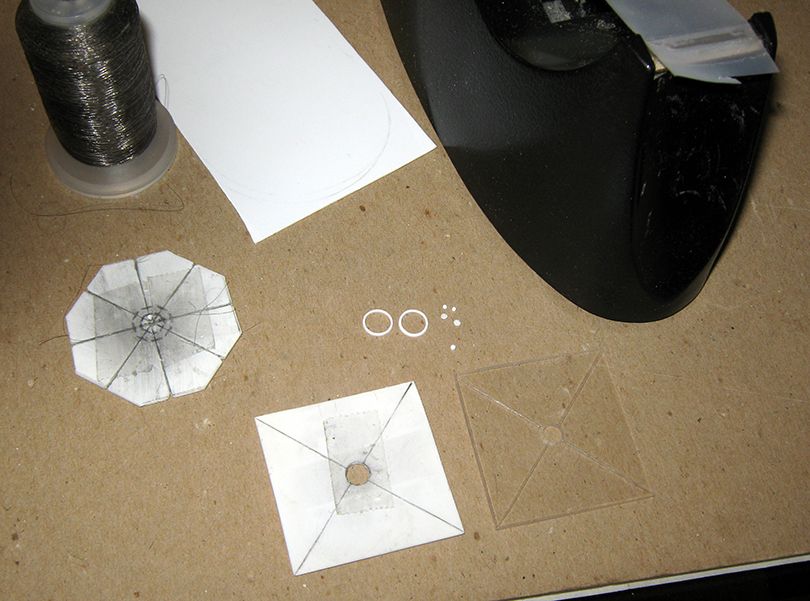
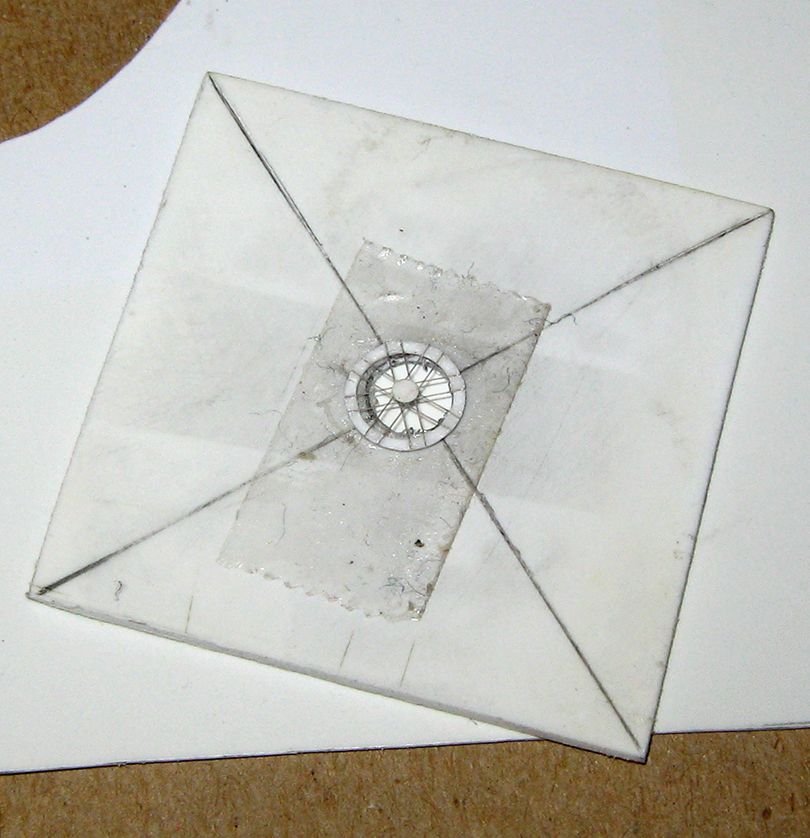
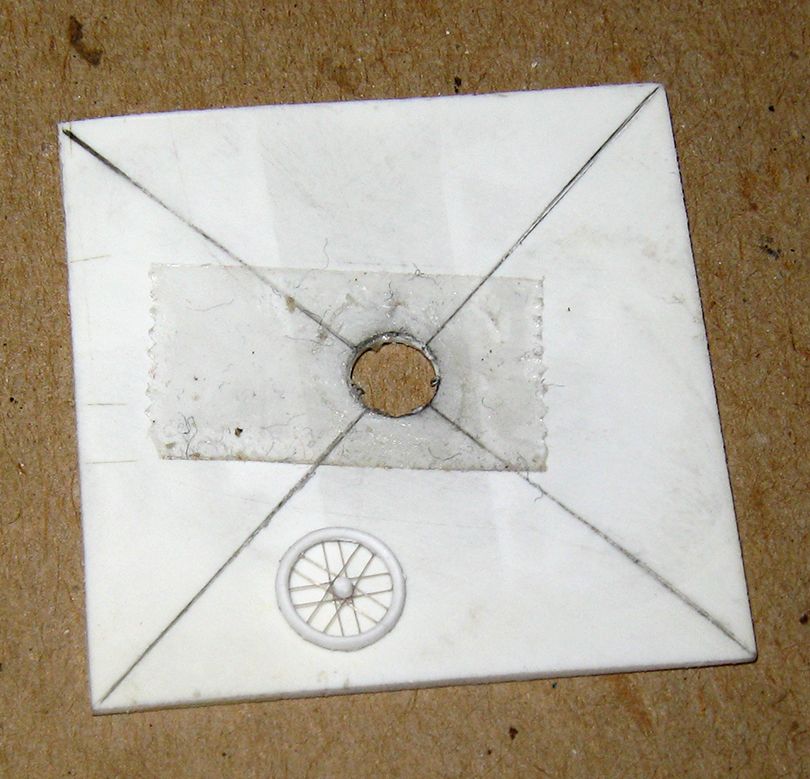
The two wheel halves are obvious, the bits beside them are two thin discs made of small slices of 1mm rod flattened down hard in a smooth-jaw pliers, two thin slices of 1mm rod left as is, and a half millimeter disc of of 1.3mm rod ---these make up the spacer/axle and anchors for the centers of the spokes. The octagonal piece is the weaving jig for the spokes, it is 1mm thick. The square pieces, one of white and one of clear plastic, also 1mm thick, with holes in the center, are assembly tools. The tape is used to tack down the ends of the monofilament line at start and finish. The larger sheet of plastic is one means of providing a background against which the spokes can be seen clearly during several steps (they don't call this stuff 'invisible thread' for nothing...)...

The wheel halves are cut off the end of a length of tube with a 7mm outer diameter.


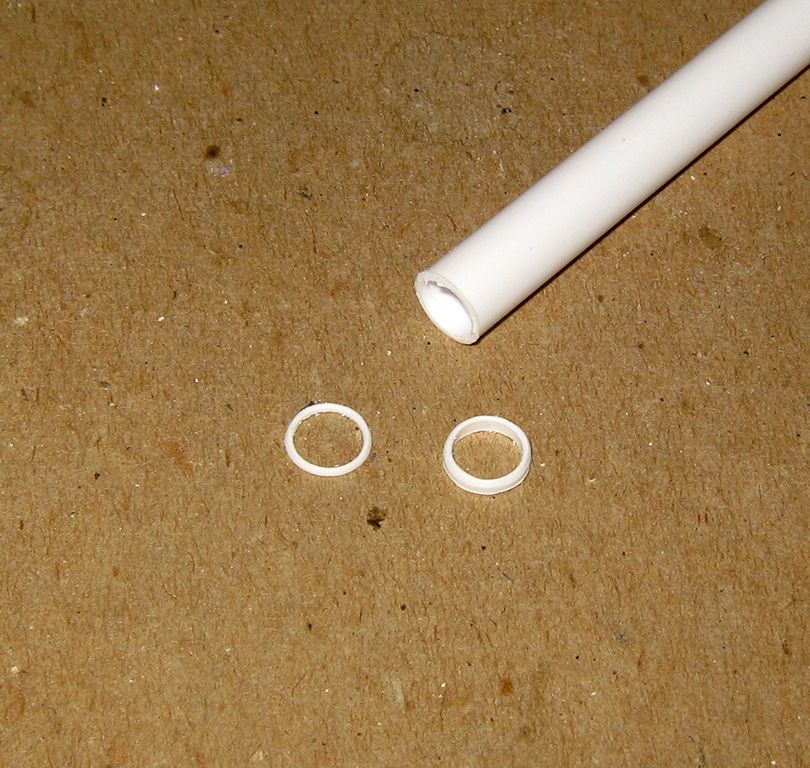
The suggestion of 'roundness' can be given to the end of the tube before cutting off the ring, and once cut off, the excess can be sanded down to a proper thinness. The ring on the left is finished, the one on the right is straight off the tube.


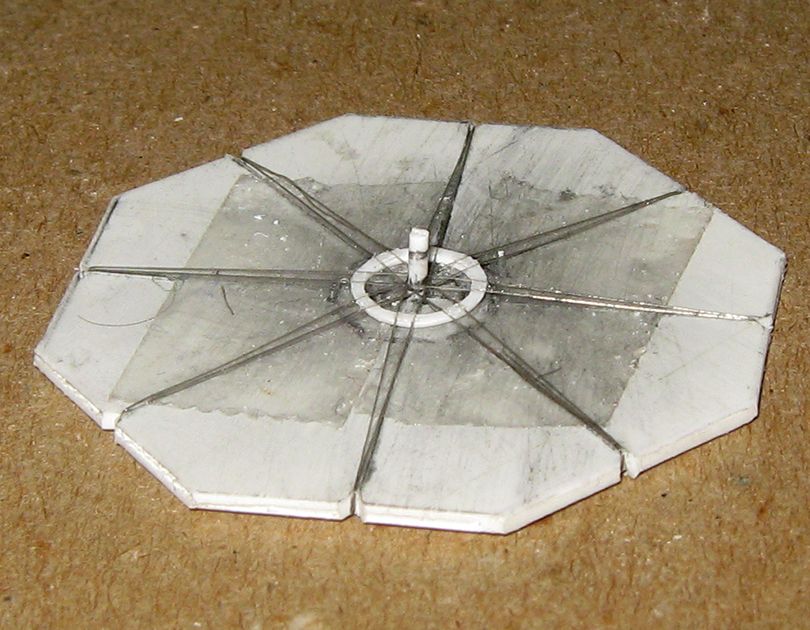
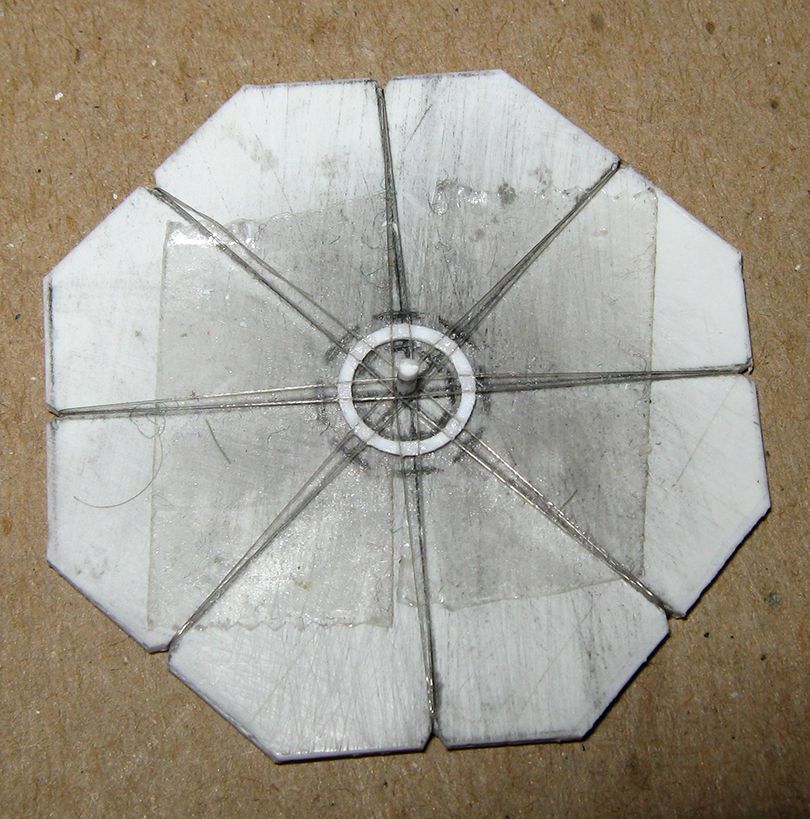
Here a wheel half is on the weaving jig, with the spokes in place. The pencil marks are measured to provide a placement guide for centering, double-face tape sticks the piece in place, the projecting piece of 1mm rod at the center spreads the spokes out. Both ends of th length of monofilament are taped down on the back of the jig. A dab of CA gel is placed between the paired spokes on the rim, and spread to cover them. Care must be taken to keep glue off the inside rim, and it s best to do this twice. Let the glue set ('liquid patience' can be used to ave time, but doing so will make it necessary to replace the double-face tape for each use of the jig). Test by a little nudge with a toothpick to see each spoke is firmly attached.

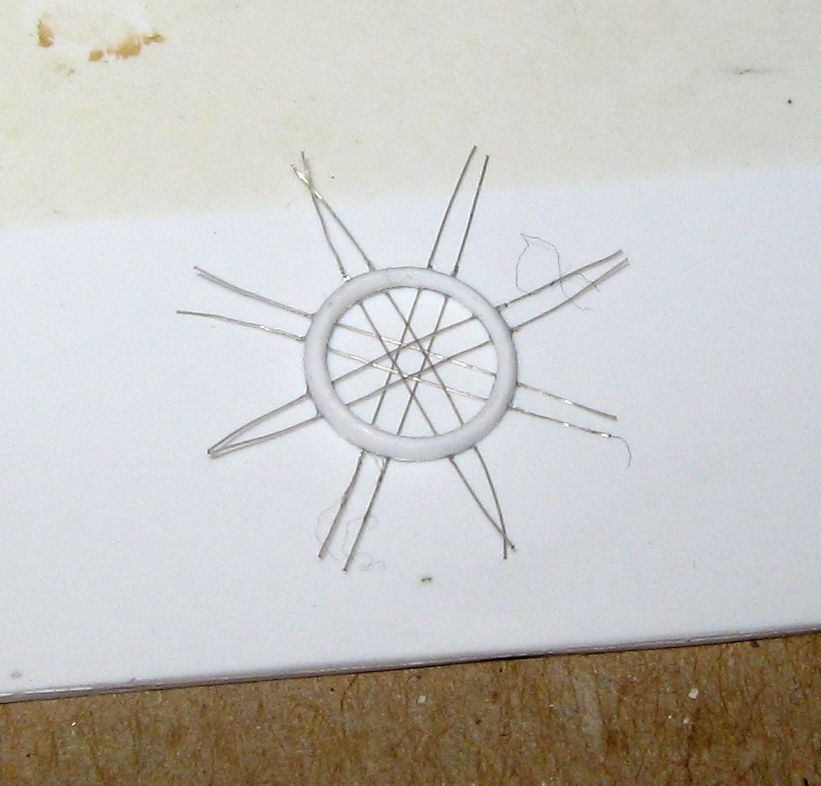
Then clip the lines outside the rim, and lift the half-wheel with spokes off the jig....


Trim the excess monofilament off at the rim, closely (the stuff is very resistant to sanding, so get it right at the edge with the scissors or knife). Place it mating surface up on the opaque assembly tool, prepared with double-face tape, and glue one of the thin flattened discs in the center. Hold over a white surface while you do this, so you can see the center....


Place the wheel half mating surface down on a flat white surface, and glue one of the un-flattened discs of 1mm rod in the center....


Return one of the two wheel halves to the assembly tool, mating surface up, and fasten the half millimeter length of 1.3mm rod to the center disc...


Leaving that piece in place, attach the other wheel half to the bit of 1.3mm rod, taking care to off-set its spokes from those of the other wheel half. This is where the magic begins to happen....


The wheel halves are still separated by a bit under a millimeter's distance, however....


Apply glue all around the mating surface of the bottom wheel half, taking care to keep it off the inside rim. Place the clear assembly tool over the upper wheel half....


Squeeze the assembly tool together, doing your best to see the wheel halves come together with their otter diameters closely aligned. You won't always succeed, but about two out of three times the result will be acceptable. Holding the sandwich firmly together for a minute of so will be enough for the CA gel to set. If it looks useable, douse wit accelerator and tend to the seam, thinning down the outsides of the 'tire' a bit as well.

I am still mulling over ways to improve the final external alignment. I am thinking that a 'collar' of the tubing, with several lengths of stout rod, perhaps 1.5mm thickness, affixed to the outside of the 'collar', would provide a good resting point for the bottom wheel half, and a good guide for fastening the upper wheel half to the spacer/axle piece, and for pressing it down to mate with the bottom wheel half. Another length of the tubing could be used as a tool to press down the upper wheel half in this step. I expect I will give that a try before I actually put wheels on 'El Sonora', but as I have usable wheels in hand, and know I can do this at the rate of about forty minuted a wheel complete, I consider the problem solved, and now, with wheels and motor in order, I can move to making the airframe. Next step will be the wings and engine mounting....


Offline lcarroll

  • Administrator
  • Hero Member
  • ******
  • Posts: 8546
Re: 'El Sonora' in 1/72
« Reply #19 on: June 19, 2017, 11:46:25 AM »
   Hat's off to you OM, that's real Model Building you've described here, and outstanding work at that! I marvel at the Scratch Builds that you, Des, and Stephen (Lone Modeller) turn out. It takes, IMHO, a very special love of the hobby and considerable skill to work in your chosen genre. Great Build logs, wonderful subjects, and always so much learned. Keep those posts coming!
Cheers,
Lance
« Last Edit: June 19, 2017, 11:52:09 AM by lcarroll »

Offline RLWP

  • Hero Member
  • *****
  • Posts: 1494
  • Bodger
Re: 'El Sonora' in 1/72
« Reply #20 on: June 19, 2017, 07:18:35 PM »
I knew you would crack this problem in the end, they look great!

I think this is one of things that will bug you, and no-one else will notice. There is so much going on with El Sonora to do with the unusual configuration, exposed engine, flimsiness, pilot position, rigging and so on. A slightly off-centre 7mm wheel is going to disappear in the impressiveness of the complete model

Your wheels are brilliant, I still can't understand why anyone would scratchbuild in such a tiny scale - you must be mad!

Richard
Hendon for flying - the fastest way to the ground!

Offline Old Man

  • Hero Member
  • *****
  • Posts: 600
Re: 'El Sonora' in 1/72
« Reply #21 on: June 19, 2017, 10:26:23 PM »
   Hat's off to you OM, that's real Model Building you've described here, and outstanding work at that! I marvel at the Scratch Builds that you, Des, and Stephen (Lone Modeller) turn out. It takes, IMHO, a very special love of the hobby and considerable skill to work in your chosen genre. Great Build logs, wonderful subjects, and always so much learned. Keep those posts coming!
Cheers,
Lance

Don't under-estimate innate perversity as a motivating factor....

But seriously, thank you for the kind words. I will always maintain scratch-building is more a question of nerve than skill, and am firmly of the view that many modellers have the craft skills necessary for it, even though they think they don't.

Offline Old Man

  • Hero Member
  • *****
  • Posts: 600
Re: 'El Sonora' in 1/72
« Reply #22 on: June 19, 2017, 10:42:36 PM »
I knew you would crack this problem in the end, they look great!

I think this is one of things that will bug you, and no-one else will notice. There is so much going on with El Sonora to do with the unusual configuration, exposed engine, flimsiness, pilot position, rigging and so on. A slightly off-centre 7mm wheel is going to disappear in the impressiveness of the complete model

Your wheels are brilliant, I still can't understand why anyone would scratchbuild in such a tiny scale - you must be mad!

Richard

Thank you, Sir.

I expect you are right, though with two caveats. First, a crooked or off-center axle can effect the 'sit' of the model. Second, the interior rims really out to be at least dull silver, which catches the eye and heightens imperfections. Some of the first could be finessed in fastening, though (this will have to be attached to a base, there is nowhere to conceal lead in front to keep its tail up), and I could go with a light grey on the rims, I suppose.

I am going to give the 'tube tool' a try, and I am also thinking of ways to sort of 'box in' the wheel halves on the existing assembly tool (lengths of thin strip fitted around a sample wheel on on both elements, which would hold the wheel pieces in place, and give a positive visual mark for alignment as the things are pressed together) to avoid slippage on the surfaces, whih dos seem to present a problem with the current method.

1/72 is just 'my scale', and has been, back when I was young, and again now. I was a jeweler for some years while a young man, and so my craftsmanship is attuned to quite small things.

Offline RLWP

  • Hero Member
  • *****
  • Posts: 1494
  • Bodger
Re: 'El Sonora' in 1/72
« Reply #23 on: June 19, 2017, 10:50:43 PM »
Three or four pins would be enough to guide and locate the rims. I would probably put them inside and slide the haves over the pins

And a grassy base with a slip of styrene under a tyre would be practically invisible and true up the wings

Richard

Hendon for flying - the fastest way to the ground!

Offline Old Man

  • Hero Member
  • *****
  • Posts: 600
Re: 'El Sonora' in 1/72
« Reply #24 on: June 19, 2017, 11:23:53 PM »
Three or four pins would be enough to guide and locate the rims. I would probably put them inside and slide the haves over the pins

And a grassy base with a slip of styrene under a tyre would be practically invisible and true up the wings

Richard

Thanks for the placement suggestion. Inside could be tricky because of the risk of interfering with the spokes. The pins would need to be no more than 0.75mm thick. The circle in the pressing plate would have to be cut precisely, if it were done with the existing flat pieces. Pins could be both inside and outside on the projected 'tube tool'. One advantage of 'inside pins' is less chance of involvement with the final glue application.

Sonora State, unfortunately is pretty much desert --- they've thought of everything to make a modeler's life difficult, the cabrones...

Offline RAGIII

  • Hero Member
  • *****
  • Posts: 18793
Re: 'El Sonora' in 1/72
« Reply #25 on: June 19, 2017, 11:31:10 PM »
   Hat's off to you OM, that's real Model Building you've described here, and outstanding work at that! I marvel at the Scratch Builds that you, Des, and Stephen (Lone Modeller) turn out. It takes, IMHO, a very special love of the hobby and considerable skill to work in your chosen genre. Great Build logs, wonderful subjects, and always so much learned. Keep those posts coming!
Cheers,
Lance

I can't say it any better!!!!
RAGIII
"A man has to know his limitations": Harry Callahan

"Don't slop it on" Lynda Geisler

Offline RLWP

  • Hero Member
  • *****
  • Posts: 1494
  • Bodger
Re: 'El Sonora' in 1/72
« Reply #26 on: June 20, 2017, 01:52:07 AM »


Sonora State, unfortunately is pretty much desert --- they've thought of everything to make a modeler's life difficult, the cabrones...

Are you sure?


http://www.geo.arizona.edu/Antevs/biomes/azlifzon.html

 ;D

Richard
Hendon for flying - the fastest way to the ground!

Offline Old Man

  • Hero Member
  • *****
  • Posts: 600
Re: 'El Sonora' in 1/72
« Reply #27 on: June 20, 2017, 02:20:57 AM »
Maybe it could hve landed on that srub in a pinch, Sir, but take-off would be problematic, I expect. Pictures I'm sure are of the machine show flat, pretty bare earth, and I doubt anyone mowed it....


Offline RLWP

  • Hero Member
  • *****
  • Posts: 1494
  • Bodger
Re: 'El Sonora' in 1/72
« Reply #28 on: June 20, 2017, 03:01:32 AM »
Yes, that seems unlikely to me too. She seems to be standing on some kind of prepared surface

Richard
Hendon for flying - the fastest way to the ground!

Offline lone modeller

  • Hero Member
  • *****
  • Posts: 5300
Re: 'El Sonora' in 1/72
« Reply #29 on: June 20, 2017, 03:29:02 AM »
This is a tutorial that I have been waiting for. Spoked wheels in God's Own Scale is something which I have wanted to do but did not really know where to start. You have blazed a trail which one day I must follow. I have just used Eduard PE spoked wheels for my Voisin (will post the last bit later) and they are nowhere near as realistic as yours.

All of your models are mini-masterpieces but I am especially attracted to these early machines - all wood, wire and faith to get them into the air. This is proving to be another super build log to follow - very many thanks.

Stephen.