Author Topic: Another double build: Sopwith Pup (HR Models) and Triplane (Revell), 1:72  (Read 23664 times)

Offline Juan

  • Hero Member
  • *****
  • Posts: 2455
  • All gave some, some gave all.
Looks really good, your patience and efforts are paying dividends.

Offline steveb

  • Full Member
  • ***
  • Posts: 237
Yes! Very nice engineering to arrive at the outcome!

Steve

Online RAGIII

  • Hero Member
  • *****
  • Posts: 18793
Just amazing work/ problem solving! Beautiful builds!!
RAGIII
"A man has to know his limitations": Harry Callahan

"Don't slop it on" Lynda Geisler

Offline IanB

  • Hero Member
  • *****
  • Posts: 2435
Thanks folks!

 I've had another good day on the Triplane today, touching up where needed, and then working on the rigging.

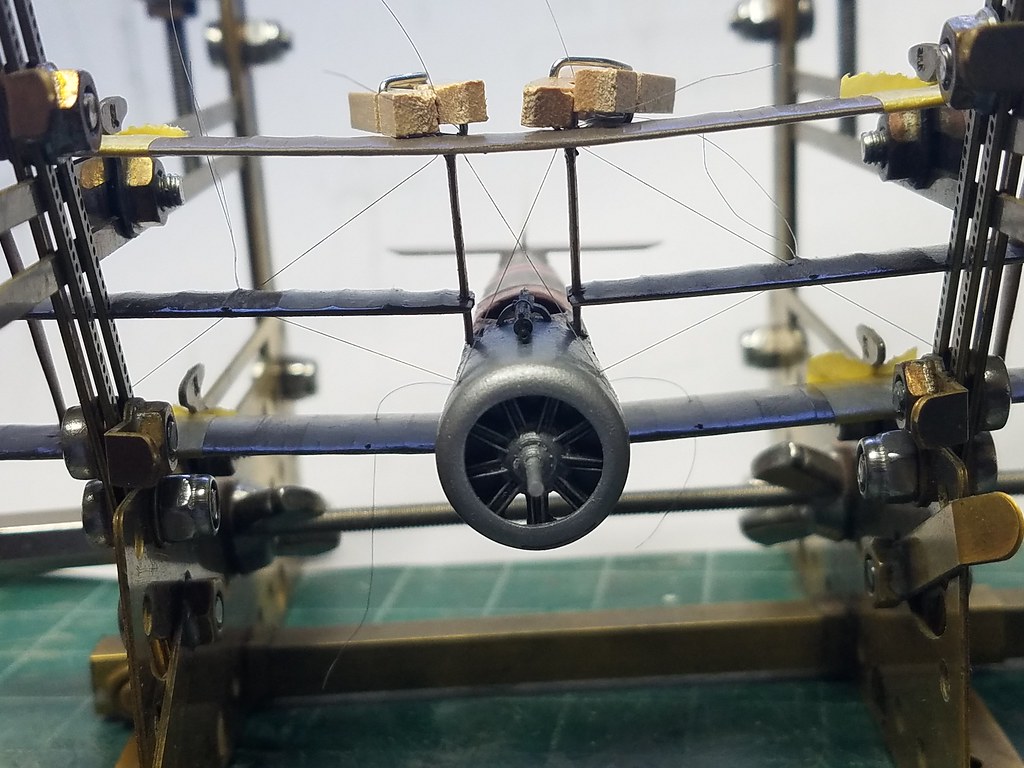
I left it in the jig for most of it as there is virtually no strength to the top wing attachment and it would be very easy to pull it out of alignment with the rigging. The first job was to attach the centre wing drag wires and cabane rigging wires to the fuselage.


 These were attached as usual by dipping the ends of the lines into thick CA and then slipping them into the predrilled holes. Once dry, they could be tensioned, the ends being held in place by small clothes pegs, and thin CA was carefully applied to the underside of the holes with a sharpened toothpick. My camera seems to have eaten that pic, too....

Once those had set, I repeated the process for the landing wires...
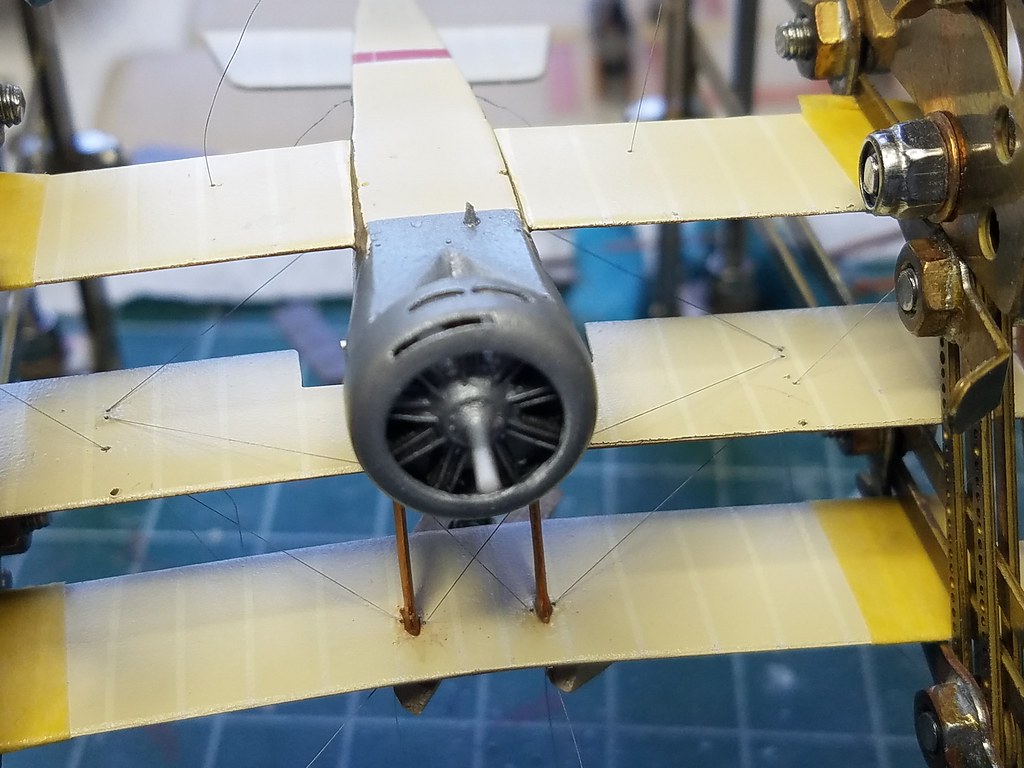


and from underneath


 To do the flying wires I had to remove it from the jig. The same procedure though....


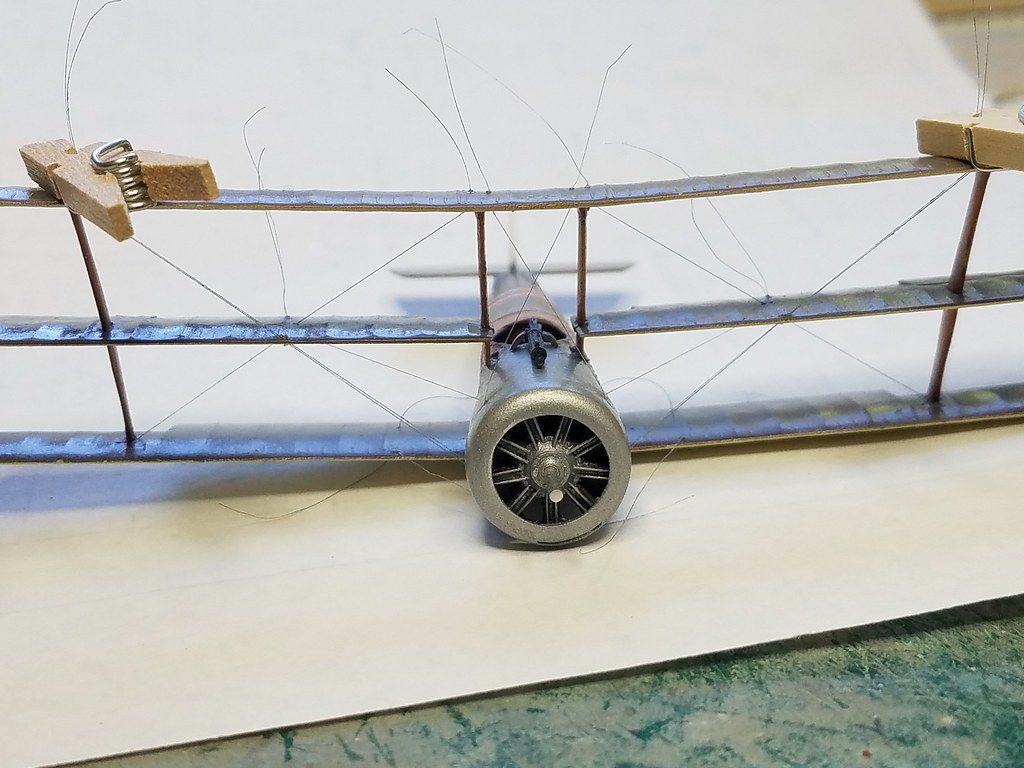
and it looks as though my measuring for the holes in the centre wing was pretty much spot on!


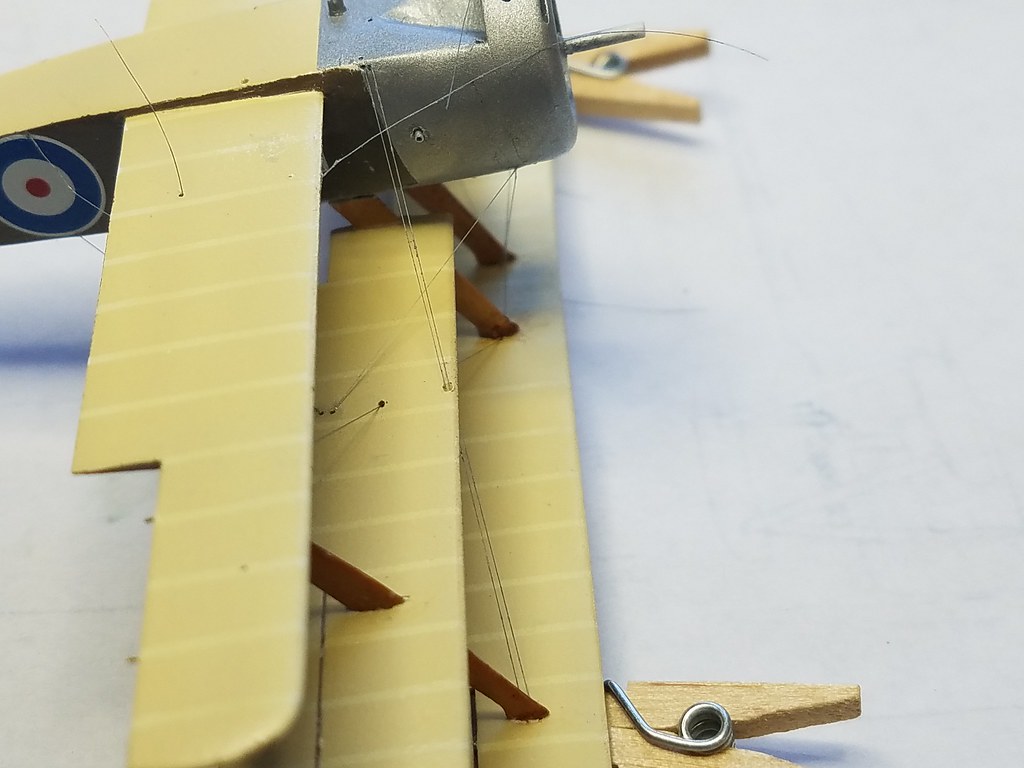
 I was careful not to drill the wing straight through, perpendicular, but estimated the slope of the wires from the plans and drilled at the appropriate angle so the wires continued without a bend. It seems to have worked as both sets of landing and flying wires form a straight line with no kink through the centre wing.

Thanks for looking in!

Ian

Offline KiwiZac

  • Global Moderator
  • Hero Member
  • *****
  • Posts: 2589
    • My Linktree
Brilliant work. Double wires in 1/72? I may faint!

Online RAGIII

  • Hero Member
  • *****
  • Posts: 18793
I somehow missed this update. The rigging is outstanding as we have come to expect from your builds!
RAGIII
"A man has to know his limitations": Harry Callahan

"Don't slop it on" Lynda Geisler

Offline lone modeller

  • Hero Member
  • *****
  • Posts: 5300
Brilliant piece of rigging Ian - double wires in this scale are extremely difficult. I also like the clothes peg idea - bit like some of my jigs - cheap and effective.

Stephen.

Offline Monty

  • Hero Member
  • *****
  • Posts: 1643
Very impressive, Ian! Lovely work on the rigging! Regards, Marc

Offline Juan

  • Hero Member
  • *****
  • Posts: 2455
  • All gave some, some gave all.
Wow Ian, great build and outstanding rigging.

Offline IanB

  • Hero Member
  • *****
  • Posts: 2435
Many thanks gents, your comments are much appreciated! I have, at least so far, drawn the line at double wires for the rudder controls.....

Work is starting to pick up now, so no modelling time last week, but I did get a bit done yesterday in preparing the Pup for the upper wing

 The jig was adjusted and the Pup entombed in its cage..... I then added all the rigging wires to the lower wing and fuselage.


 I decided it would be a good idea to thread the lines through the upper wing before adding the struts, as some of the angles are quite tight and it is far easier to thread the lines without the struts in the way.


 They're not tightened yet, that will be done when the struts are in place. I then started to add the cabane struts, and discovered they are all a tad too long. The gap between the upper wing and the top of the cowling should be 6.5mm and it was 7.5 so I'll have to shorten them all slightly That will be the next job.

Thanks for looking in,

Ian


Offline lcarroll

  • Administrator
  • Hero Member
  • ******
  • Posts: 8547
Ian,
    There's some brilliant improvisation going into this project. I found the Tripe touchy to rig in 1:32 scale, your double runs in 1:72 and the center wing pass through alignment are mind blowing in 1:72!
    Impressive building, and a shining endorsement of the AeroClub Jig!
Cheers,
Lance

Offline IanB

  • Hero Member
  • *****
  • Posts: 2435
Thanks Lance, although I have to admit the alignment was more luck than judgement though!

 I came home from work today and decided to tackle the task of shortening the cabane struts.  The front two went easily and were left clipped in place as I did the third, which also slipped into place nicely. When I put the jig down I noticed that the two front struts had fallen out. One was lying right in front of me on the bench, alongside the fourth strut, but where was the other? I searched everywhere, cleared the bench, scoured the floor, checked my clothing, even checked the jig itself to make sure it wasn't caught up in it somehow....3 or 4 times, but still couldn't find it. I decided it had gone, and the only solution was to make another, but I didn't feel like it at that moment. I went and took a shower, came back and decided to replace a couple of wires which had pulled out while fiddling with the struts. Duly done, I put the jig back on the bench.....and there were 3 struts sitting there...the fourth was were I'd left it, clipped into the wing! I have no clue where the strut had been on its little sojourn, I find it hard to believe that it had fallen into the cockpit as I was holding it upside down when they fell out! I guess I'll never know the answer to that one!
 Anyway, now I had all 4 struts again, I continued with my original plan and finished the adjustments, then glued them in place......


 The wires are clipped in place to stop them pulling out, but they won't be tightened and secured until the outer wing struts are in place. Hopefully a job for tomorrow!

Ian

Offline Juan

  • Hero Member
  • *****
  • Posts: 2455
  • All gave some, some gave all.
Looks like the Pup is undergoing a medieval torture session, but turning out quite nicely.   ;)

Offline IanB

  • Hero Member
  • *****
  • Posts: 2435
It is, Juan, but it's a bit of a masochist, so it's enjoying it!

 The wing struts were trimmed this morning, then installed. This afternoon the landing wires and all the cabane rigging wires were tightened and fixed in place using thin CA applied with a sharpened toothpick.


 Getting there, slowly......

Ian

Offline lone modeller

  • Hero Member
  • *****
  • Posts: 5300
Sounds like a case of the Lonesome Strut…… Very impressive rigging Ian: the jig is obviously a great help with thread - it seems that rigging like this in this scale would probably be nearly impossible without it.

Stephen.