Author Topic: Ansaldo A.1 "Balilla" 1/32 Aviattic OOB  (Read 33488 times)

Offline steveb

  • Full Member
  • ***
  • Posts: 237
Re: Ansaldo A.1 "Balilla" 1/32 Aviattic OOB
« Reply #75 on: January 06, 2017, 02:10:38 PM »
Great stuff, as always. (not the stranded part, but the rest) ;)

Steve

Offline bobs_buckles

  • Hero Member
  • *****
  • Posts: 3724
  • Freedom isn't free.
    • Bobs Buckles
Re: Ansaldo A.1 "Balilla" 1/32 Aviattic OOB
« Reply #76 on: January 06, 2017, 09:50:08 PM »
All looking rather splendid, Bo!  ;)

More!!!

vB


https://www.bobsbuckles.co.uk/

Last Minute Man Of Faith

Offline uncletony

  • Hero Member
  • *****
  • Posts: 4349
    • Aircraft In Pixels
Re: Ansaldo A.1 "Balilla" 1/32 Aviattic OOB
« Reply #77 on: January 12, 2017, 02:49:09 PM »
valve gear installed:


cam gear tower & h2o pump installed:
« Last Edit: February 15, 2017, 11:48:41 PM by Bo »

Offline Gisbod

  • Hero Member
  • *****
  • Posts: 2438
Re: Ansaldo A.1 "Balilla" 1/32 Aviattic OOB
« Reply #78 on: January 12, 2017, 05:15:15 PM »
Nice one Bo!

Sorry to hear about your trials and tribulations..  :P

Guy
“Oh! I have slipped the surly bonds of Earth -
Put out my hand, and touched the face of God.”

P.O. John Gillespie Magee 1941

Offline PrzemoL

  • Hero Member
  • *****
  • Posts: 4853
  • There was Eru... and he made first the Ainur...
    • Przemysław Litewka
Re: Ansaldo A.1 "Balilla" 1/32 Aviattic OOB
« Reply #79 on: January 12, 2017, 07:38:12 PM »
Lovely work on the engine (despite all the external odds).
Thank you, Bo, for showing this tutorial, it will be very helpful when I will start my Balilla build (I am looking forward to it).
Ash nazg durbatuluk, ash nazg gimbatul,
Ash nazg thrakatuluk, agh burzum-ishi krimpatul.

Offline RAGIII

  • Hero Member
  • *****
  • Posts: 18793
Re: Ansaldo A.1 "Balilla" 1/32 Aviattic OOB
« Reply #80 on: January 12, 2017, 09:28:19 PM »
Beautiful engine Bo. You actually came fairly close to OOB  ;D So far anyway!
RAGIII
"A man has to know his limitations": Harry Callahan

"Don't slop it on" Lynda Geisler

Offline Adam

  • Hero Member
  • *****
  • Posts: 647
Re: Ansaldo A.1 "Balilla" 1/32 Aviattic OOB
« Reply #81 on: January 13, 2017, 03:32:54 AM »
Your engine looks like real.

Adam.

Offline lone modeller

  • Hero Member
  • *****
  • Posts: 5300
Re: Ansaldo A.1 "Balilla" 1/32 Aviattic OOB
« Reply #82 on: January 13, 2017, 03:54:40 AM »
I'll bet you were pleased to get back to boring routine …. and an excellent model engine!

Stephen.

Offline uncletony

  • Hero Member
  • *****
  • Posts: 4349
    • Aircraft In Pixels
Re: Ansaldo A.1 "Balilla" 1/32 Aviattic OOB
« Reply #83 on: January 14, 2017, 08:31:39 AM »
Szymon Grzywocz just reminded me which I've been meaning to point out  -- the breathers on the intake side apparently should face backwards. I followed Ron's (draft) build and placed them all facing forwards, but the museum examples do not seem to bear this out.

Too late to fix on my build, and actually, what difference it makes, which way they face, in actual practice I can't imagine (they are simply breathers, not scoops), but...


« Last Edit: February 15, 2017, 11:47:46 PM by Bo »

Offline uncletony

  • Hero Member
  • *****
  • Posts: 4349
    • Aircraft In Pixels
Re: Ansaldo A.1 "Balilla" 1/32 Aviattic OOB
« Reply #84 on: January 14, 2017, 01:32:35 PM »
On to the ignition system...

first, the magnetos -- need to be defaced by drilling .3mm holes @ aprox 45° angle at each lead connection:


magneto painted up and wired with .2mm modelkasten rigging stuff:


Now super important-- note that there are "2 each" of PE parts 22 & 23 -- but! they are not interchangeable -- they are handed


part 23 of each side need to be bent into tapering U channel as shown:


after blackening the brass, wires fed thru harness:


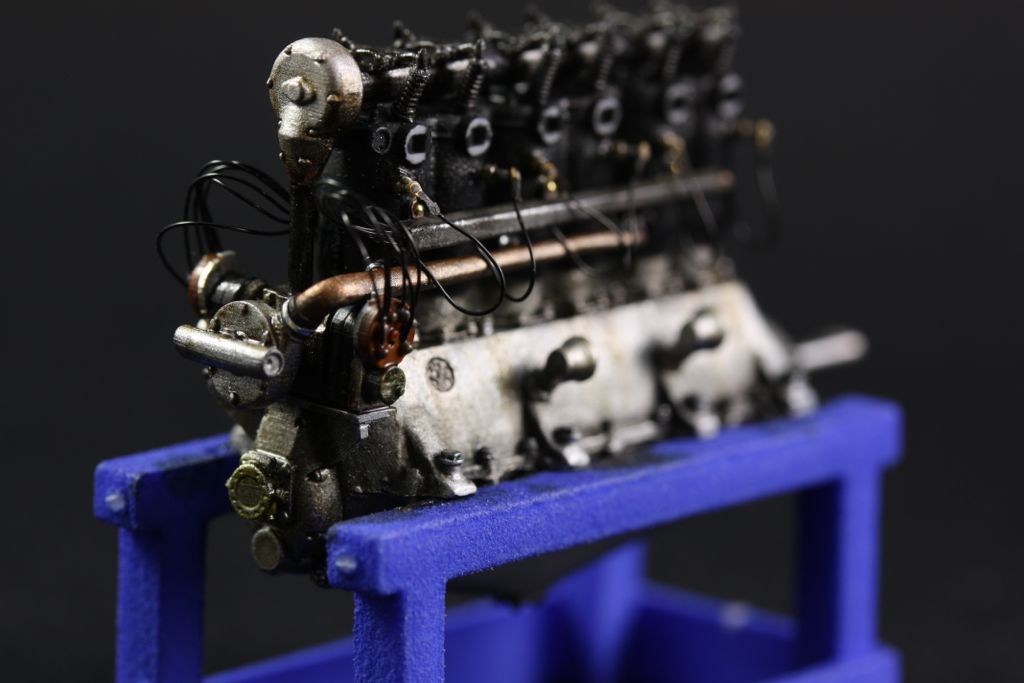
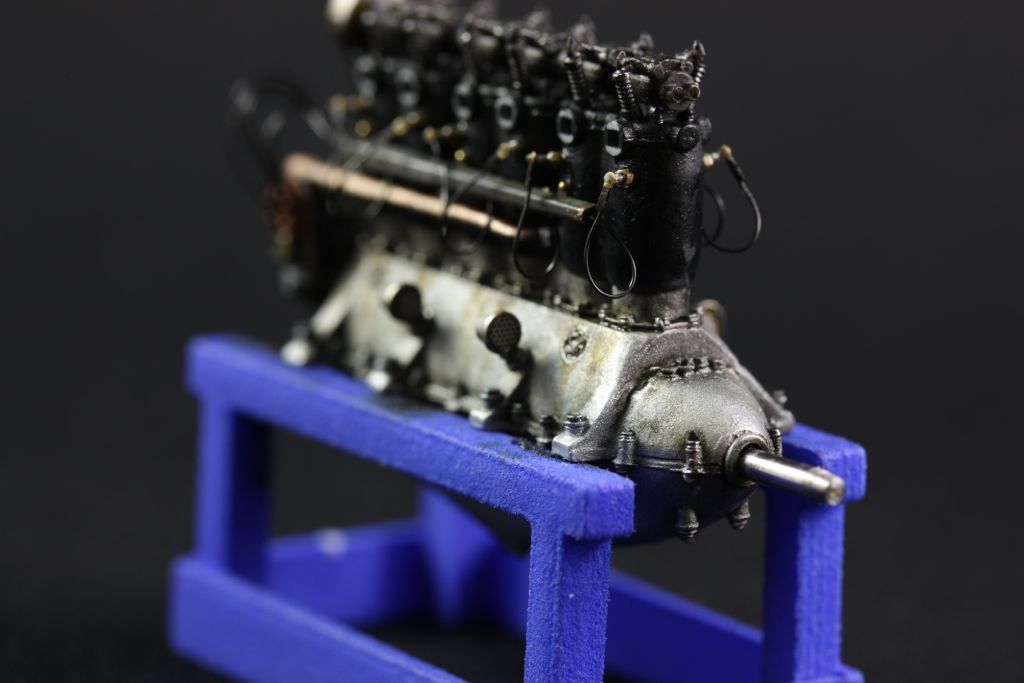
All assembled, inc spark plugs and spark plug connectors at the end of the wires:


Offline Gisbod

  • Hero Member
  • *****
  • Posts: 2438
Re: Ansaldo A.1 "Balilla" 1/32 Aviattic OOB
« Reply #85 on: January 14, 2017, 06:50:16 PM »
Super wiring Bo,

How do you attach the wiring to the plugs so neatly? It's always something that has me stumped  ???


Guy
“Oh! I have slipped the surly bonds of Earth -
Put out my hand, and touched the face of God.”

P.O. John Gillespie Magee 1941

Offline RAGIII

  • Hero Member
  • *****
  • Posts: 18793
Re: Ansaldo A.1 "Balilla" 1/32 Aviattic OOB
« Reply #86 on: January 14, 2017, 10:28:20 PM »
The wiring harness, tubes, and magnetos are all awesome as usual Bo.
RAGIII
"A man has to know his limitations": Harry Callahan

"Don't slop it on" Lynda Geisler

Online Juan

  • Hero Member
  • *****
  • Posts: 2455
  • All gave some, some gave all.
Re: Ansaldo A.1 "Balilla" 1/32 Aviattic OOB
« Reply #87 on: January 14, 2017, 11:21:09 PM »
Outstanding Bo, your engine is alive with detail.

Offline lcarroll

  • Administrator
  • Hero Member
  • ******
  • Posts: 8547
Re: Ansaldo A.1 "Balilla" 1/32 Aviattic OOB
« Reply #88 on: January 15, 2017, 01:08:04 AM »
    That ignition harness from magnetos to plug terminals is about as good as it gets, simply beautiful! Really enjoying your progression on this Build Bo, great work! 8)
Cheers,
Lance

Offline uncletony

  • Hero Member
  • *****
  • Posts: 4349
    • Aircraft In Pixels
Re: Ansaldo A.1 "Balilla" 1/32 Aviattic OOB
« Reply #89 on: January 15, 2017, 09:33:18 AM »
cheers guys :)

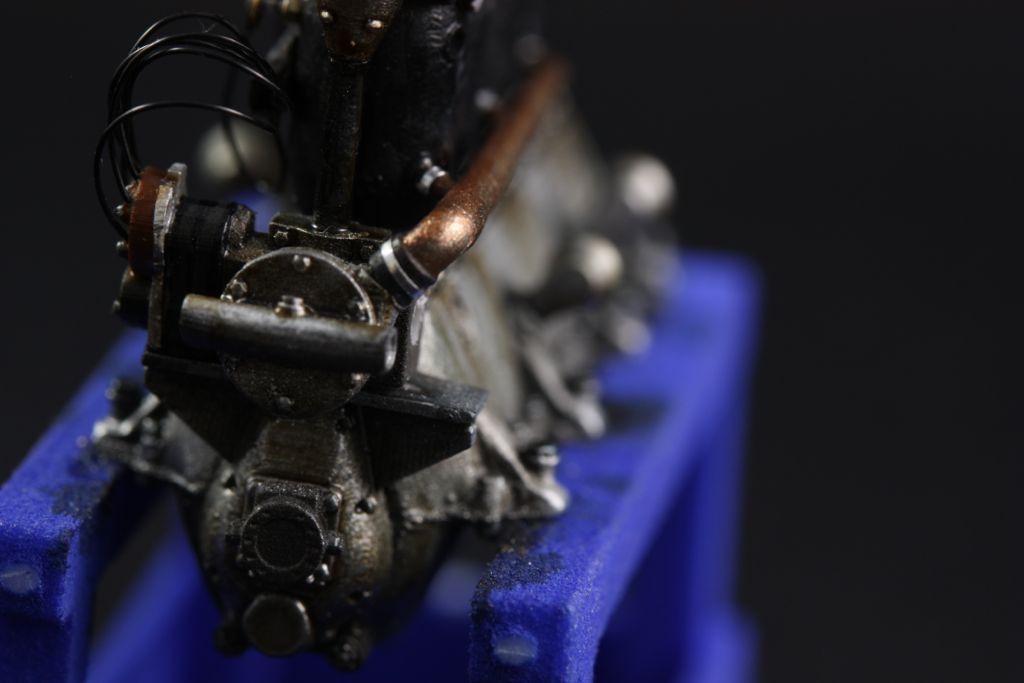
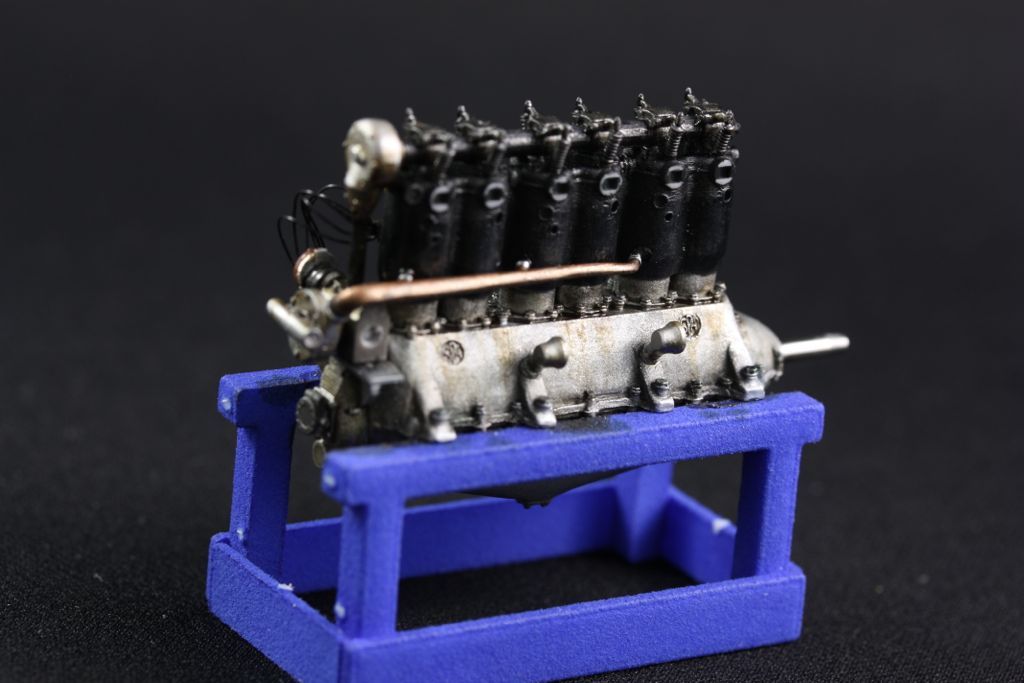
Moving over to the ignition wiring on the exhaust side, which I will present in a little more detail. First, however, part 15, the pipe that connects the water pump to the cylinder jackets, must be cut out, cleaned up, and installed:
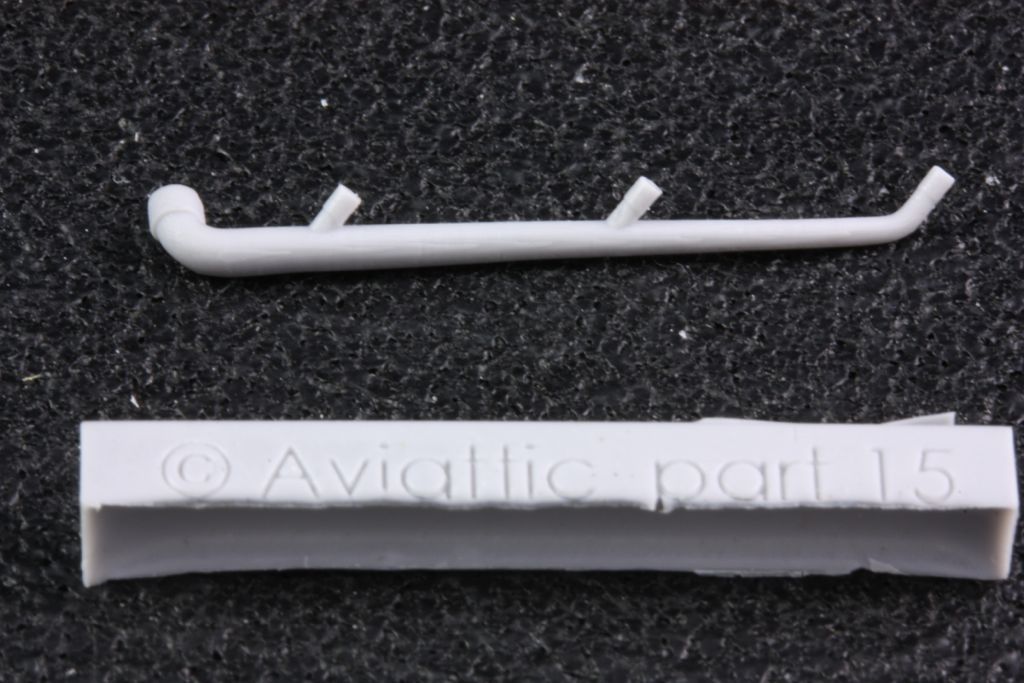


like so:


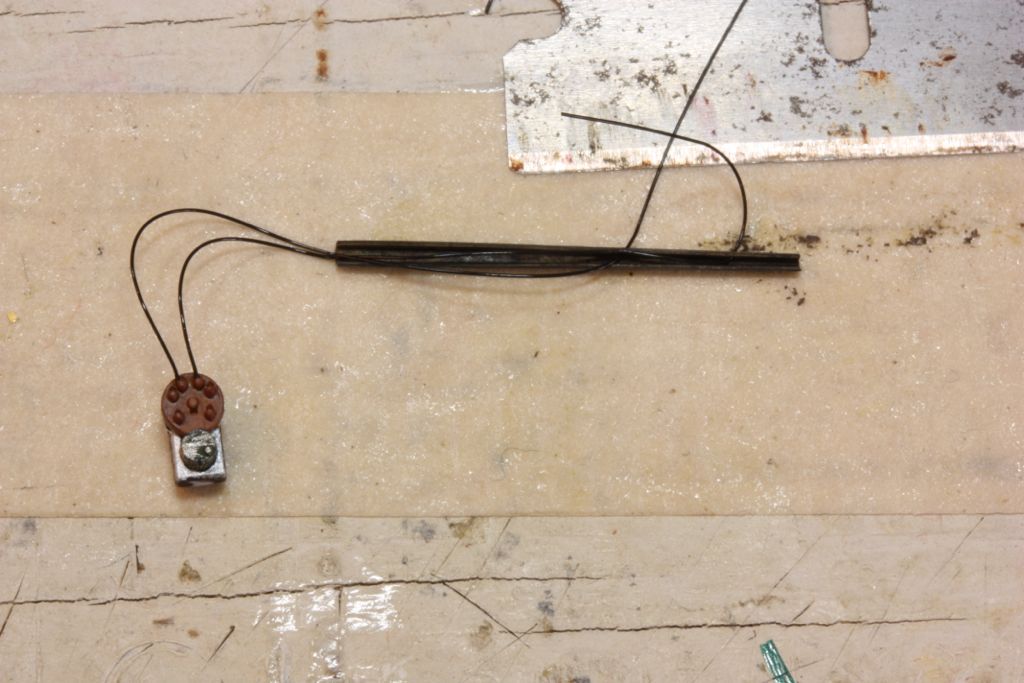
Here is my method for assembling the wiring harness. Start by laying out the magneto and the harness tube
(PE part 23) roughly as they sit on the engine, but note the tube is upside-down at this point. Run the first two wires thru the forward most small holes in PE part 23 and attach to the topmost magneto points. Leave a good 20mm of slack exiting the tube for each lead:

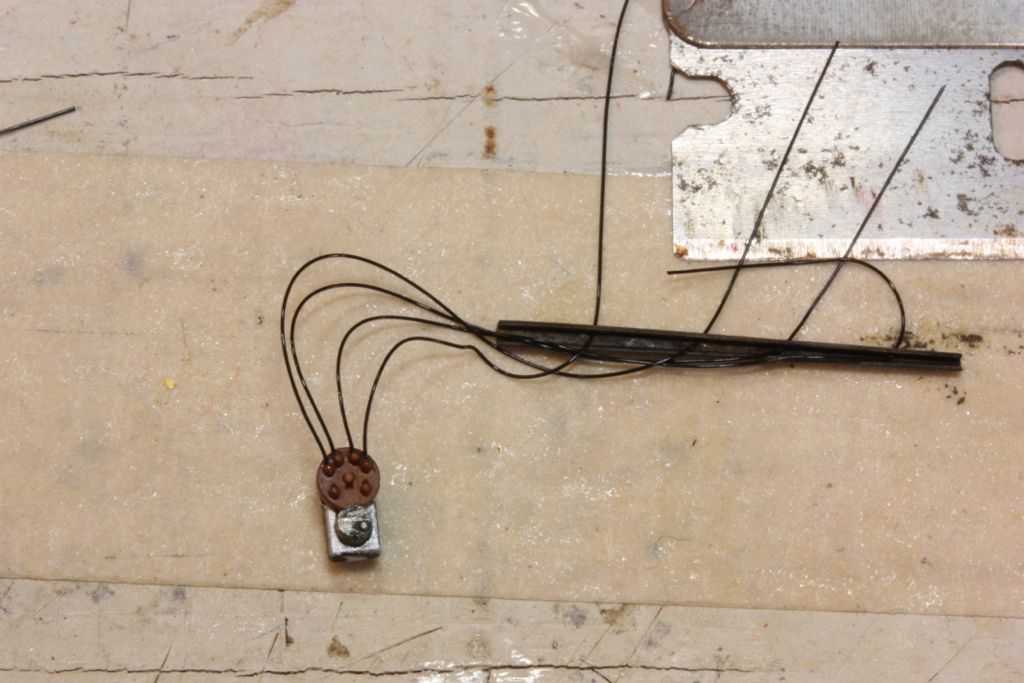
next, wire up the next highest pair of points on the magneto, same as before:

and finally the bottom two points. Note that one wire, the longest, simply exits out the front of the tube:
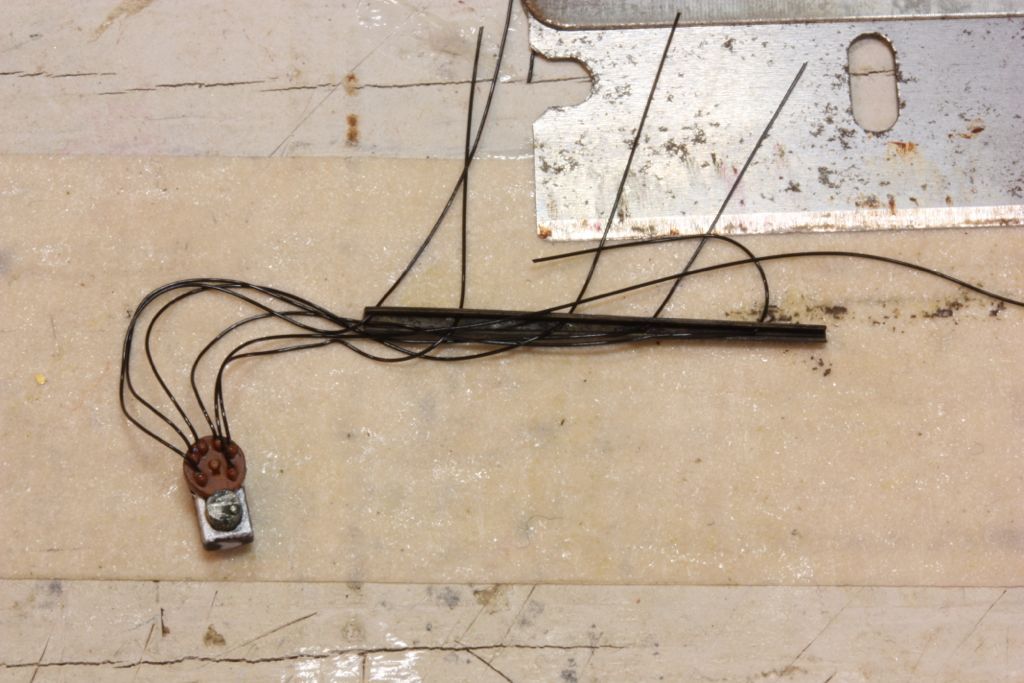

now is a good time to paint the magneto connectors:
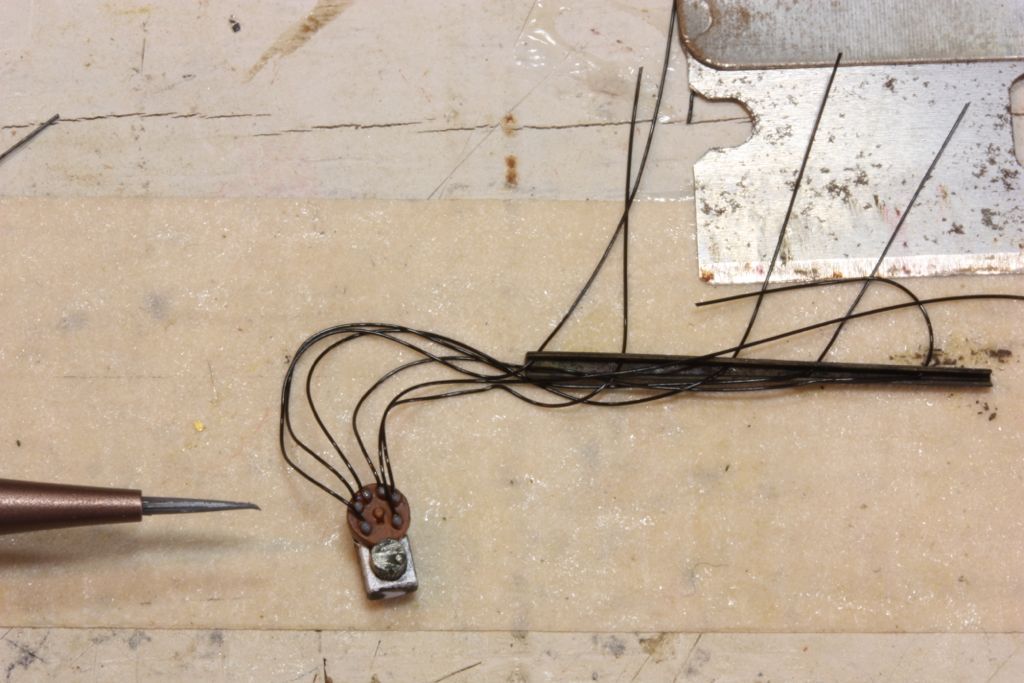

Press the wires down into the tube channel and glue in place with a few drops of CA:
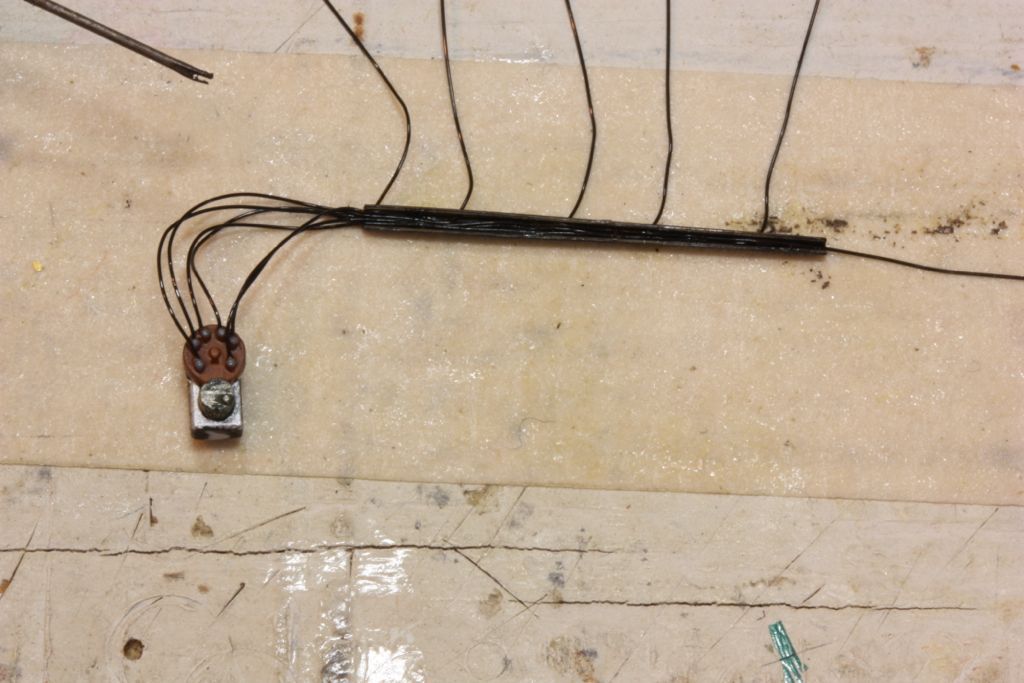

Now you can flip the tube, and paint it:
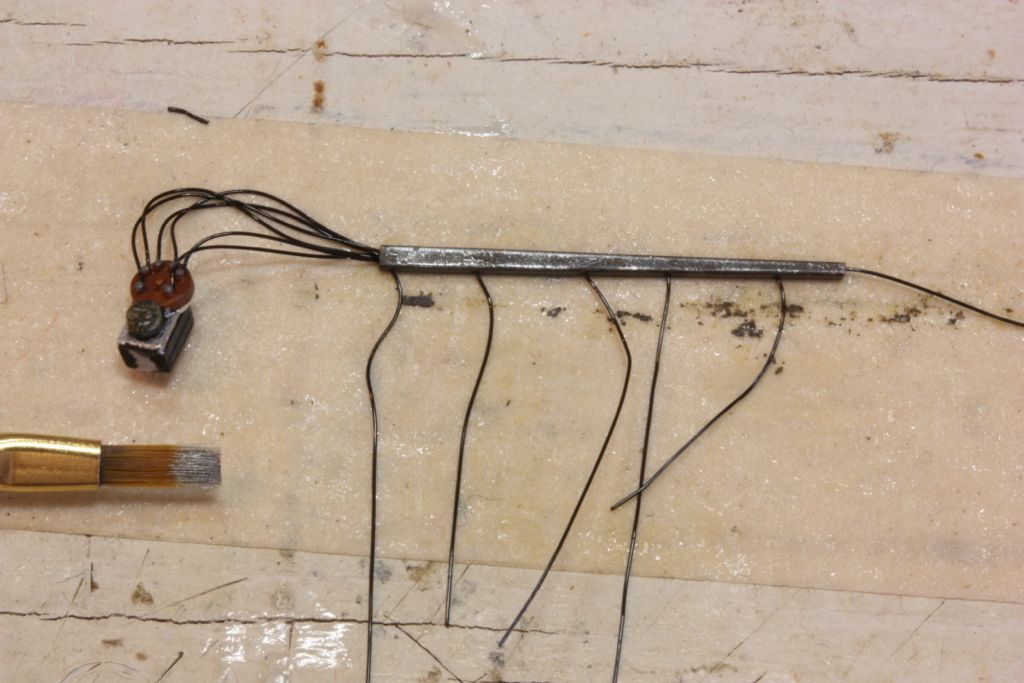

The back of the tube (part 22) can now be glued on. I used several dollops of epoxy...
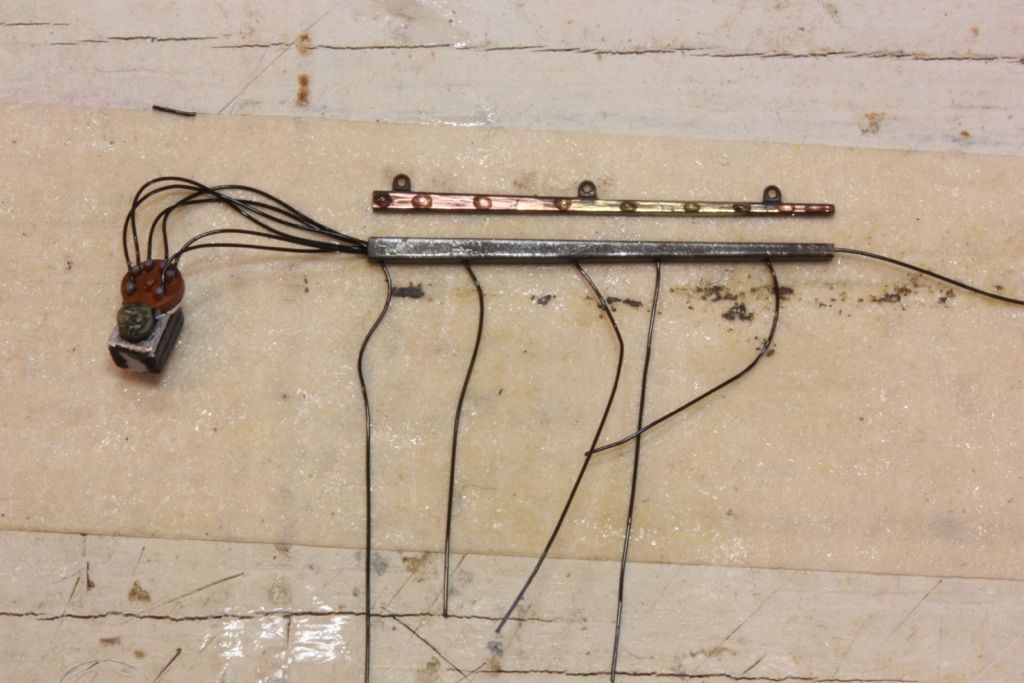

...weighted down. In 15 minutes or so it'll will be ready to continue:
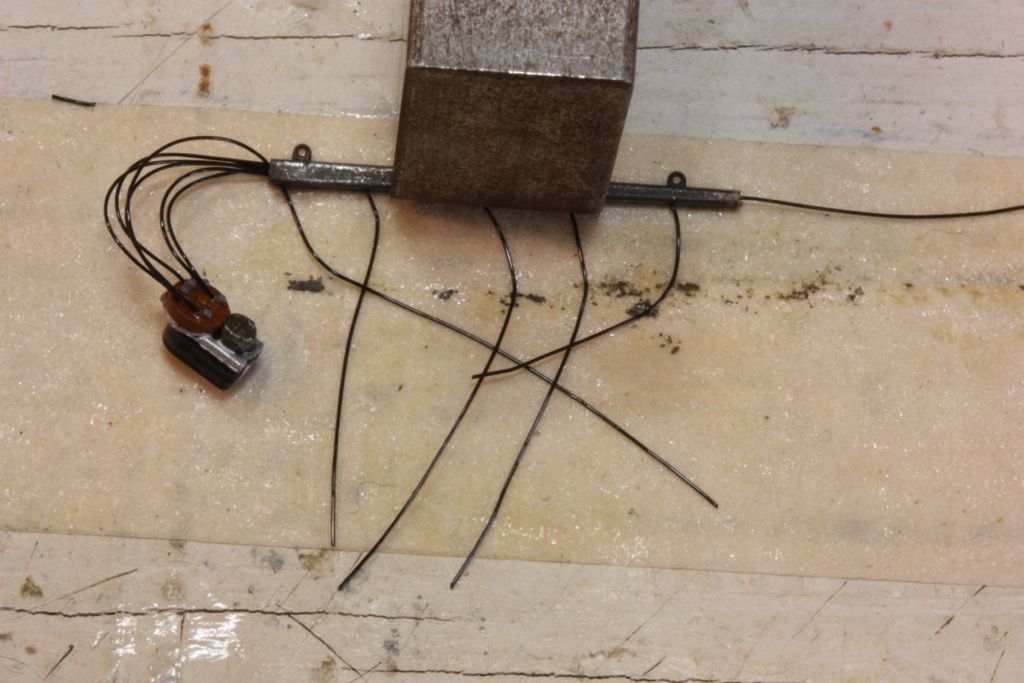

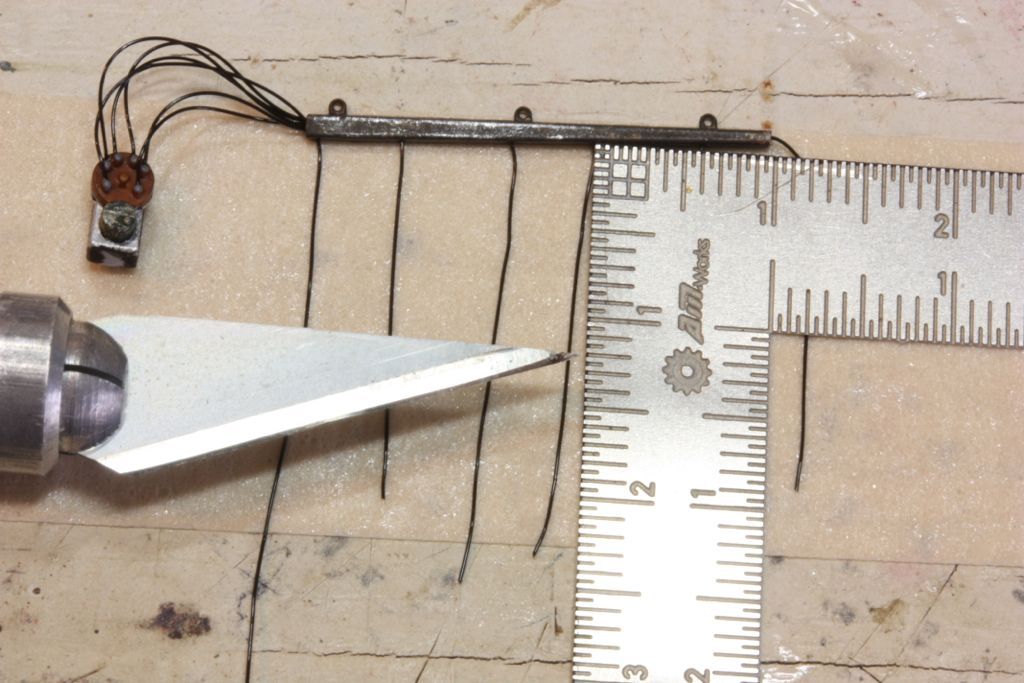
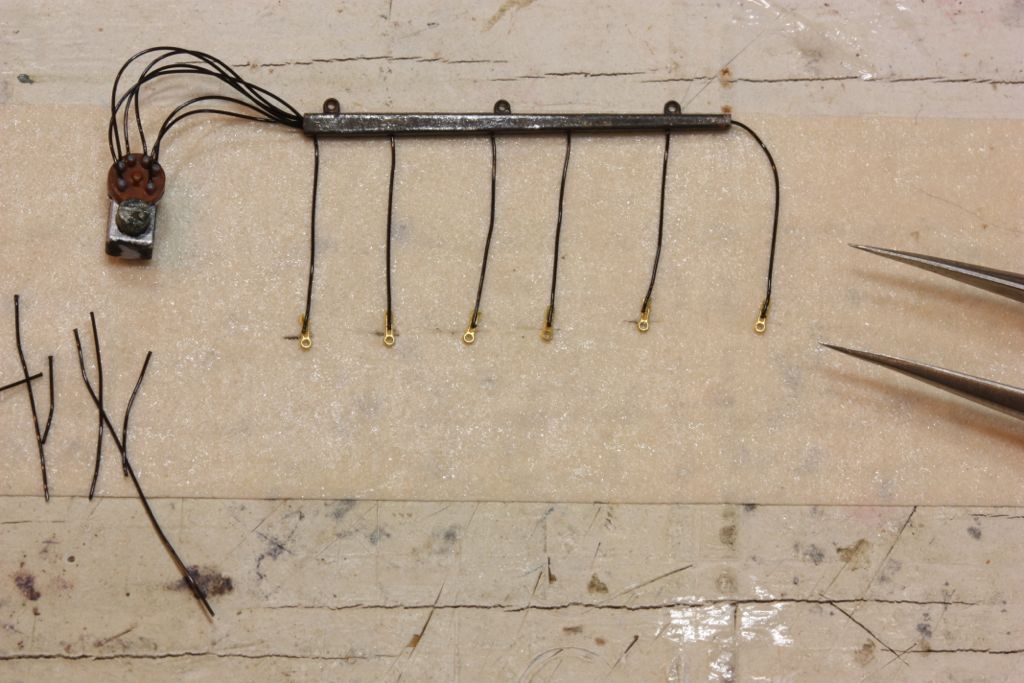
Now the leads are trimmed to ~12mm as measured from where they exit the tube:

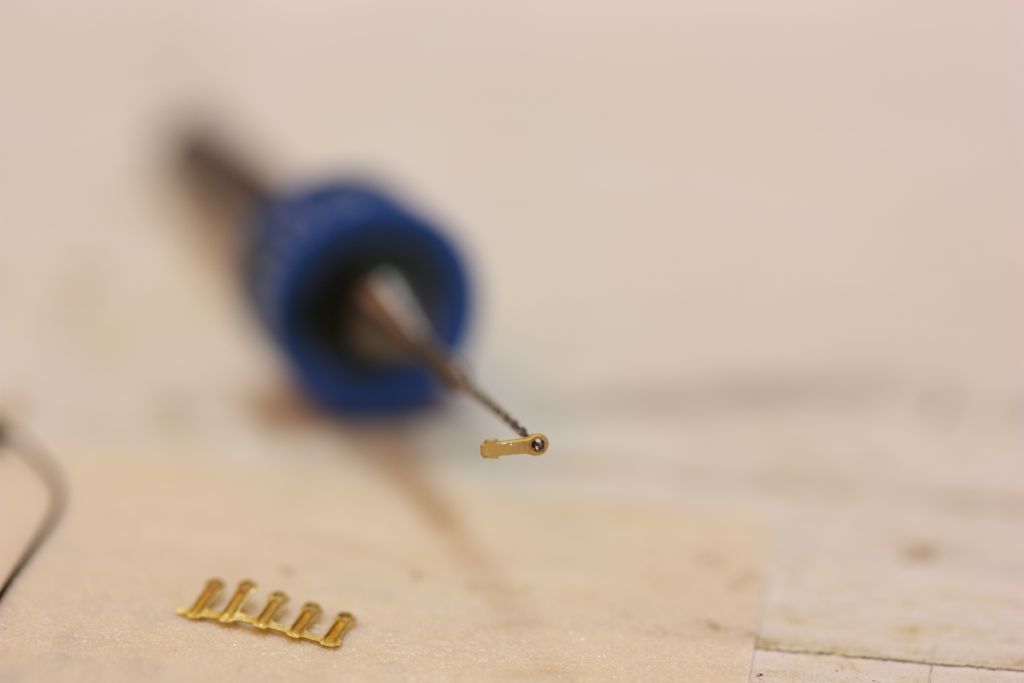
The spark plug connector ends should be carefully reamed out to .35mm:
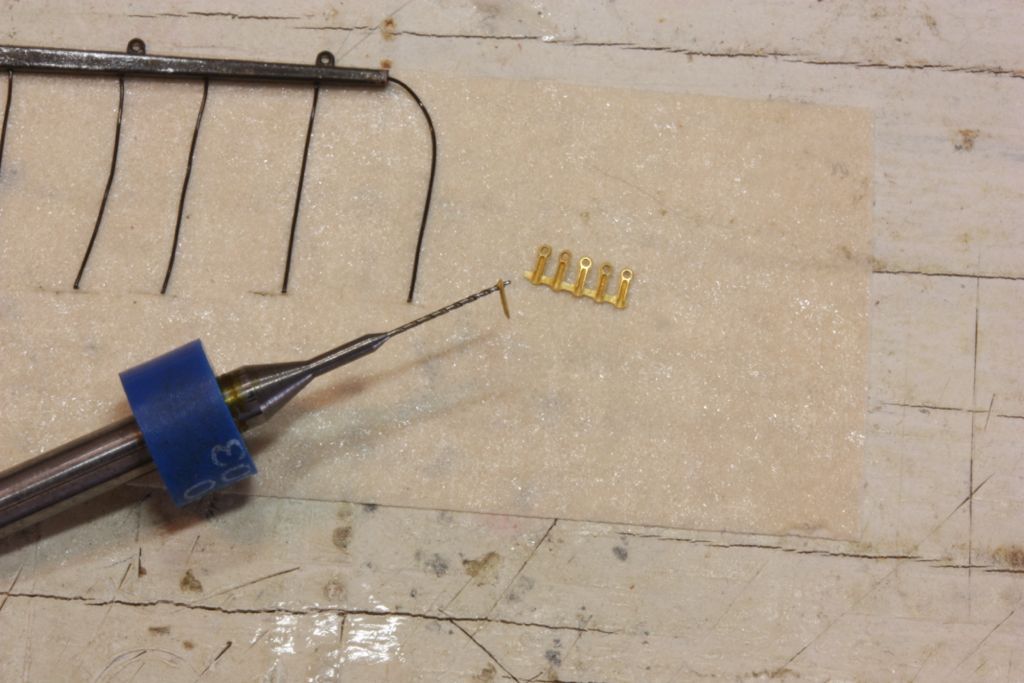


Now the connectors can be CA glued to the leads. Just a drop'll do ya; be  careful not to plug up the hole with CA:

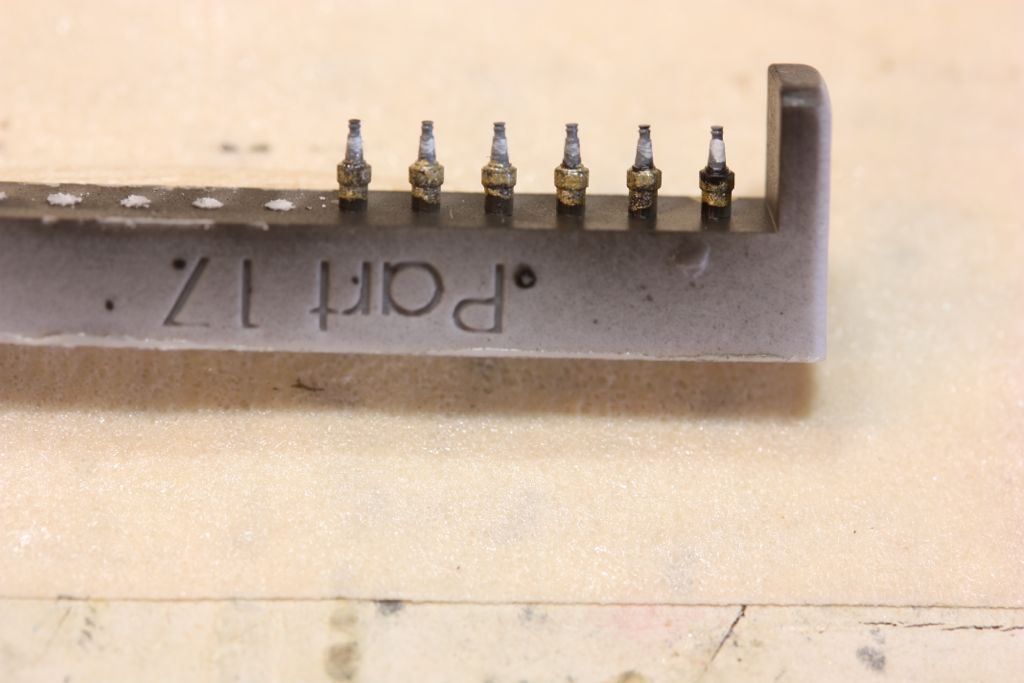
Spark plugs are painted while still on the casting block and set aside...

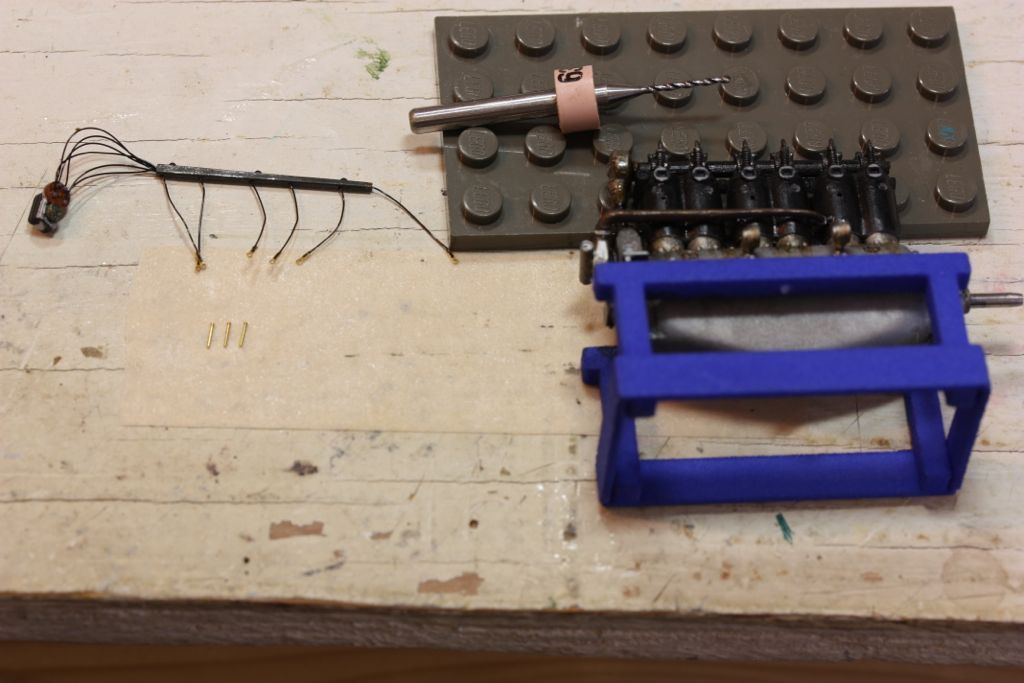
Now we're ready to install the harness. First, though, ream the spark plug holes in the block with a .9mm drill bit to clear out any paint and ensure an easy fit. Get your rivets ready (or whatever you are using to pin the harness in place):

I like to use epoxy for this, and let it set 3-5 minutes after applying drops in the holes before continuing. At that point it is starting to 'kick' and is very sticky, vs. simply greasy as it is when freshly mixed:
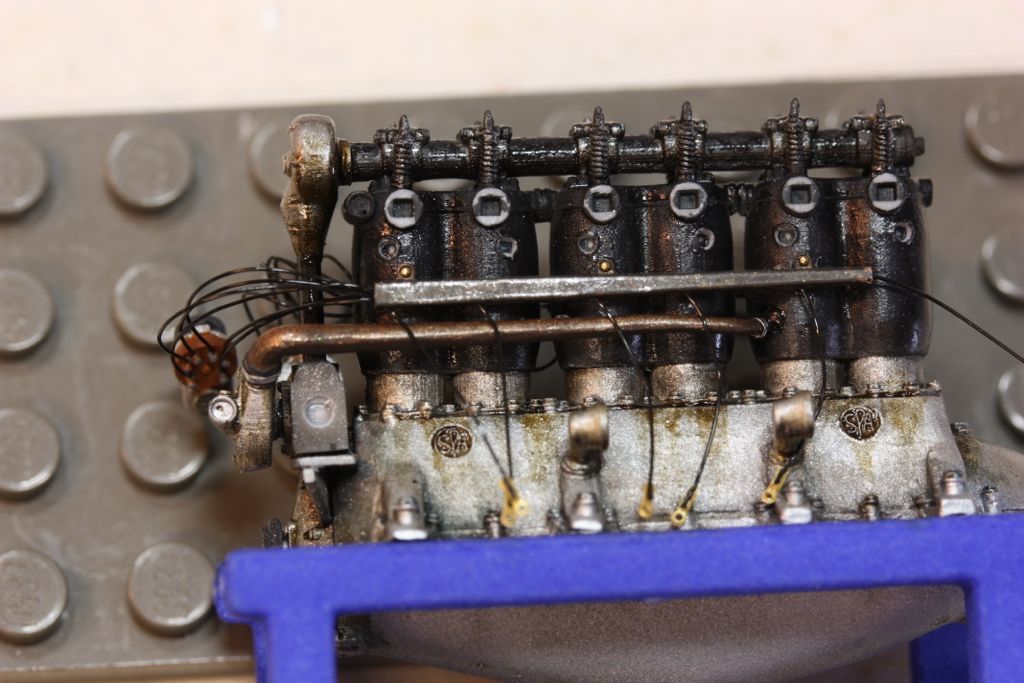

Once the harness is cured in place, the magneto goes in. Again, same deal -- let the epoxy start to cure a bit and you will have to spend much less time holding parts together, avoid accidentally slobbering the good side in glue, etc (sorry wrong photo):
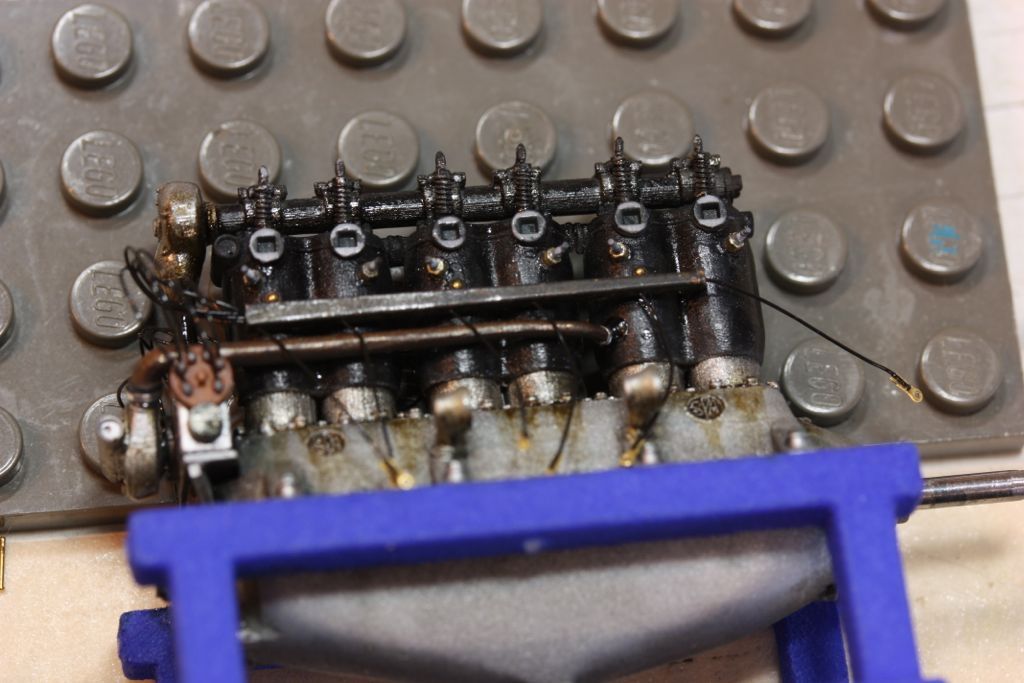

Next the plugs go in. I use CA, a small drop on the butt of the plug, shove it into the socket, and then lock it into place with a tiny bit more applied underneath:
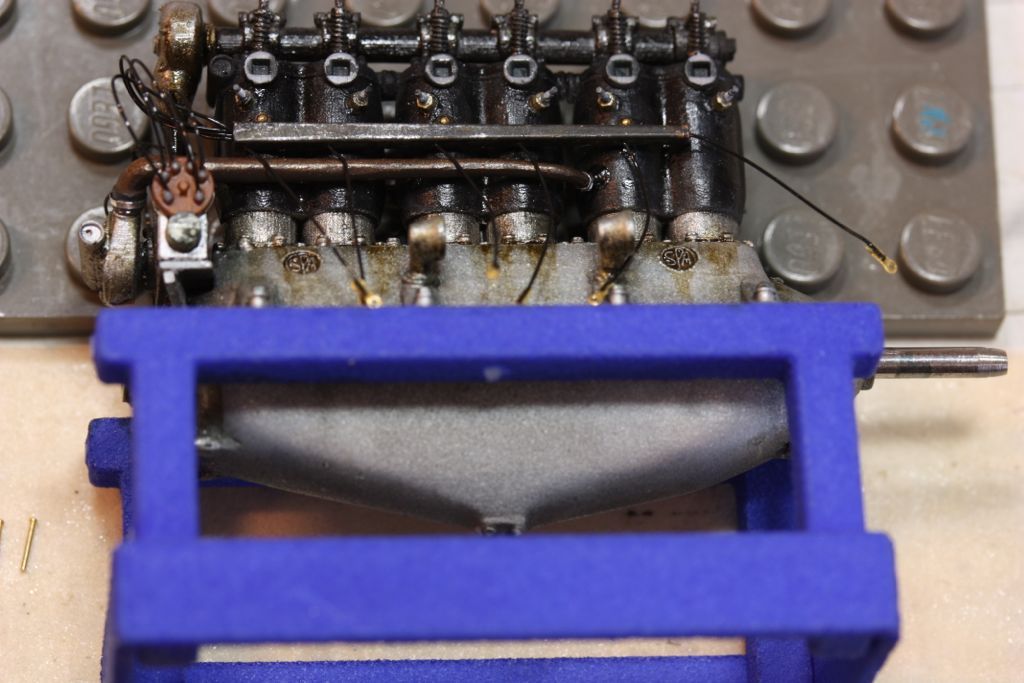

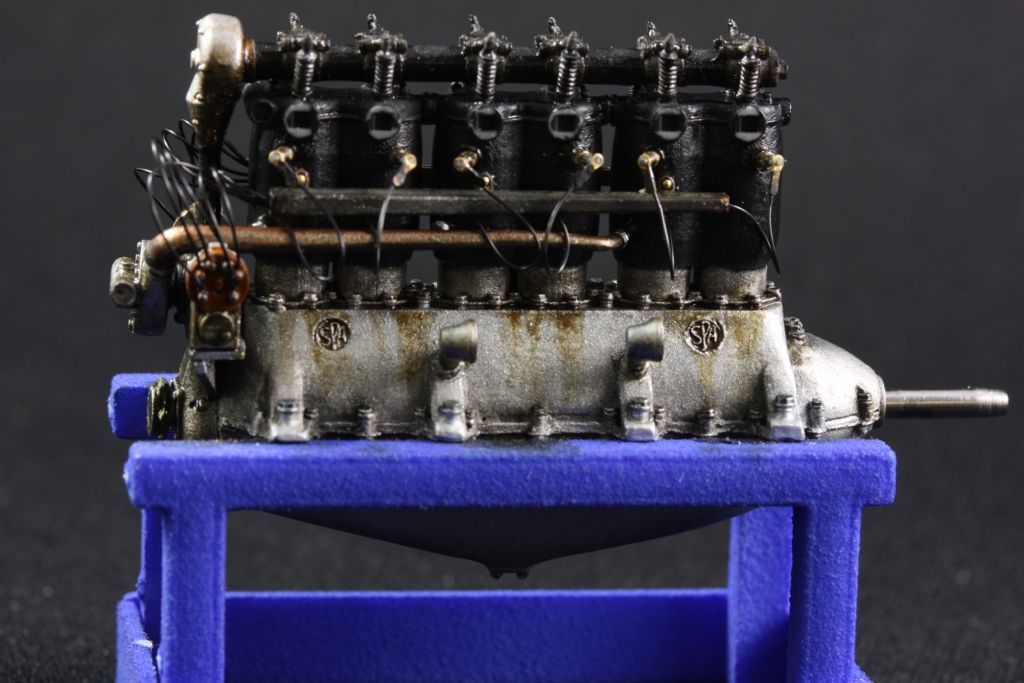
Finally, leads attached to plugs and a little touch up here and there:

« Last Edit: January 15, 2017, 11:13:13 AM by Bo »