Getting down to the wire with this one.
Save for intervals of sleep and the odd meal and other necessities of life, I have been pretty much stuck into it on the bench non-stop, and not always too happily, either. Things have got well into 'I need this #@%$!!! hobby to relieve my stress!' territory.
Today is my 'sanity' break. Even with the deadline looming up I am doing no modelling at all. Made a nice lunch of lamb shanks for us, and even drank a glass of wine. There is a fine line between sticking to it and getting stupid, and I want to stay on the right side of it.
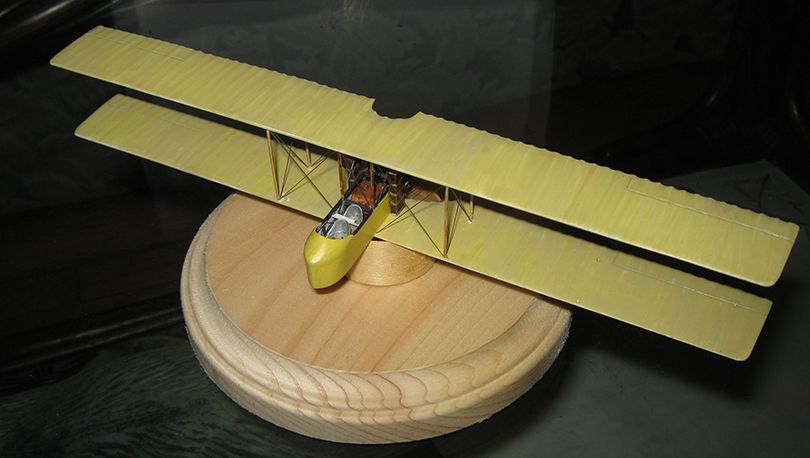
I have gotten a good deal done. Though the pictures stop a bit short as you will see, interior and motor arrangements are complete, basic painting is in hand, upper wing is on and rigged, and the undercarriage set up (though not yet painted, and lacking its wheels). This weekend will be devoted to the tail assembly, which is pretty much all there is left.
A couple of things cost me time.
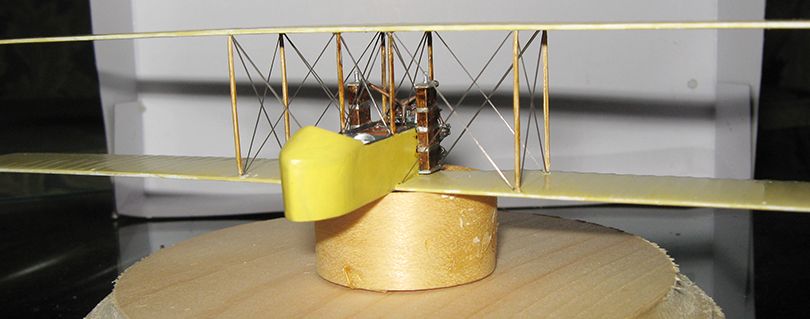
First, once I decided on doing a South African machine, I felt the basic interior needed some revision. When I was intending a late service English machine out on the Northwest Frontier, I figured 'it's dark and dirty in there' would be fine for the interior, but the South African machines were new, were in modern terms a 'pre-production batch', and were something H. Farman hoped would lead to substantial orders. So I felt a 'best foot forward' finish was appropriate, and the factory standard for Henri Farmans seems to have been interior of metal panels (I suspect the whole nacelle was covered in aluminum) painted white or very pale buff, and structural members painted black or very dark grey. Painting white over what I had did not go well, and I wound up up having to do things no modeller should do, or having done, own up to doing. But I did emerge from the passage with a couple of tips worth passing on. One: if you are using Model Master style acrylics, and you have an unsightly thickness of paint building up where it is not practical or safe to get at it with conventional methods, a cotton bud (Q-Tip) wet with rubbing alcohol will do a good job of smoothing down and removing the paint (it might evn work to blend colors in a 'soft' demarcation, the way thinner over enamel can), and will do so even if the stuff is pretty well cured. Two: Titanium White from an artist's acrylic tube covers very well, even when cut down with Future. I wound up doing the frames in pencil, which is nice and dark but can give a metallic glint if the the light hits it right, unless treated with a matte coat. Which leads to odd tip number three. If you mix Tamiya Flatting agent into Future, and the mix builds up a bit where raised detail meets flat surface, when it dries it does what a dark wash does, only white. Oddly useful, here, it turned out --- one for the 'do it once, it's a mistake; do it twice, it's a technique' file.
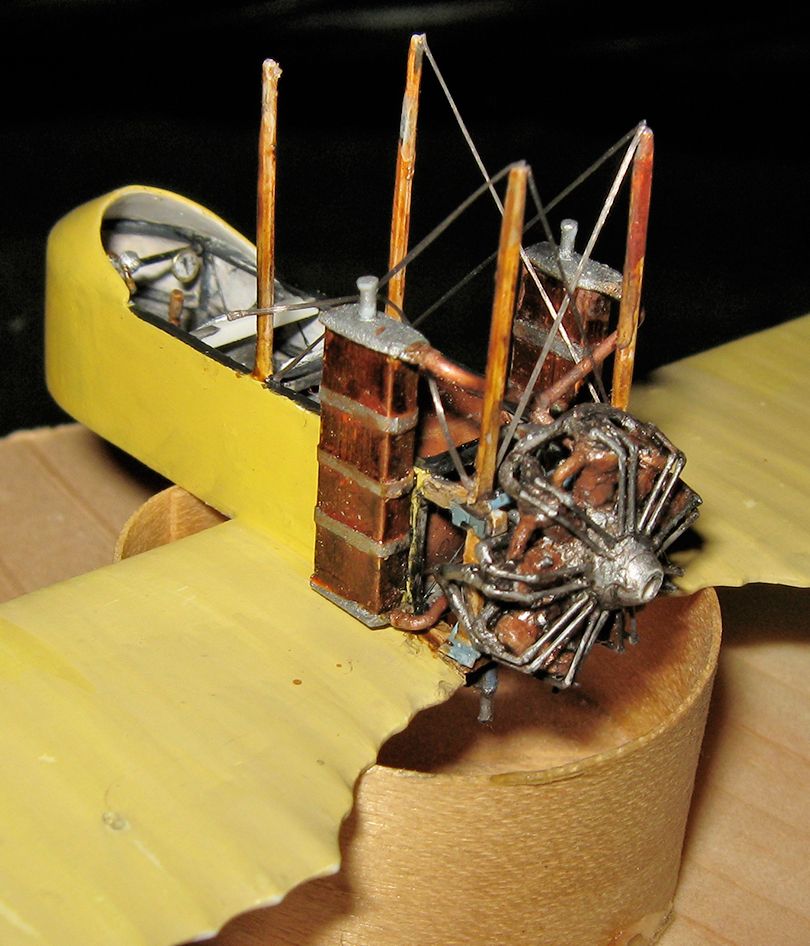
Second, I learned a bit more about the engine mounting. Someone brought to my attention a better resolution version of a picture I had seen before but not studied closely, a profile shot, and it showed some upper fittings similar to the 'shackle' arrangement prominent at the lower corners in the South African picture. As photographs will, when you have reason to thing something is there, I could discern these now in the South African picture. When I tried to put them in, the motor dislodged, and a good many little bits at the rear began to come loose. It was extremely aggravating, and hard to tell for a while if I was making progress or losing ground. Finally got through it, however...though there were moments when Mr. Farman could well have been abruptly introduced to Mr. Wall, and left to make the best of it with his new pal.
Anyway, here are the pictures....
Elsewhere, someone asked what I would do to keep this from being a tail-sitter it made me think. That had not occurred to me, and I did not think it too likely, but it seemed worth taking out some insurance over, so...

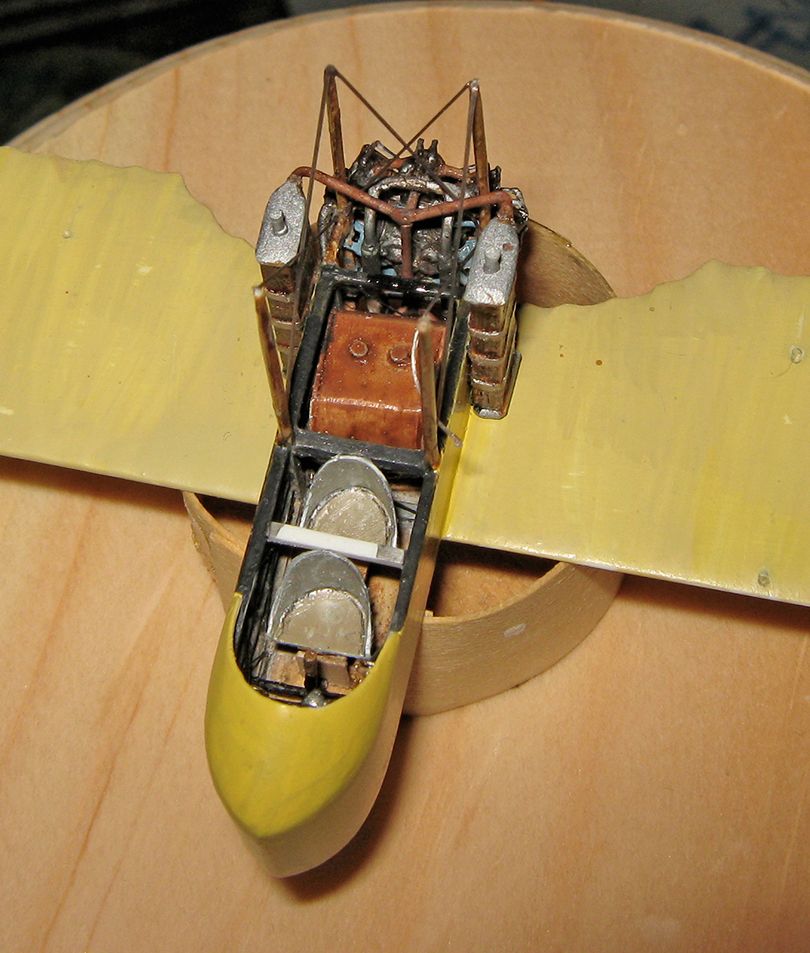
The seating arrangements and the fuel tank conceal a good deal of lead....
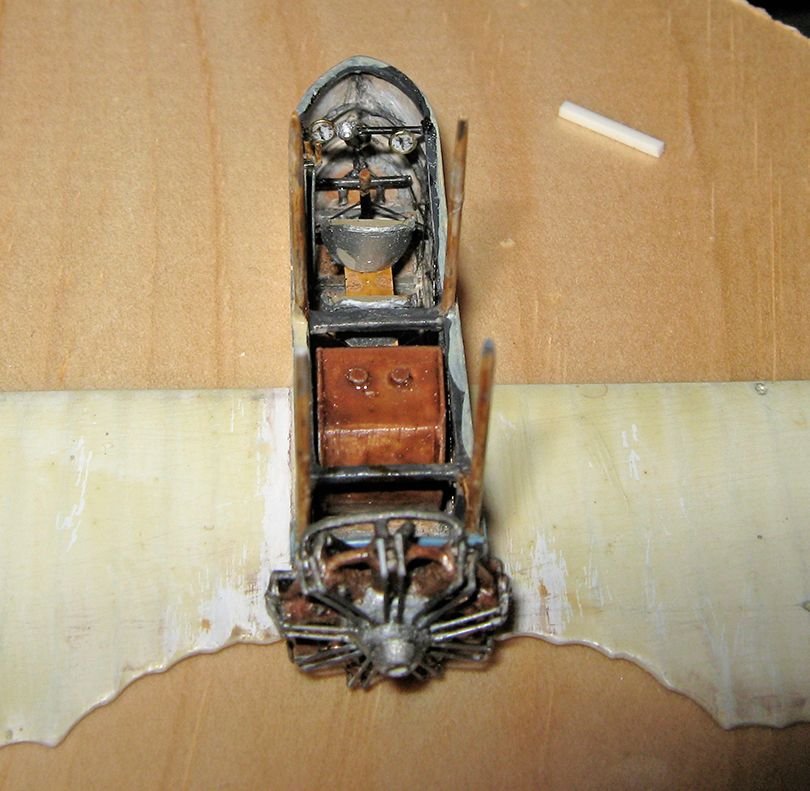
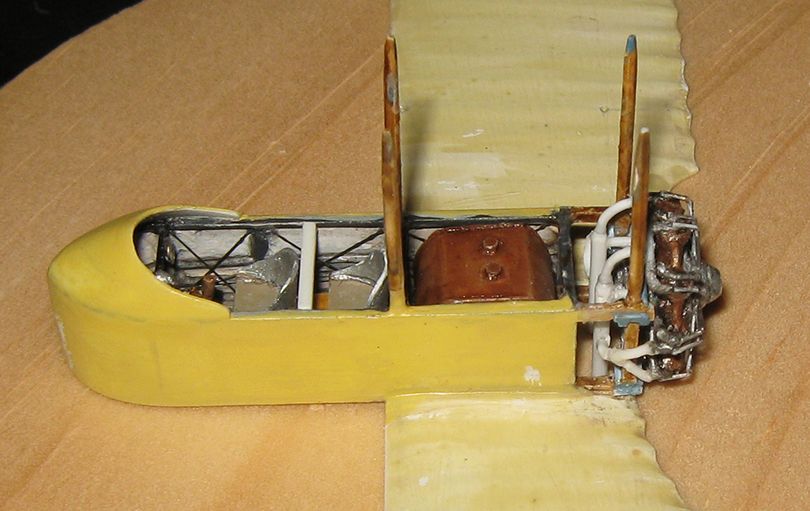
Here are some pictures showing the finished interior and mounted motor, wings and nacelle in the early stages of painting.

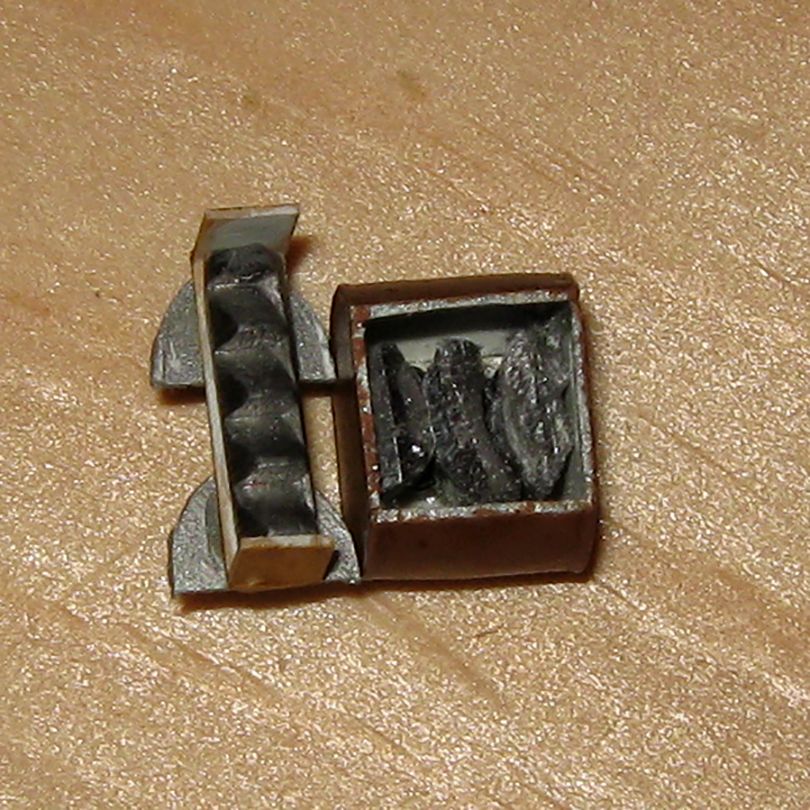
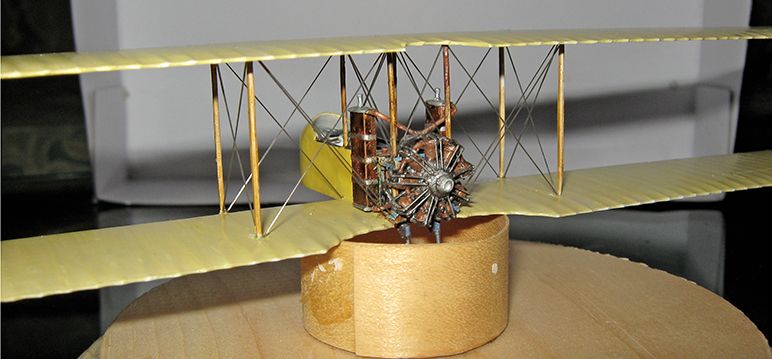
Here are some pictures showing the construction of the exhaust manifolds (they are not yet painted). Note how pipes wrap around the nacelle framework. The nose cap is on, and painting more advanced. The camera flash exaggerates the yellow, and the difference in tone between wings and nacelle. The white piece across the interior is just a spacer wedged in place, to prevent bowing in the nacelle sides during handling for the extensive work at the rear.
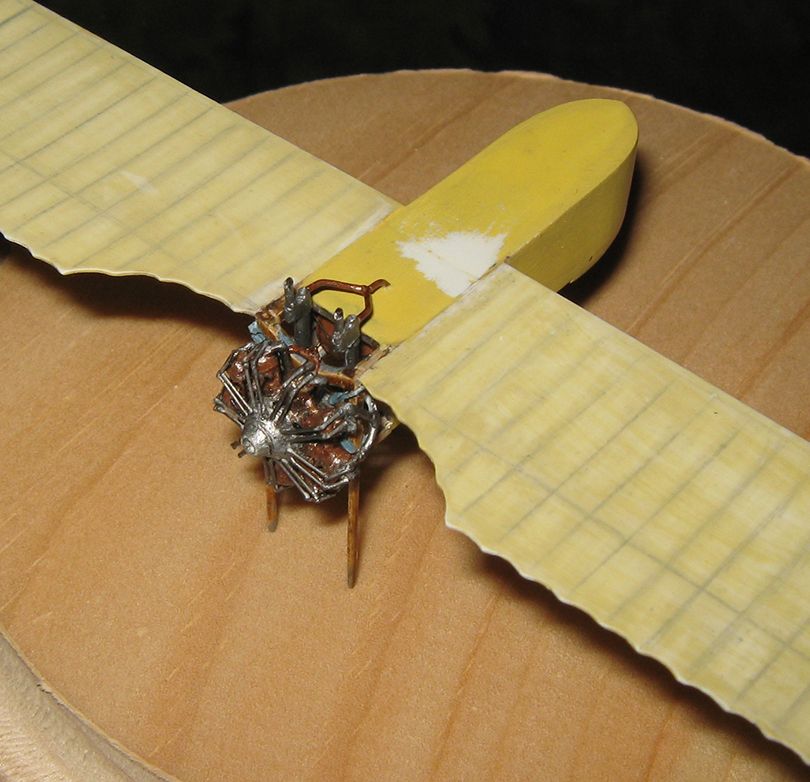
The pipes feeding fuel to the motor ran alongside the exhaust pipes, in the thicker section of the vertical element, and feed into the charging manifold through the pipes which branch off level where the thicker portion of the vertical ends. Here is a shot showing the fuel feed from the tank, and the housing of the carburetors and the exhaust outlet below the nacelle....
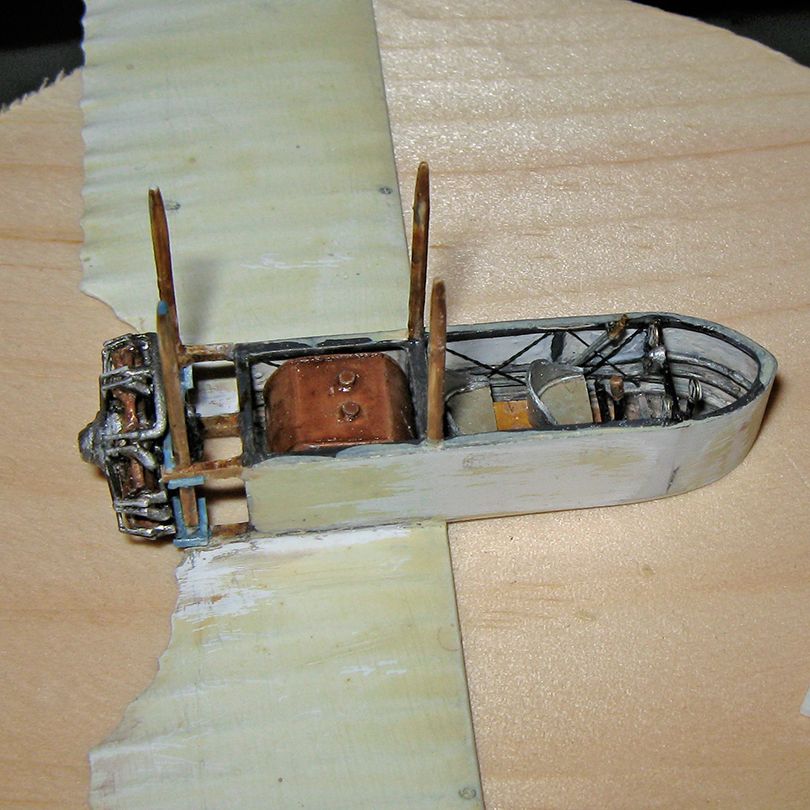
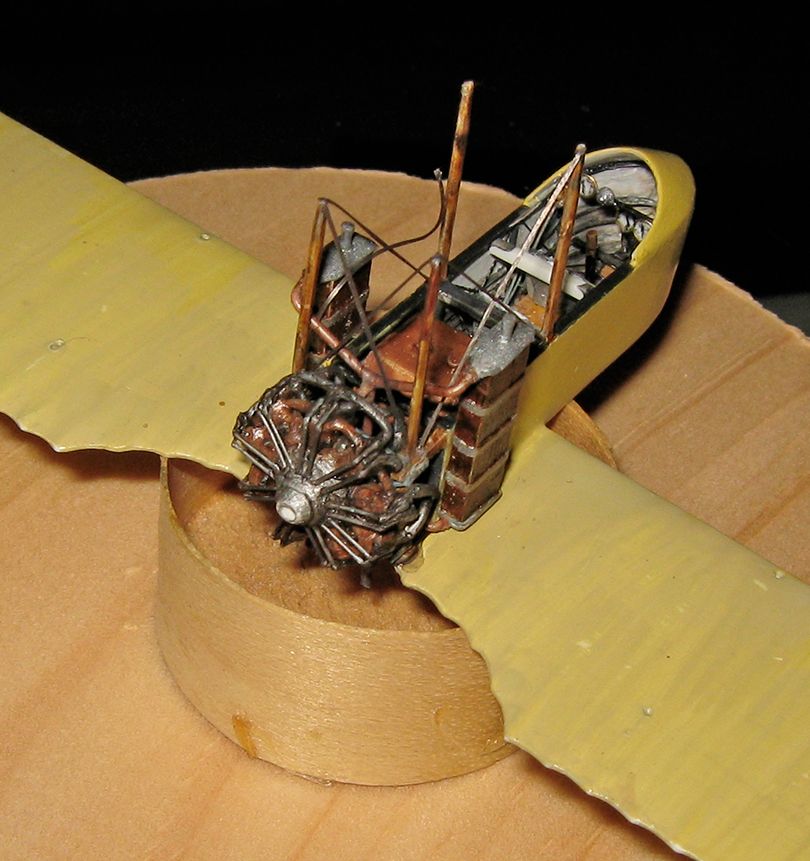
Here are some shots of the completed motor area, with the radiators and their plumbing in place. A bit of pre-rigging has been done in preparation for attaching the upper wing.
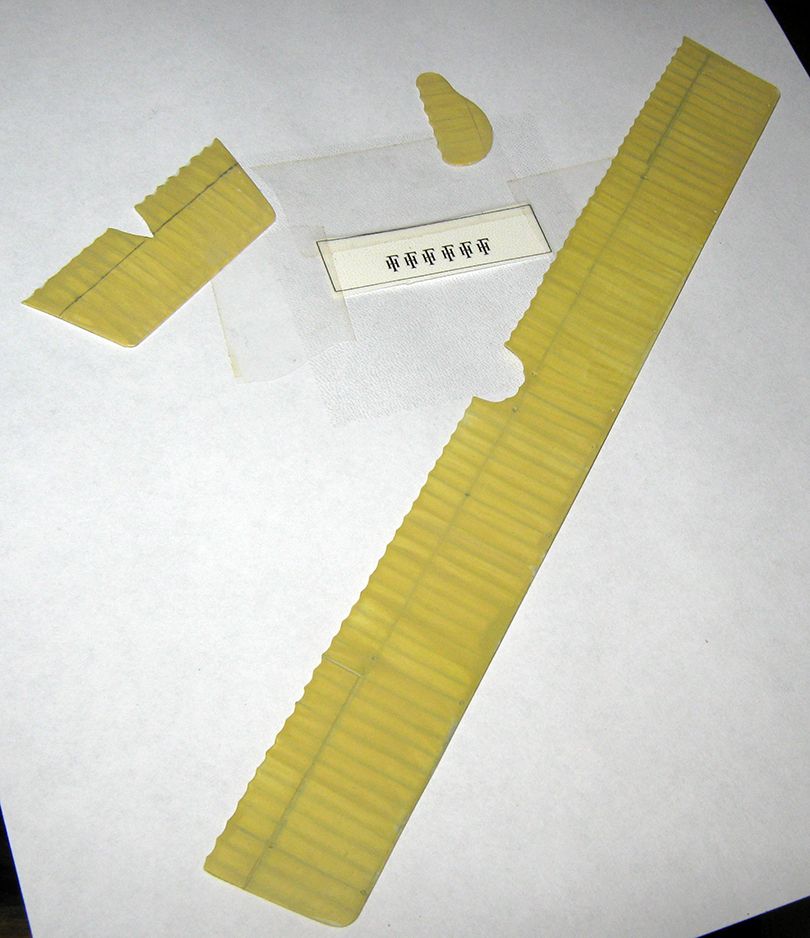
Here are some additional elements: the underside of the upper wing, the horizontal tailplane, and the rudder. The bit of decal is a representation of the Henri Farman logo which wife put together for me. It took considerable manipulation to manage.
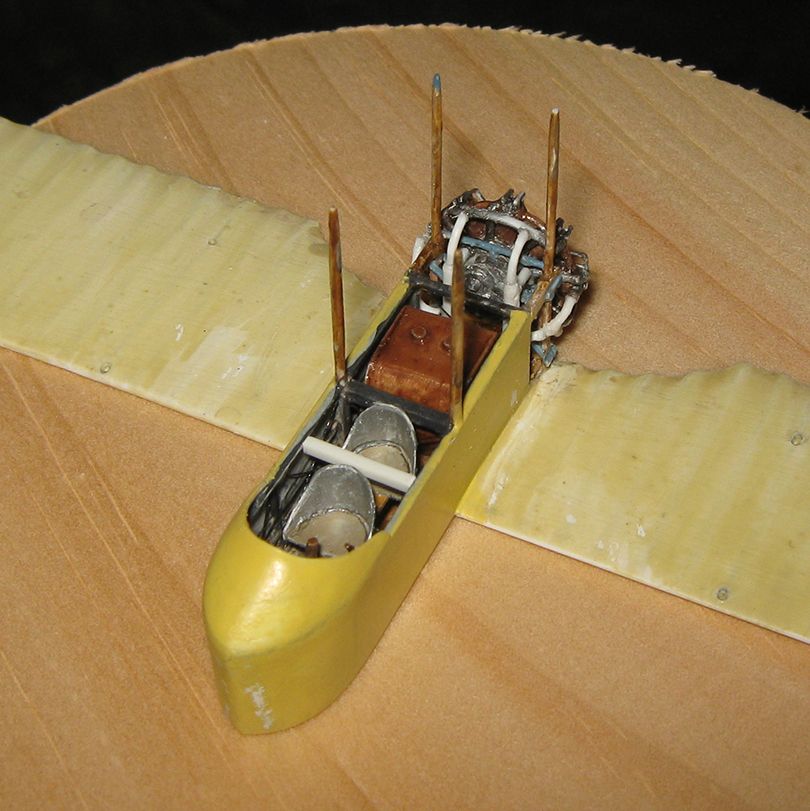
Here are some shots of the upper wing attached to the four central interplane struts. At this point things are extremely wobbly....
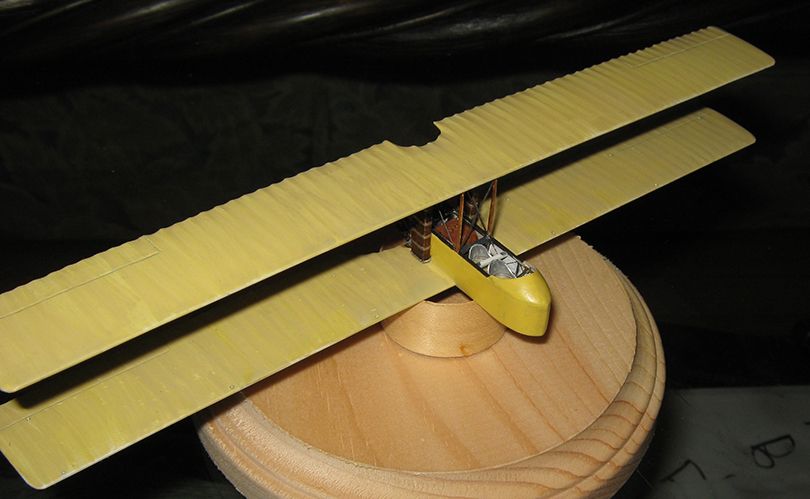
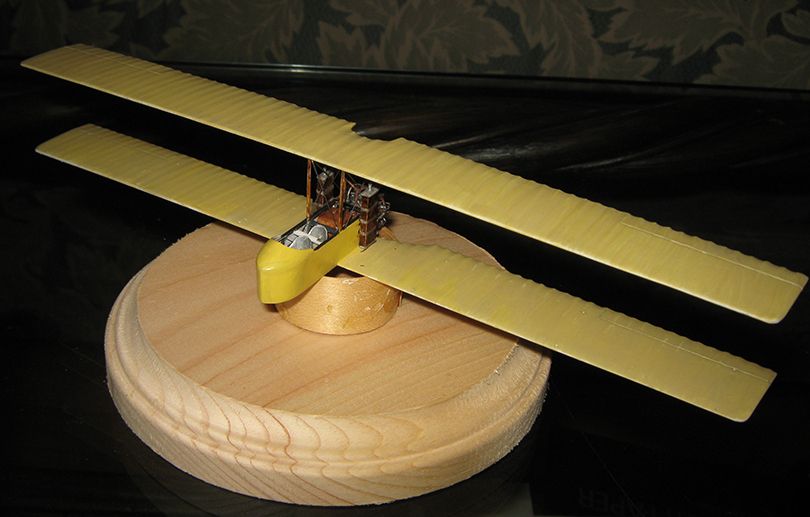
The finish is somewhat conjectural. Henri Farmans used bleached linen, and it was common to employ a linseed oil varnish when a machine had a rotary motor, as early Henri Farman machines did, since this stood up better to the oil than normal varnish. It has a distinct yellow tint. Photographs of early HF-27s do not seem so translucent as would be expected from plain doped linen, so I suspect some pigment was involved in the covering. Tones for wings and nacelle seem very close, suggesting a paint over the metal matched to the fabric color. While this became a general French practice during 1916 (the 'yellow finish' of early SPADs and others), examples have been noted from much earlier.
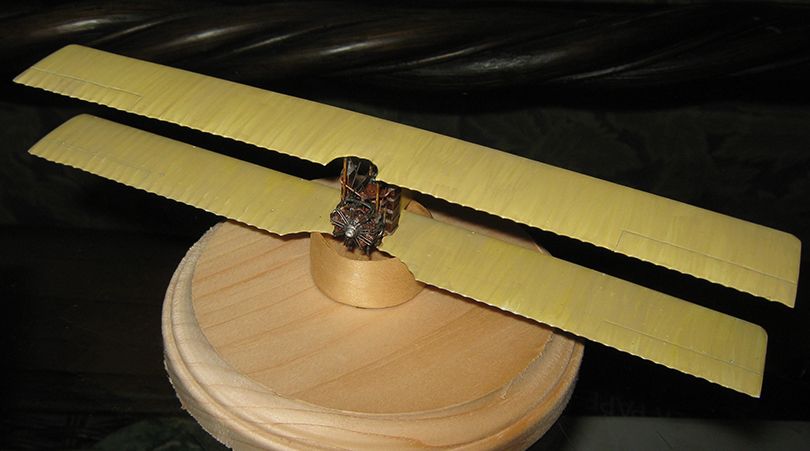
Here are some pictures from the early stages of adding struts and rigging. The method is to work out from the center, to keep on top of potential alignment issues, with each strut made and fitted individually.
As I said, I stopped doing pictures at this point, and carried on with the business at hand, getting in all struts and structural rigging, and assembling the undercarriage.
Tomorrow I will be back at the bench, and while the rating remains 'fighting chance', I sense somehow resistance is weakening on the ridge-line....

