Author Topic: Kempf's Dr.I roden 1/32  (Read 19596 times)

Offline mc65

  • Full Member
  • ***
  • Posts: 216
Kempf's Dr.I roden 1/32
« on: November 18, 2013, 06:43:07 AM »
hi all!

waiting for alclads for the nieuport project, I opened another box from the stash... also this one is for a friend, who wants it straight from the box and in the friedrich kemp's painting.

I must say that this kit is far ahead compared with the other WWI aircrafts I did since now: nice surfaces, good joints, well designed kit and details.

just to say, the following photos are the result of an afternoon session! I'm very pleased about, thinking to purchase another one to myself!


I started building the internal nose structure, absent in the kit, but provided in the eduard set. I used the PE as template, and did it with evergreen.
8496

instead to solder a new seat with brass sheets from tom's modelwork, I gave a try at the kit's one. just trimming the ends and cushioning it. the harnesses are also from eduard, but I burned out the paint on them, I didn't like that prepainted film. also, they where so rigid... a go on open flame softened the metal at best.
8498

I tried to stay at the "customer" wishes, but some bits where the minimum!
8502

waiting the cockpit's frame glue drying, I assembled the eduard spandaus mantelts. sturdier than the tom's ones, but good enough, I guess.
8503

and here the internal frame, ready to paint. after I'll give it instruments and other bits.
8513

all the parts that will fill the fuselage... I just discovered that the fuel tank was also the oil tank... so I'm studying the way to open the other hole on the fuselage and build another filler neck similar to the fuel one.
8512

another detail completely wrong it's the front cowl: it misses the round riveted contour and edge. I'm guessing how to solve this prominent fail of the kit.
8493

well, I'm pretty satisfied for a single session, especially considering that I just wanted to fill a little free time studying the box!
bye, p. ;)

Offline Des

  • Administrator
  • Hero Member
  • ******
  • Posts: 9325
    • ww1aircraftmodels.com
Re: Kempf's Dr.I roden 1/32
« Reply #1 on: November 18, 2013, 07:06:54 AM »
For just one session you have made excellent progress, everything you have done so far looks very good, I'm sure your friend will be very pleased with the results.

Des.
Late Founder of ww1aircraftmodels.com and forum.ww1aircraftmodels.com

Offline Ernie

  • Hero Member
  • *****
  • Posts: 3961
  • "Once more into the breach"
Re: Kempf's Dr.I roden 1/32
« Reply #2 on: November 18, 2013, 07:16:38 AM »
I have one of these in my stash Paolo so I will enjoy following your build, hoping
to pick up some of your great ideas.  The seatbelts look very good...kind of dirty
and used.  Very nice work on the interior.  I will be anxious to see how you improve
the cowling.  I didn't realise that it was not right.  Thank you for letting us know!

Cheers,
Ernie :)
The new old guy, take two...

Offline rhallinger

  • Hero Member
  • *****
  • Posts: 1976
Re: Kempf's Dr.I roden 1/32
« Reply #3 on: November 18, 2013, 08:18:49 AM »
You're doing a great job Paolo!  The cockpit was the toughest part of the two of these that I nave built, and you made it look easy! ;D  There are a couple of fixes for the cowling rivets.  You can wrestle with a PE part that someone makes (I don't recall who), or you can order a relatively inexpensive resin cowling with rivets from Ron Kootje's shop here on the forum.  I have one of those for my next DR1.

Regards,

Bob

Offline RAGIII

  • Hero Member
  • *****
  • Posts: 19100
Re: Kempf's Dr.I roden 1/32
« Reply #4 on: November 18, 2013, 09:46:39 AM »
You're doing a great job Paolo!  The cockpit was the toughest part of the two of these that I nave built, and you made it look easy! ;D  There are a couple of fixes for the cowling rivets.  You can wrestle with a PE part that someone makes (I don't recall who), or you can order a relatively inexpensive resin cowling with rivets from Ron Kootje's shop here on the forum.  I have one of those for my next DR1.

Regards,

Bob

I agree, Rons Cowling looks to be great! Your cockpit improvements look terrific as do your Spandaus!
RAGIII
"A man has to know his limitations": Harry Callahan

"Don't slop it on" Lynda Geisler

Offline stefanbuss

  • Hero Member
  • *****
  • Posts: 976
Re: Kempf's Dr.I roden 1/32
« Reply #5 on: November 18, 2013, 09:48:53 PM »
Quote
You can wrestle with a PE part that someone makes (I don't recall who),

This PE part is part of a set produced by PART of Poland. (har har, what a play for words)

Stefan

Offline coyotemagic

  • Hero Member
  • *****
  • Posts: 7710
  • "Here's to not buggering it up." -Winston Chuchill
    • My Models
Re: Kempf's Dr.I roden 1/32
« Reply #6 on: November 19, 2013, 02:35:14 AM »
Brilliant start, Paulo!  Your friend is very lucky.
Cheers,
Bud
"All men dream: but not equally. Those who dream in the dark recesses of the night awake in the day to find all was vanity. But the dreamers of day are dangerous men, for they may act their dreams with open eyes, and make it possible." -T. E. Lawrence

Offline mc65

  • Full Member
  • ***
  • Posts: 216
Re: Kempf's Dr.I roden 1/32
« Reply #7 on: November 19, 2013, 05:05:35 AM »
thank you all very much!
the easy link with the ron's work of upgrading is great! :D :D :D

my friend is lucky, but has an hard head.... seeing the wip of this Dr.I, he fall in love, and ordered two more kits, asking me to build also an udet's one, and an F.I with red upper wing... nothing to comply, it's an easy kit, with just some few improvements needed, so it's a matter of quick build and have fun with painting.
improvements that I judge a must, and he a nice... so, for instance, the cowl trouble can be solved just by colors, to him.
obviously, I'm not contrary to that, it's just against my religion!

I found a possible way to solve the cowling case... I may cut out the circular front section as per pencil line, then thin the cowl from inside, and then put in a new front plate from plasticard.
8590
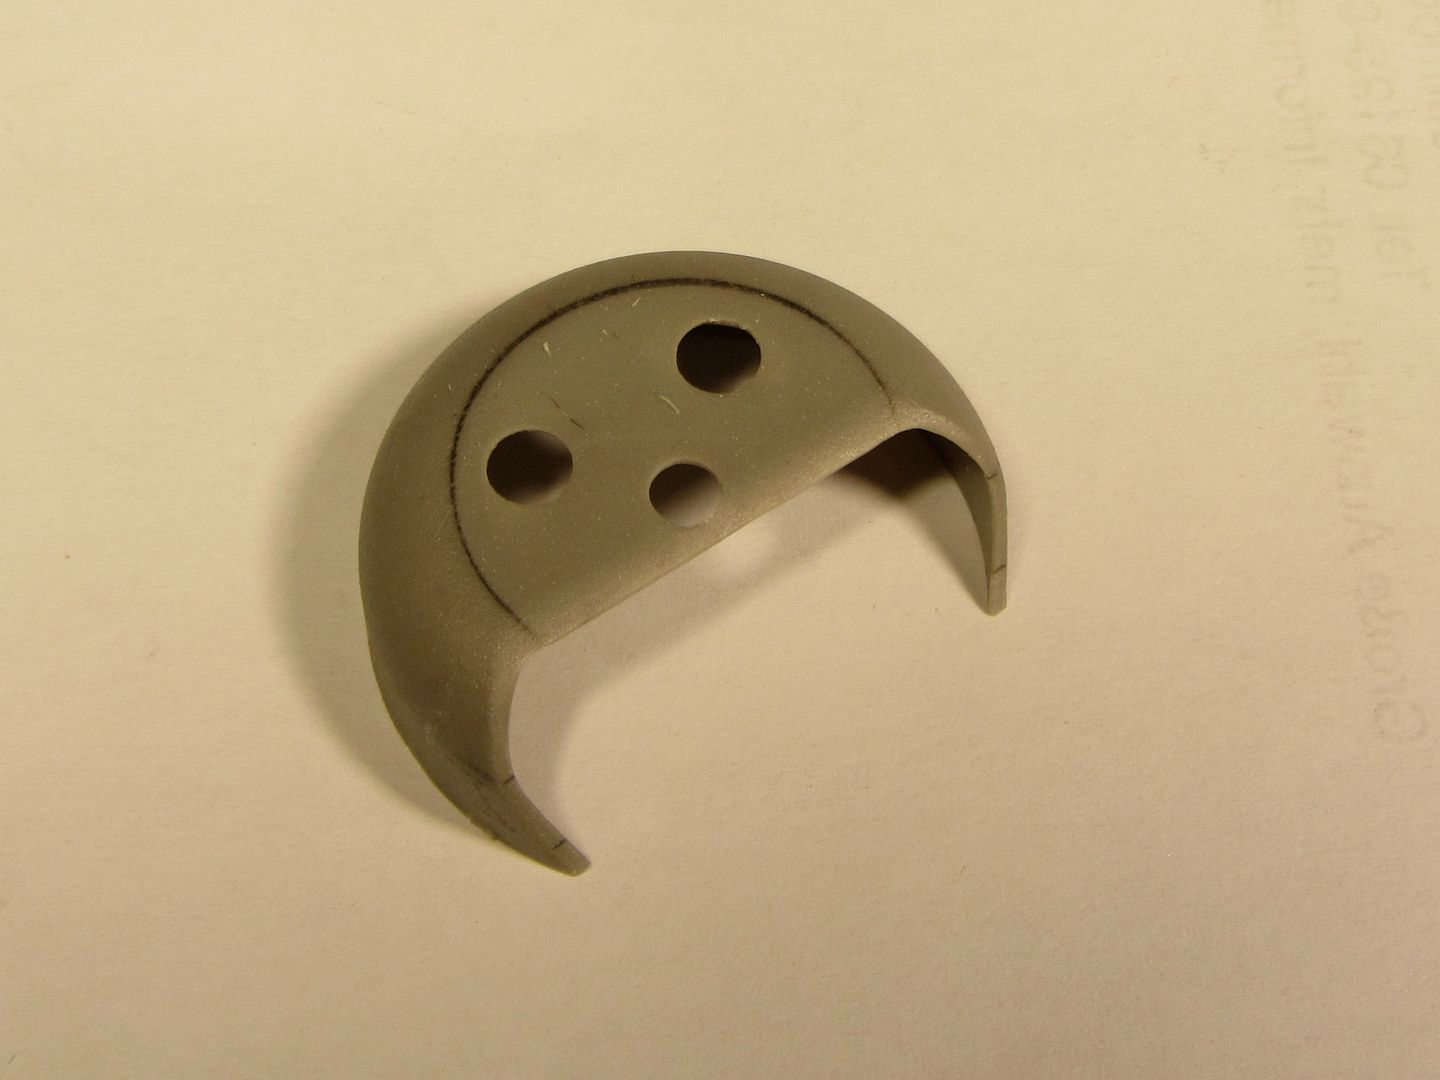
quite easy, I suppose... for a single sample, but for 3-4 of them?!? look at them side by side will show some little differences, I fear...  :o

I'll think at that then, today I'm enough stressed by weather, this morning I had crosswind up to 47 kts on short final, with heavy rain and thunderstorms all around the field... so, all I want now it's just to relax!

and that I did. I played a little with colors on nieuport, and I took advantage from the dirty iwata also on this one.
but, before the paint shots, some home made upgrading..
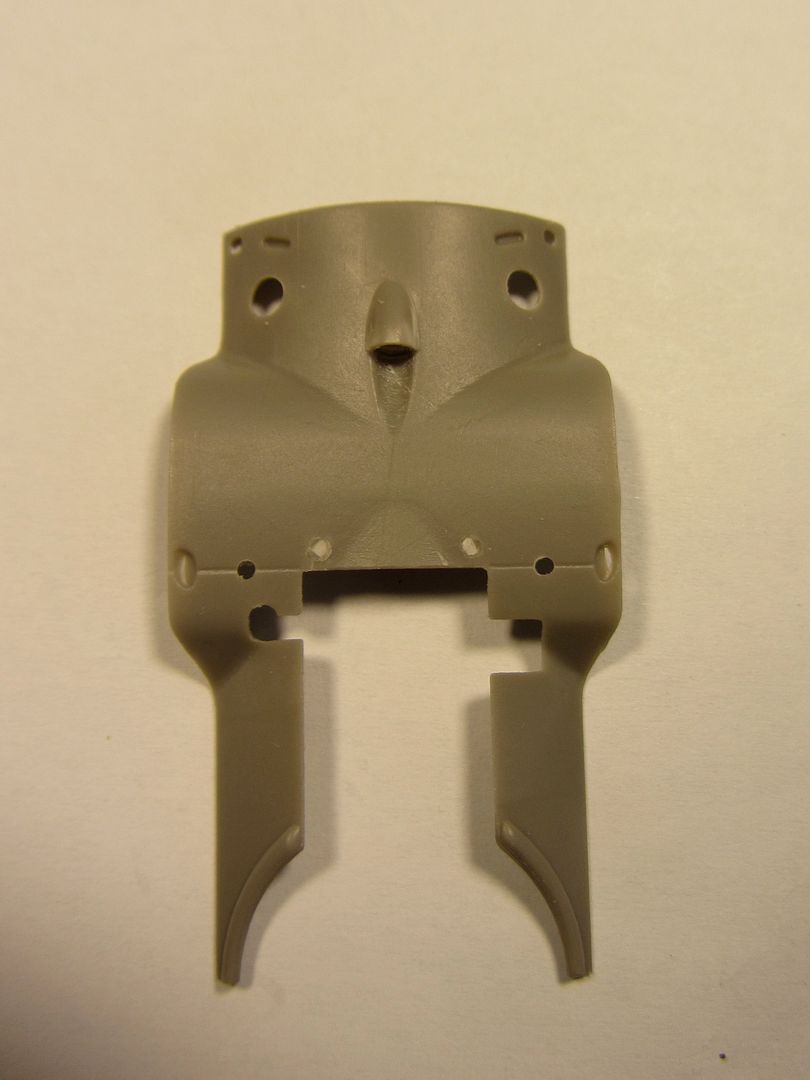
the upper fuselage cowling. I opened the second hole for the oil filler neck, closed the holes intended for the spandaus, and opened those for the ailerons cables. also, I opened the hole within will find home the RPM gauge.
8532

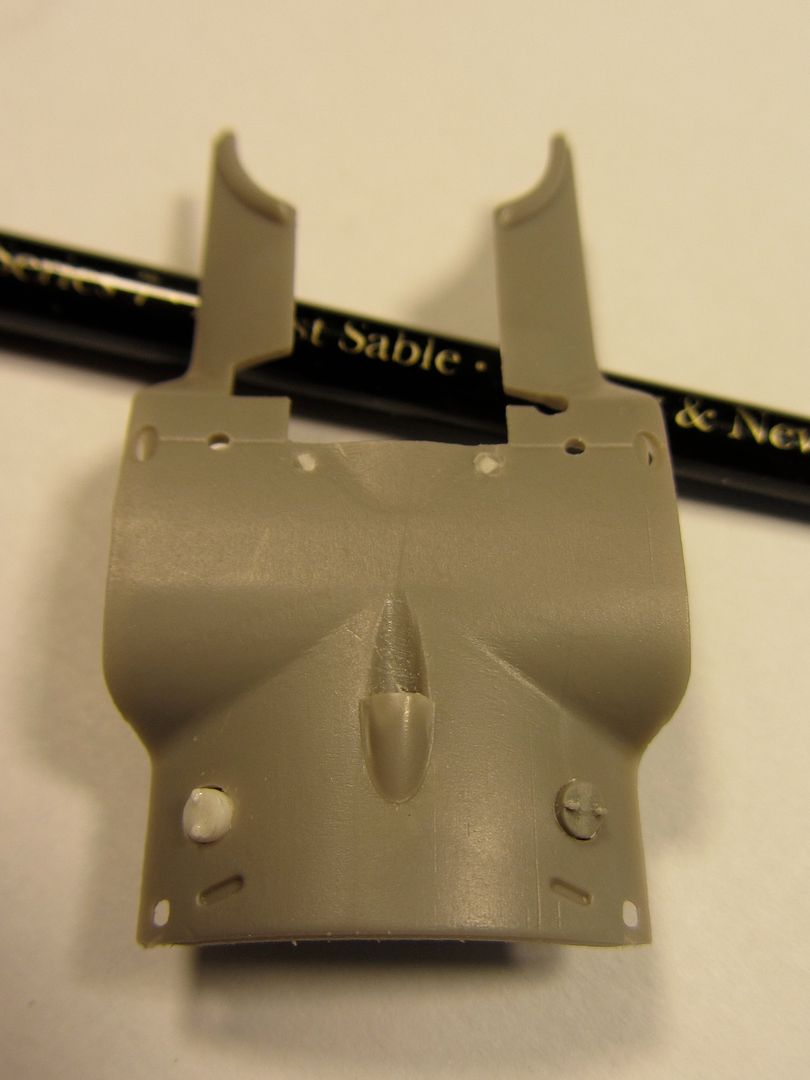
the new filler neck,
8534

and how it sits in place.
8536

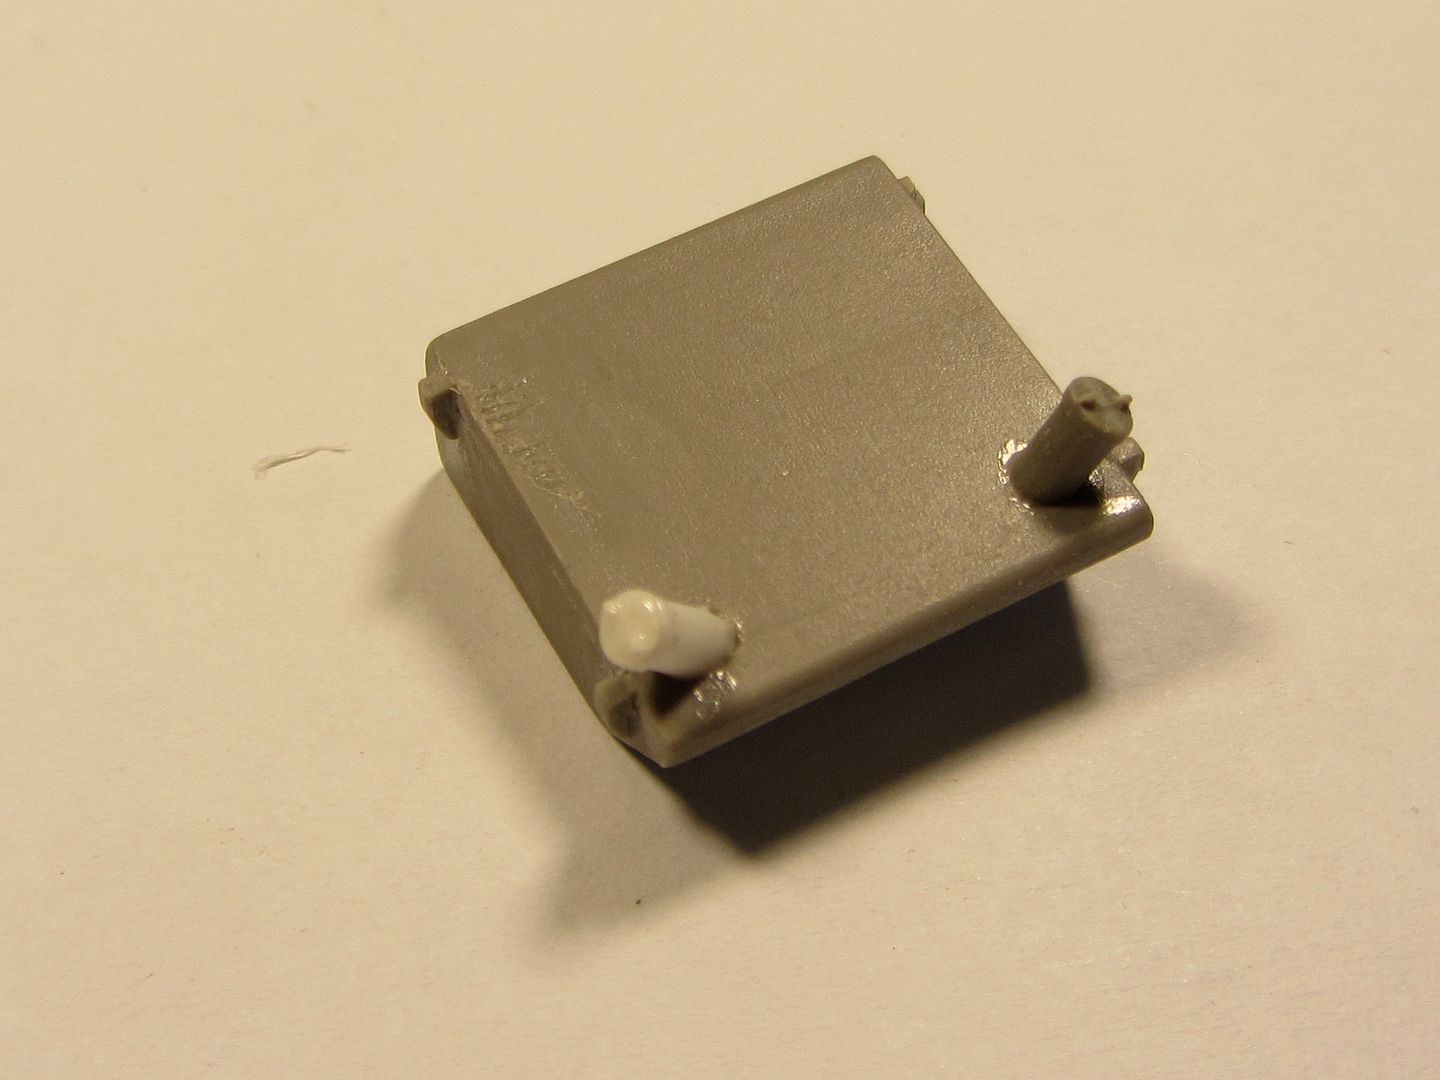
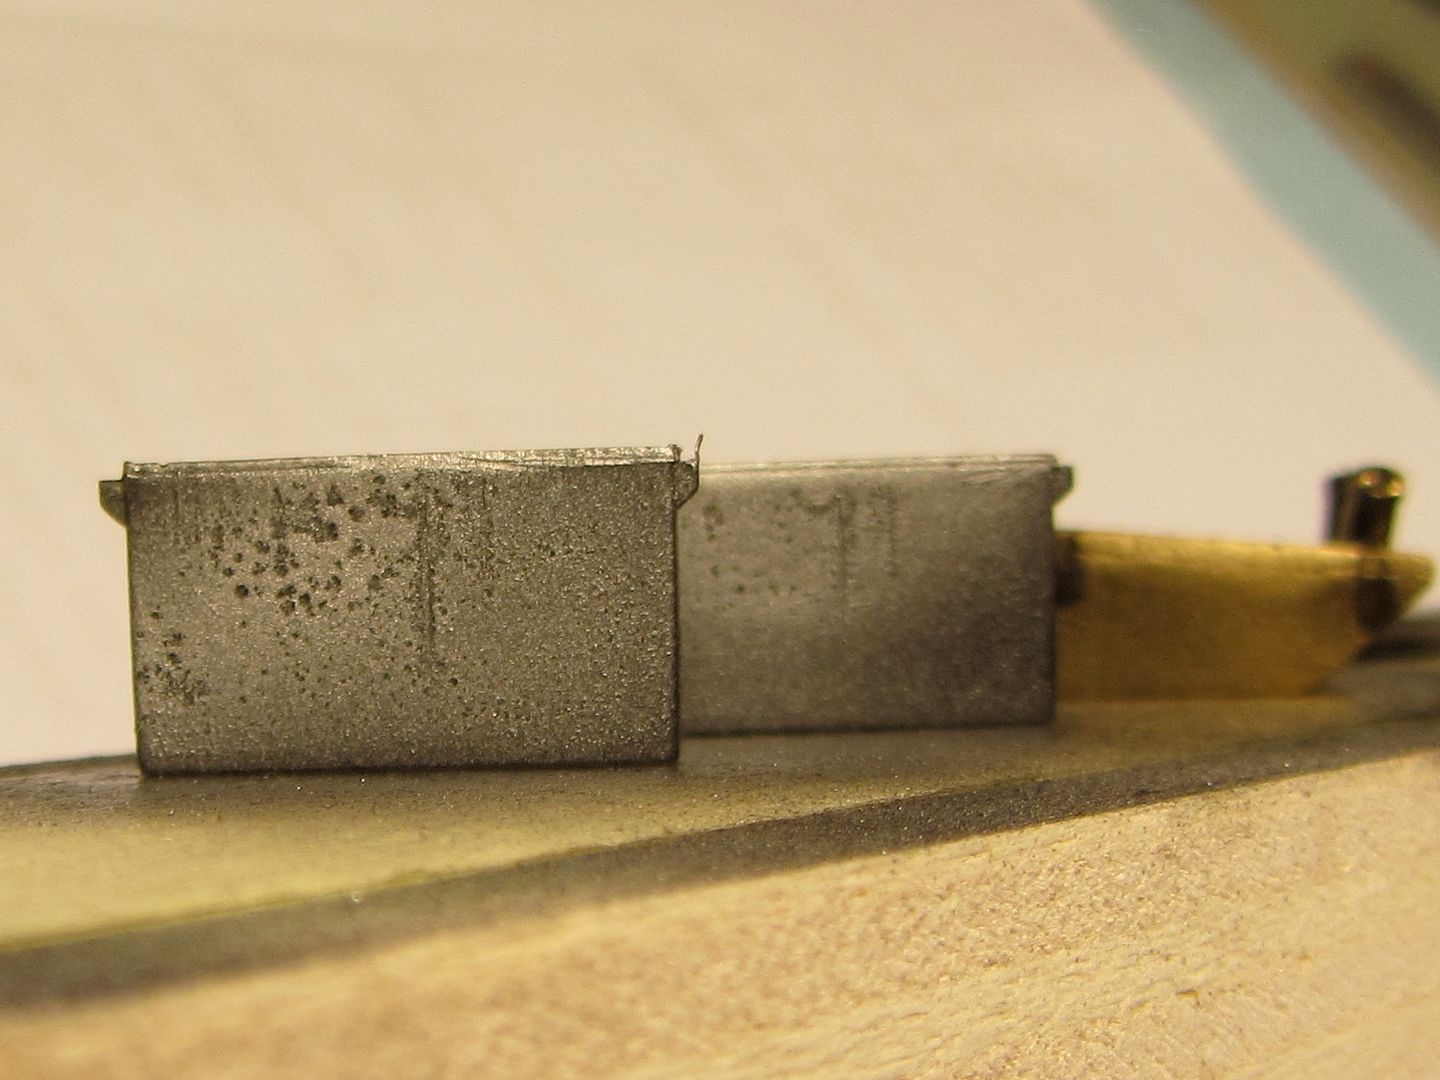
and now, the paint. some effects on the ammo cans,
8541

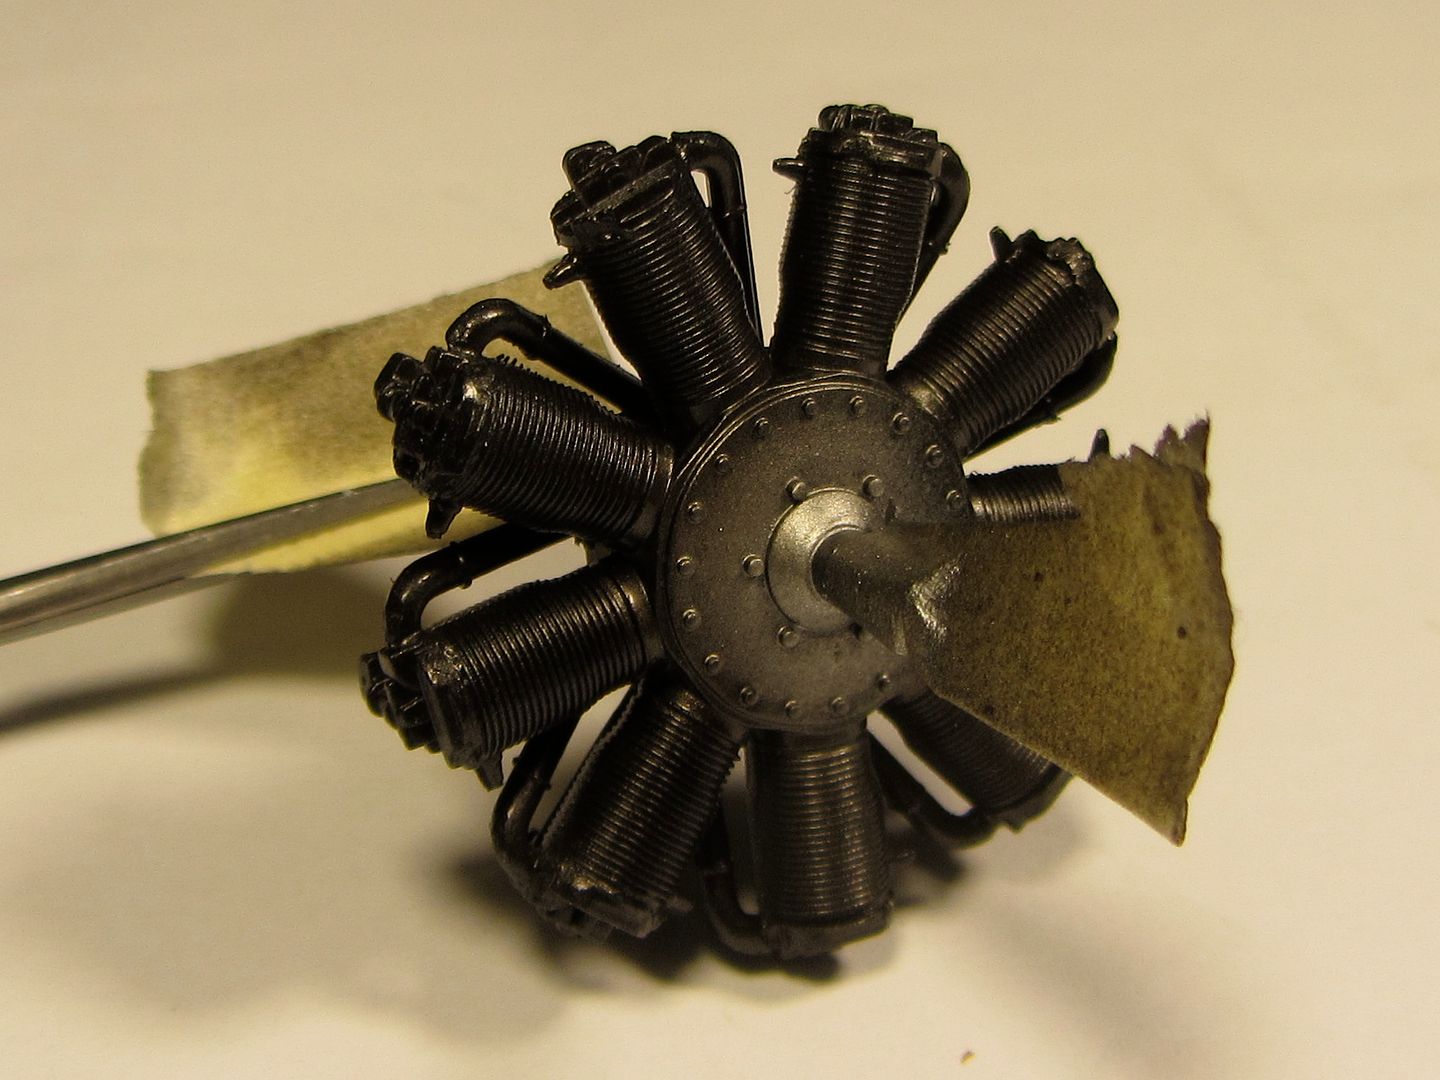
a metallic base for the engine,
8543

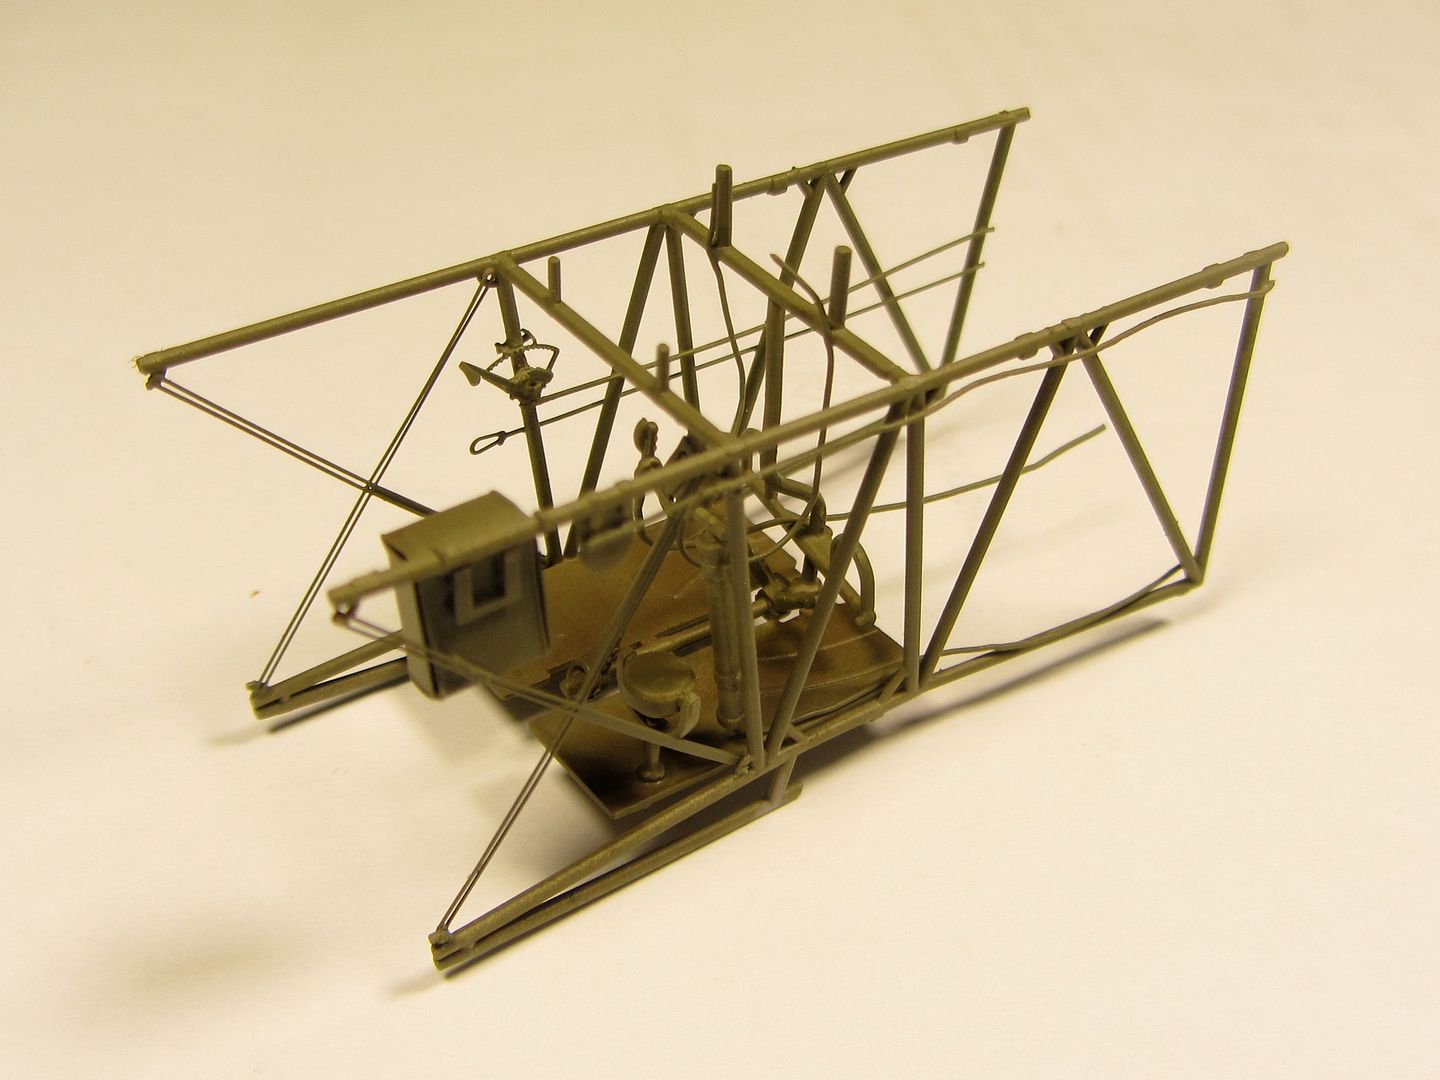
some green on the cockpit frame...
8546

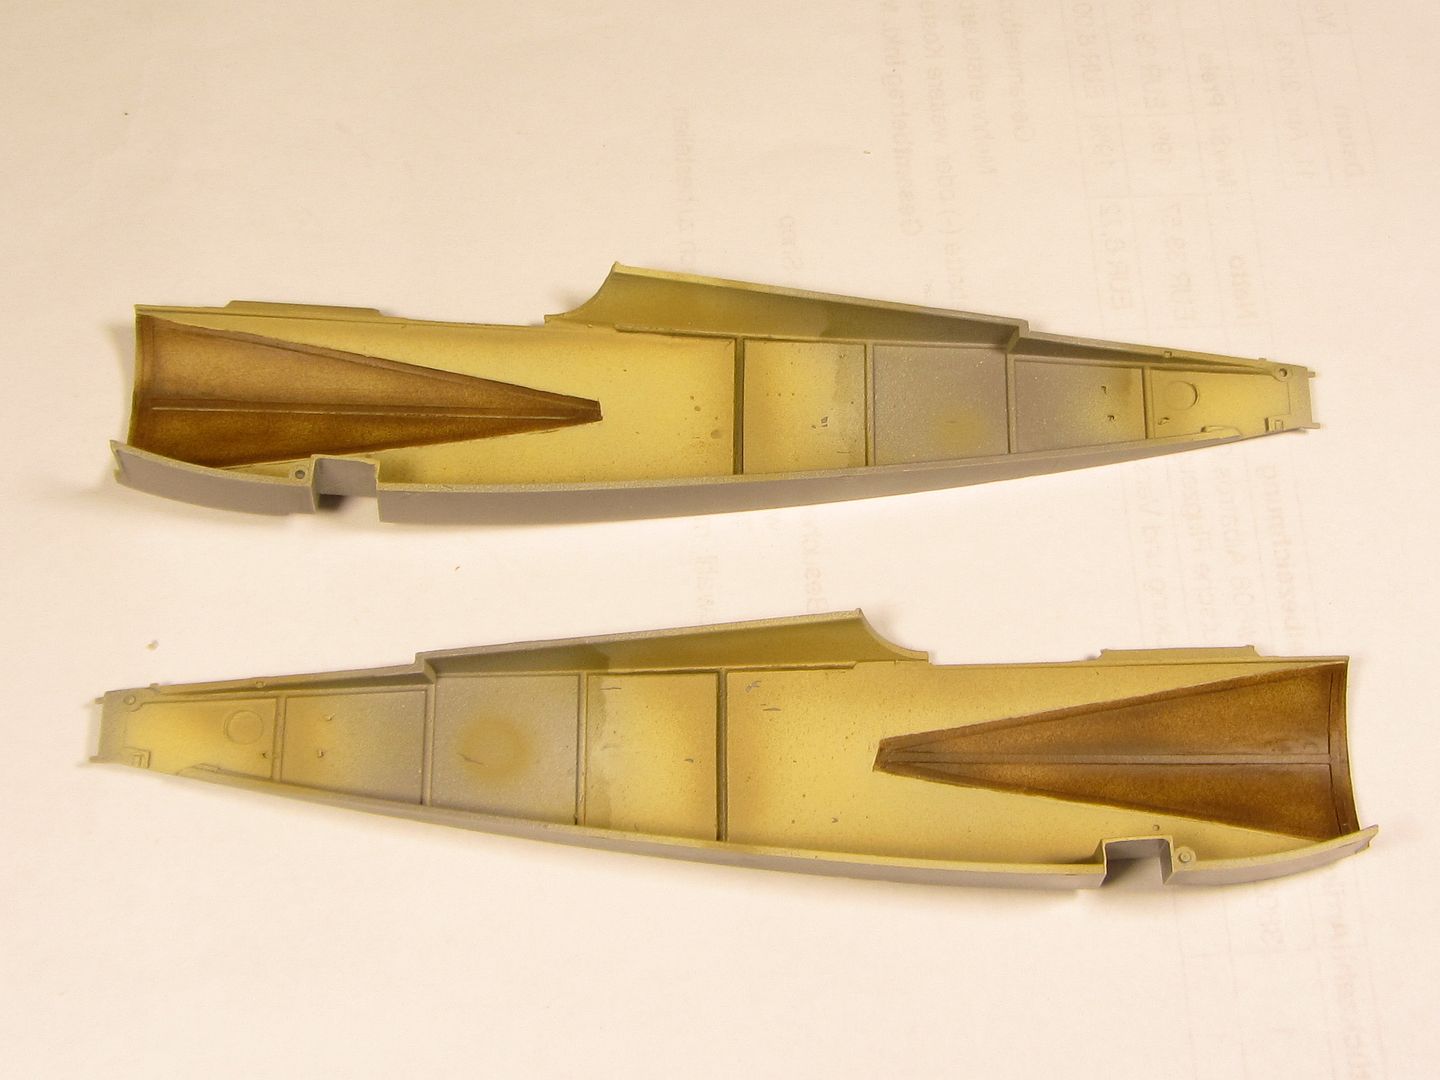
and the base colors for the interior.
8548

next steps, some painting by brush on them.
bye bye, p. ;)

Offline Nigel Jackson

  • Hero Member
  • *****
  • Posts: 2608
Re: Kempf's Dr.I roden 1/32
« Reply #8 on: November 19, 2013, 05:46:47 AM »
Hello Paulo

This is shaping up really well. It's very enjoyable watching you proceed with it.

Best wishes
Nigel

Offline Ernie

  • Hero Member
  • *****
  • Posts: 3961
  • "Once more into the breach"
Re: Kempf's Dr.I roden 1/32
« Reply #9 on: November 19, 2013, 08:06:35 AM »
Nice work, Paolo.  This is a very interesting...and of course enjoyable build.   


Cheers,
Ernie
The new old guy, take two...

Offline RAGIII

  • Hero Member
  • *****
  • Posts: 19100
Re: Kempf's Dr.I roden 1/32
« Reply #10 on: November 19, 2013, 10:22:09 AM »
Paulo,
I think I stated earlier that I have built 2 of these kits. That being said, I am going to continue to watch your build for tips and details because you are doing an Awesome job of improving this kit!
RAGIII
"A man has to know his limitations": Harry Callahan

"Don't slop it on" Lynda Geisler

Offline mc65

  • Full Member
  • ***
  • Posts: 216
Re: Kempf's Dr.I roden 1/32
« Reply #11 on: November 20, 2013, 04:59:30 AM »
thank you, pals..

I'm taking this project as a time-filler while something else is stopped on the bench, and I'm enjoying this approach.

today I just put together some details and corrected with colors the cockpit area:
8598

also, the soft approach of my friend made me free (actually, oblige me) to skip on some details, so all is fast!
8602

in example, I follow the eduard instructions, not bothering too much about the right spot for the magneto switch..
8608

well, the compass should be right, there!
8605

before starting with shadow and aging, I tried it inside the fuselage.
8614
8615

as last thing, i prepared the RPM's nest. I like very much the design of this aircraft, it's so modern, for its time!
8621

bye ye, p. ;)

Offline uncletony

  • Hero Member
  • *****
  • Posts: 4350
    • Aircraft In Pixels
Re: Kempf's Dr.I roden 1/32
« Reply #12 on: November 20, 2013, 05:27:42 AM »
v nice (as is your nieuport) Paolo. You sure do work fast!

Offline coyotemagic

  • Hero Member
  • *****
  • Posts: 7710
  • "Here's to not buggering it up." -Winston Chuchill
    • My Models
Re: Kempf's Dr.I roden 1/32
« Reply #13 on: November 20, 2013, 05:32:51 AM »
Stunning cockpit work, Paulo.
Cheers,
Bud
"All men dream: but not equally. Those who dream in the dark recesses of the night awake in the day to find all was vanity. But the dreamers of day are dangerous men, for they may act their dreams with open eyes, and make it possible." -T. E. Lawrence

Offline Des

  • Administrator
  • Hero Member
  • ******
  • Posts: 9325
    • ww1aircraftmodels.com
Re: Kempf's Dr.I roden 1/32
« Reply #14 on: November 20, 2013, 06:23:46 AM »
Beautiful result with the cockpit interior Paolo, and you did a great job with the extra filler neck, this is shaping up to be a real winner.

Des.
Late Founder of ww1aircraftmodels.com and forum.ww1aircraftmodels.com