Author Topic: Painting figures 101  (Read 42750 times)

Offline Repainted

  • Jr. Member
  • **
  • Posts: 55
Re: Painting figures 101
« Reply #30 on: September 25, 2013, 05:42:59 PM »
Hi
Here is the Kellerkind RFC Mechanic and it’s delicate. You got seven bits of finely cast grey resin and I have not found any air bubbles and just one bigger mould line on one of the legs. The figures pose is not what we see in this range every day, leaning against the work table in a natural resting pose. The table or work bench is nicely cast and no warped bits here folks. I must say that this time Martin did a gorgeous figure I´m just hoping that Martin will come up with a second mechanic to go with this kit. This kit has given me ideas about a new vignette, but more of that another time. First we will be painting this little gem.
Martin has done the grains in the wood sharp and subtle enough, no over doing here. When I saw this kit at first time I´ll had some problems finding the bench empty and just wonder why, now I´m glad that clean space is there. This will give the modeler plenty to go for by himself. Just look into the Wingnuts´s and see what you can find there. The left arm fits nicely and no filler will be needed.


Preparing the figure for painting.
For this job you will need a razor blade, needle files, hobby knife, emery paper, paper clip and a drill bit matching the clips thickness, 1mm. From the casting process there´s always some lines around the figure and some part, they will be removed carefully with the knife, needle files and emery paper. Then the casting plugs are removed from the feet with the razor blade. The paper clip is used, a 1mm hole is drilled in one foot and a piece of the clip is glued in place and will help you during the painting and finely when it’s time to glue the figure onto the base.


Cheers LarsaQ

Offline Repainted

  • Jr. Member
  • **
  • Posts: 55
Re: Painting figures 101
« Reply #31 on: September 25, 2013, 09:04:17 PM »
The figure is prepared and just a tiny filler was used joining the left arm to the body. Some light sanding was done to the table legs to ensure right height between the figure and table. So from here I´ll going to load the airbrush with primer and give the figure a even thin coat of primer before I close down for a nights rest. I must again say I´ll love this one and what a personality this one is.


Took some time to play around with the clean table using some guns from Wingnut´s RE8 kit and at once the feeling of a vignette was there.


Regards
LarsaQ

Offline Ernie

  • Hero Member
  • *****
  • Posts: 3961
  • "Once more into the breach"
Re: Painting figures 101
« Reply #32 on: September 25, 2013, 09:40:12 PM »
Nice!  It already looks good, Larsa. ;D

Cheers,
Ernie :)
The new old guy, take two...

Offline uncletony

  • Hero Member
  • *****
  • Posts: 4349
    • Aircraft In Pixels
Re: Painting figures 101
« Reply #33 on: September 25, 2013, 10:43:43 PM »
Nice photos Lars. The figure is really well sculpted.

Offline kornbeef

  • Hero Member
  • *****
  • Posts: 961
  • U.K. Carpet monster genocide squad leader.
Re: Painting figures 101
« Reply #34 on: September 26, 2013, 01:10:07 AM »
What a wonderfully  sculpted figure, got to love the  individual look given to him, those ears really suit the look of his face.  ;D
Never too old to learn sumfink noo

Offline RAGIII

  • Hero Member
  • *****
  • Posts: 18793
Re: Painting figures 101
« Reply #35 on: September 30, 2013, 02:18:04 AM »
What a wonderfully  sculpted figure, got to love the  individual look given to him, those ears really suit the look of his face.  ;D

Martin Puts lots of "Character" in all of his figures. His sculpting is getting more crisp with each release, at least in My Opinion!
RAGIII
"A man has to know his limitations": Harry Callahan

"Don't slop it on" Lynda Geisler

Offline Nigel Jackson

  • Hero Member
  • *****
  • Posts: 2608
Re: Painting figures 101
« Reply #36 on: September 30, 2013, 03:38:04 AM »
Hello All

What I like about this is how the sculptor (Martin) appears to have handled the eyes. It seems to me that people out in the open, (and also maybe not in the first flush of youth!) tend to squint or at least half close their eyes in broad daylight, as I think Martin has shown. Sometimes beautifully sculpted, cast and painted work can be let down by eyes so wide open and bright that they wouldn't be out of place in a television advert  for some sort of cosmetic/optical product.

Best wishes
Nigel (not in the first flush of youth!)

Offline Repainted

  • Jr. Member
  • **
  • Posts: 55
Re: Painting figures 101
« Reply #37 on: October 10, 2013, 06:13:50 PM »
Hi folks
The first coat off flesh is on and I mixed it from Humbrols Flesh 61 and wood 110.The reason for using wood 110 in the flesh 61 is just to take that screaming top off the flesh colour. The 61 flesh is a good base colour for skintones but needs “knocking off” a bit. Leather 62 could be used to or instead. I´m often try to change the skin tones so I don´t ending up with a standard paint mix for my figures. If so I wouldn’t like to take a look on the shelf where I have my figures so take a good look around you at your local Mal, skin tones comes in many tones .The paint was added with a Kolinksi #0 brush.
I often see this on WW1 models where the modeler just using the same old tin for all his British birds. I´m not so impressed to see the same clear doped linen in the same tone, so make some changes.


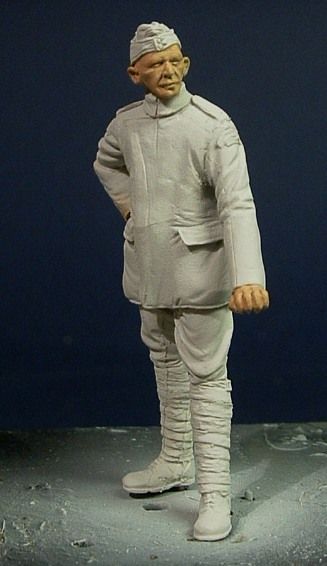
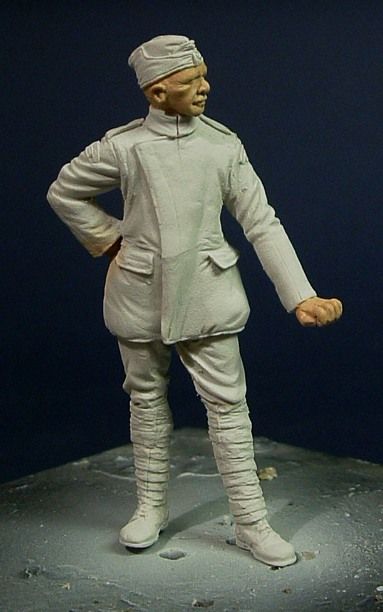
 I used two thin coats for this and make sure that the first coat was completely dry before adding the second. The whole face and hands was covered, no fuss here just simple brushing. The paint mix was diluted 50-50% with white spirits just so I had a good cover off the areas. If you do this make sure that the paint isn´t diluted to thick, you will lose all that nicely detail the sculptor have worked in.
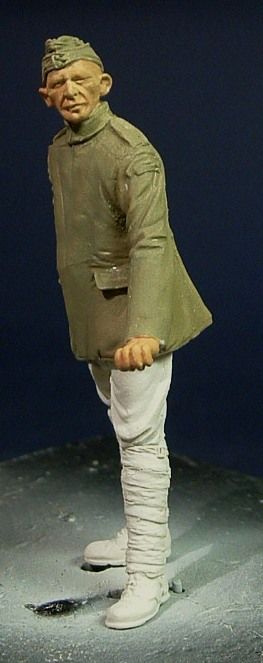
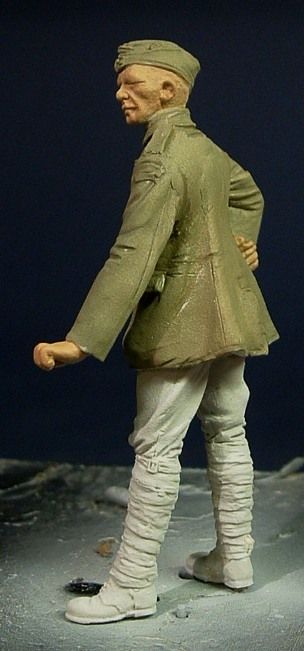
When the first flesh coats having a day to dry up my attention was to the tunic and hat. I just painted the tunic and hat here with the same mix off Kaki. The mix was done with Hu 78 Cockpit green and Kaki 26.Two thin coats will be added to give it a good base for the next to come. I did not paint the trousers with this mix, because I want to get another Kaki mix for this, just following my own advice here. The paint was added with a Kolinksi #0 brush. On the pics I have just put on the first thin coat off Kaki and now it will take 12 hours off drying time, that’s what I calling painting ”wet on dry” method.


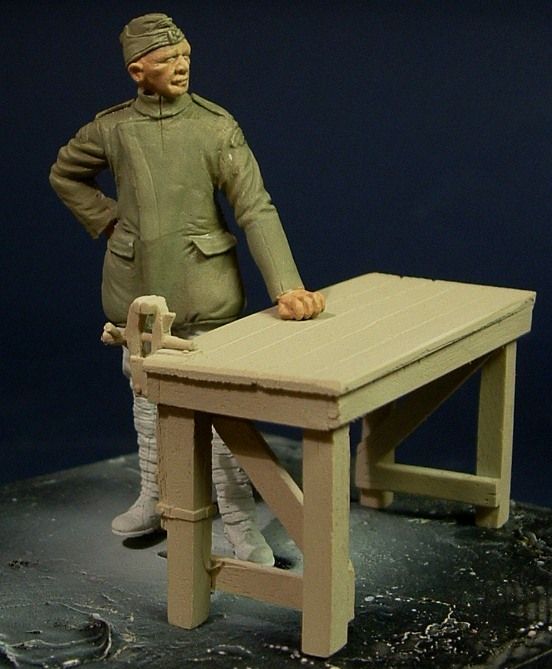
When I was in the primer work with my airbrush I mixed wood 110 and sand in the airbrush jar un cleaned after the figure was primed, so ending up with a soft wooden colour in the airbrush me attention was on to the working table/bench.


Critics and comments are off course welcome
regards
LarsaQ

Offline Des

  • Administrator
  • Hero Member
  • ******
  • Posts: 9325
    • ww1aircraftmodels.com
Re: Painting figures 101
« Reply #38 on: October 10, 2013, 06:49:20 PM »
Beautiful work so far Larsa, the figure is exceptionally well made and your painting is bringing it to life, I look forward to learning a lot more.

Des.
Late Founder of ww1aircraftmodels.com and forum.ww1aircraftmodels.com

Offline Gisbod

  • Hero Member
  • *****
  • Posts: 2438
Re: Painting figures 101
« Reply #39 on: October 10, 2013, 07:49:27 PM »
Great stuff Larsa..

But can you hurry up - I'm about to start painting my figure!  ;D

Watching with interest..

Guy
“Oh! I have slipped the surly bonds of Earth -
Put out my hand, and touched the face of God.”

P.O. John Gillespie Magee 1941

Offline Repainted

  • Jr. Member
  • **
  • Posts: 55
Re: Painting figures 101
« Reply #40 on: October 10, 2013, 07:55:54 PM »
Great stuff Larsa..

But can you hurry up - I'm about to start painting my figure!  ;D

Watching with interest..

Guy
Hi Guy
Whats the hurry??? And if so check in my bust tutorial or pm me about your Q:s

I´m hurrying as much I can my friend, but the paint have to dry.
Regards
LarsaQ

Offline Repainted

  • Jr. Member
  • **
  • Posts: 55
Re: Painting figures 101
« Reply #41 on: October 10, 2013, 08:44:46 PM »
Hi While the figure drying up my attention was on the bench/table. With soften light brown as base colour I used Raw Sienna and Raw Umbra oil paint for the wood graining. Painting these grains with an old very used brush is the best way for me. The oils where diluted to milk like consistence and washed in one direction. Care was taken to stay inside each plank on the top side of the table. When all covered I used the same brush to “brush” off excess paint from the table. The old worn out jeans I have when modeling had to take the excess paint so the old brush stayed as dry as possible. Someday I´ll have to take a picture of these jeans….


The importance here is to stay in the grains direction all the time and using long strokes with the brush, from one end to the other in one stroke .When enough oils was brushed away the soften light brown base colours is shining thru and give the table that wooden graining. So from here the table/bench will have 24 hours of drying time before I can give it stains and a more worn look. Just remember not to overdo the grains, so stay in scale buddy.


When the oils is dry it will need a sealer otherwise you will disturb the oils again when painting on stain and some light dry brushing. I will use a semi gloss varnish from Humbrols for that.
Comment and critics are welcome
Regards
LarsaQ


Offline Ernie

  • Hero Member
  • *****
  • Posts: 3961
  • "Once more into the breach"
Re: Painting figures 101
« Reply #42 on: October 10, 2013, 08:59:40 PM »
Wonderful work, Larsa.  The woodgrain on the table is great.  I bet your
painting jeans are a work of art itself. ;) ;D

Cheers,
Ernie :)
The new old guy, take two...

Offline Des

  • Administrator
  • Hero Member
  • ******
  • Posts: 9325
    • ww1aircraftmodels.com
Re: Painting figures 101
« Reply #43 on: October 10, 2013, 09:12:41 PM »
The workbench looks fantastic Larsa with excellent wood grain, looking forward to seeing more.

Des.
Late Founder of ww1aircraftmodels.com and forum.ww1aircraftmodels.com

Offline Repainted

  • Jr. Member
  • **
  • Posts: 55
Re: Painting figures 101
« Reply #44 on: October 10, 2013, 09:40:49 PM »
Wonderful work, Larsa.  The woodgrain on the table is great.  I bet your
painting jeans are a work of art itself. ;) ;D

Cheers,
Ernie :)
Thanks Ernie
LarsaQ