Author Topic: LVA Fokker D.VII from Wingnut Wings  (Read 27551 times)

Offline mgunns

  • Hero Member
  • *****
  • Posts: 2255
Re: LVA Fokker D.VII from Wingnut Wings
« Reply #75 on: January 29, 2013, 08:59:49 AM »
Hello Ivo:

Part 35 is the prop boss to attach the prop to the shaft on the engine.  Your engine is looking outstanding with the extra work you have put into it, it is paying off for you.  The scheme is intersting as it is so different from the usual. 
Looking forward to seeing you wrap this up.

Best

Mark
Mark

We few, we happy few.....

Offline GAJouette

  • Hero Member
  • *****
  • Posts: 3579
  • " Beware of the Spanish Inquisition"
Re: LVA Fokker D.VII from Wingnut Wings
« Reply #76 on: January 30, 2013, 01:01:12 AM »
  Ivo,
Magnificent additional details for her Mercedes my friend. Your going the extra mile with the aftermarket detail items certianly paid off outstandingly. Looking forward to the next awesome update.
Highest Regards,
Gregory Jouette
" What Me Worry"

Offline IvotB

  • Sr. Member
  • ****
  • Posts: 426
Re: LVA Fokker D.VII from Wingnut Wings
« Reply #77 on: January 30, 2013, 08:16:04 AM »
PS: Great to see a Fokker D.VII in something other German colors.
Just a remark I forgot to make earlier: you know that there were also Fokker D.VII's in the US army and I found a picture of a D.VII with a canadian maple leaf. So there must be more than D.VII's from Germany.

Ivo

Offline miamiangler

  • Full Member
  • ***
  • Posts: 194
Re: LVA Fokker D.VII from Wingnut Wings
« Reply #78 on: January 30, 2013, 10:11:21 PM »
  Your Fokker is looking great!. I did my timing gear in nato black with mix of gun metal ,screws and springs in steel then a wash of black .

   I`m thinking of doing a Polish Fokker in the near future.

                                                                                                Willi 


Offline IvotB

  • Sr. Member
  • ****
  • Posts: 426
Re: LVA Fokker D.VII from Wingnut Wings
« Reply #79 on: February 01, 2013, 09:58:30 AM »
I haven't found any flares or flare guns on pictures of an LVA D.VII. So I'm not going to use these parts this time.

I have made some progress with the engine, but almost all parts still should get painted.

I started with the priming valves. As explained earlier I planned to use brass handrail knobs used in model railway models from DJH, but next to the spark plugs from Taurus Models they were just too big. So I went for smaller knobs made by Phildie. A small supplier of parts for building H0 model railroad locomotives:


Here you see the brass castings of the handrail knobs next to the Taurus Models Spark Plugs.

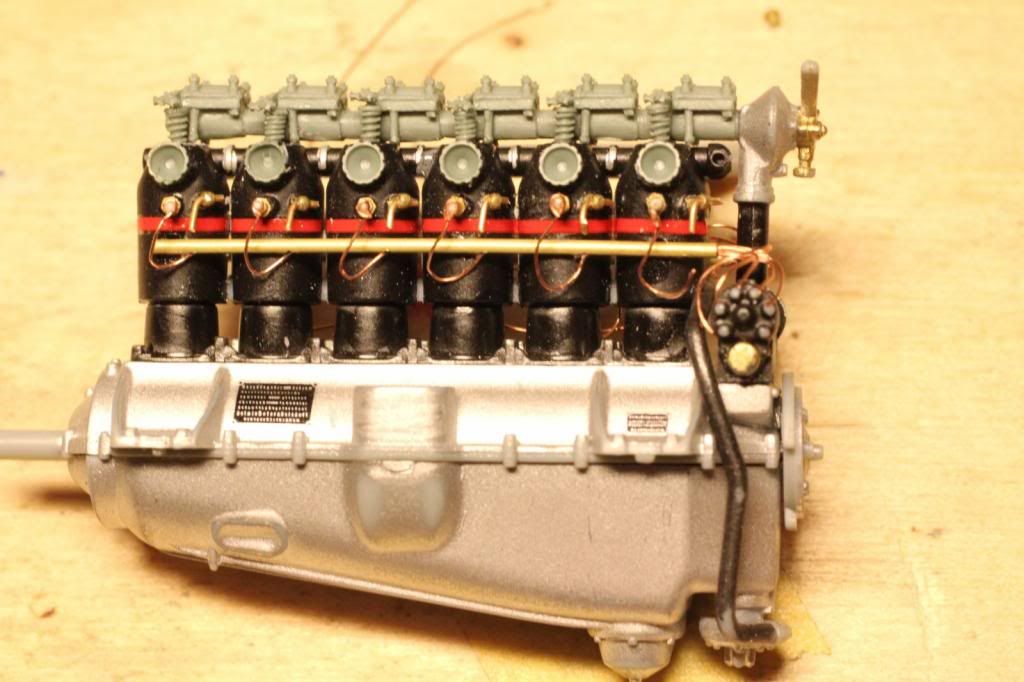
So first I drilled larger holes for the priming valves, fitted the handrail knobs inside and cut a small piece of 0,4mm brass wire and bended it. Then I glued it in the handrail knob and it looks like a priming valve. If it would haven been a little bigger I might have drilled a small hole on top of the handrail knob, but as this was just to small I didn't do it.


I may paint the handles gloss black (that's what they are on pictures of the engine in the WNW manual), but perhaps I'll leave them bare metal. They will weather by themselves anyhow.

Next step were the fitting of the spark plugs on the intake side of the engine:


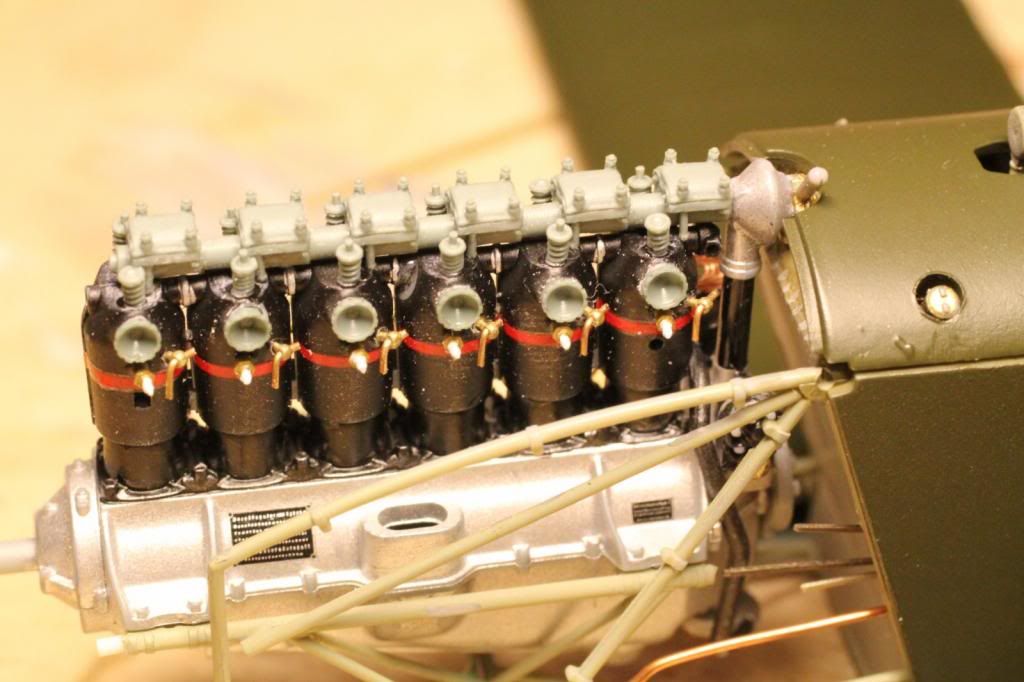
Picture doesn't really show them. I would have preferred that Taurus Models would put those spark plugs on a little piece of resin with a smaller diameter than the spark plug itself, because it would make fitting easier, by fitting them into a hole in the cylinders.

Same picture, another angle.


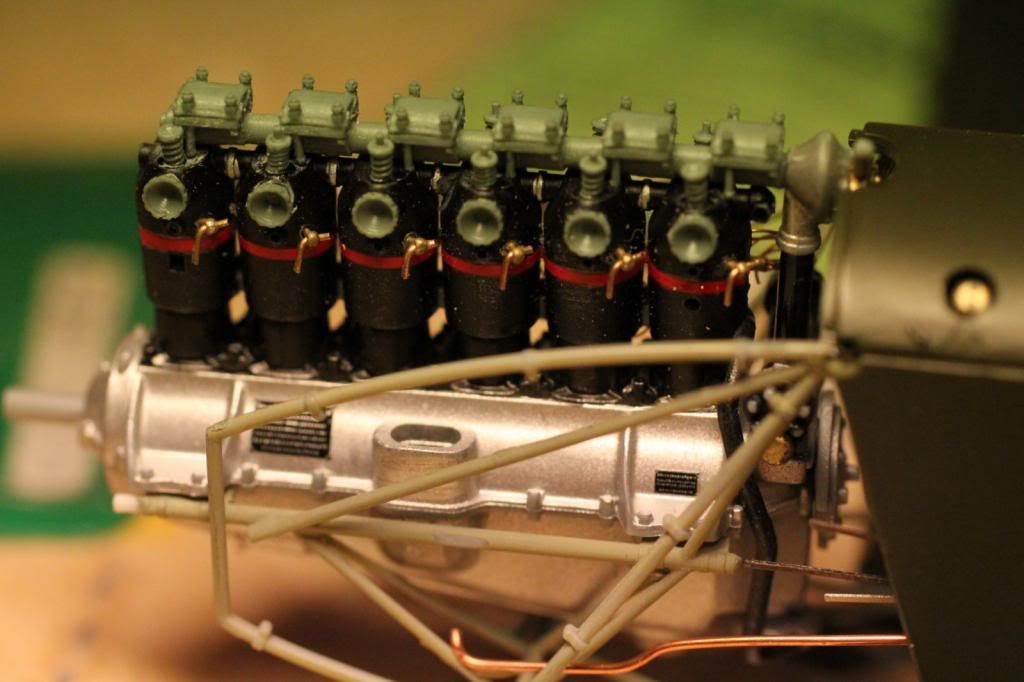
Next step is to make the spark plug leads:


I explained these earlier. The finishing touch is just to bend the copper wires from below the tube with a nice curve upwards and turn them around the end of the spark plug. At the other end you just bend 6 wires towards the contacts of the magneto.

Next step I took was placing the rockers:


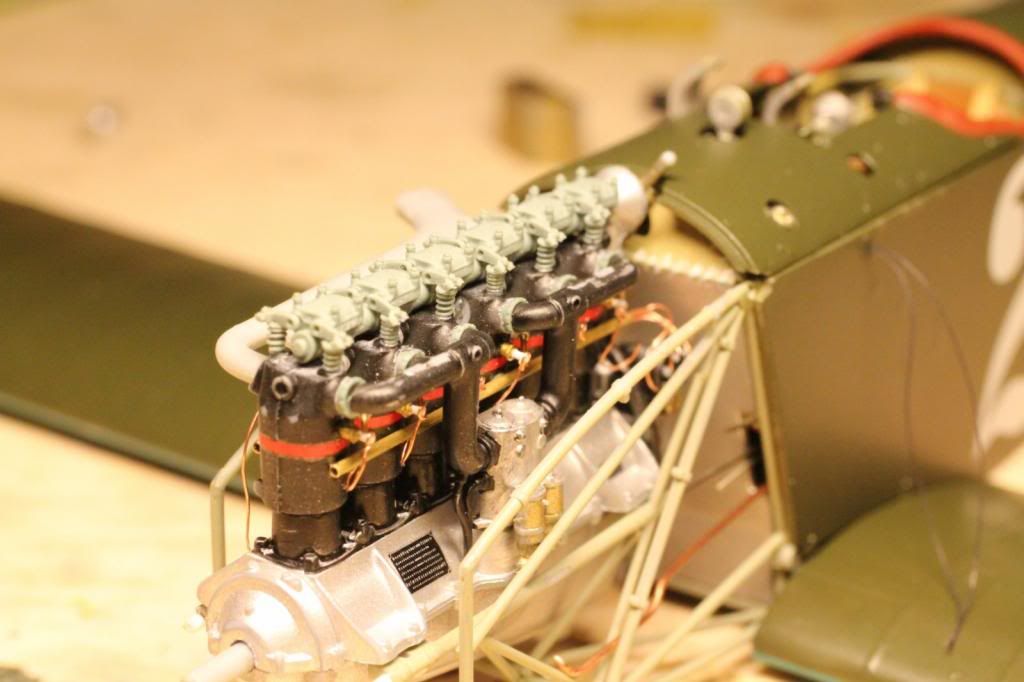
For best fit the valve springs should have been placed at a bigger angle to the cylinder. It doesn't feel right though, but it would mean a better fit. I decided that I wanted the rockers to sit in the correct location on the rocker boxes and accept that the rockers are a little bit too far to the left and right, but the total picture of the rocker boxes, camshaft and rockers would be correct. There are 4 opened valves and 8 closed, you can see it, but I have the impression that you need to know where they are. Perhaps after painting and especially some dry brusing of the valve springs will make this easier to see.

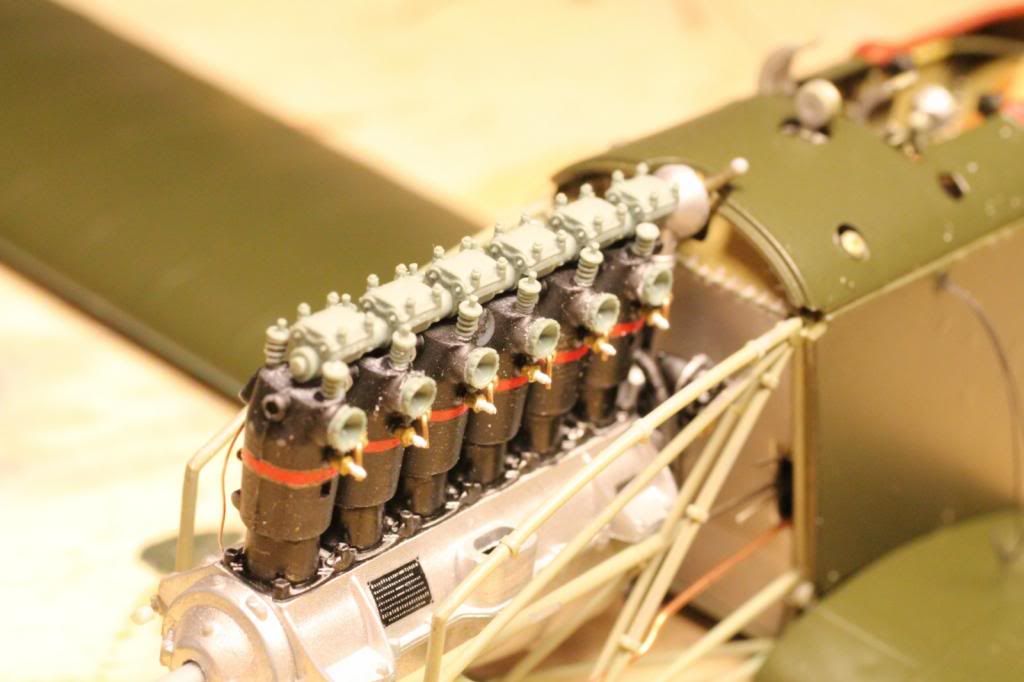
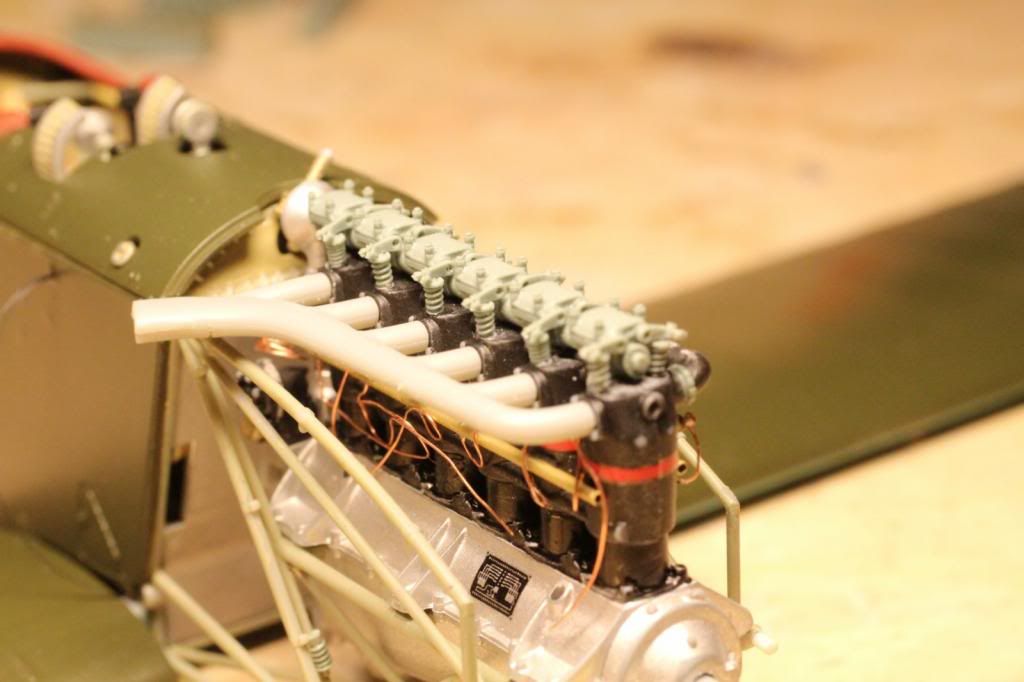
A view of the other side of the engine. Here the spark plugs are still missing, so I need to do some work here.


Top view of the rocker boxes and rockers:


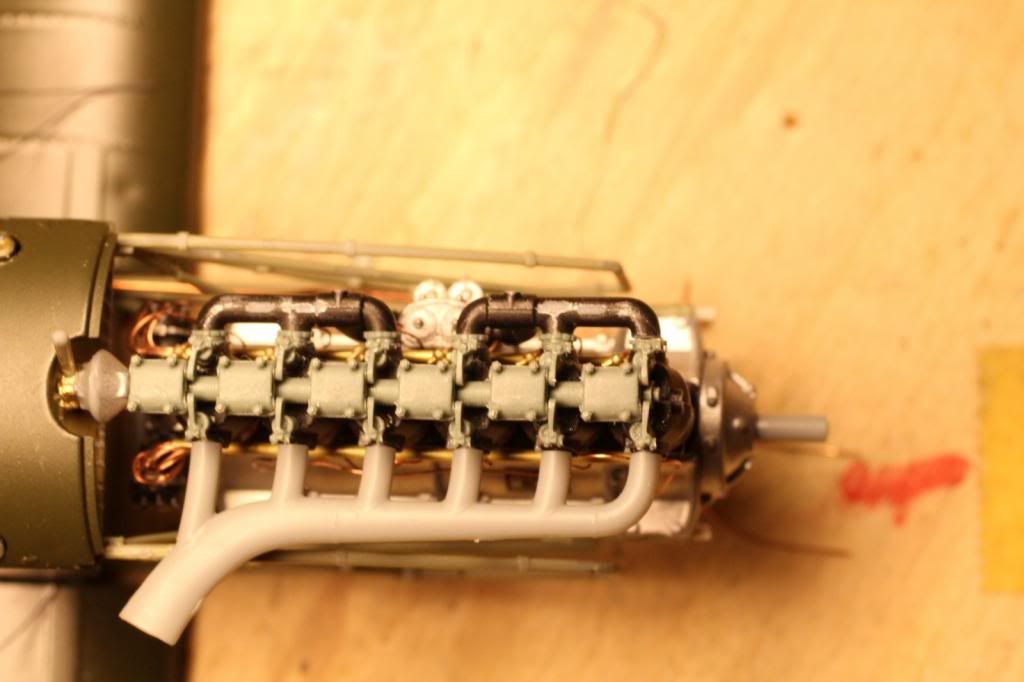
And just a nice picture.


Next step is the exhaust side and painting the entire thing. The lower part of the engine is too shiny and needs some weathering. I have seen excellent examples, so I am going to try to reproduce that as well.

regards,
Ivo
« Last Edit: February 01, 2013, 10:00:39 AM by IvotB »

Offline GAJouette

  • Hero Member
  • *****
  • Posts: 3579
  • " Beware of the Spanish Inquisition"
Re: LVA Fokker D.VII from Wingnut Wings
« Reply #80 on: February 01, 2013, 12:36:21 PM »
  Ivo,
Now that's one magnificent Mercedes my friend. The additional details you've included on the Mercedes are outstanding. Thank you for one heck of a great and informative thread.
Highest Regards,
Gregory Jouette
" What Me Worry"

Offline stefanbuss

  • Hero Member
  • *****
  • Posts: 976
Re: LVA Fokker D.VII from Wingnut Wings
« Reply #81 on: February 01, 2013, 04:45:13 PM »
Quote
I would have preferred that Taurus Models would put those spark plugs on a little piece of resin with a smaller diameter than the spark plug itself, because it would make fitting easier, by fitting them into a hole in the cylinders.
What do you propose for fitting Taurus' spark plugs? Enlarging the holes that are already present? Or do they fit as they are?

Stefan

Offline IvotB

  • Sr. Member
  • ****
  • Posts: 426
Re: LVA Fokker D.VII from Wingnut Wings
« Reply #82 on: February 01, 2013, 06:21:05 PM »
Gregory,

Thanks, but its not ready yet. On my rather unforgiving last picture you see a vertical seam in front. I must do something about that. Also between the carburator and the intake manifold there are thesame nuts as between the intake manifold and the cylinders. I didn't realise those yet. The carburator controls are also still missing. But I am nearing the final assembly  ;)

@ Stephan,

As I wasn't able to have a stub left at the spark plugs when cutting them of the resin casting, I just glued them directly at the indicated locations of the cylinders. I would have preferred if there would have been a piece of resin left with a smaller diameter than the spark plug itself and then fitting would be easier and more exact, because then you could enlarge or drill a hole in the cylinder to match that piece. That is why I also think that the spark plugs made from brass tubes and brass wire as presented by Des at this website will be easier to install.

The Taurus Models are on the other hand a good representation and it works faster than making your own out of 4 different parts.

regards,
Ivo
« Last Edit: February 01, 2013, 09:49:09 PM by IvotB »

Offline Chris Johnson

  • Hero Member
  • *****
  • Posts: 1959
Re: LVA Fokker D.VII from Wingnut Wings
« Reply #83 on: February 02, 2013, 12:05:57 AM »
Awesome engine detailing and painting Ivo! It's a superb looking Mercedes.

Cheers,

Chris
You can have it good; You can have it fast; you can have it cheap. Pick any two, but all three are impossible.

Offline Epeeman

  • Hero Member
  • *****
  • Posts: 1419
Re: LVA Fokker D.VII from Wingnut Wings
« Reply #84 on: February 02, 2013, 01:26:53 AM »
Ivo -

Super, super detailing work - your DVII is going to looks the business when complete.

Regards

Dave
As we say in fencing, what's the point?

Offline IvotB

  • Sr. Member
  • ****
  • Posts: 426
Re: LVA Fokker D.VII from Wingnut Wings
« Reply #85 on: February 02, 2013, 08:47:23 AM »
Some additional work on the engine tonight. The exhaust side got the spark plugs too and they are connected now to the sprak plug leads. Further a lot of painting. rust for the spark plug leads tube and exhaust, beige for the spark plug leads, black for the spark plug connections and priming valve handles and a mixture of metalisers for the intake manifold nuts and the rocker boxes assembly. The nice thing about the pictures is that I see now there are actual nuts on the rocker boxes that you really don't recognise when working on the model, because it is a lot smaller than in the pictures. I am not really satisfied with the finish of the rocker boxes. Perhaps I am going to highlight some details with a dry brush run or I could paint the nuts a lighter shade. Also the exhaust is definitely going to recieve another treatment, because this intended rust color is absolutely worthless.

But some pictures:


Just a paint job


Now you do see opened and closed valves


Intake manifold nuts and priming valves come out nicely in this picture


Exhaust side


View from the top


Regards,
Ivo

Offline coyotemagic

  • Hero Member
  • *****
  • Posts: 7710
  • "Here's to not buggering it up." -Winston Chuchill
    • My Models
Re: LVA Fokker D.VII from Wingnut Wings
« Reply #86 on: February 02, 2013, 09:13:40 AM »
Excellent work on the engine, Ivo.  Those Taurus bits really enhance the engine beautifully.
Cheers,
Bud
"All men dream: but not equally. Those who dream in the dark recesses of the night awake in the day to find all was vanity. But the dreamers of day are dangerous men, for they may act their dreams with open eyes, and make it possible." -T. E. Lawrence

Offline stefanbuss

  • Hero Member
  • *****
  • Posts: 976
Re: LVA Fokker D.VII from Wingnut Wings
« Reply #87 on: February 04, 2013, 04:23:53 PM »
Yes, really beautiful work. A lot to copy from for my Fokker project...

Stefan

Offline IvotB

  • Sr. Member
  • ****
  • Posts: 426
Re: LVA Fokker D.VII from Wingnut Wings
« Reply #88 on: February 04, 2013, 06:07:00 PM »
Did some work on the engine over the weekend. I have now painted the exhaust with Modelmasters burnt iron metaliser paint, which improved it enormous and I also overpainted the valve, rocker arms and rocker boxes assembly with H 27003, which improved that too. It is however difficult to buff this assembly, but still it looks improved to me. I also started with the copper tubes running from the air pump. I was pleased with it until I noticed that the radiator now didn't fit anymore. This just requires some extra bending, but it is impeding progress. And I could add some more detail to the engine as two additional (water) lines between the water pump and the carburator and intake manifold. It is almost ready to recieve its final location in the engine room.

regards,
Ivo

Offline Des

  • Administrator
  • Hero Member
  • ******
  • Posts: 9325
    • ww1aircraftmodels.com
Re: LVA Fokker D.VII from Wingnut Wings
« Reply #89 on: February 04, 2013, 06:34:52 PM »
Excellent detailing and painting of your engine Ivo, you did a brilliant job creating the primer taps, they look very realistic. The Taurus parts have added a great deal to the engine and brings it to life, I look forward to seeing the engine completely finished with all the final paint touches.

Des.
Late Founder of ww1aircraftmodels.com and forum.ww1aircraftmodels.com