Author Topic: Eduard Weekend Edition 1/48 SE5a - Hispano Suiza. Eduard Weekend Edition 1/48  (Read 10868 times)

Offline Fvdm

  • Sr. Member
  • ****
  • Posts: 326
Re: SE5a - Hispano Suiza. Eduard Weekend Edition 1/48
« Reply #15 on: January 21, 2021, 04:16:21 AM »
This looks way better.

Offline Dave Brewer

  • Hero Member
  • *****
  • Posts: 514
Re: SE5a - Hispano Suiza. Eduard Weekend Edition 1/48
« Reply #16 on: January 21, 2021, 08:49:26 AM »
Agreed, well worth the effort Hugh.

Offline Monty

  • Hero Member
  • *****
  • Posts: 1643
Re: SE5a - Hispano Suiza. Eduard Weekend Edition 1/48
« Reply #17 on: January 25, 2021, 01:02:33 AM »
A great start to this build, Hugh! And I do like your explanations and extra bits of research - I love that interesting stuff! I attacked the Meng wing detail just as you did for this kit - I agree with you 100%! Regards, Marc.

Offline hrcoleman66

  • Sr. Member
  • ****
  • Posts: 275
Just as an update...

I have been working on the Cockpit and details therein.  Painting, painting...

I'll show it when I have something to show, but at the moment, it's just gluing bits together and painting it all up... 

The plastic all goes together very well and the details have been very well done.  It's a complex structure though...  Nearly on par with a Hawker Hurricane, or Tempest.  Eduard have ensured that pretty much every aspect of the Cockpit details are represented in some way.

One other thing I'll say though...  My eyes don't seem to be as good as they used to be.  I'm struggling to discern individual details for painting even with 1.5 x reading glasses...  I must be getting old.

Photos soon!

Cheers,

Hugh
« Last Edit: February 01, 2021, 12:59:55 PM by hrcoleman66 »

Offline Alexis

  • Hero Member
  • *****
  • Posts: 7947
  • Love the self
Looking forward on your up-date Hugh on what you have done so far .  :)


Alexis
Hurra ! , Ich Leben Noch
Body and life is a vessel we use to travel the planet . Femininity is the gift , The miracle comes from what we do with it .

Offline Early Bird Fan

  • Sr. Member
  • ****
  • Posts: 261
i'm just starting the revell brand version of this kit so i'm looking forward to seeing yours come together. I know what you mean about the cockpit, so many parts and colours to paint  :D

Offline Monty

  • Hero Member
  • *****
  • Posts: 1643
1,5 reading glasses, Hugh?? Amateur amongst us (senior) modellers! Glasses, +3, optivisor with 2 lenses... But watching and following intently... Regards, Marc

Bughunter

  • Guest
I am already looking forward to the pictures of the next steps!

Cheers,
Frank

PS: still modeling without glasses ;)

Offline hrcoleman66

  • Sr. Member
  • ****
  • Posts: 275
Patience everyone...  I've been finishing details on the Cockpit preparing for a spray coat of satin/semi gloss clear to prep for an oil wash.

My ability to paint in my new work area (the other corner of the spare room where I have set up my home office) is restricted by the 18 exotic parrots that live in our house...  Paint fumes are not going to go down well, and my wife has a nose like a blood hound!

Cheers,

Hugh

Offline hrcoleman66

  • Sr. Member
  • ****
  • Posts: 275
Well, a slight hitch.

A dry fit with the fuseage frame attached to the floor, which is integral with the lower wings, and the Fuselage sides showed me that;

a) the frame was slightly too wide and the pressure when pushed down between the inboard ends of the wings pushed the wings apart and down, thereby causing the moulded in dihedral to virtually disappear.  So I was forced to obliterate the ezyline rigging that I had applied for the frame bracing and sand the sides slightly so that they were a better fit with the floor/wings.    The fuselage bracing will be replaced with fine copper wire.

b) Somehow, I had gotten the seat glued about 1.5mm too far forward...  which due to complexity of geometry (the seat bearers are at an incline), was then interfering with the upper cockpit section...  So I removed the seat, put it where it was supposed to be and carried on...  But I had to remove the harness which I had fabricated from paper strip...  This gave me an opportunity to replace the harness though with my preferred lead foil, donated from a bottle of Bron Brothers Tawny Port...  Must have been a while ago I snaffled that away (the Port and the Foil).

All this means some cleaning up with the paint job as well...

Sorry guys.

Cheers,

Hugh

Offline hrcoleman66

  • Sr. Member
  • ****
  • Posts: 275
Well, once you have the cockpit done, the rest goes together very quickly.

Shots of the cockpit fitted in the assembled fuselage.


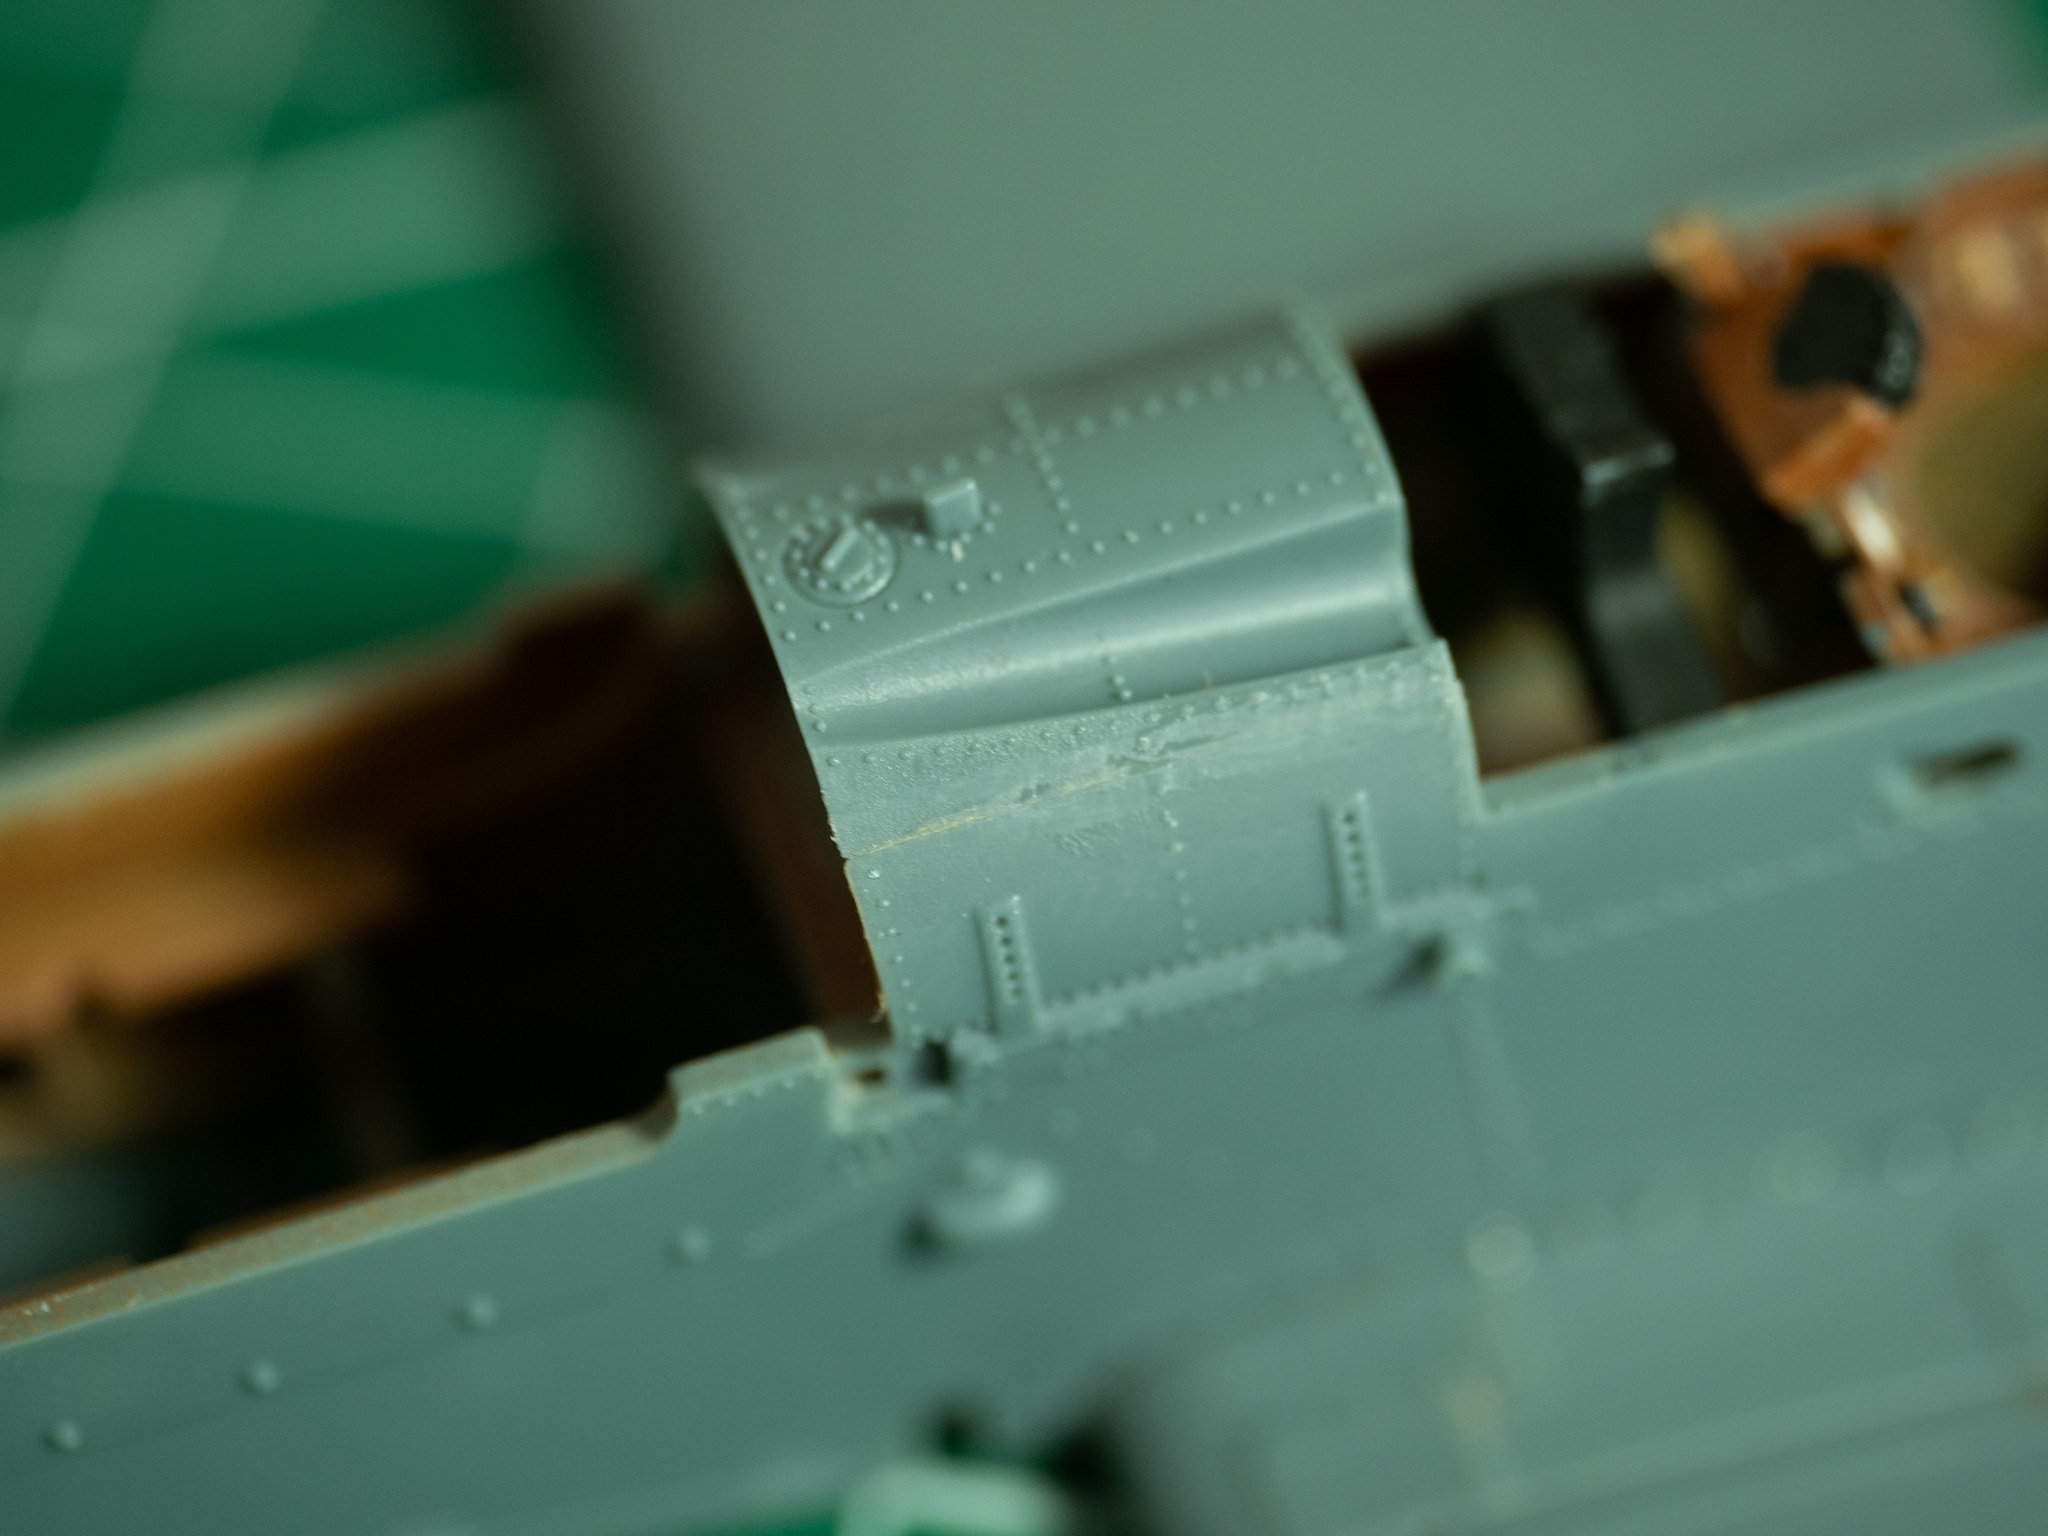
The Fuel tank goes on easily, but the seam needs great care in cleaning up so as not to destroy all the lovely rivet detail.


Dry fitting the Cockpit combing and surrounds over the Vickers Gun (How the hell am I going to mask that for painting???).  This will need great care in assembly and gluing as it also will need cleaning up at the join.


The rear underside of the fuselage is going to need a LOT of filling.


I wonder if maybe I should have tackled something a little less... detailed to start back in after so long away...  Maybe the Eduard Ne11 Baby (weekend)... 

I've had to invest in an Optivisor, which is helping, but my hands are not as steady as they once were either...  This getting old, it can suck on a big hairy...

Maybe 1/32 is more my mettier these days...  And then moving on to 1/24?

So far, my comments on the kit...  Lots of fine detail, (not withstanding the rib stitching is overdone)...  A complex assembly, which needs great care.  Lots of dry fitting and thinking ahead. 
Eduard announced that they were doing an SE5a many years ago...  Like, 20 odd years ago.  I remember it was just after I built the Blue Max limited run kit.  I was so looking forward to it.  But it seemed never to happen.  I didn't even know it was released until I visited Metro Hobbies one day after a Whitehorse Orchestra rehearsal and happened to see it on the shelf. 
My thinking is that they delayed until they thought they could do it justice.  Have they?  Done it justice?  Yes, but it's not an easy build for someone who hasn't built a 1/48 scale kit since he could still see all the details without the need for reading glasses and had a much steadier hand.

I think I'm going to have to do a couple Mojo finding build after this one.  I have lots of kits I can choose from...

Cheers,

Hugh


« Last Edit: February 12, 2021, 09:01:24 AM by hrcoleman66 »

Offline Alexis

  • Hero Member
  • *****
  • Posts: 7947
  • Love the self
Nice work within the pit Hugh , really like your wood tones . That gap on the underside doesn't look very pleasing in the least bit . You are doing a super job on the kit , looking forward on the next up-date .


Alexis
Hurra ! , Ich Leben Noch
Body and life is a vessel we use to travel the planet . Femininity is the gift , The miracle comes from what we do with it .

Offline hrcoleman66

  • Sr. Member
  • ****
  • Posts: 275
Thanks Terri,

But to be honest, I'm not 100% happy with the finish...  I need more practice.

Cheers,

Hugh

Online RAGIII

  • Hero Member
  • *****
  • Posts: 18845
I think your interior painting and detailing looks Fantastic! I am sort of shocked at the fit as this isn't an Old Mold and one would expect better! I also notice some really nice molded detail and some like the access hatch on the right fuselage that look sort of iffy  ::) JMHO,
RAGIII
"A man has to know his limitations": Harry Callahan

"Don't slop it on" Lynda Geisler

Bughunter

  • Guest
The fit of this kit is perfect. I know this , because I build it already. But it is unforgiving regarding any small mistake inside.
I guess you have paint on some glued surface. This is often written also about WNW kits.
If the cockpit frame is sitting right and deep enough on the lower wing, the fuselage halves fits around the seat frame.

This is no critics on your work, nicely painted by the way, just a information for the next builder of the kit to look for.
I must also admit, that it is definitly not an easy kit because of the number of parts. Don't get me wrong, it is a great kit with a fantastic engineering (let's call it a WNW in 1/48), but it needs some care during build.

Cheers,
Frank