Author Topic: Lloyd C.V 1/32 Scratch Build Project  (Read 44903 times)

Offline mgunns

  • Hero Member
  • *****
  • Posts: 2255
Re: Lloyd C.V 1/32 Scratch Build Project
« Reply #105 on: February 09, 2013, 11:37:43 PM »
Hello Bob:

The engine looks good sitting in the compartment and adds a sense of progress on the build; not that the fuselage halves don't.  By reading your narrative, it also seems as if you have worked out a lot of the small details to good effect.  So.......I will be looking forward as to how you progress.  I too would welcome an A/H albie from WNW.  Maybe in the November - December time frame?

Best

Mark
Mark

We few, we happy few.....

Offline rhallinger

  • Hero Member
  • *****
  • Posts: 1976
Re: Lloyd C.V 1/32 Scratch Build Project
« Reply #106 on: February 10, 2013, 02:47:10 AM »
Time for a mini photo update.  The HGW seatbelts are installed and the cockpit is officially finished.  Here are some shots of it sitting in place in the fuselage:


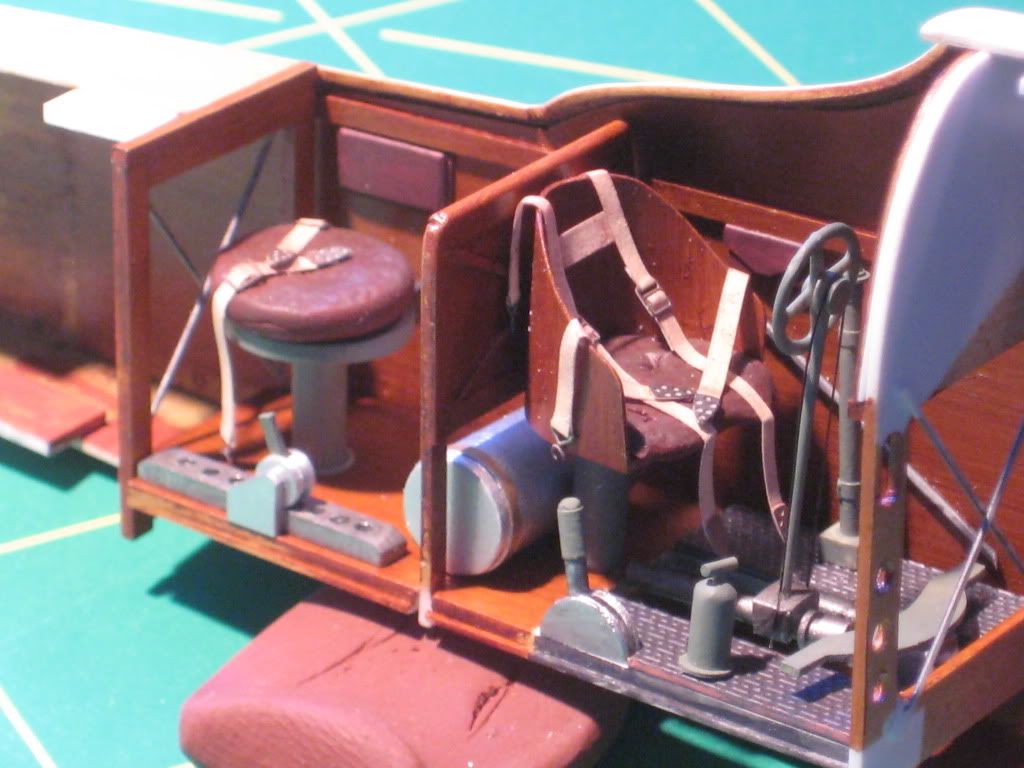
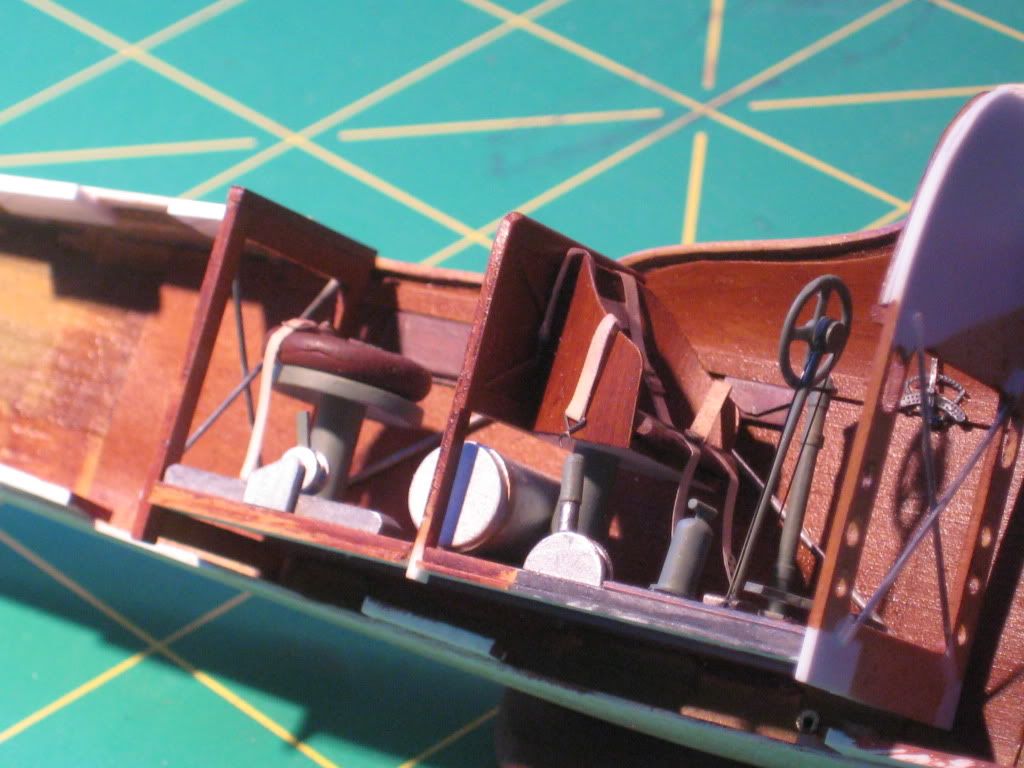
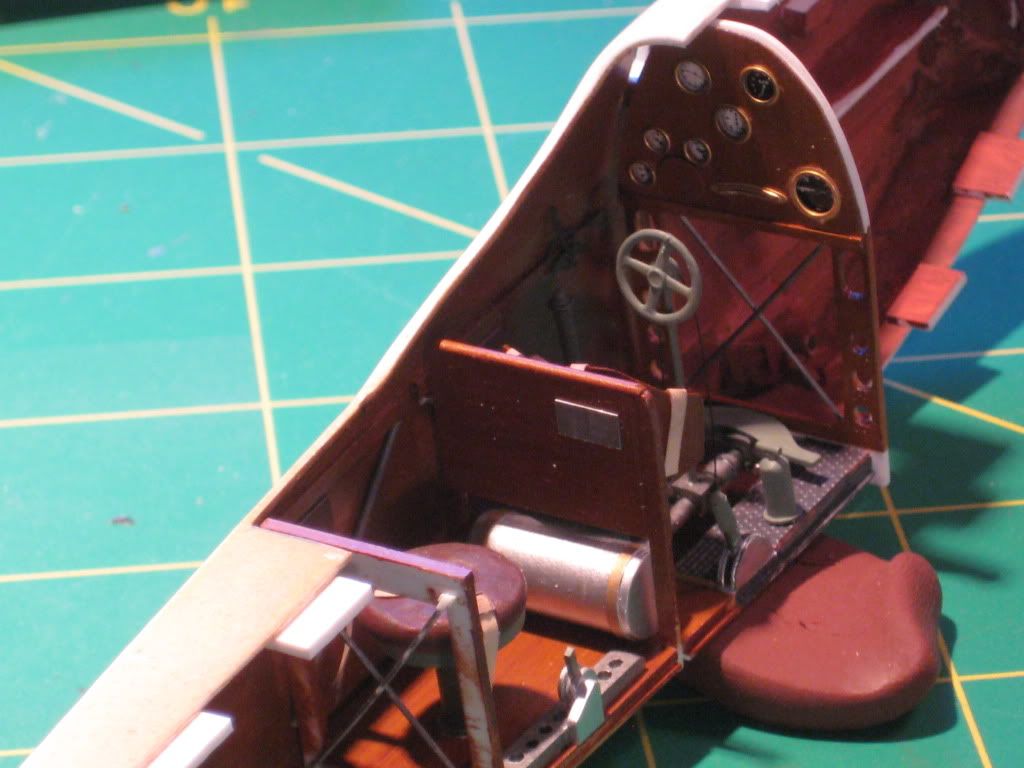
I'm happy with the overall look, but I think the observer's stool might be a tad high.  I'm not going to change it though, as it will look fine from above when the fuselage is closed up.  I have some photos of the Lloyd with a pilot in his seat, and it apears that the crew sat fairly high in the cockpit anyway (the photos also show how relatively small the Lloyd was for a 2-seater---you can really tell that with the pilot in the cockpit).  I still have to add some wires along the near side of the cockpit framing.  The observer's desk will be added when the cockpit assembly is glued in place, as it rests on the interior fuselage longeron running along the top of the cockpit on the port side.  It will cover the front port quadrant of the observer's space.

This is as much detail as I like in a cockpit, since much of it will be hard to see once the fuselage is closed.  Not museum standard, but I'm satisfied, and it was fun to do!  I've been largely following the lead of the two build threads for the 1/48 Special Hobby Lloyd C.V with regard to the interior, along with the prototype photos posted there.

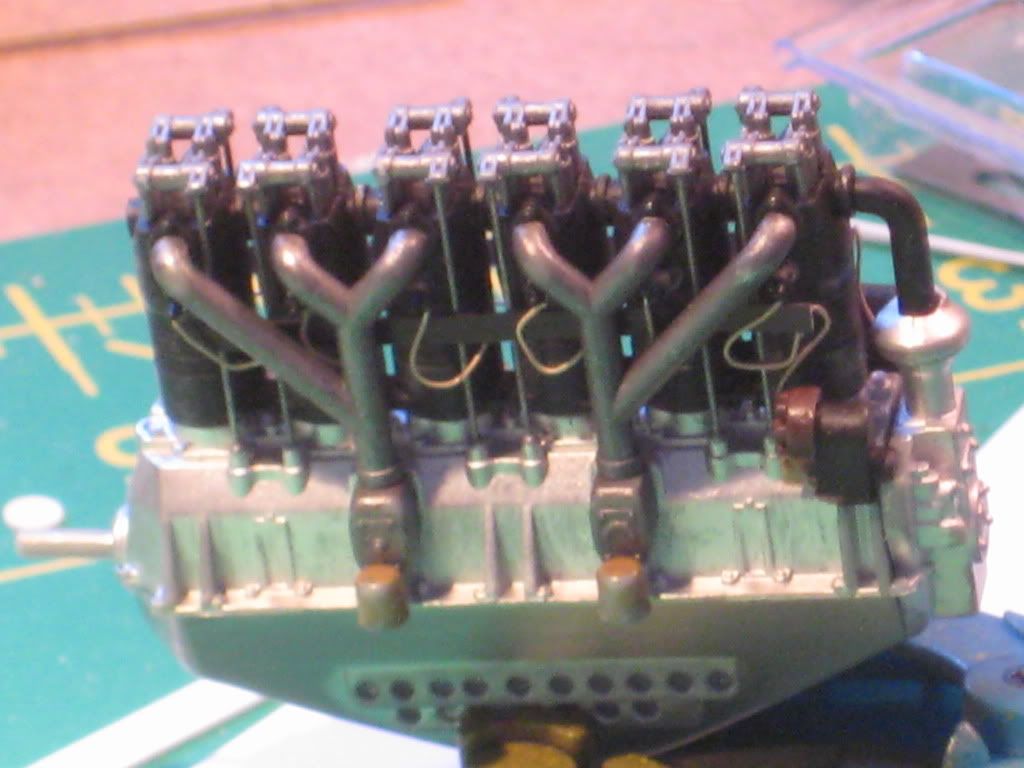
The engine is now complete with the addition of spark plug wires, although you can't see much of them behing the tree-like manifold.  I chose to do little detailng or weathering of te engine (a WNW sprue from the LVG kit) because most of it will be invisible in the fuselage, hence no wires to the distributor caps, since they will never be seen.  Here's a shot:


I hope to close up the fuselage this weekend.  At last!  I finally feel like I mght get this done by April 29th! ;)  Thanks for watching. 

Regards,

Bob

Offline coyotemagic

  • Hero Member
  • *****
  • Posts: 7710
  • "Here's to not buggering it up." -Winston Chuchill
    • My Models
Re: Lloyd C.V 1/32 Scratch Build Project
« Reply #107 on: February 10, 2013, 02:59:15 AM »
Brilliant work, Bob!  Just perfect.
Cheers,
Bud
"All men dream: but not equally. Those who dream in the dark recesses of the night awake in the day to find all was vanity. But the dreamers of day are dangerous men, for they may act their dreams with open eyes, and make it possible." -T. E. Lawrence

Offline mgunns

  • Hero Member
  • *****
  • Posts: 2255
Re: Lloyd C.V 1/32 Scratch Build Project
« Reply #108 on: February 10, 2013, 11:55:51 AM »
Hi Bob:

Looking really good.  It is neat to see this come together.  How do you like the HGW seat belts.  I used them for the first time in my Pfalz DXII.  The wanted to curl up.  I soaked them in water to no avail, and finally had to CA glue them in place.  I don't like fiddling with PE, I guess I like them, and I will use them again.  Wondering what you think.  You are certainly doing a bang up job on this, and I suspect with due diligence, you will meet the 29 April deadline.

Best

Mark
Mark

We few, we happy few.....

Offline rhallinger

  • Hero Member
  • *****
  • Posts: 1976
Re: Lloyd C.V 1/32 Scratch Build Project
« Reply #109 on: February 10, 2013, 12:55:49 PM »
Thanks all! 

Mark, I had to CA the belts also, but I do like them better than the PE ones, because they are more supple and fold over compund curves better, and I think they hang more loosely and realistically.  Not perfect, but a little easier to work with than the PE, IMO.  Of course, they're a little more work to assemble, but I'll take the tradeoff.

Well, the fuselage is now buttoned up, and the seams filled with CA, sanded, then Squadron green putty applied.  I'll try to get the seams sanded tomorrow.  I'll post some pix when that's complete.  I think I'll take a break from the fuselage for a bit and work on the wings.  The bottoms are sanded and just need to have the battans cut and applied.  The tops still need lots of sanding before the battans are applied.  When that's all done, I'll be ready to start painting the base coat for the wood. :)

I am also in the process of ordering a wooden prop for the LLoyd from Doug Craner at the Prop Shop.  Doug has been very helpful looking into an appropriate propeller for the Lloyd, and its been interesting learning about A-H props.  I'm sure it will look great on this machine!

So far, so good.   

Regards,

Bob

Offline rhallinger

  • Hero Member
  • *****
  • Posts: 1976
Re: Lloyd C.V 1/32 Scratch Build Project
« Reply #110 on: February 11, 2013, 12:21:46 PM »
Time for the weekend update. :)

The fuselage is now closed and the seams filled and sanded, ready for exterior details.


The engine compsrtment vents can be seen in this shot.  Louvers will be added a little further back.


Here's a bit of the cockpit.  The observers desk will be added after the fuselage is painted,


Here are the bottom wings, as I am beginning to add the battans.


I have started fabricating some of the fuselage details, but will probably focus on the wings now until they are ready for paint.  I have decided to go with oils over sealed acrylic for the mahogany veneer finish, mainly because I plan to mask and paint the crosses on white fields for the scheme I have chosen, and masking over decals, even if sealed, makes me very nervous.  A further benefit is that oils will go much faster, even with the drying time, and we do have a deadline to meet. ;)

Regards,

Bob


Offline LindsayT

  • Hero Member
  • *****
  • Posts: 844
  • "Somehow it didn't seem like war at all..."
Re: Lloyd C.V 1/32 Scratch Build Project
« Reply #111 on: February 11, 2013, 12:59:24 PM »
That's gotta be a pretty satisfying step, Bob. Looks great.

Lindsay

Offline pepperman42

  • Hero Member
  • *****
  • Posts: 4507
  • Sergeant, my brown pants.......
Re: Lloyd C.V 1/32 Scratch Build Project
« Reply #112 on: February 11, 2013, 01:12:24 PM »
Coming together brilliantly!!!

Steve

Offline Galloway

  • Full Member
  • ***
  • Posts: 202
Re: Lloyd C.V 1/32 Scratch Build Project
« Reply #113 on: February 14, 2013, 01:00:22 AM »
Bob,

  Beautiful work ............ learning much from your build .............


  Ken 
"Slàinte mhòr agad!"

Offline Von Schlepp

  • Newbie
  • *
  • Posts: 37
Re: Lloyd C.V 1/32 Scratch Build Project
« Reply #114 on: February 14, 2013, 04:26:15 AM »
Me too, I love this forum for the learning aspect. The inspiration as well.

-Roger

Offline rhallinger

  • Hero Member
  • *****
  • Posts: 1976
Re: Lloyd C.V 1/32 Scratch Build Project
« Reply #115 on: February 14, 2013, 02:07:05 PM »
Here's a mid-week mini-report, since I'll be away this weekend and further progress will stall for a few days.

The battans are added and sanded on the lower wings, and the brass pins installed in the wing roots.  Naturally, I just had to assemble what I could, i.e., lower wings, fuselage and horizontal stabilizers.  I can actually start to see an aeroplane here!


The assemblage is only fit together by brass pins, and is merely temporary, just to see what it looks like and to make sure things line up.  No glue yet!  The aircraft is resting on the lower wing dihedral jig I made from sheet and srtip styrene.  The lower wings of the Lloyd have some dihedral, while the top wing is dead straight.

I've still got lots to do, but this test fitting is kind of exciting. ;D 

Regards,
 
Bob

Offline uncletony

  • Hero Member
  • *****
  • Posts: 4392
    • Aircraft In Pixels
Re: Lloyd C.V 1/32 Scratch Build Project
« Reply #116 on: February 14, 2013, 02:23:27 PM »
That is exciting!

Offline coyotemagic

  • Hero Member
  • *****
  • Posts: 7710
  • "Here's to not buggering it up." -Winston Chuchill
    • My Models
Re: Lloyd C.V 1/32 Scratch Build Project
« Reply #117 on: February 15, 2013, 02:01:37 AM »
That is exciting!
Yes, I must admit that my heart raced for a second when I opened the thread.  Really looking good, Bob.
Cheers,
Bud
"All men dream: but not equally. Those who dream in the dark recesses of the night awake in the day to find all was vanity. But the dreamers of day are dangerous men, for they may act their dreams with open eyes, and make it possible." -T. E. Lawrence

Offline Epeeman

  • Hero Member
  • *****
  • Posts: 1419
Re: Lloyd C.V 1/32 Scratch Build Project
« Reply #118 on: February 15, 2013, 02:59:26 AM »
Crickey - this is brilliant!

Sorry that I have not been following the GB builds, Bob - your cockpit work is very impressive, actually.

Regards

Dave


As we say in fencing, what's the point?

Offline GAJouette

  • Hero Member
  • *****
  • Posts: 3579
  • " Beware of the Spanish Inquisition"
Re: Lloyd C.V 1/32 Scratch Build Project
« Reply #119 on: February 15, 2013, 09:25:59 AM »
  Bob,
What can I say other than this project just keeps getting better and better with each update. It's a joy to follow my friend.
Highest Regards,
Gregory Jouette
" What Me Worry"