Author Topic: Another Felixstowe F.2a Build  (Read 15976 times)

Offline Scottypos

  • Newbie
  • *
  • Posts: 21
Re: Another Felixstowe F.2a Build
« Reply #60 on: July 02, 2018, 02:49:27 AM »
Hello Everyone,
  No, I was not abducted by aliens, but I was abducted by one of our clients at work and dragged overseas for a while. Now that's done I can get back to the important stuff.

  Being far away from all my toys, I haven't gotten much done. I finished laying decals for the plywood on the interior. I had repainted everything from tan to white so these see through decals would look better...


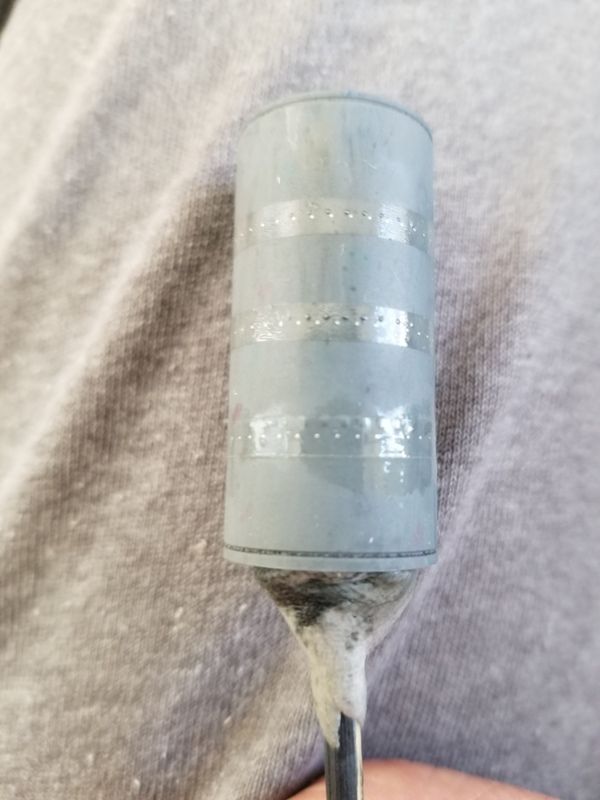
  I think it's looking much better with a white base. Now when I went to seal the decals with some varnish I used Vallejo satin varnish straight from the bottle. I like this stuff ok, but it doesn't go on very smooth, it's expensive for such a small bottle, and I think I need to keep looking for better stuff because when I went to mask over it, this happened...


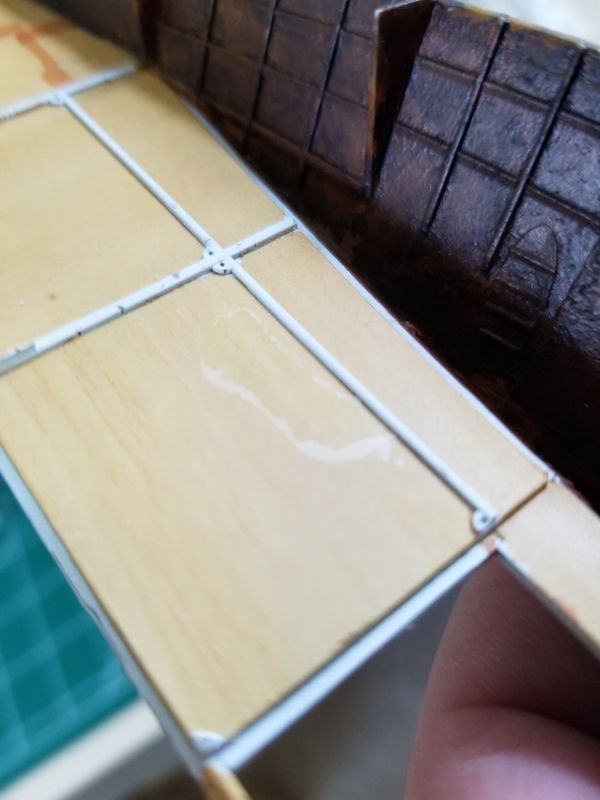
  The tape lifted the varnish so easily that a slight bump of the tape made it come right off. It's likely due to the decals not holding on to the varnish, but this could cause serious issues on other projects. Most of all, I am now without a way to seal large decals and it worries me about how to seal the outside of the plane when I do those decals. Anyone have any advice here? What types of varnish have you used to cover your wood decals?
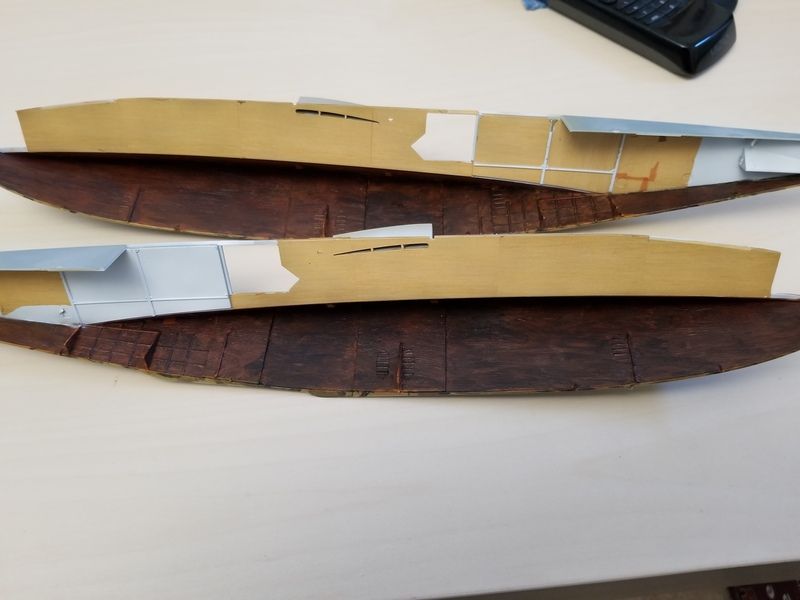
  After a few colorful words I moved on with the interior. I decided to finally glue the interior to one half of the fuselage and continue with interior details. I also put down a filter over the plywood to give it a little age and wear.


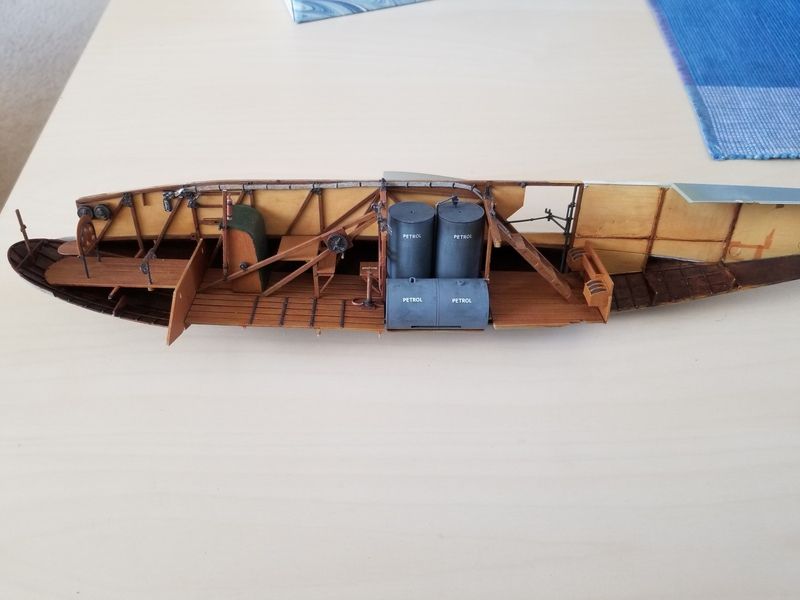
  I'm finally happy with the petrol tanks and added the decals and started with the plumbing after gluing them in. I finally received the rivet decals in the mail from HWG. I really like the products from these guys. They are cheaper than Uschi, and the quality is really close, if not the same, or even a little better. The only problem is it takes over a month to get an order from them. The rivets are so tiny it's doubtful they will be seen, but I wanted to give them a try and see how they work.


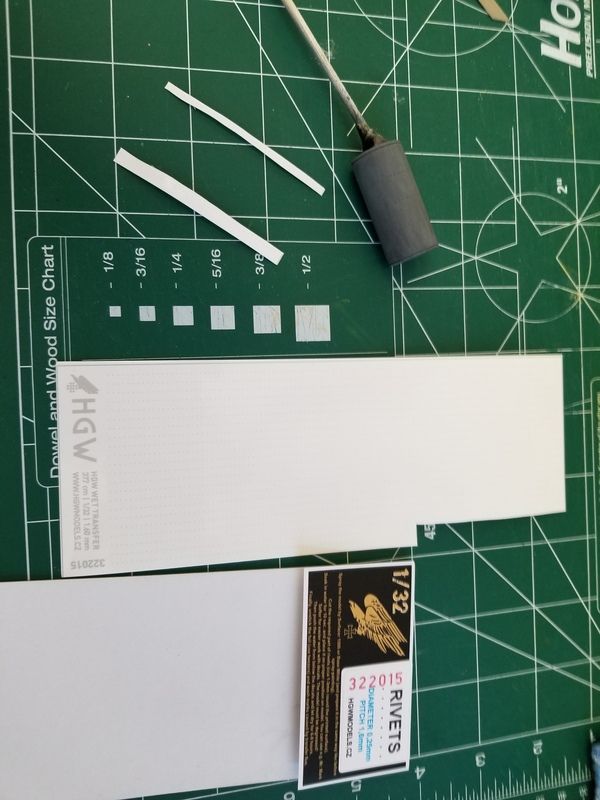
  The carrier film is rather difficult to get off, it's still on in the picture, but once it's off and the rivets are sealed, they look great.

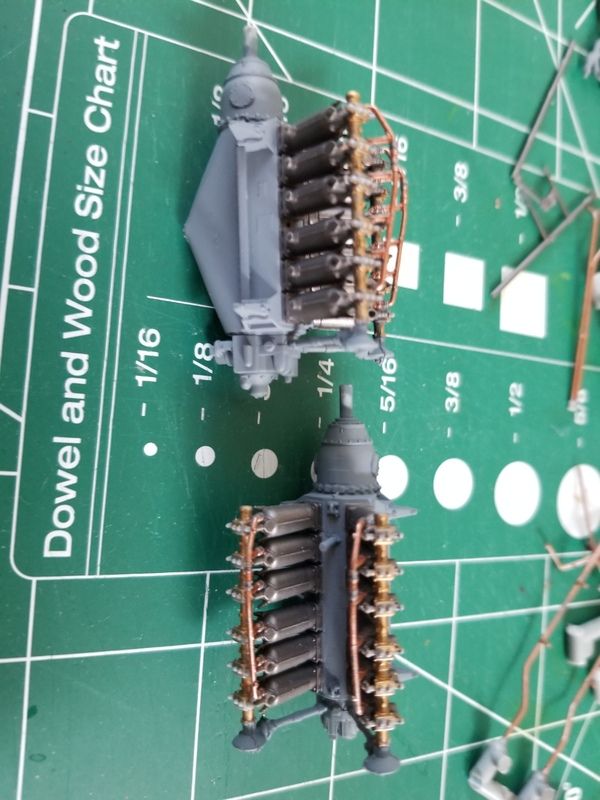
  As a last bit of work for this session, it's more detail painting on the engines. These little gems are going to be quite colorful. There's so many different colors on the pictures of the originals, and I may be getting away from how they are supposed to look on the version of the plane I'm doing, but I'm a rebel who likes to do what looks best as opposed to what it's supposed to be in reality. I'm toying with the idea of a diorama where the plane was battle damaged and one of the engines is being replaced. Since Wing Nut was so kind to send me an entire engine for one broken part, I'll likely do one as it's supposed to look, and another that is more factory fresh that wasn't painted with the Battleship Gray when the plane was first built.


  So I'm glad to be back home and working on my project. I hope you like the progress, but honestly I'm running into so many problems with the interior, I'm beginning to have second thoughts about opening up the framework on the top to let viewers see the inside better. We'll see how things continue. Maybe I will, maybe I won't.

Offline pepperman42

  • Hero Member
  • *****
  • Posts: 4507
  • Sergeant, my brown pants.......
Re: Another Felixstowe F.2a Build
« Reply #61 on: July 05, 2018, 10:03:36 PM »
Big project so hang in there!! I'm not sure if you solved the varnish situation but applying more on the effected patches might feather it in. I order a lot of stuff from Jadar in Poland, including HGW, and it usually gets here (Canada) in about three weeks. I'm not sure where you are but I'm sure it would get to European countries quicker.   

Steve

Offline RAGIII

  • Hero Member
  • *****
  • Posts: 19694
Re: Another Felixstowe F.2a Build
« Reply #62 on: July 06, 2018, 12:24:55 AM »
In my opinion your Felix is looking great! As for that tear I would probably try touching up with some raw sienna oils blended in, but that is me  ;D
Good to see you back at this one!
RAGIII
"A man has to know his limitations": Harry Callahan

"Don't slop it on" Lynda Geisler

Offline krow113

  • Sr. Member
  • ****
  • Posts: 458
Re: Another Felixstowe F.2a Build
« Reply #63 on: July 06, 2018, 02:42:00 AM »
Looking good!
Good to see you back on it.
I sealed The Gotha's wood decals with 50/50 IPA and Future.
Spray it hard and fast , light coats.
You guys may wanna know , a 'hot mix' , that is more thinner than paint  , will result in a hard and very well ingrained coating. Try it with laq's and primer for thin coats that provide full tooth for the coming paint.

Offline GB

  • Full Member
  • ***
  • Posts: 248
Re: Another Felixstowe F.2a Build
« Reply #64 on: July 06, 2018, 06:20:12 AM »
Try these guys for rovets - http://www.archertransfers.com

Used rhem a lot on armour builds and don't take a month tk arrive!

Gary

Offline GazzaS

  • Hero Member
  • *****
  • Posts: 1193
Re: Another Felixstowe F.2a Build
« Reply #65 on: July 06, 2018, 04:09:45 PM »
Love the extra details for the interior.  Much braver than me in that area.

Gaz
There are only two states to be in:  Queensland and blotto.

Offline Scottypos

  • Newbie
  • *
  • Posts: 21
Re: Another Felixstowe F.2a Build
« Reply #66 on: July 09, 2018, 03:04:38 AM »
Good morning fellow Sprue Masters,

  Thank you much for the advice on clear coats pepperman and RAGIII. I actually ended up hiding the tear with some oils, thinking it won't be seen clearly that far back in the plane. I'm just a little too lazy to make a full repair. Finding a clear coat that'll spray well, stick hard, and hold up under the onslaught of my sometimes overzealous weathering torture, would end a long search.
  krow113, IPA and Future? I'm sure there's an Indian Pale Ale in my Future, never thought of putting it in my airbrush. Seems like alcohol abuse. (sorry, bad joke). I'll assume your talking about isopropyl alcohol and floor wax. I've heard good things about using Future as an armor coat for base colors and protection from weathering, as well as a great undercoat for decals. Honestly, I'm terrified it'll gum up my airbrush and turn into concrete, never to be removed. Is IPA the best thinner and cleaner for Future? Maybe it's time to throw caution to the wind and see what everyone is talking about.
  Thanks for the link GB. I'll price shop them and see if price verses patience will balance with them. I'll wait to get something dirt cheap, but I'll likely complain about how long it's taking anyway.
  I'm glad you like the detail so far GazzaS. I'll be messing with it for some time yet to come. Depending on how battle weary this plane gets as I move along, I'll be adding stuff to try and express its number of missions by adding spent bullet casings, empty magazines, a little trash left over from mission critical snacks, as well as other odds and ends. I just have to keep in mind that the guys took really good care of their machines and not over do it.

  So, still continuing on with the interior, I started plumbing out the petrol tanks. Not a lot of parts here but I must say it was a bit of a struggle getting the little red pipe marking stripe decals on. Getting them to wrap tightly and stay flat was a time consuming struggle. It seemed that the MicroScale micro sol took a long time to soften up the decals.


  Then it was on to the cockpit. I'm loving the seat belts from HGW. They are fairly easy to assemble and the detail is spot on.


  The rest of the cockpit details are looking fine, but the steering wheel cables are a little small I'm thinking. When it comes to rigging out the rest of the flight controls, I think I'll go with some thicker stock.


  That's all folks. I hope to get a little more time in this weekend, but my to do list is ever-present.

Take care

Offline GazzaS

  • Hero Member
  • *****
  • Posts: 1193
Re: Another Felixstowe F.2a Build
« Reply #67 on: July 09, 2018, 07:02:57 AM »
Some fine work!

Gaz
There are only two states to be in:  Queensland and blotto.

Offline Borsos

  • Hero Member
  • *****
  • Posts: 3609
Re: Another Felixstowe F.2a Build
« Reply #68 on: July 09, 2018, 07:32:09 AM »
Really a nice progress!
Andreas
"Deux armées aux prises, c'est une grande armée qui se suicide."
Barbusse.
"Ein Berg in Deutschland kann doch einen Berg in Frankreich nicht beleidigen. Oder ein Fluß oder ein Wald oder ein Weizenfeld."
Remarque.

Offline RAGIII

  • Hero Member
  • *****
  • Posts: 19694
Re: Another Felixstowe F.2a Build
« Reply #69 on: July 09, 2018, 08:22:22 AM »
Your interior is moving along nicely. All is looking terrific!
RAGIII
"A man has to know his limitations": Harry Callahan

"Don't slop it on" Lynda Geisler

Offline Juan

  • Hero Member
  • *****
  • Posts: 2474
  • All gave some, some gave all.
Re: Another Felixstowe F.2a Build
« Reply #70 on: July 09, 2018, 08:44:16 AM »
Great looking, really like what you have done.  Looking forward to your progress.

Offline Manni

  • Hero Member
  • *****
  • Posts: 1768
    • Der Militärmodellbauer
Re: Another Felixstowe F.2a Build
« Reply #71 on: July 09, 2018, 03:29:54 PM »
Great work! Looking for the next update.
Bye,
Manni
"Ich hab' da mal was vorbereitet.": Jean Pütz
"Warum noch mehr Bausätze?!?": meine Frau

Offline Scottypos

  • Newbie
  • *
  • Posts: 21
Re: Another Felixstowe F.2a Build
« Reply #72 on: August 11, 2018, 12:10:27 PM »
Hello everyone,

  Well that was an adventure. I got snapped up for a big task at work and just couldn't seem to get back to the personal business. But, all done now and it's time for some model building. I wish I could say I got a lot done, but the main control panel was a bit of a challenge. It starts out as a bunch of tiny decals...


  I kind of like these better than the single sheet of dials like the ones for the engineer's panel in back. However manipulating these little suckers was tough, especially when trying not to damage the paint. The altimeter? decal got roached, the long one on the left side. I had to touch it up with a little paint to make it look decent. After that it was a little dial glass. It's always a heart attack moment putting on the Micro Gloss stuff, turning everything white and covering up the fine decals...


  But in the end things turn out ok. Just need a little weathering and a pin wash...


  Then it's all nestled in its cockpit...


  Before it was time to end this little episode of playing with plastic, I finished up the fuel lines for the petrol tanks...


  I'm finally starting to see the light at the end of the tunnel for the interior. I'm still messing with the radio cabinet. I just ordered some resin radios online and I"m going to try and modify them a little. They are American WWII radios that I'll try and backdate them a little to make them look convincing. I've abandoned the idea of the printed paper radios. I started gluing little bits to them to make them look better, but I hated it and tossed them into the junk pile in the basement.
  The guy who sold me the kit included a spool of rigging line. I've been messing around with it and I put some of it on the steering wheels, but I don't like it. I'm thinking the line is too small. Any suggestions on some good stuff? I'm supposed to be using .15 mm stuff according to the instructions.

Thanks for watching and have yourselves a fine weekend.


Offline krow113

  • Sr. Member
  • ****
  • Posts: 458
Re: Another Felixstowe F.2a Build
« Reply #73 on: August 13, 2018, 01:40:52 AM »
Looking good.
Good to see you back on it.

Offline mgunns

  • Hero Member
  • *****
  • Posts: 2255
Re: Another Felixstowe F.2a Build
« Reply #74 on: August 15, 2018, 09:54:21 AM »
I'm catching up on your posts on the Felixstowe and your work is truly noteworthy.  The petrol tanks look the business with those rivets on them.  Reminds me of my Gramma's old Water heater, just a large tube with a riveted jacket.  Modelkasten makes a nice stretch line that I use I think it's .06 something like that, the only thing it's scarce to find.  I think either Uschi or HGW makes a nice stretch line similar to the Modelkasten line,  Works great.

The "Color Commentary" adds to viewing your work as well.  keep it up.  Looking forward to the next update and interesting to see what you do with the fuselage, shame to cover all that effort.
Mark

We few, we happy few.....