Author Topic: Another Felixstowe F.2a Build  (Read 15975 times)

Offline krow113

  • Sr. Member
  • ****
  • Posts: 458
Re: Another Felixstowe F.2a Build
« Reply #30 on: April 16, 2018, 09:55:54 AM »
I think those tanks stand on end in the airframe. So use some .005" plastic card cut in a circle on top of the tank, no more seam.

Offline eclarson

  • Hero Member
  • *****
  • Posts: 611
Re: Another Felixstowe F.2a Build
« Reply #31 on: April 16, 2018, 10:04:28 AM »

.....
I chose the Vallejo Burnt Iron to pick out all the metal details on the interior. I like this color because it is a nice shade that is somewhere near to wrought iron and old steel. I also bought some copper from this same line, but they didn't have any brass. So I got a bottle of AK's Xtreme Metal Pale Brass. Wait, what? $12 for a little bottle of brass paint? Yup, wow, ok, this snit better be good. I needed it for some brass artillery shells anyway.
....


Hi,

I've been following your Felixstowe build and you're doing a great job!  I noticed your comment about using Vallejo metal paints, which I also use, and thought you'd like to know they do make a brass paint though it's not in the same series as their Burnt Iron.  Bright Brass Metallic is in their Model Air line and is just a few bucks for a small bottle.  I have some and it looks great.  I apply it over a silver or aluminum base coat.

http://store.spruebrothers.com/product_p/val71067.htm

Cheers,
Eric

Offline Scottypos

  • Newbie
  • *
  • Posts: 21
Re: Another Felixstowe F.2a Build
« Reply #32 on: April 16, 2018, 02:53:01 PM »
hey krow,

  I'll give it a try, I think I have some...somewhere. Two of the tanks stand on end and the third lays on it's side.

Hey Eric,

  Thanks for the tip. I do like the Model Air line for brush painting. The stuff goes on smooth and covers well. I already bought the $12 bottle of brass and I do like it. seems like it'll spray on as well as it brushes on. I never though about a silver base. I'll give that a try when I'm looking to do some bright shiny brass..

Thanks guys.

Offline gbrivio

  • Hero Member
  • *****
  • Posts: 1682
Re: Another Felixstowe F.2a Build
« Reply #33 on: April 17, 2018, 06:41:45 AM »
Welcome to the forum, nice start on your flying boat.
Giuseppe

Offline RAGIII

  • Hero Member
  • *****
  • Posts: 19694
Re: Another Felixstowe F.2a Build
« Reply #34 on: April 17, 2018, 06:45:35 AM »
Your interior is coming along nicely. I am enjoying watching your progress and your lighthearted writing style  ;D
RAGIII
"A man has to know his limitations": Harry Callahan

"Don't slop it on" Lynda Geisler

Offline Scottypos

  • Newbie
  • *
  • Posts: 21
Re: Another Felixstowe F.2a Build
« Reply #35 on: April 22, 2018, 03:21:00 AM »
Good morning everyone, and happy weekend.

  Thanks for the welcome Giuseppe.
  I'm glad you like the interior so far RAGIII, and yeah, I'm quite the goofball. I just hope everyone will let me know if I get out of control. I tend to do that from time to time.

  I've been messing around a little bit during the week, but not getting a whole lot done. The kit I bought, coming from a previous owner, I was a little concerned about parts damage. Naturally, after getting the kit, the first thing I did was inspect every single part. To my surprise, aside from a few stress marks, only one part in the entire kit was broken. It was a water manifold pipe on one of the engine sprues. Even odder, was that it was completely destroyed.
  I snapped a picture of the broken part and sent it off to WNW. Quickly, I got a reply. It really impresses me when a company, especially a model manufacturer, takes the time to interact with their fans. The reply was rather short, just an acknowledgement and what looked like a shipping order/notification. I figured I'd see a replacement part eventually.
  To my surprise, a rather large envelope arrived in the mail last week. Bewildered, I tore open the package to find and entire engine sprue!


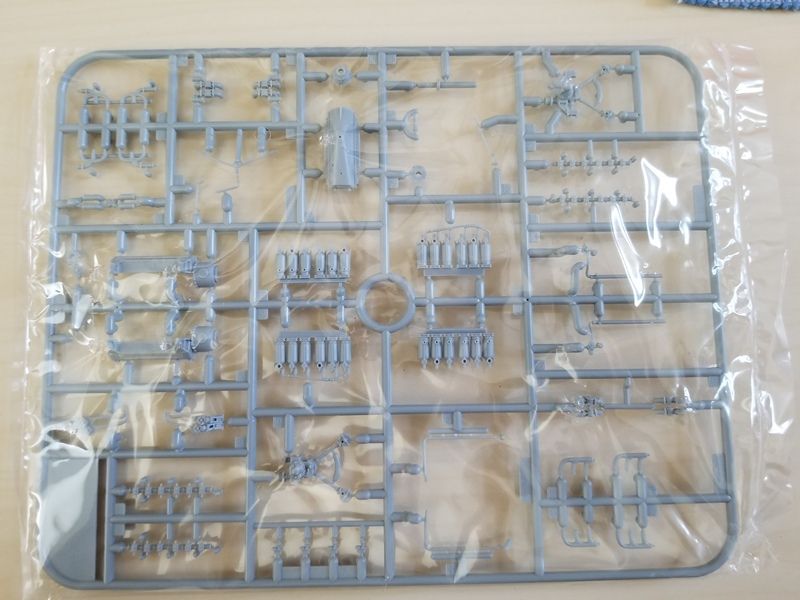
  I bow and genuflect to one of the best model manufacturers out there, Wing Nut Wings. How generous of them! You guys rock!
  Now I have all kinds of ideas for a vignette, no wait, this model is way too big for a vignette, how about a diorama, a big one! I have all these extra engine parts and I'd hate to see them go to waste. I was thinking about building a war weary plane anyway, so how about one under repair? Hmmm, we'll have to look into that.

  I started to mess around with the decals over the week. I must say these bad boys are HUGE!


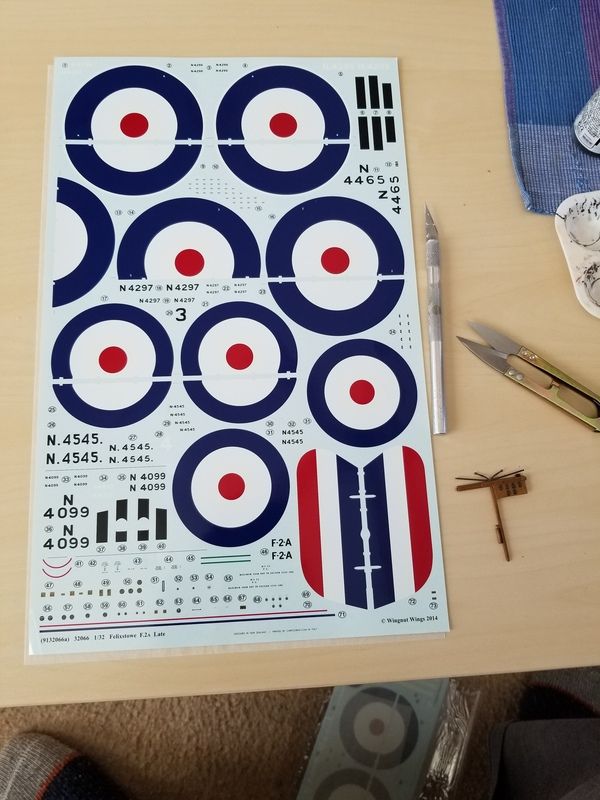
  Nestled among those dinner plate sized heralds are the tiny gauges. I thought I'd try and finish up the Engineer's panel first, since it's more hidden than the Pilot's. Yeah, I have a confidence issue here. I was pleased to find that the gauge cluster was one whole decal and I didn't have to worry about placing each tiny gauge. I was also delighted to find that the decal included microscopic gauge labels. Wow!


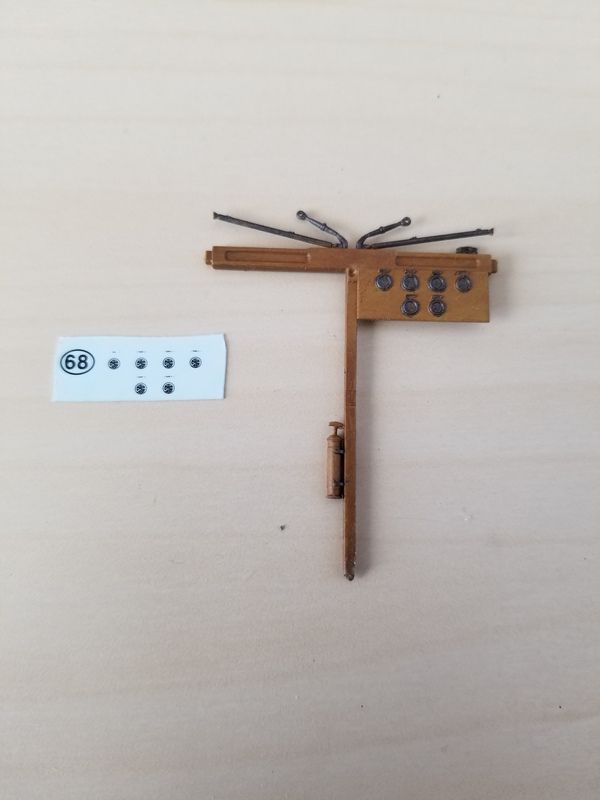
  I've done small decals before, but I must admit this one kicked my can, hard. Placing the decal over the gauges, I couldn't get them to line up. The spacing was off just enough to cause me to mess with it way too much and too long. The Oil Gauge did not survive the onslaught of my armature decal manipulation skills.


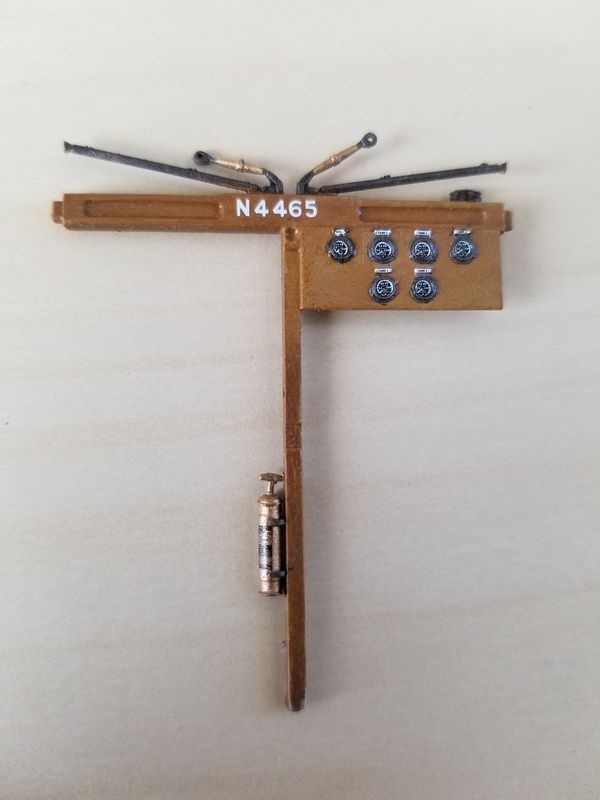
  Despite my frustration with my mad decal skills, wait, said that wrong... despite my frustration with my decal skills that make me mad, I like how it turned out. I was amazed that you could actually read the gauge labels! I didn't notice that until I looked at the pictures. I also noticed my parts are quite dirty and the paint is rather fouled with dust. I'm going to have to work a little cleaner.
 
  So hopefully I'll get to finish up the bulk of the main detail painting this weekend and get another coat of protective lacquer over that, and my decal adventure, this weekend. I'm looking forward to doing some weathering, washes, and filters.

Thanks for checking in and I wish you many hours of modeling bliss for the weekend.

Offline RAGIII

  • Hero Member
  • *****
  • Posts: 19694
Re: Another Felixstowe F.2a Build
« Reply #36 on: April 22, 2018, 03:26:20 AM »
Awesome IP and yes, WNW rocks in customer service! I can't think of another kit Manufacturer that makes more clear and concise gauges for their models Just another of many reasons to be impressed by WNW.
RAGIII
"A man has to know his limitations": Harry Callahan

"Don't slop it on" Lynda Geisler

Offline GazzaS

  • Hero Member
  • *****
  • Posts: 1193
Re: Another Felixstowe F.2a Build
« Reply #37 on: April 22, 2018, 11:29:43 AM »
Nice IP!
There are only two states to be in:  Queensland and blotto.

Offline Scottypos

  • Newbie
  • *
  • Posts: 21
Re: Another Felixstowe F.2a Build
« Reply #38 on: April 26, 2018, 12:53:06 PM »
Thanks RAGIII and CazzaS, I'm glad you like it. I just wish I hadn't fudged the gauge on the left.

  Any suggestions on something good to use to simulate dial glass? I've seen PVA, CAA, and gloss paint, but I don't know what is the best and safest with consistent results.

  Well the week seems to have sneaked up on me and kept me away from my build log. I got a little break today so I thought I'd pop in for a little update.

  I spent my model time this past weekend fooling with the details. I finished up the bulk of the detail painting and decided to hit the air brush for another round of target practice with my mighty Iwata Eclipse. I love this little air brush. I swear I could push used motor oil through it and get a great finish. This time I was out to seal all this painting with some semigloss so my weathering can slide into all the nooks and crannies. I also shot at all the engine parts because I can't wait to put these little gems together.


  Once everything dried I went back to the instructions to see how well behaved I've been with sticking to the instruction sequence. Seems I'm not a good boy. looking at things closer, really closer I found this decal...


  Wait, no, that's a speck of dust. Or? Holy cow, is a speck of dust that says "Open", and there's another one that says "Closed". In the picture, That's my Exacto, #11 parts launcher pointing to it. Yeah, I nearly missed these two, and after surprisingly few cuss words I got them on. It's silly though, you'll need a telescope to see them from a few inches away.


  There's a nice decal for what I think may be the fuse panel for various landing lights and other undetermined gadgets that are connected to that cable bundle running along the top of the side frame. I thought about carving that off and replacing it with little strands of actual wire, but the thought of likely destroying a lot of the paintwork so far, I changed my mind. Wish I had thought about it earlier.
  After some more detail painting and touch ups, I hit some of the parts with a nice brown wash...


  The wash looks subtle in the photos, but it really brought out a lot of the detail, and besides, I have a lot more weathering I want to do.

  Yeah, I'm still messing with those stubborn seams on the tanks. I'll wipe them out, even if I have to use a Howitzer to do it.

  I also broke out the detail set for the weapons and added straps to the drum magazines. I really like the details, but I think I'm not liking the paint work on these. I'll have to mess with that a little more...


  See the two decals in the picture? They are supposed to go on the magazines, on either side of the strap. Please tell me what you think about putting those on. I really don't like them and I've never seen them on any of the pictures of these weapons on the Net.

  Well that's about it for this episode of micro fun. I'm really liking how things are coming together, and dry fitting the interior together is showing me that this thing is going to look really cool.

Till next time, ya all take care.

Offline GB

  • Full Member
  • ***
  • Posts: 248
Re: Another Felixstowe F.2a Build
« Reply #39 on: April 26, 2018, 01:08:55 PM »

Offline krow113

  • Sr. Member
  • ****
  • Posts: 458
Re: Another Felixstowe F.2a Build
« Reply #40 on: April 26, 2018, 01:13:34 PM »
I've found repeated applications of Humbrol gloss clear to be effective for lens' , repeated to assure a level setting.
For The Gotha instruments I used .005" clear plastic sheet, and black to build up the instrument body. Made with various punch sets I've accumulated.
Fstowe is looking good.
« Last Edit: April 26, 2018, 02:50:16 PM by krow113 »

Offline Manni

  • Hero Member
  • *****
  • Posts: 1768
    • Der Militärmodellbauer
Re: Another Felixstowe F.2a Build
« Reply #41 on: April 26, 2018, 05:25:30 PM »
Great work, Very good wood work.
I prefer to use a UV-light curing glue. I place just a drop on the instrument switch on the lamp and ready it is. Flat or convex lenses are very easy.
Bye,
Manni
"Ich hab' da mal was vorbereitet.": Jean Pütz
"Warum noch mehr Bausätze?!?": meine Frau

Offline PrzemoL

  • Hero Member
  • *****
  • Posts: 5349
  • There was Eru... and he made first the Ainur...
    • Przemysław Litewka
Re: Another Felixstowe F.2a Build
« Reply #42 on: April 26, 2018, 05:30:26 PM »
Nice, nice, nice.
Seeing builds like this and presented like this makes me wonder - should I tackle this model once more? Maybe some day, but for now I will be watching this one progress.
Ash nazg durbatuluk, ash nazg gimbatul,
Ash nazg thrakatuluk, agh burzum-ishi krimpatul.

Offline lcarroll

  • Administrator
  • Hero Member
  • ******
  • Posts: 8659
Re: Another Felixstowe F.2a Build
« Reply #43 on: April 26, 2018, 10:19:03 PM »
    Another option for instrument glass is Future; several repeated applications produce a bright and clear lens. It also acts as the adhesive to hold separate instrument bezels if you are adding them.
Cheers,
Lance

Offline Scottypos

  • Newbie
  • *
  • Posts: 21
Re: Another Felixstowe F.2a Build
« Reply #44 on: April 29, 2018, 12:28:35 AM »
Happy lazy, lay on the couch, do nothing, watch TV, drink beer, weekend everyone.

  Thank's again for all the expert tips ya all...

Gary, I've used MicroScale products a lot. I like their decal solutions, and they've been around for as long as I've been building models (= many years). I didn't know they made this stuff. I'll see if the local candy store has some.

krow113, I've used gloss clear paint in the past for representing shiny things and I did some gauges on a space robot armor thingy this way. I was using an old bottle of Testors clear coat. It looked great, but after a couple days, the paint got all weirded out, and there was this divot, bubble lookin thing on the gauge. I never went back to that method. I've heard a lot about Humbrol paints and I have an ancient pot of rust from them that I really like. I've never found a rust paint that looks and behaves like theirs. I'll look into their clear coat, especially since I'm still on the hunt for a clear coat that I really like.
  Clear plastic sheet? I like you. You're just my kind of modeling masochist. Great idea, but I'll save that one for a scratch build. Besides, I have yet to add a punch set to my tool box. Yeah I know, I'm pathetic.

Manni, UV Light Curing Glue? I can't say I've ever heard of that, so I did a quick Google trip on it. Lots of choices there. Can you tell me about some of the uses for this stuff besides making gauge glass?

Thanks PrzemoL, tackle this model once more? You know what they say, if you touch it more than once, or for too long, you're playing with it. chuckles.

Lance, I've heard a lot about the uses of Future in model building. How do these people come up with this stuff? I can guess on this one..."no Wife, I"m not building models, I'm waxing the floor...really", Hey wait a minute, this stuff would make great gauge glass. I'll go raid the wife's cleaning supplies and see what we have.

Thanks again for the tips, but may I indulge in your vast knowledge one more time? This...


.... is the wireless aerial reel. There isn't any more information on it in the instructions, and actually I can't even find the aerial itself. I'm thinking there's some missing detail here and I'd like to add it if I can get some information on it.
  I spent some time researching WWI radios and came across some really cool stuff. I'm still thinking about opening up the waterproof wireless cabinet, the one with the green cover. I found what seems like period, British equipment...


  I really like the look of this stuff, but to recreate it in 1/32nd scale would be tough. Anyone know of a kit, or something that would be a good starting point, like a photo etch set or something?

  Been working on erasing the lines on the fuel tanks. Think I'm getting there...


Once again, many thanks for the help.
take care