Author Topic: Another Felixstowe F.2a Build  (Read 15974 times)

Offline Trackpad

  • Hero Member
  • *****
  • Posts: 1306
Re: Another Felixstowe F.2a Build
« Reply #15 on: April 08, 2018, 12:00:08 AM »
Hello, Scotty, and welcome to the Forum!

We've got lots of great Forumites here, always ready to help, encourage and assist. Don't hesitate to call. Looks like you're well underway on this voyage and, if your gigantic truck is any indication, you'll make your destination in good stride. Just two small suggestions if you don't mind: keep a close eye on your various component parts as, without the sprue-stamped part numbers and a myriad of items, things might get a little...challenging; and have a really fun time building this behemoth.

You've already got a bunch of guys on your side, and I'm happy to join the cheering section. Good Luck!  8)
Cheers!
Gary

"It was an adventure, a great adventure. And, like all great adventures, we never knew where it would lead or how it would end."

Offline Scottypos

  • Newbie
  • *
  • Posts: 21
Re: Another Felixstowe F.2a Build
« Reply #16 on: April 10, 2018, 11:38:04 AM »
Hey there everyone, and thanks again for all your offers of support.
  Twas a busy weekend (taxes finally and a massive "honey do list"), but I did manage to have my fun. I broke out my old tubes of oil paint, with the caps impossibly glued on with old dry paint, and went to town on all the interior wood in this beast of an armed flying yacht.


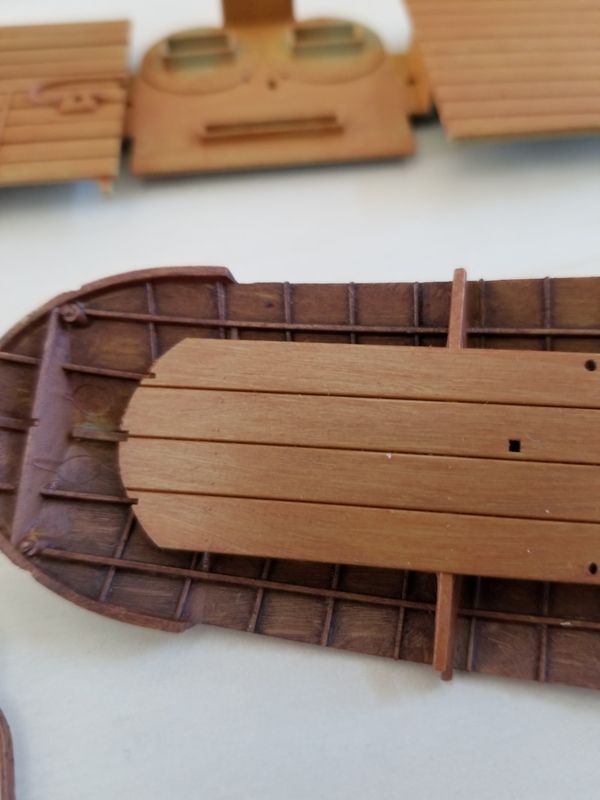
  I thought about actually doing some research, well I did a little. I wanted to know what type of woods the actual plane was built out of so I could make an attempt to recreate it. I ended up just seeing everyone else's fine work and couldn't think about anything but getting started on mine. I noticed that most had a combination of darker woods on the frames and structural members, and lighter colors on the floor boards. Good enough for me, time to start.
  I did make one big diversion from the norm that I was seeing in everyone else's work, as well as the instructions. The bottom of the plane is black. I hated it in every picture I saw. It was always this beautiful, pleasantly hued, natural looking shades of wood, and this monotone, stark black on the bottom. So the rebel in me said, "no way" and I went for a dark brown wood instead.


For the colors of oil paint..

A base solid color of Yellow Ochre
  This looked so weird when it went down that I panicked a little, but went with it anyway
Burnt Umber for the dark wood
Burnt Sienna for the light stuff

  Basically I just messed around with the paint in a few different ways, but it all ended up coming out the same way. It mixed the base and the next color and put subtle lines of different hues that looked just like wood grain. Wonderful!
  I do have a couple issues. Seems the wood grain goes in the wrong direction in a few places. I didn't actually notice it until I looked at the pictures I took. Also, I may have overworked the paint in a few places, creating a whole different color and loosing some of the wood grain effect.


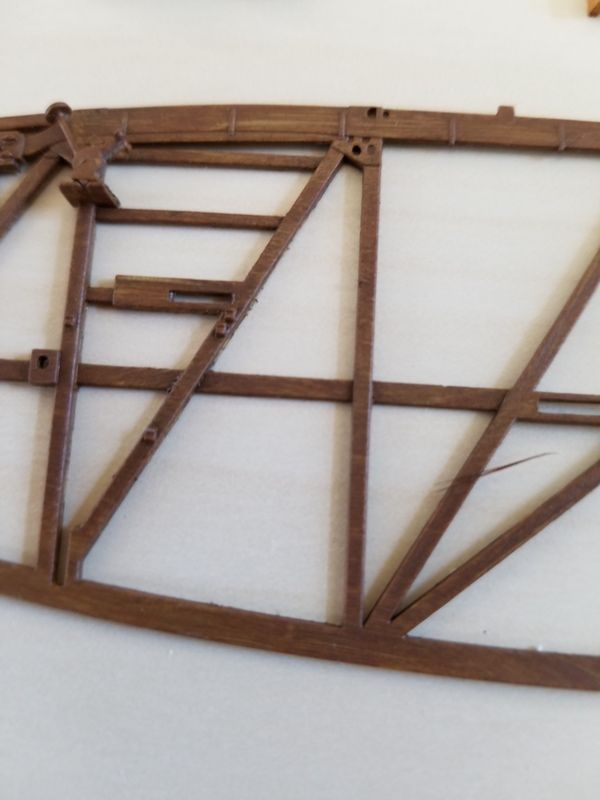
  Two tone painting like this is a little tough. It tends to bleed over into each tone. It's likely my poor choice of brushes that's the cause, but next time it'll be a trip to the craft store to get some cheapo stiff brushes in various sizes to make things a little easier to do.


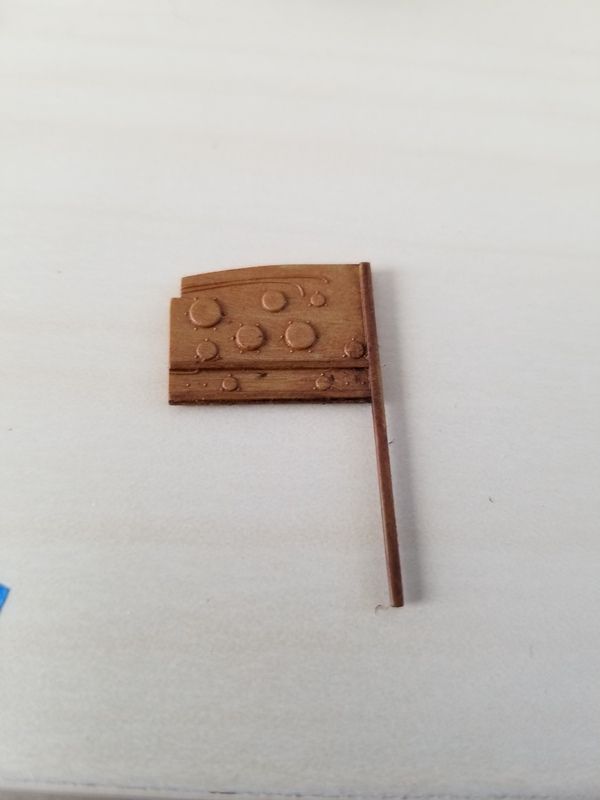
  Overall I'm happy with the way things turned out. I'm a little miffed at how the oil paint is so thick and that it's covering some of the fine detail, but I'll have to learn those little tweaks on the next few models. I really like the look of the fine wood grain. I considered adding larger grain work with a detail brush, as well as maybe some knots and stuff, but I'm way too lazy. I checked the parts today when I got home from work, and they are still way wet. I hope things will dry up by next weekend so I can start poking paint at all those fine details after a protective coat of satin varnish.

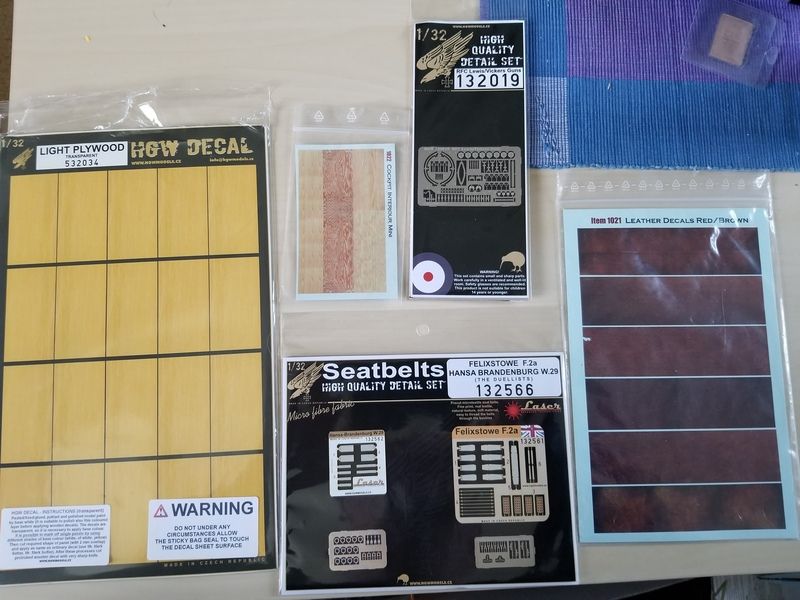
P.S, Got some goodies to improve an already fine model. Jeez I'm a detail lush.


Take care everyone

Offline GazzaS

  • Hero Member
  • *****
  • Posts: 1193
Re: Another Felixstowe F.2a Build
« Reply #17 on: April 10, 2018, 03:51:10 PM »
Your wood looks great!  After my class about orthochromatic film regarding the Albatros D's, I'm wondering about all WWI dark-looking wood.

Gaz
There are only two states to be in:  Queensland and blotto.

Offline Trackpad

  • Hero Member
  • *****
  • Posts: 1306
Re: Another Felixstowe F.2a Build
« Reply #18 on: April 10, 2018, 07:36:40 PM »
"Jeez I'm a detail lush."

I'm much the same way but, in my case, I've got the tendency but not much of the talent. And who would've thought: decals for leather?  ???

All is looking good so far. Good luck as you progress through this "flying, armed yacht!"  8)
Cheers!
Gary

"It was an adventure, a great adventure. And, like all great adventures, we never knew where it would lead or how it would end."

Offline RAGIII

  • Hero Member
  • *****
  • Posts: 19694
Re: Another Felixstowe F.2a Build
« Reply #19 on: April 10, 2018, 11:40:32 PM »
Your wood effect looks nicely done. One thing about the oils think of them as more of a stain over an acrylic base. The idea is to remove most of the pigment leaving the impression of the wood. Makes things a tad less thick, although I must say I don't see the "thickness" in your photos.
RAGIII
"A man has to know his limitations": Harry Callahan

"Don't slop it on" Lynda Geisler

Offline Scottypos

  • Newbie
  • *
  • Posts: 21
Re: Another Felixstowe F.2a Build
« Reply #20 on: April 11, 2018, 01:49:48 AM »
Hello GazzaS,
  I did wonder about all the dark wood as well. My limited knowledge about wood tells me that dark woods are generally very hard and heavy, not what I'd choose to build a plane with. However with lighter woods there are a whole lot of different types with all the different features. I did find a reference to Mahogany, it seems to have been the wood they used to put the lateral slats on the outer skin of the hull. It's a lighter wood, yet hard and flexible, perfect for boat and plane building. When you varnish it, it can get quite dark, but more of a red than a brown I'd think. I'm going to do a little more research for the outside before I paint it.

Hello RAGIII and Trackpad,
  Thanks for the tips. Are you thinking I should thin the paint a little? The paint tends to build up in the cracks and crevices of the details and that's the aggravating part because it's hard to clean out and not damage the rest of the finish. Next time I"m thinking about a much thinner and lighter coat, and then darkening it with washes and filters, but I hope the grain will come out with thinner paint. The problem isn't too serious. I'm glad you like how it turned out.
  Yeah, leather decals. I've never upholstered anything with a decal before, but I'll give it a try and see how it turns out. It might be easier to just paint it, but this build is all about playing with new things for me.

Offline Trackpad

  • Hero Member
  • *****
  • Posts: 1306
Re: Another Felixstowe F.2a Build
« Reply #21 on: April 11, 2018, 02:10:22 AM »
Hi,

Here's the link to the Wingnut Wings "Hints and Tips" page. Go to the bottom right corner and you'll see a short demo of using oils to replicate wood grain: http://www.wingnutwings.com/ww/hintsandtips . I've used the method, but not recently. However, it worked nicely back in the day and, with other methods, can be used to give a pretty good rendition of plywood and solid wood. A Google search of "oil paints technique for plywood" might chase up a few more advanced methods.

Good Luck!  8)


Cheers!
Gary

"It was an adventure, a great adventure. And, like all great adventures, we never knew where it would lead or how it would end."

Offline Scottypos

  • Newbie
  • *
  • Posts: 21
Re: Another Felixstowe F.2a Build
« Reply #22 on: April 11, 2018, 02:25:49 AM »
Thanks for the link Trackpad, by the way, luv the name you chose, I was a M109 Field Artillery Mechanic so I know track pads well. My guess is that you're an armor modeler as well?

  Anyway, thanks for the link. I've been to WNW's site a few times and never ran across their tips section. I'll be hanging out there for a while. Google was a great source for getting me started.   

Offline Trackpad

  • Hero Member
  • *****
  • Posts: 1306
Re: Another Felixstowe F.2a Build
« Reply #23 on: April 13, 2018, 01:31:50 PM »
Thanks for the link Trackpad, by the way, luv the name you chose, I was a M109 Field Artillery Mechanic so I know track pads well. My guess is that you're an armor modeler as well?

Hey, a gunner-type guy! You Mechs are a real boon to the SP guns and our Armour vehicles. I was RCAC for quite a while and got involved with museum pieces like Centurions, M113s, Lynxes and the like. And yes, I do armour builds as well as aircraft, a ship or two and one lonely dinosaur. Here's a turretless Stuart V light tank of the 8th (Princess Louise's) New Brunswick Hussars, Italy, 1944:


Glad that the link may prove useful to you. Continued good luck to you with the Felix!  8)
Cheers!
Gary

"It was an adventure, a great adventure. And, like all great adventures, we never knew where it would lead or how it would end."

Offline krow113

  • Sr. Member
  • ****
  • Posts: 458
Re: Another Felixstowe F.2a Build
« Reply #24 on: April 14, 2018, 01:40:05 AM »
Flying boat looks great!
A lot of thought and practise goes into the wood replication , next you'll be trying to make knots...!
As far as the black in the bottom of the fuse , its prolly a coating like the stuff on Hansa floats. It would most likely obscure a lot of the wood grain it is applied to.
I wouldn't want to do one of these in wood decals!

Offline Scottypos

  • Newbie
  • *
  • Posts: 21
Re: Another Felixstowe F.2a Build
« Reply #25 on: April 14, 2018, 11:23:28 AM »
Hey Trackpad, T
  hat's a sharp looking Stuart! Can't say I've ever seen one without a turret. A very unique build to be sure. I have a half built Stuart in the basement. I went nuts on it trying to account for every detail and lost interest in it. I got most of the interior done and started detailing the outside. it started out as the really old Tamiya kit and I ended up basically replacing the entire kit with after market parts. I'll dig it up and snap a couple pics for you.
  I did like the big guns, but I played with the engine and drive train more than the gun itself. I did get to fire the 8 inch before the phased them out. Nearly knocked me on my ass. That's an amazing piece of hardware. I wanted to keep working on the "toys" after I got out but I never found a museum or club in Colorado that restores the classics. That would be fun.

Hey krow,
  Thanks for the info on the hull coating. I guessed that may have been what the black paint was for and I was thinking about trying a thick, off black, with a little brown, wash to recreate it, or just give a nod that it's there, while still making it a little interesting with various tones.
  I hear ya on the decals. I thought about doing the frames with decals, but that didn't last long. To do all those little squares entered my mind as well, yeah, not. Way too time consuming.

Offline Scottypos

  • Newbie
  • *
  • Posts: 21
Re: Another Felixstowe F.2a Build
« Reply #26 on: April 15, 2018, 11:43:39 PM »
Hey Trackpad,

  Here's a couple shots of my Stuart. It's mostly Tiger Models aftermarket parts and a little scratch building. I'm waiting on someone to make an engine kit for it at this point because I wanted to go all out on it. I just haven't seen anyone do an engine yet and I'm not really interested in trying to scratch build one, yet.


Offline Scottypos

  • Newbie
  • *
  • Posts: 21
Re: Another Felixstowe F.2a Build
« Reply #27 on: April 16, 2018, 12:51:46 AM »
...but I digress. I'm like people who are distracted by shiny objects, I'm distracted by miniature objects.

  The oil paint seems mostly dry. There's one part that just doesn't seem to want to dry completely. It's still turning my fingers a little brown when I handle it. I'm too impatient so I boxed it all up yesterday, with a bunch of stuff I want to put a layer of gray on, and it's off to load up the airbrush with some semigloss for a nice protective layer over the oil paint.


  All that dried overnight, and this morning I got up early and started poking the parts with some detail painting. Vallejo makes some outstanding "Metal Color" paint that goes on very nicely with a brush. Tamyia paint, me and my airbrush just love them, but they are awful for brush painting. I chose the Vallejo Burnt Iron to pick out all the metal details on the interior. I like this color because it is a nice shade that is somewhere near to wrought iron and old steel. I also bought some copper from this same line, but they didn't have any brass. So I got a bottle of AK's Xtreme Metal Pale Brass. Wait, what? $12 for a little bottle of brass paint? Yup, wow, ok, this snit better be good. I needed it for some brass artillery shells anyway.


  Luv the little gunner's seat in the front, but jeez I'd bet another WNW kit that I'll break it off before I close up the interior.

  Now, so far I am really liking the WNW kit. Everything fits together perfectly and the detail is truly exquisite, but what is with these fuel tanks? There's a fine lip around the top of the tanks and microscopic rivet detail around the tank itself. The way they molded it, there's an impossible line all the way around the tank. I've already obliterated most of the rivet detail and I'm worried about the lip at that top as I try to eliminate the line. I'm going to go get some of those rivet decals to recreate that detail, but if I damage the lip, there's not going to be much I can do to replace it. I wish WNW had done end caps here.


  I'm going to poke at some more details today if I get the time, and I'll yak at ya some more after.

Thanks for checkin' in. Take care

Offline krow113

  • Sr. Member
  • ****
  • Posts: 458
Re: Another Felixstowe F.2a Build
« Reply #28 on: April 16, 2018, 01:31:33 AM »
Not tryna be lippy about the lip , but maybe check some completed Felix models to see how much is visible.
Going well , good work.

Offline Scottypos

  • Newbie
  • *
  • Posts: 21
Re: Another Felixstowe F.2a Build
« Reply #29 on: April 16, 2018, 09:21:57 AM »
Hey there krow,

  Thanks for the lip, I could use some because according to my wife, I gave her all my lip when she said I had to go do yard work instead of building models, chuckles. Looking around the net for other builds just makes my head big. There are so many fine modelers out there, I have to try to one up them and make mine look better.
  I did look at a bunch of interiors and in all of them the seam is gone and no apparent damage to the lip. It's odd, the instructions actually show the seam on their drawings, but I know it ain't supposed to be there. How these modelers work those seams so....seamlessly... is beyond my technical prowess. I'll play with mine a little more and see if I can erase it.

  Not much done on detail painting today. Just continuing to pick out all the metal bits, and decided to paint the cover on the wireless cabinet. That cabinet and table beckons me to do detailing there. I'd love to open up the cabinet and spread out some radio gadgetry on the table, but WWI radios in 1/32nd scale don't seem to be available. Anyone know where a guy might find some?


  Enjoy the rest of what's left of your weekends, and thanks again for having a peek.