Author Topic: 1/32 Fokker v.23 - my first scratchbuild  (Read 19983 times)

Offline kensar

  • Hero Member
  • *****
  • Posts: 2503
  • Reshaping the world - one piece at a time.
1/32 Fokker v.23 - my first scratchbuild
« on: January 15, 2018, 11:56:54 AM »
I'm starting this build finally after dispatching an RC sailplane project and also in the middle of a FW190 build.  I usually have at least two builds going at the same time.  I saw a picture of this  prototype on the web and took a liking to it.  This plane took part in German fighter trials in March - April 1918, but was rejected due to the view downward being obstructed.  Only one prototype was constructed.

I first thought about modding a Fokker D.VII kit, but RLWP and RAGIII convinced me it would be easier to scratchbuild it, so here I go...

I found some drawings and a build log of an Omega Models 1/48 scale kit on a Dutch website, as well as a few pictures of the original to go by.
Richard also told me about Harry Woodman's book on scratchbuilding, so I got the relevant sections of that.
I also found a cheap 1/32 resin Merc engine from True Details that looked very good, better than the Roden one.
I will be using the D.VII type design and components to fill out the details as that plane was made about the same time.


I drew out the tail surfaces on some 0.040" sheeting.  0.030" was too flimsy.  I figured the actual surfaces were about 1" thick or so.
I also drew out one wing on 0.010" sheeting, but the lines don't show up on pics.


I've started the balsa wood cores for the wing. 


I have them rough shaped using a small plane (using a plane to make a plane).  Final sanding is next and then I'll try skinning them with the plastic sheeting.

Till next time...
« Last Edit: April 20, 2018, 10:57:38 PM by p9o1r1sche »

Offline Des

  • Administrator
  • Hero Member
  • ******
  • Posts: 9325
    • ww1aircraftmodels.com
Re: 1/32 Fokker v.23 - my first scratchbuild
« Reply #1 on: January 15, 2018, 12:32:13 PM »
A very interesting project you have taken on Ken and one that I will be following closely, looking forward to the next updates.

Des.
Late Founder of ww1aircraftmodels.com and forum.ww1aircraftmodels.com

Offline RLWP

  • Hero Member
  • *****
  • Posts: 1494
  • Bodger
Re: 1/32 Fokker v.23 - my first scratchbuild
« Reply #2 on: January 15, 2018, 08:11:11 PM »
but RLWP and RAGIII convinced me it would be easier to scratchbuild it

You don't want to listen to them...

I find a bit of sandpaper wrapped around a sanding block will shift balsa pretty quick, and it seems to be a more flexible way of working. So, the curve on a wing becomes a bit of sanding at varying angles

Another thing, don't sweat wing profiles too much. Get the edges of the balsa block very thin, after that - who is going to check the profile?

Really pleased to see someone else having a go at sratchbuilding

Richard
Hendon for flying - the fastest way to the ground!

Offline Juan

  • Hero Member
  • *****
  • Posts: 2455
  • All gave some, some gave all.
Re: 1/32 Fokker v.23 - my first scratchbuild
« Reply #3 on: January 15, 2018, 09:58:27 PM »
Looking forward to your treatment on this one Ken.  Awesome subject you don't see everyday.

Offline lone modeller

  • Hero Member
  • *****
  • Posts: 5300
Re: 1/32 Fokker v.23 - my first scratchbuild
« Reply #4 on: January 16, 2018, 04:10:42 AM »
I wholly agree with Richard - nice to see someone else having a go. It is actually easier than many people think (and I used to be one of them). I also agree that balsa is best shaped using glass paper as it is soft and easy to work. This is a completely new type to me - another prototype which is very unlikely to ever be produced as a kit - so a learning experience to see one being built.

I will also be watching closely for any tricks or techniques which I can use on one of my own builds in future.

Stephen.

Offline kensar

  • Hero Member
  • *****
  • Posts: 2503
  • Reshaping the world - one piece at a time.
Re: 1/32 Fokker v.23 - my first scratchbuild
« Reply #5 on: January 29, 2018, 03:53:36 AM »
Made a little progress on this, amid many other projects going on currently.

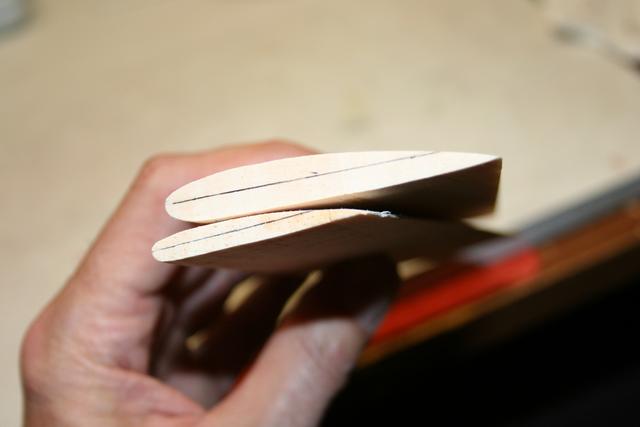
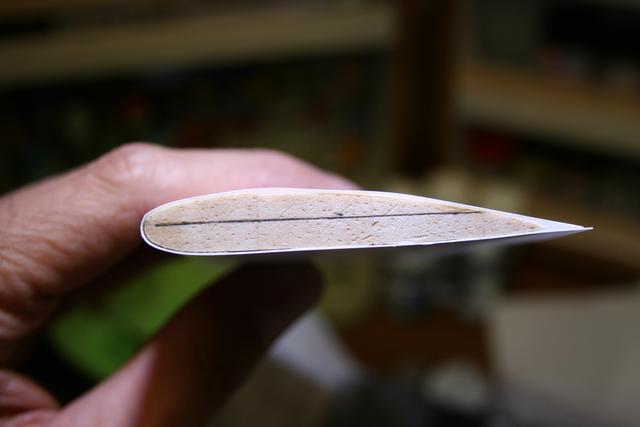
I got the balsa wing cores shaped with sandpaper.  The Fokker's wings are different from a lot of WW1 aircraft in that it is a thick airfoil.  The large end is the wing root, the small one is the tip.  I started with 3/8" thick balsa.


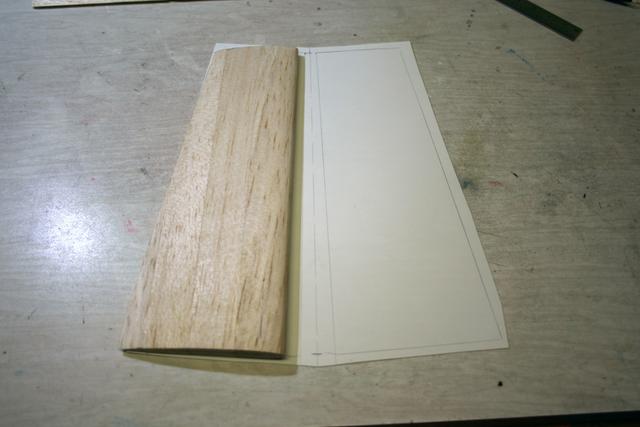
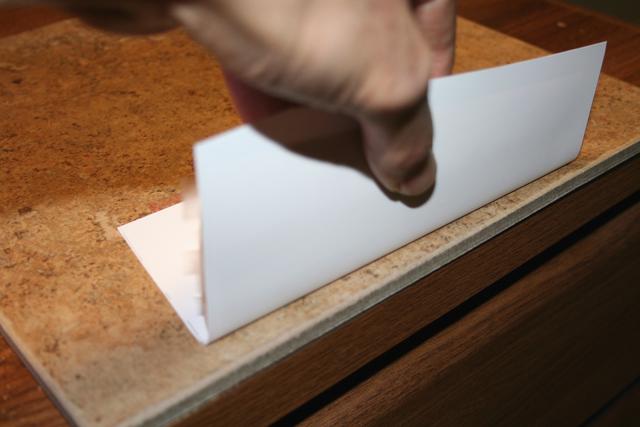
This pic shows the plastic sheet wing skin.  I marked the center of the leading edge.


My first attempt:  attached the skin to the wing bottom with double sided tape and pulled the skin around the leading edge while heating with a heat gun.


Oops - too much heat.  Note to self - use hair dryer, not heat gun.  Start over.


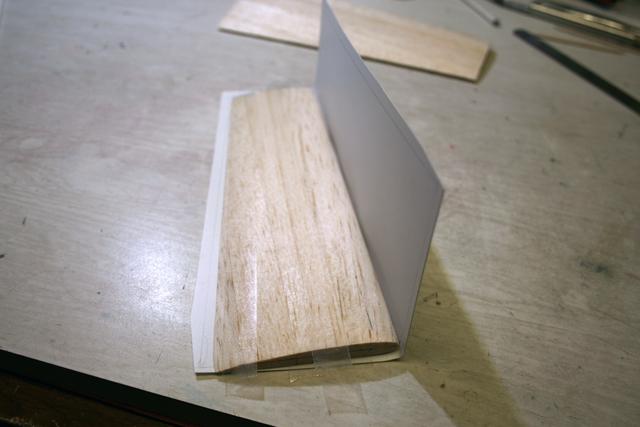
Take two: I put the leading edge of the wing core on the center of the wing skin and rolled it onto the core, bottom first, then around the top.  Used three strips of double sided tape on each side of the core. Heated the leading edge with a hair dryer as I went.


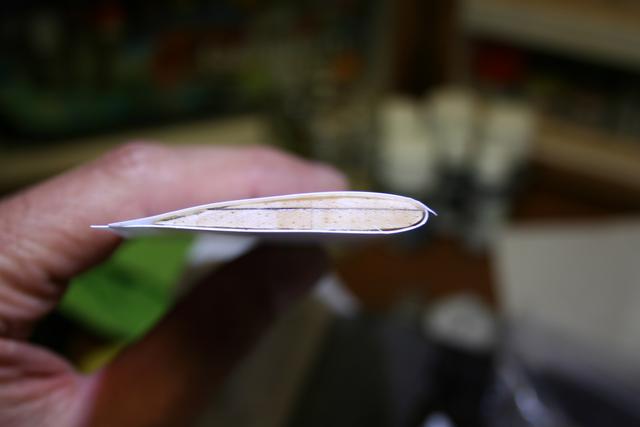
Looking at the wing root, the skin lifts off the core where there is no tape.


I'll let this go this time, but on the next wing, I will cover it more completely with tape.


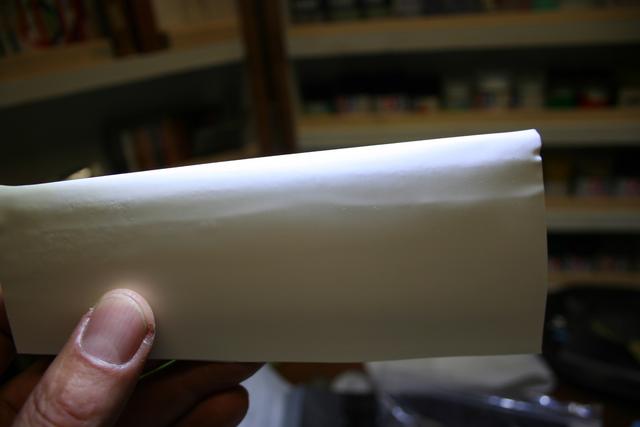
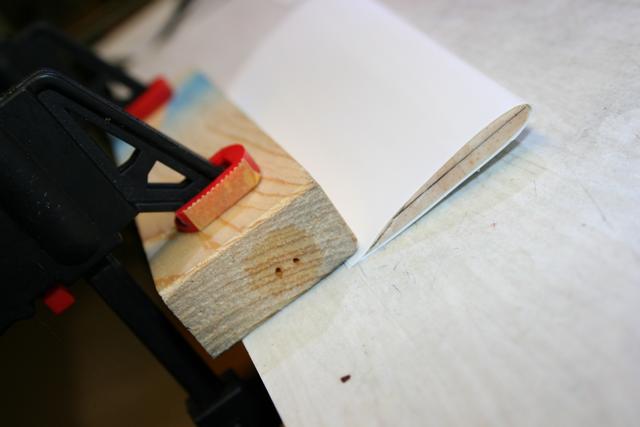
Glued and clamped the trailing edge.  I think the process of building the wing is okay.  On to the other wing.


If anyone has experience with building wings this way and has some tips for me, I would appreciate it.
Thanks.

Ken M.
« Last Edit: April 20, 2018, 10:58:51 PM by p9o1r1sche »

Offline lone modeller

  • Hero Member
  • *****
  • Posts: 5300
Re: 1/32 Fokker v.23 - my first scratchbuild
« Reply #6 on: January 29, 2018, 04:12:02 AM »
I have not used this method Ken but may do so in future if I build another large aircraft. Looking at your attempts so far I would think that you have been very successful.

Stephen.

Offline RLWP

  • Hero Member
  • *****
  • Posts: 1494
  • Bodger
Re: 1/32 Fokker v.23 - my first scratchbuild
« Reply #7 on: January 29, 2018, 08:26:13 AM »
Tips, well...

I use a fan heater, not a hairdryer or heat gun. So far all mine have had sharp leading edges, so I have been holding the skin between two blocks of wood

I always completely cover the balsa core with tape

Sorting out what happens at the wing tips is trying, you'll get there with persistence

I recently got a balsa core completely misplaced when sticking it to the outer skin. Pulling it off I destroyed the core...

Finally this bit: "I'll let this go this time" is a really good way of approaching this. You (and I) are not likely to get everything right first go, and finishing a 'plane is a better result than junking a project

Welcome to the Woodman Club - you are doing fine

I have a DeHavilland Cirrus Moth on the go on another forum: http://forum.largescaleplanes.com/index.php?showtopic=72068. I'm hoping to inspire a few Spitfire and fast jet builders. Must be mad

Richard
Hendon for flying - the fastest way to the ground!

Offline kensar

  • Hero Member
  • *****
  • Posts: 2503
  • Reshaping the world - one piece at a time.
Re: 1/32 Fokker v.23 - my first scratchbuild
« Reply #8 on: February 09, 2018, 08:54:15 AM »
Richard - Your Moth is looking good.  Its coming together well.  Hope your injury isn't slowing you down too much.

Feb 7 Update

Some major parts cut out.


Getting the fuse started.


Squaring up the fuse.


Putting the front fuse top on.


I see a metal engine cover in my future!


I'm planning to construct the cockpit in one piece and insert it up from the bottom before putting the bottom of the fuse on.
« Last Edit: April 21, 2018, 05:29:18 AM by p9o1r1sche »

Offline RLWP

  • Hero Member
  • *****
  • Posts: 1494
  • Bodger
Re: 1/32 Fokker v.23 - my first scratchbuild
« Reply #9 on: February 09, 2018, 09:40:23 AM »
Injury coming along nicely, thank you. Scar healing well and mobility of my finger improving by the day

Y'know, I was worried about this thread, that you might have got discouraged. It looks like it's the complete opposite!

I would build a styrene engine cover then stick alloy film to that. I'm interested to see what results you get, are you thinking of 'engine turning' it?

Model on - loving your work

Richard

I think Des would be delighted by this
Hendon for flying - the fastest way to the ground!

Offline RAGIII

  • Hero Member
  • *****
  • Posts: 18793
Re: 1/32 Fokker v.23 - my first scratchbuild
« Reply #10 on: February 09, 2018, 09:53:29 PM »
This is looking quite impressive! Hard to believe it is your first !
RAGIII
"A man has to know his limitations": Harry Callahan

"Don't slop it on" Lynda Geisler

Offline kensar

  • Hero Member
  • *****
  • Posts: 2503
  • Reshaping the world - one piece at a time.
Re: 1/32 Fokker v.23 - my first scratchbuild
« Reply #11 on: February 09, 2018, 10:57:36 PM »
Discouraged? - what does that mean?

Once I get going on a project, I try to finish it.  I'll try using techniques that I think up first, if that doesn't work out, I'll try things that have worked for others.  A styrene engine cover is plan B.  I want to try a metal one first.  It would be more of a scale thickness and appearance.  I have always been envious of those that can work with sheet metal.
Not sure what you mean by 'engine turning'?
Construction so far has been very similar to that of an RC airplane built of balsa wood.  I have built many of those, so this is not really new to me, but it is the first I've done in plastic.
Now if I could only find more time to work on this.  I am also doing a major bathroom remodeling project in the house.

I was very saddened to hear of Des' passing.  I had corresponded with him regarding my Sopwith build and saw that he commented in almost every thread here with encouragement and praise.  He will be missed.

Offline RLWP

  • Hero Member
  • *****
  • Posts: 1494
  • Bodger
Re: 1/32 Fokker v.23 - my first scratchbuild
« Reply #12 on: February 09, 2018, 11:05:54 PM »
Engine turning:


I think you'll get frustrated with continually bending parts made only from thin alloy, it isn't elastic enough for handling. I'm still interested to see what you come up with - after all I could be wrong

Richard
Hendon for flying - the fastest way to the ground!

Offline Juan

  • Hero Member
  • *****
  • Posts: 2455
  • All gave some, some gave all.
Re: 1/32 Fokker v.23 - my first scratchbuild
« Reply #13 on: February 09, 2018, 11:12:26 PM »
That is some impressive progress, she is coming to life.   :D

Offline kensar

  • Hero Member
  • *****
  • Posts: 2503
  • Reshaping the world - one piece at a time.
Re: 1/32 Fokker v.23 - my first scratchbuild
« Reply #14 on: February 20, 2018, 11:17:32 AM »
Update for Feb 19

No engine turning on this one.

I have not had much time to work on this lately, but managed to make some progress.

I dealt with the wing tips.  Cut the plastic sheeting off, hardened the balsa core with thin CA glue (RC building trick), and applied body putty.
I got the shape of the tips wrong, so I am reapplying putty to reshape them.


This putty is solvent based and sands very easy.  Blends into the wing well.  With some primer, you shouldn't be able to see any line at the tip.


I put the engine together and painted it.  I found it was twisted all different ways, but still useable.  I didn't detail all of it since only the very top will be visible.  Looks like I will need to add a couple of small lines to it.


I also realized the top of the fuse is shaped wrong, so I will fix that soon.  It should be a lot flatter.  Will need to blend it in with the height of the engine.
« Last Edit: April 22, 2018, 08:20:10 PM by p9o1r1sche »