Author Topic: FINISHED: "Ikarus 1916" - Shot down LVG C II  (Read 42999 times)

Offline Borsos

  • Hero Member
  • *****
  • Posts: 3315
FINISHED: "Ikarus 1916" - Shot down LVG C II
« on: August 15, 2016, 08:20:41 PM »
Good morning friends,

after a holiday break I'd like to present my first steps in building a diorama for the diorama group build. I intend to do a scene at the site where a German twoseater crashed after being shot down over the bloody Somme battlefields in fall 1916. Some soldiers came along to watch the wreckage while the victorious RFC pilot is brought to the site by his driver in a Vauxhall staff car from his airfield, accompanied by a fellow RFC officer. I want to portray him in the very moment when he sees the dead enemies lying on the ground and his feelings of victory get mixed with bitterness facing the grimm reality of war.

So far in theory. The story of this diorama needs several special figures. The big advantage of bigger scale (1/32, 1/35) is that there are several wonderful injection moulded wwi figures and many even better resin figures. ICM, Masterbox and Tamiya for instance offer high quality wwi infantry of many nations and the resin products of Aviattic, Tommy's War, Wingcockpit, Elan13, Black Dog, CSM and several others are well known here. The problem is: If you want to model a very special scene, all these figures don't have fitting poses. The plastic figures offer mostly the usual fighting poses, the aircrew figures are rather static, made for being put next (or on)to an airplane. If you want to tell a certain story, you cannot go without convert existing figures or sculpting your own respectively. All the great Diorama makers, like Per Olav Lund (if you haven't seen his works: they are breathtaking!), had to go this way. I personnel love figures and dioramas and did several attempts to convert existing figures at first in 1/72 and 1/48, and I am still struggling with that challenge. Sculpting and painting a good figure for me is still the peak (or one of the peaks) of modelling. Although I made some progress compared to my first tries, I still have a lot ( a lot lot lot) to learn. But converting figures makes fun, you don't need to have a huge working space (therefore you can even take your projects with you when you go on holiday) and many things are even much easier than thought - especially if you use aftermarket products.
As this Group Build is about dioramas and dioramas often need figures, I thought it would possibly be a good idea to share my approach in figure conversion.
There are many more relatively cheap figure sets around that contain many useful poses that one could need for a diorama. ICM, Masterbox, Dragon, Mini Art, Tamiya, and many other manufacturers offer a huge variety of figures. The problem is: They don't fit WWI, the vast maiority is WW2. And you'll frequently come to the point where you need a special pose that is not offered as a multipose 1/35 figure and you have to scratchbuilt it, by mixing legs, arms and torsos of several other figures.
These are my solutions to get the figures I need:
1. To detail existing custom made figures
2. To "backdate" existing custom made figures to the desired epoque.
3. To scratchbuid figures with poses not yet offered.
I'll give an example for every of these three ways amd I hope, you like it or can use some of these ideas for your own diorama projects.


Borsos
« Last Edit: July 01, 2017, 03:58:55 PM by Borsos »
"Deux armées aux prises, c'est une grande armée qui se suicide."
Barbusse.
"Ein Berg in Deutschland kann doch einen Berg in Frankreich nicht beleidigen. Oder ein Fluß oder ein Wald oder ein Weizenfeld."
Remarque.

Offline FarEast

  • Sr. Member
  • ****
  • Posts: 443
Looking forward to this Borsos!

Sounds like a great Diorama 

Offline stefanbuss

  • Hero Member
  • *****
  • Posts: 976
I will be following very closely - as you know i had changed a CSM figure recently and would like to learn how you will do that.

Stefan

Offline IanB

  • Hero Member
  • *****
  • Posts: 2435
Very interesting scene, I'll be following!
 That photo made me think...I'm just reading "The Somme" by Richard van Emden and literally yesterday read a passage by a Private of the 1/6th Gloucestershire Regiment about the skeletons lying about. He vividly describes "one little fellow, about 4'10" (1.47m), with a small forage cap covering his skull....there is some sorrowing mother away in far Fatherland who mourns her son - probably never knows that he lies uncovered in enemy territory..."
 I wonder if this was the same man....it certainly brings it all home a little more......

Ian

Offline RAGIII

  • Hero Member
  • *****
  • Posts: 18793
I am looking forward to seeing your work on the figures!
RAGIII
"A man has to know his limitations": Harry Callahan

"Don't slop it on" Lynda Geisler

Offline Borsos

  • Hero Member
  • *****
  • Posts: 3315
Thank you for your interest!
1. Adding detail to a custom made figure. That's quite a simple step. As said before there are many well made figure sets on the market now and all offer great potential. The stuff I have at home to add more detail are at first the great "weapons and equipment" sets from ICM and secondly a collection of resin heads from hornet & wolf. There are other brands too, but hornet offers a wide range of different face expressions. I have many bold heads, some with hairs and some even with ww1 headgear. For my diorama i choose a set from Masterbox. It contains standing British Infantry of 1916.

The poses are suitable and they carry the leather equipment instead of the 1908 web kit which fits for Kitchener's army. They also carry the early style gas mask bags. But the expression of the faces could be better and the steel helmets are way too small. Some hornet heads instead of the kit's heads and steel helmets from ICM and it looks much better. straps and ribbons are made with Tamiya tape. All standing infantry men of this project are done this way. I took small amounts of Green stuff to create the hairs with the help of a needle. Onto the hairs I placed the steel helmets.

Soon more will follow...
Thank you
Borsos
« Last Edit: July 01, 2017, 04:01:06 PM by Borsos »
"Deux armées aux prises, c'est une grande armée qui se suicide."
Barbusse.
"Ein Berg in Deutschland kann doch einen Berg in Frankreich nicht beleidigen. Oder ein Fluß oder ein Wald oder ein Weizenfeld."
Remarque.

Offline lone modeller

  • Hero Member
  • *****
  • Posts: 5300
This is going to be another incredibly realistic dio of yours with no punches pulled - good. It is all to easy to forget the sheer horrors that those men went through (and still do today in war zones), this will act as a timely reminder to all that despite the colourful schemes and wonderful detail that we add to our models, the originals were there to deal death or injury to someone.

Stephen.

Offline coyotemagic

  • Hero Member
  • *****
  • Posts: 7710
  • "Here's to not buggering it up." -Winston Chuchill
    • My Models
Extraordinary work on the figures, Borsos!  I would be thrilled if I could do a decent job of simply painting figures, never mind modifying them to such an extent.  This is going to be another of your masterpieces, my friend.  Will the LVG be in the scene and what will you be using as the basis for it?
Cheers,
Bud
"All men dream: but not equally. Those who dream in the dark recesses of the night awake in the day to find all was vanity. But the dreamers of day are dangerous men, for they may act their dreams with open eyes, and make it possible." -T. E. Lawrence

Offline RAGIII

  • Hero Member
  • *****
  • Posts: 18793
I have to agree with my Amigo, Extraordinary work on the figures indeed! I struggle with painting figures and like Bud I can only imagine doing conversion work on them to your standard!
RAGIII
"A man has to know his limitations": Harry Callahan

"Don't slop it on" Lynda Geisler

Offline stefanbuss

  • Hero Member
  • *****
  • Posts: 976
Close ups, please! You talk about hair, but i cannot see any haircut at all. How dare you!!!!

 8)

Honestly: Closeups would be appreciated, especially of the dead crew.

S.

Offline Jim

  • Full Member
  • ***
  • Posts: 205
Close ups, please! You talk about hair, but i cannot see any haircut at all. How dare you!!!!

 8)

Honestly: Closeups would be appreciated, especially of the dead crew.

S.

Stefan - there are close-ups of the dead crew in Borsos' photo bucket. If you click on one of the one of the posted photos it should open so you can see the others.
Woof!

Offline Des

  • Administrator
  • Hero Member
  • ******
  • Posts: 9325
    • ww1aircraftmodels.com
You are doing an excellent job so far with what is going to be a brilliant diorama, the work you do on the figures is amazing.

Des.
Late Founder of ww1aircraftmodels.com and forum.ww1aircraftmodels.com

Offline Borsos

  • Hero Member
  • *****
  • Posts: 3315
It is all to easy to forget the sheer horrors that those men went through (and still do today in war zones), this will act as a timely reminder to all that despite the colourful schemes and wonderful detail that we add to our models, the originals were there to deal death or injury to someone.

Stephen.

Absolutely, Stephen, thank you for bringing it to the point!

Thank you all for your interest! Bud, yes, I wanted to show the LVG too, but I don't know yet exactly how. Edo was so kind and share his technique of modelling destroyed wooden airframe by using wood and leadfoil. I will definitely show some destroyed parts of the LVG, but my plan is to build a wreck that is still recognisable as an LVG C II. I have to see, how much time there is going to bel left as I start a new job in mid September and I am sure that I have much less time for modelling

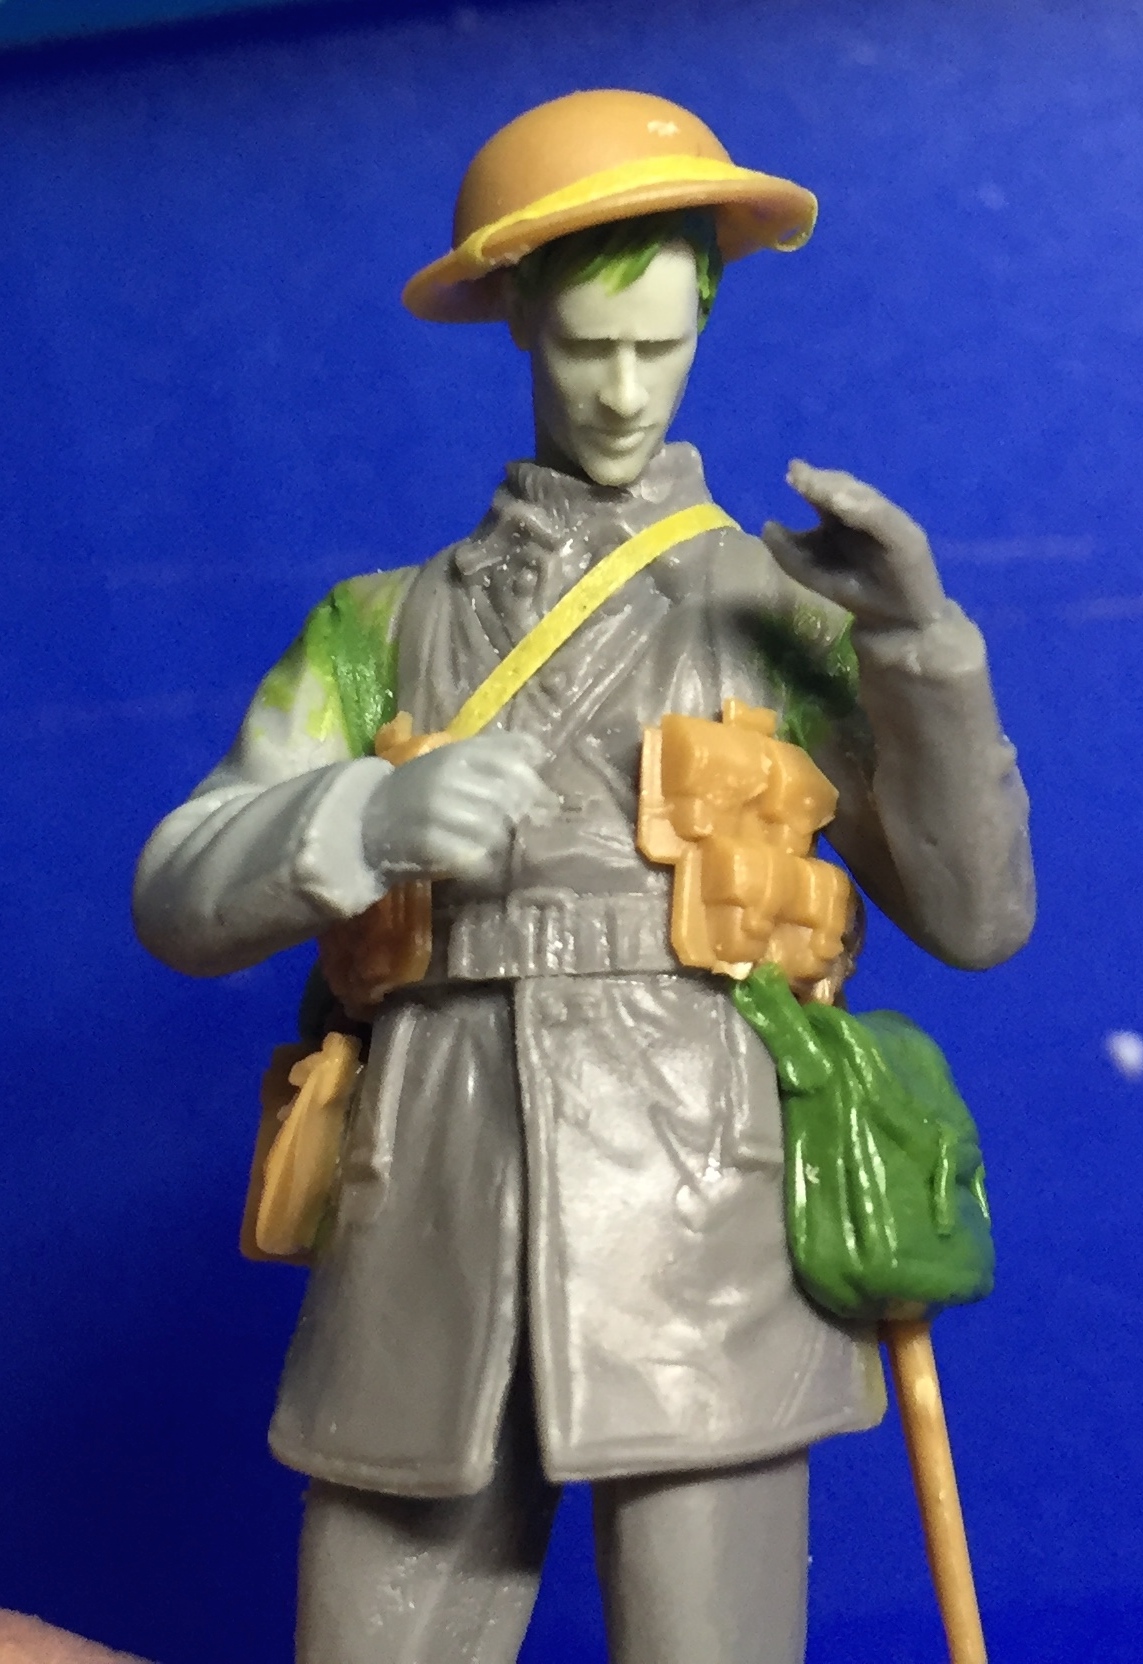
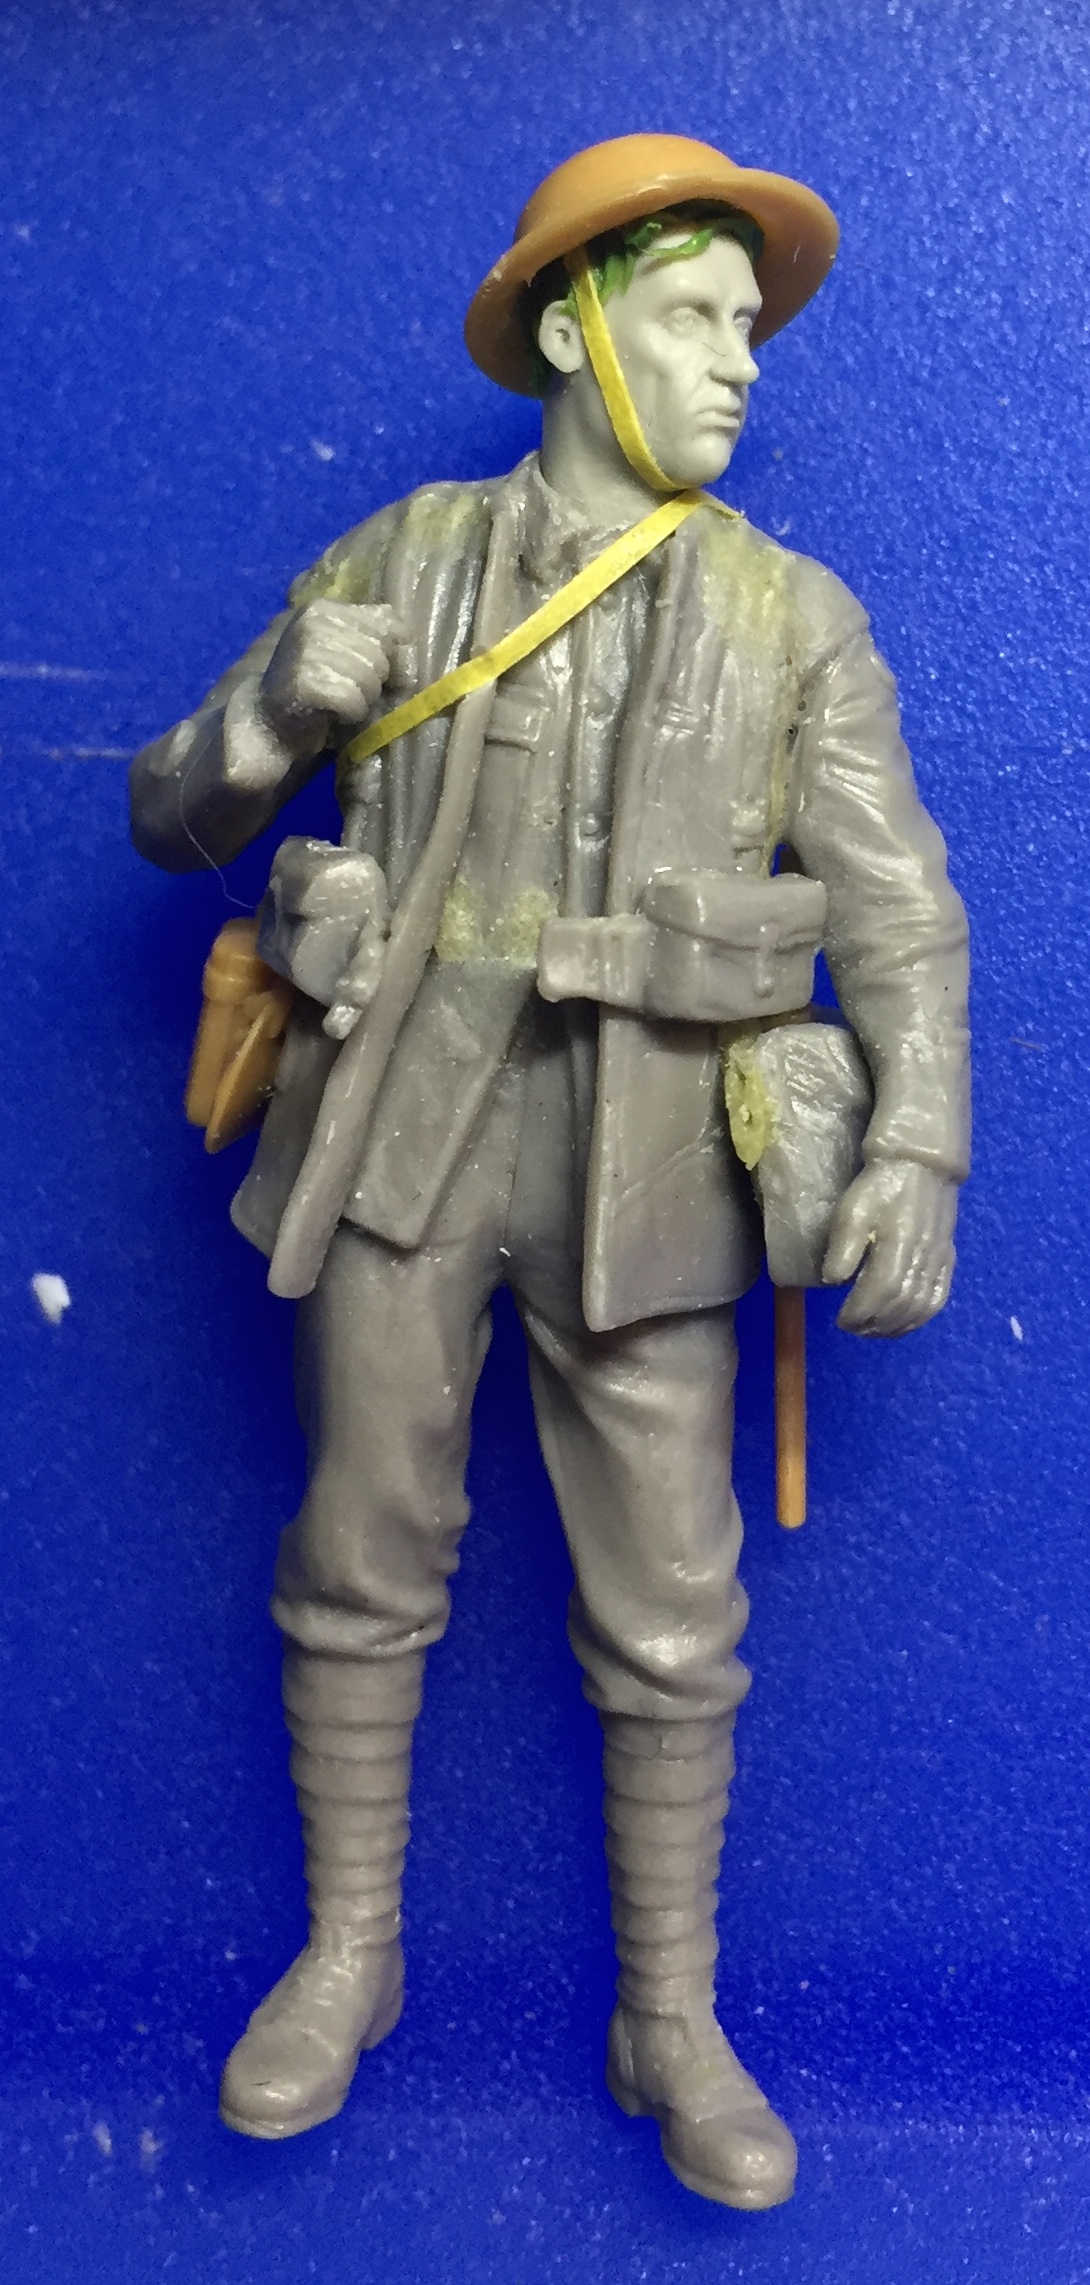
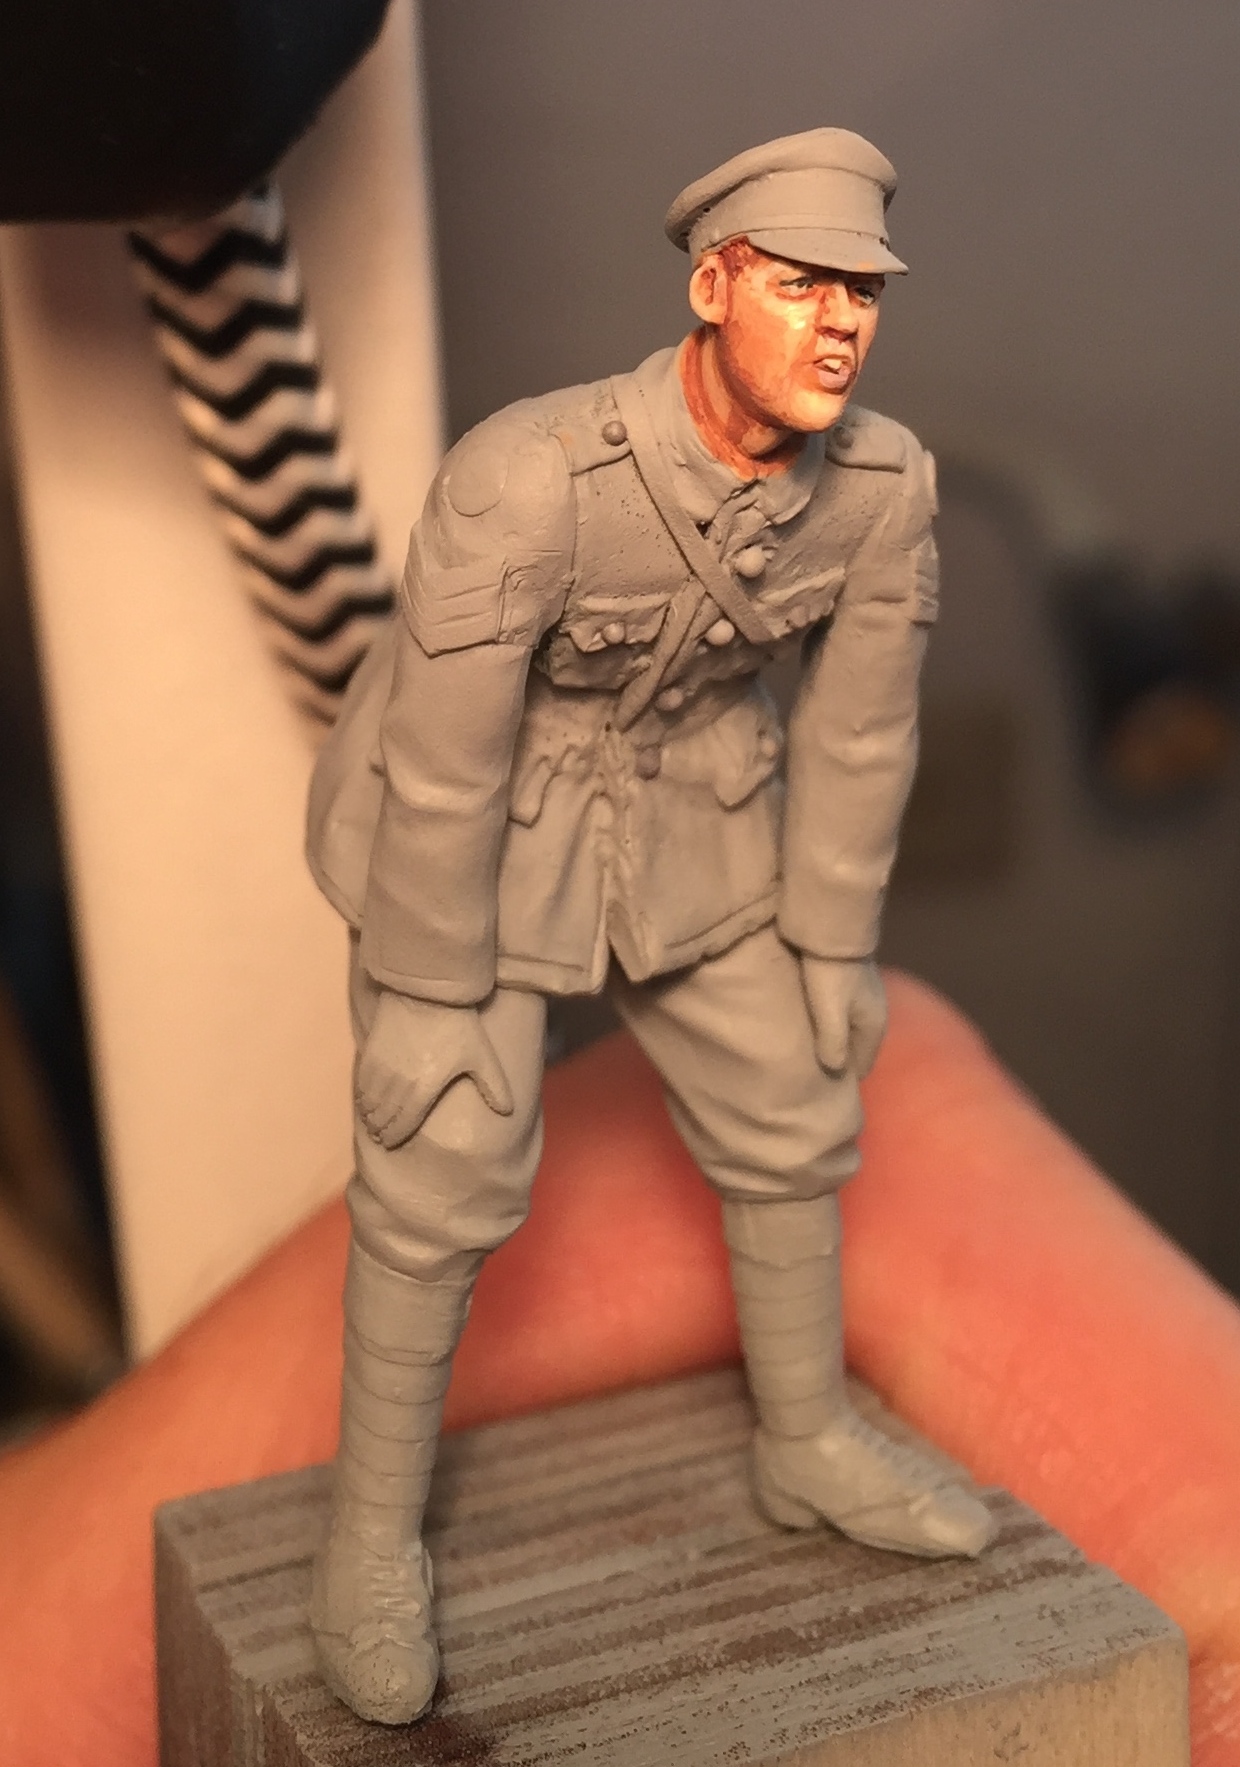
Of course, the close ups:  As described, I only changed the heads and added some ICM equipment and some Tamiya tape here and there. To fit the tin hats, I created some hairs with Green Stuff (ah, and some bags are made of this material too):

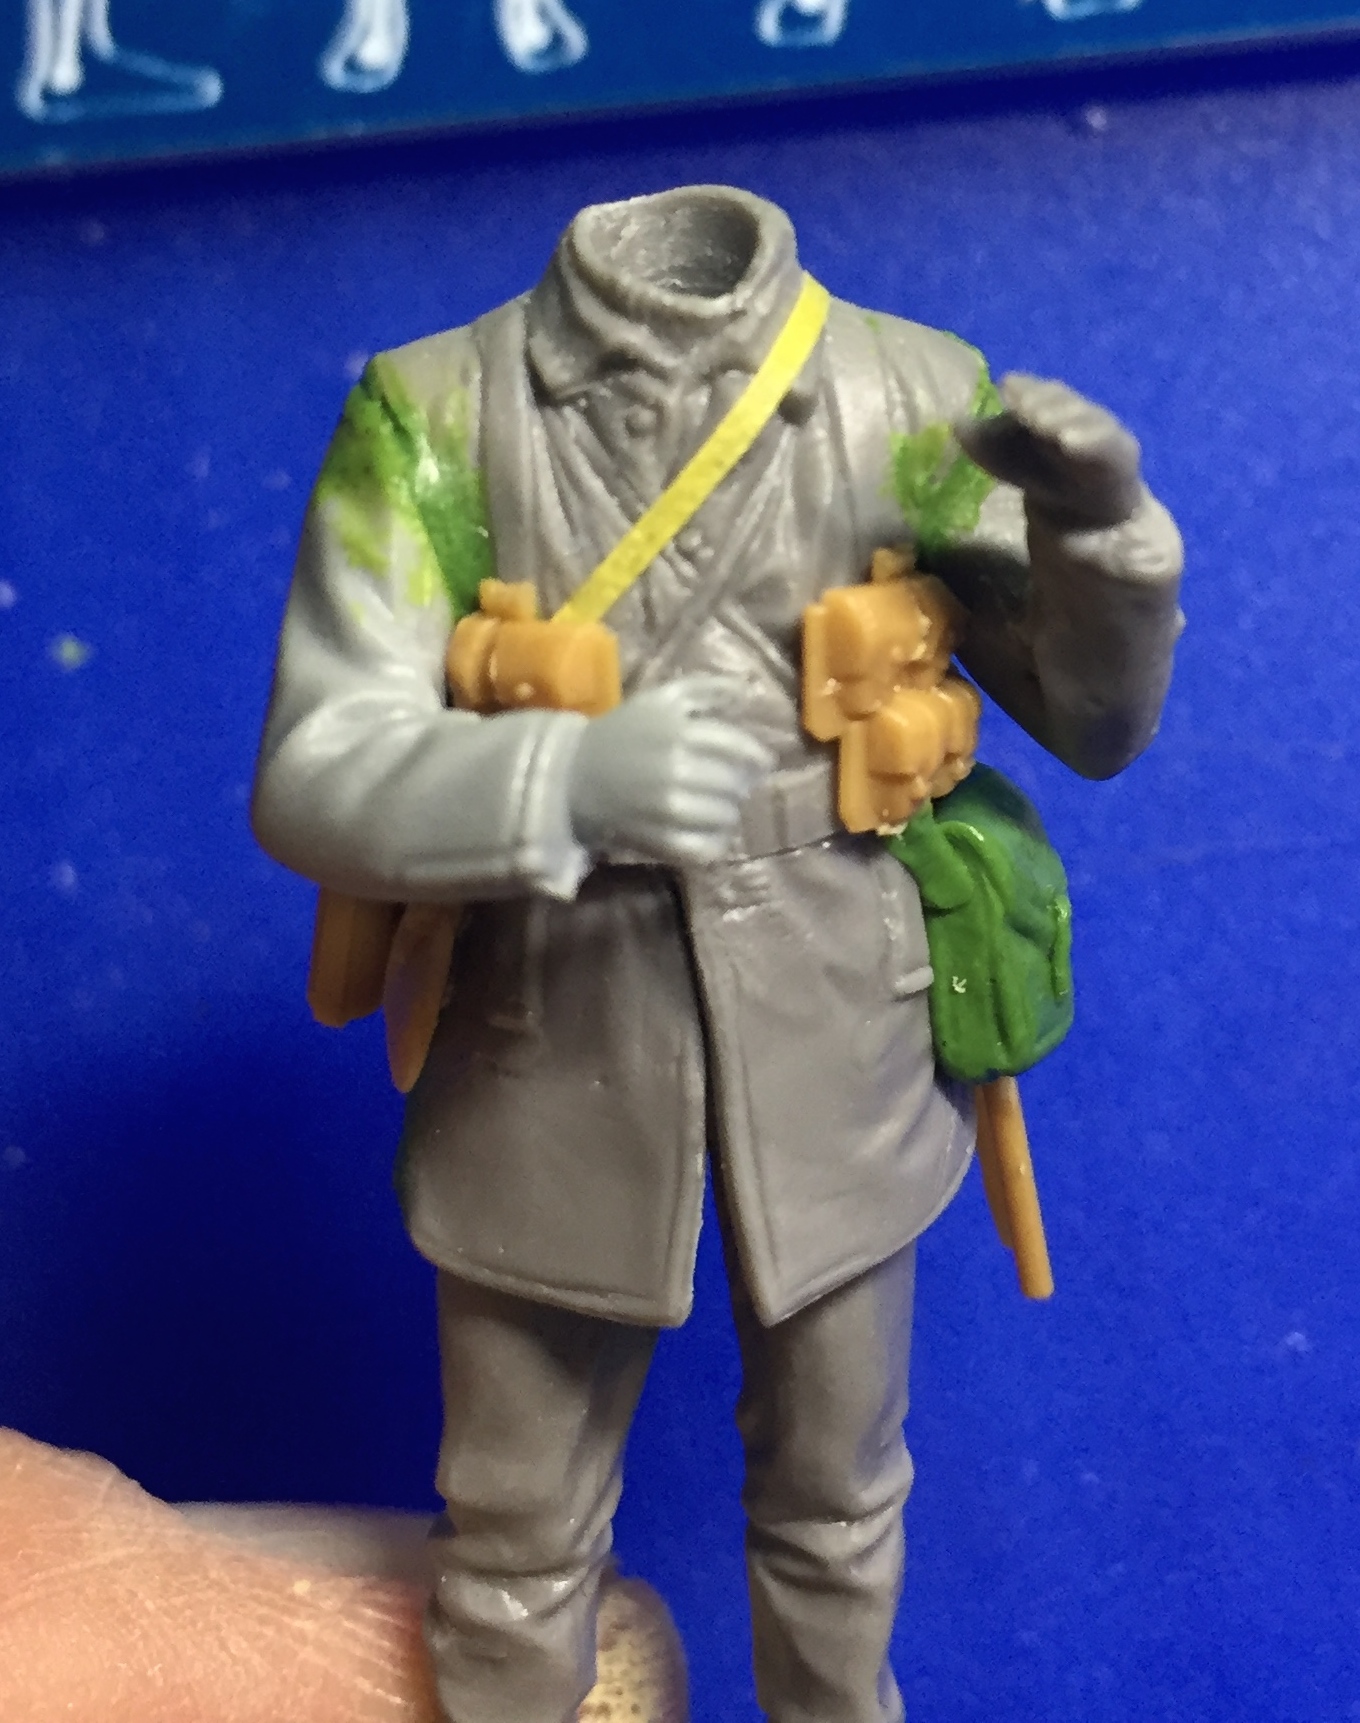
Then I'd talk about step 2: Backdating custom made figures of other ages (mainly WW2, as the maiority of multipose plastic figures are WW2 stuff). It's always good to collect what you get your hands on, especially when there's a sellout somewhere. Most sets cost about 5-10€ and they are a wonderful raw material for conversions.
this Sergeant of the British medical service is such a conversion of another Masterbox figure:
(the head is hornet again. He still needs some shoes...)

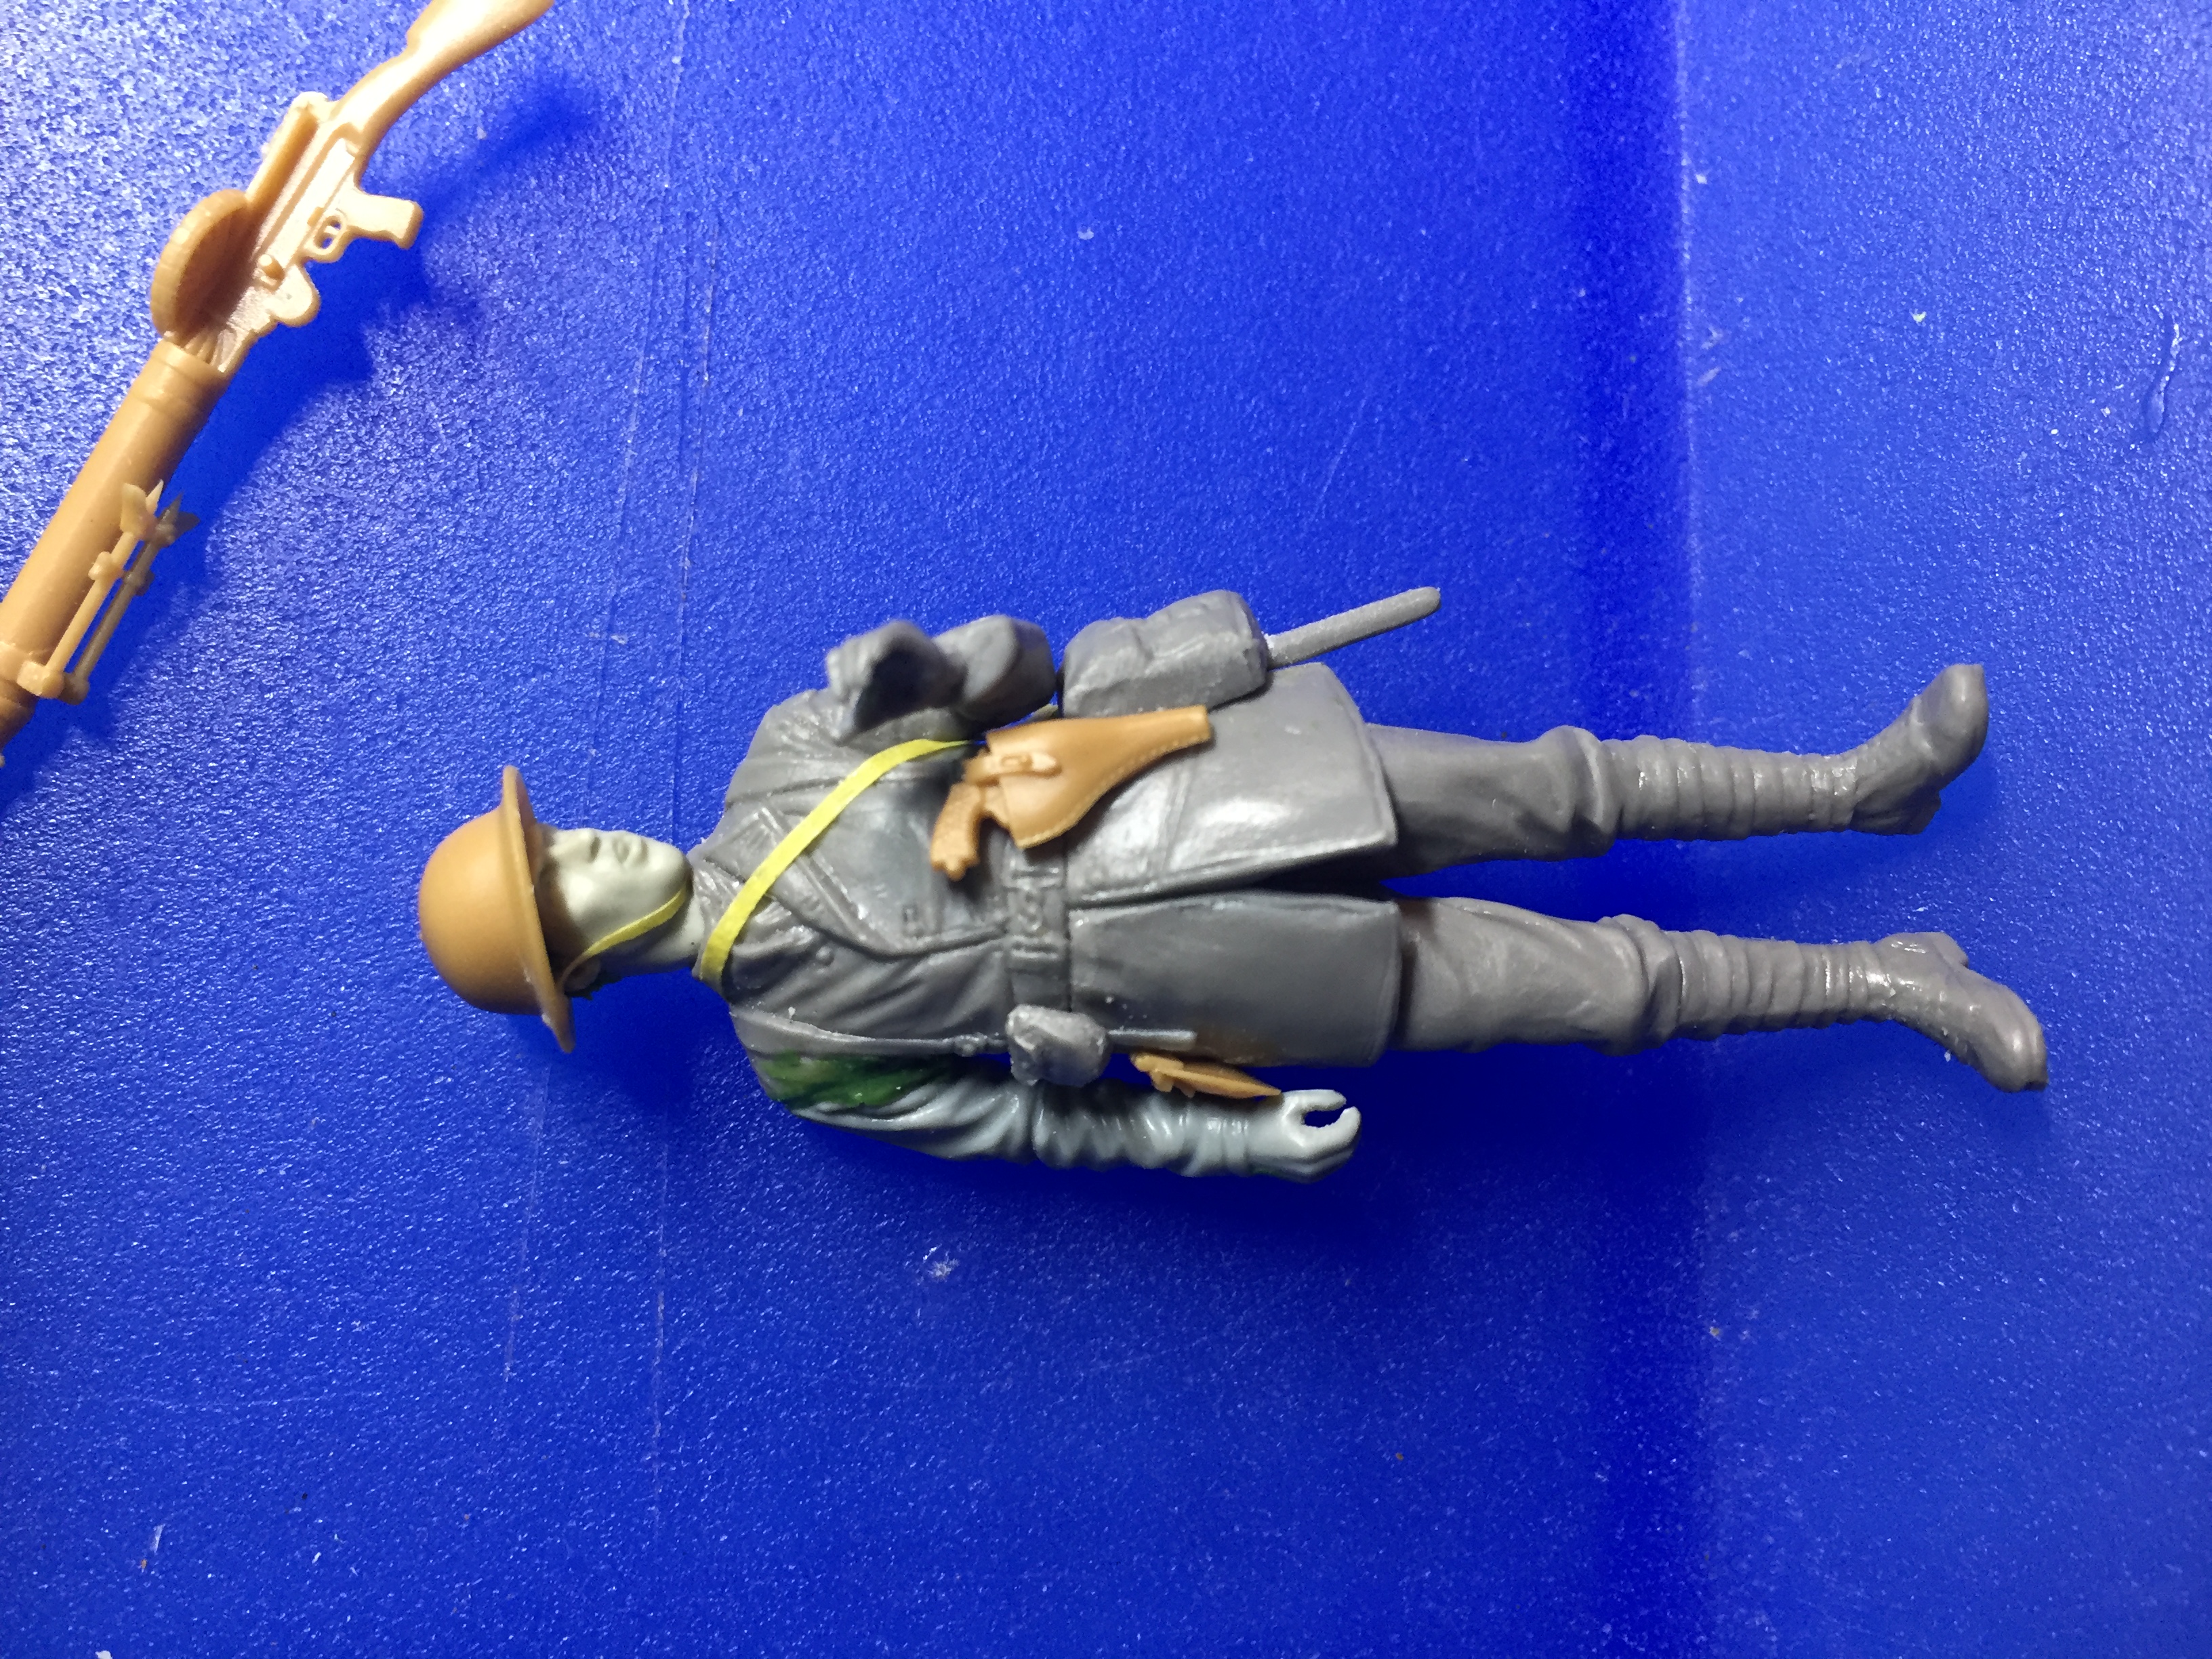
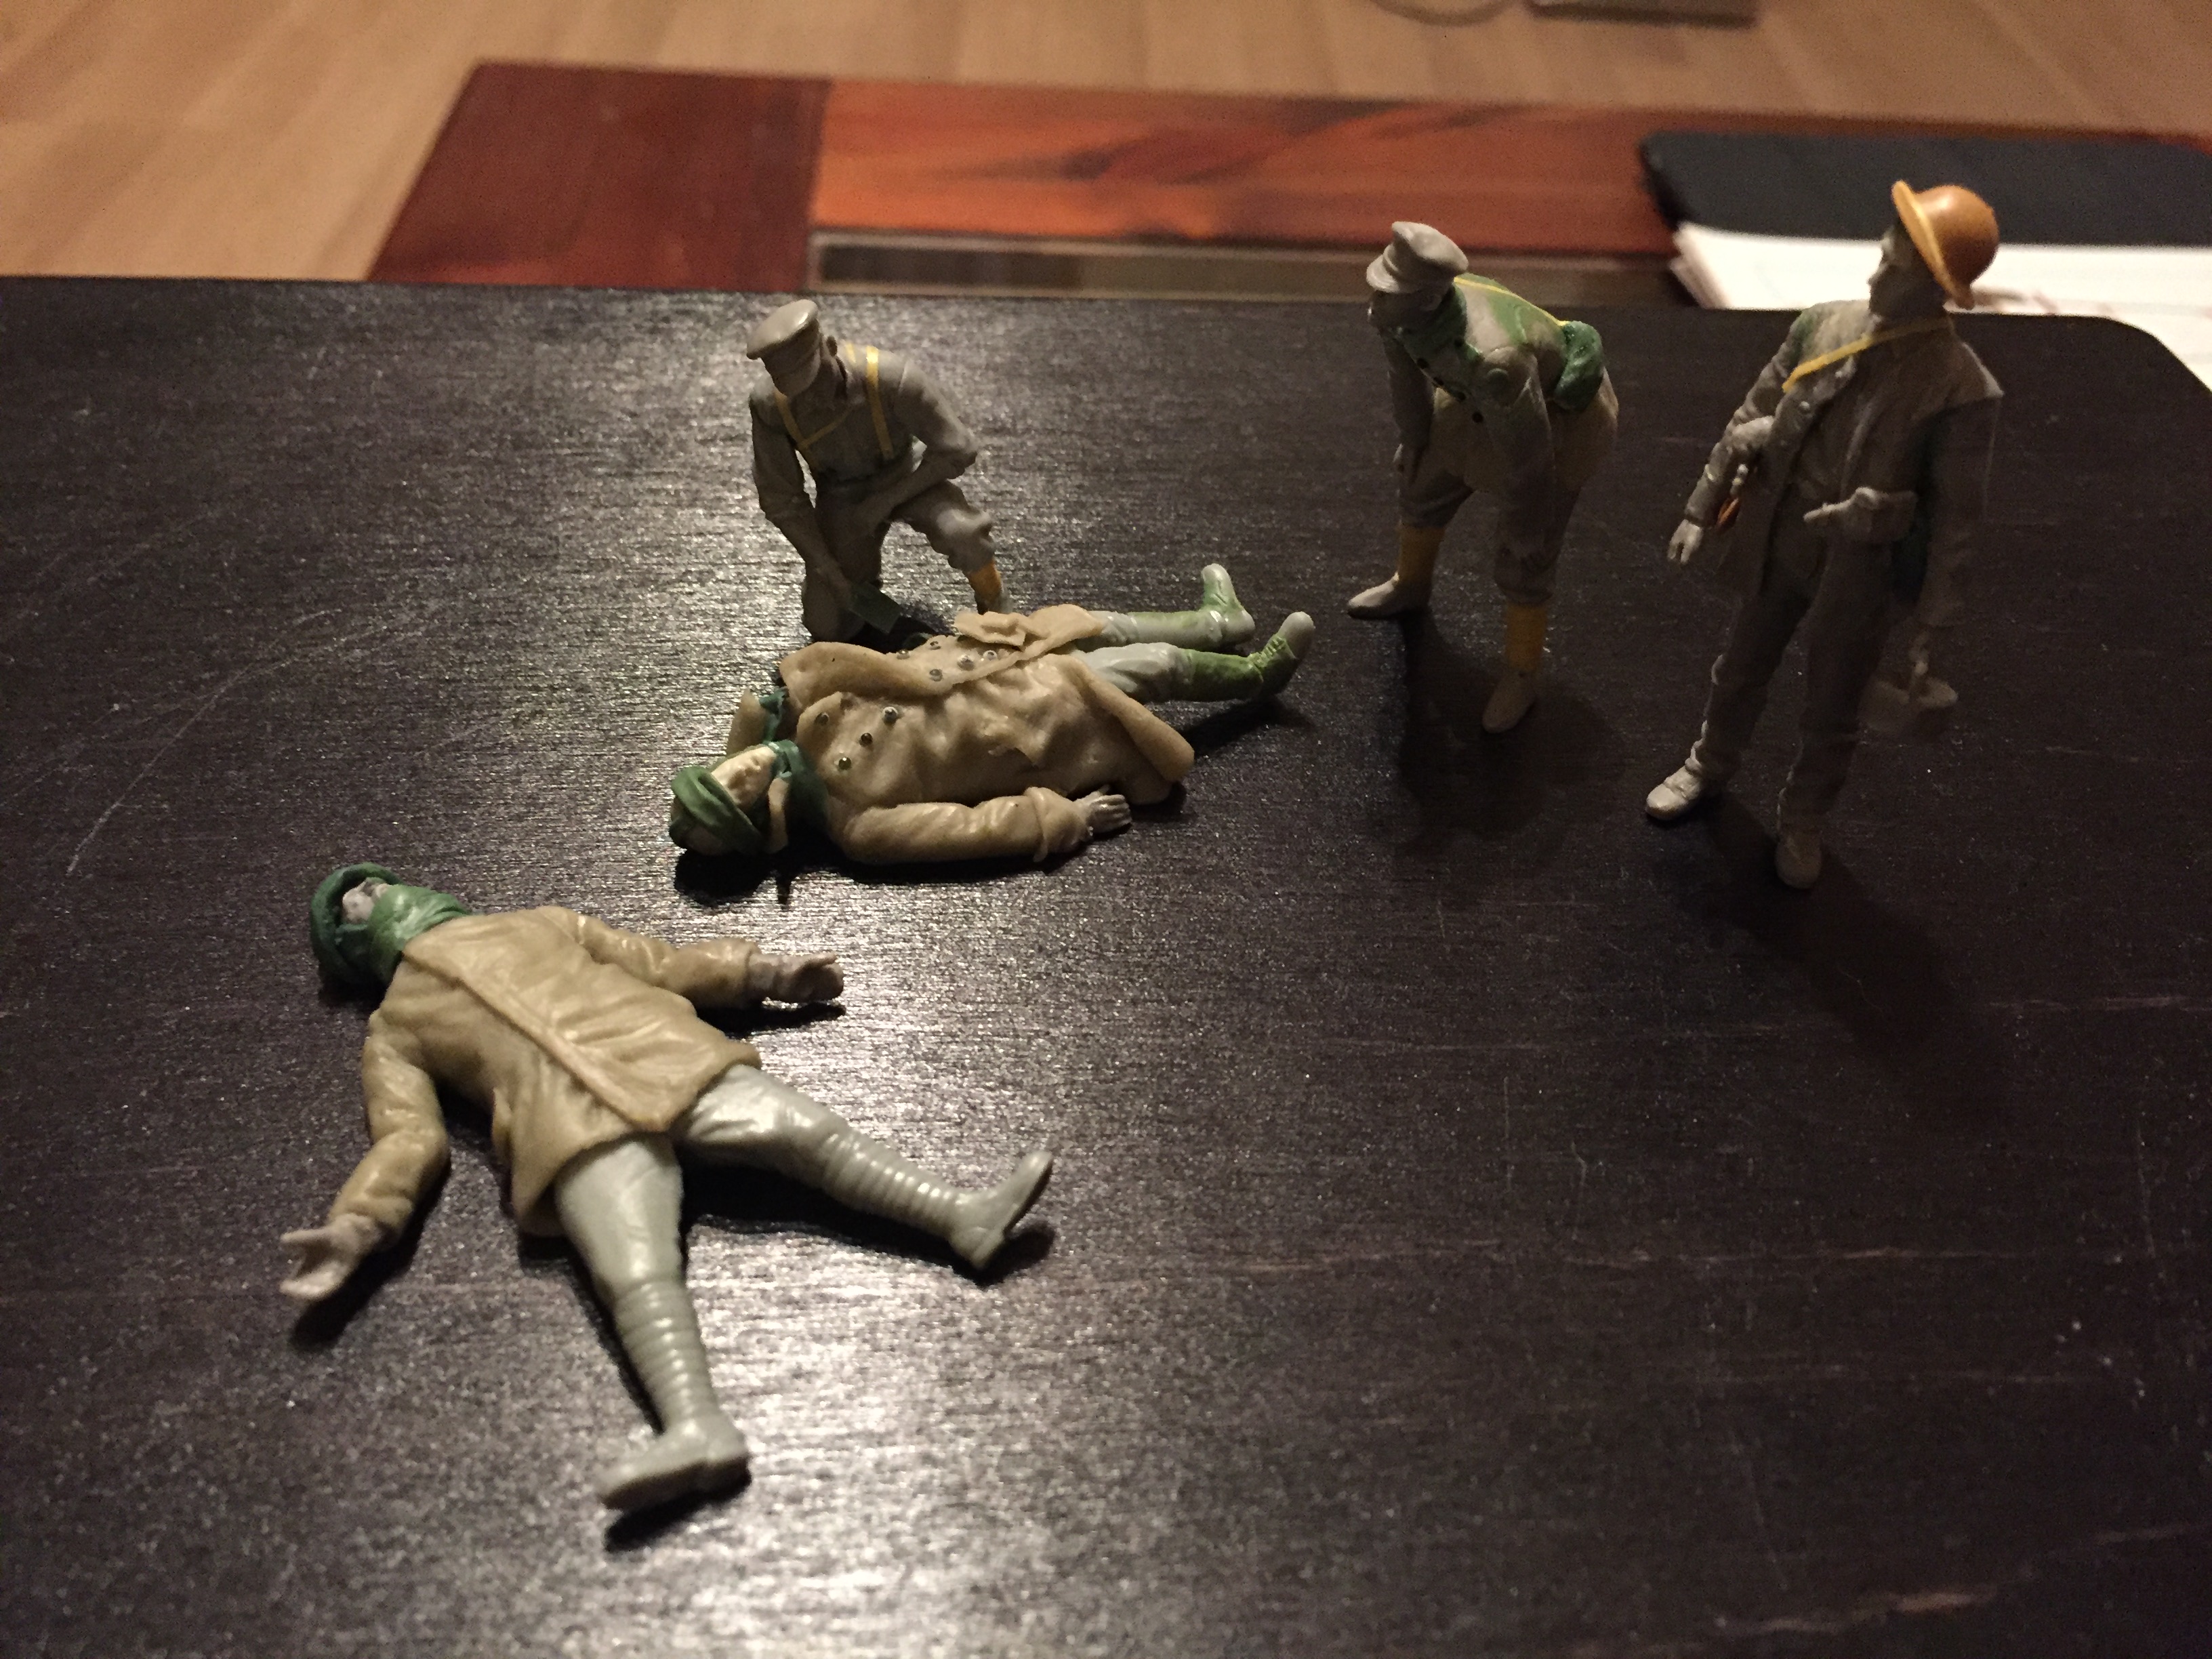
And at last creating own poses. For the dead aircrew I just used some legs from a set of WW2 Russian infantry
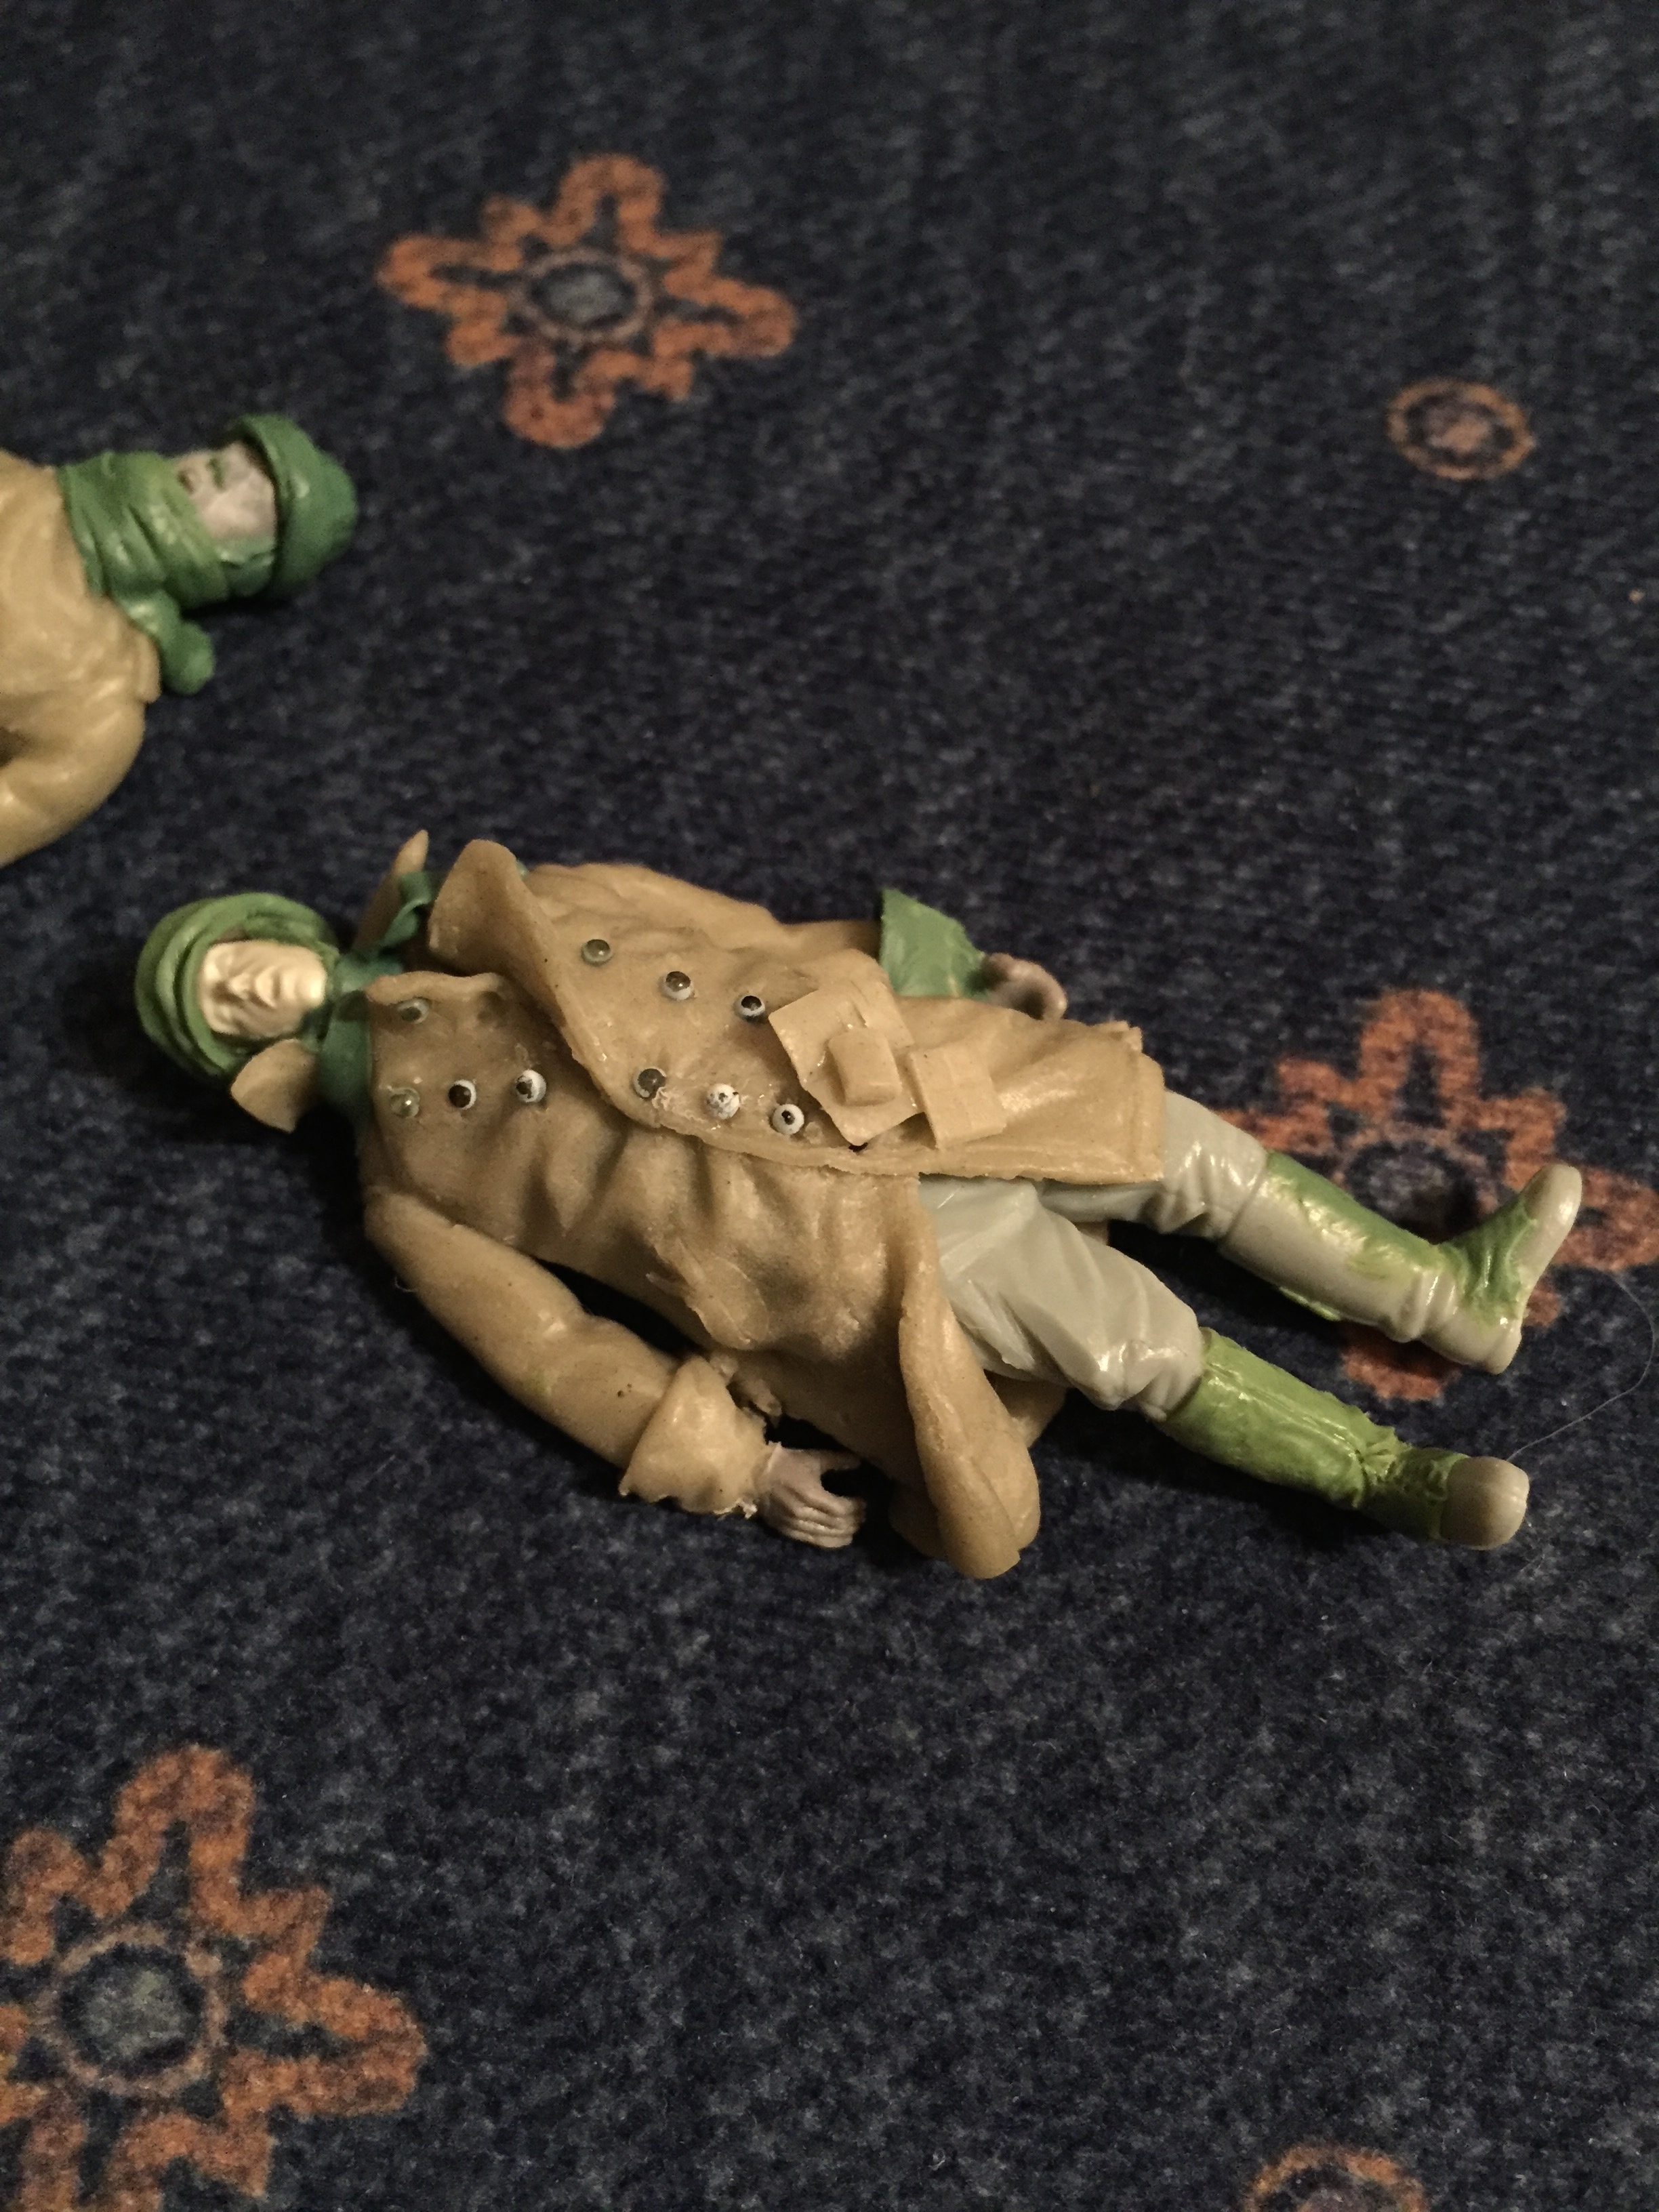
The goggles will follow after painting, I want to create them with clear plastic.
One clue here is to split every complex structur mentally into simple geometrical figures.
Again I just can offer in progress shots of the British pilot - Sorry!
I want him to walk from the car to the crash site, to look after the casualties and to pause. I played around with many figure parts and in the end I started with these two legs:

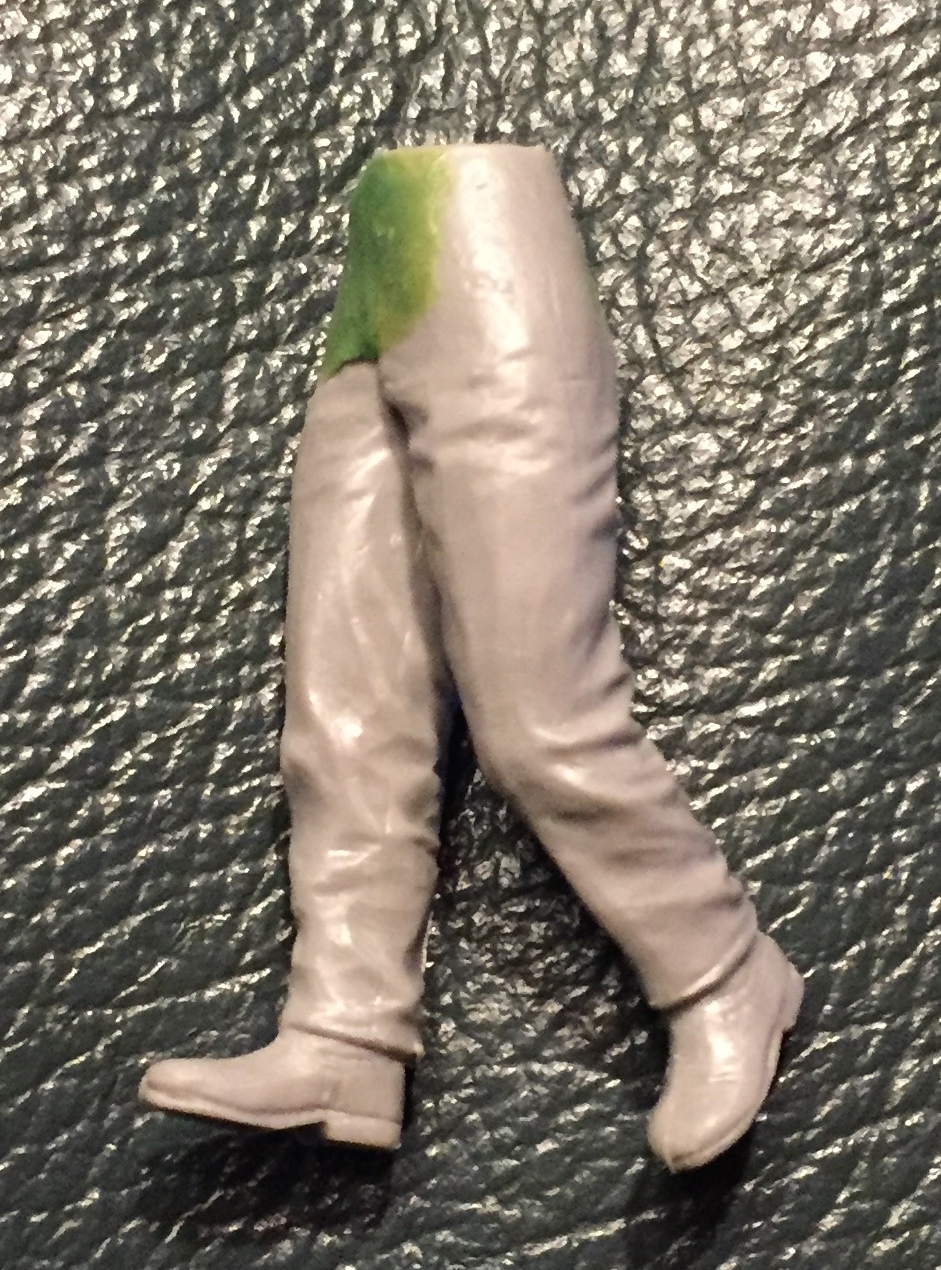
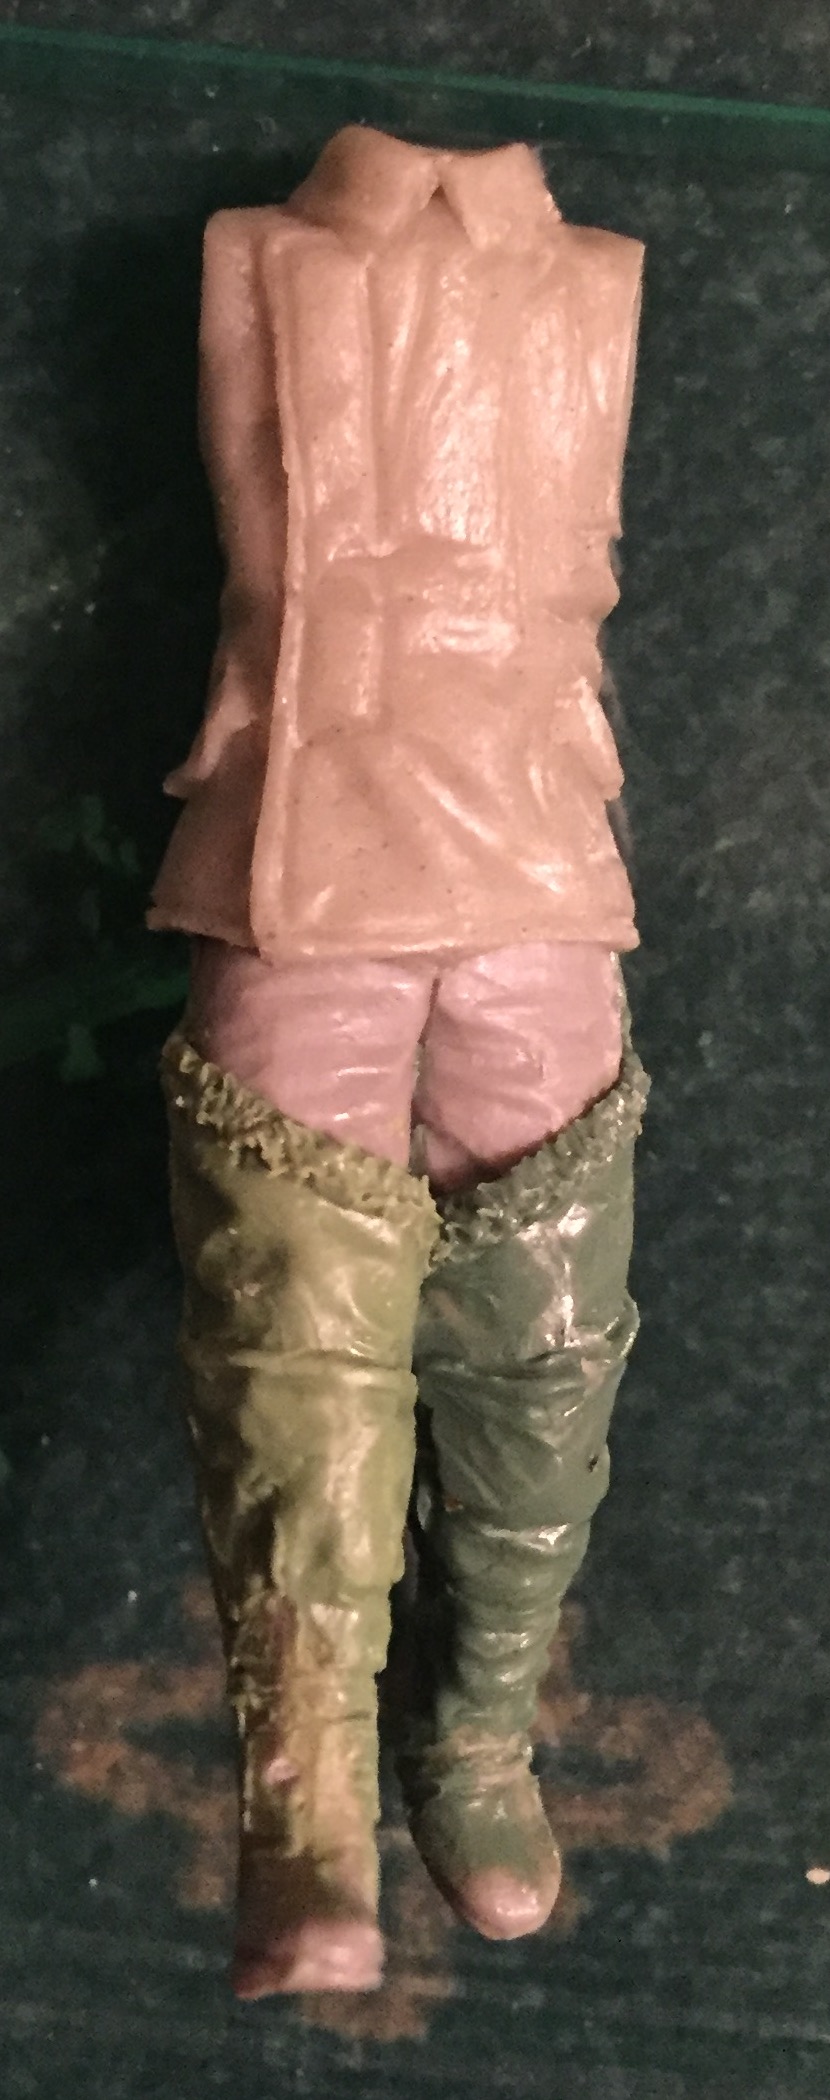
the fur boots were a torture to sculpt. A wife who thinks its funny to ask you why you model a soldier with a suspender belt doesn't make it easier...
the coat
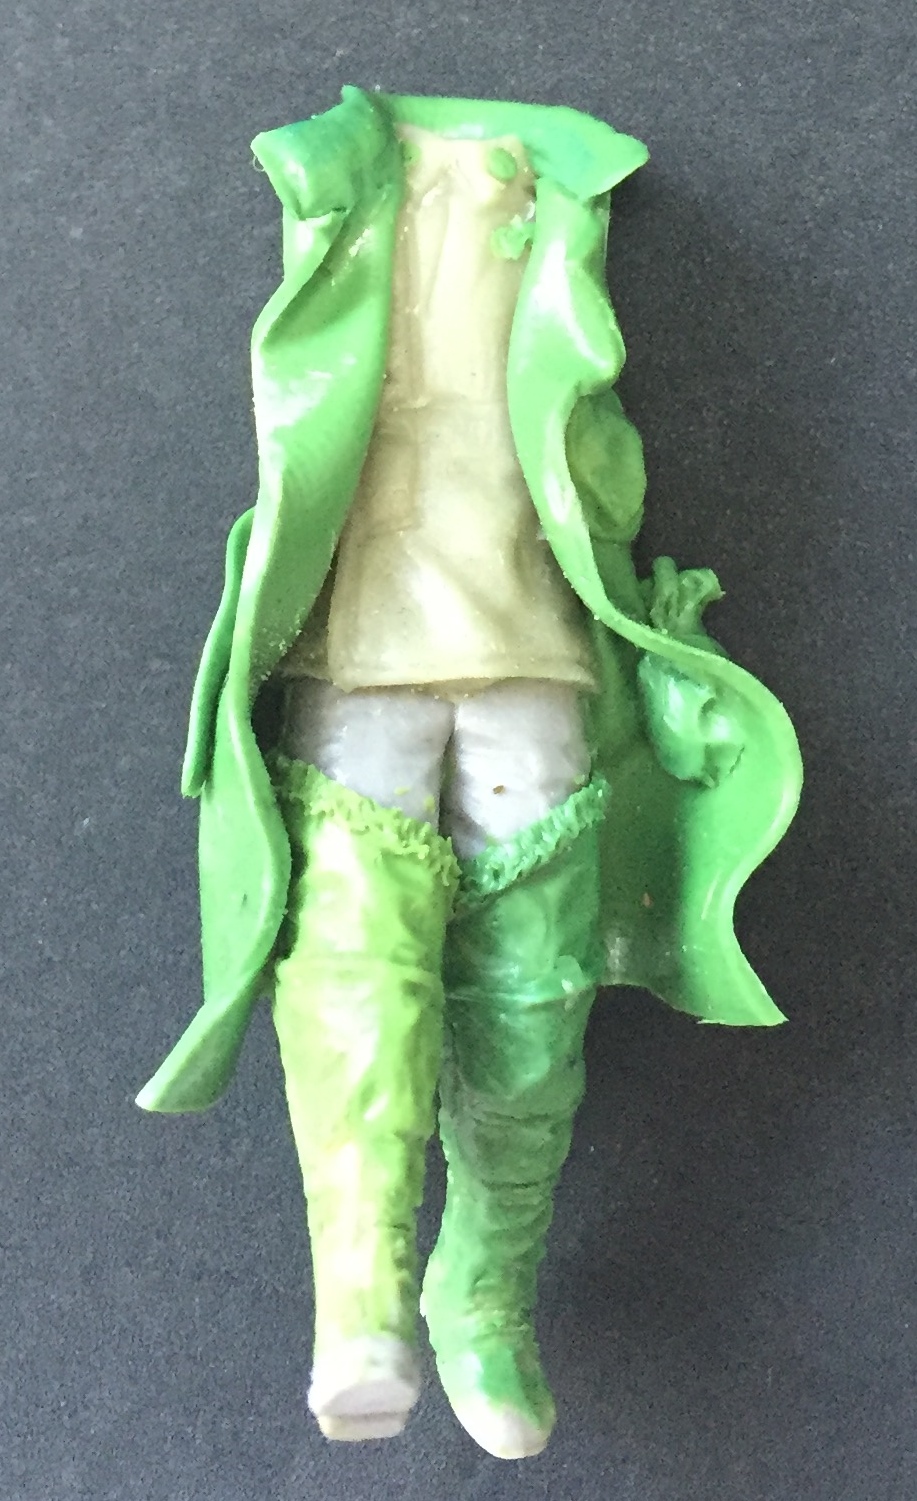
it's important here to leave the Green stuff set for a while. When the material is rolled out, it's good to wait about an hour before using it for the coat.
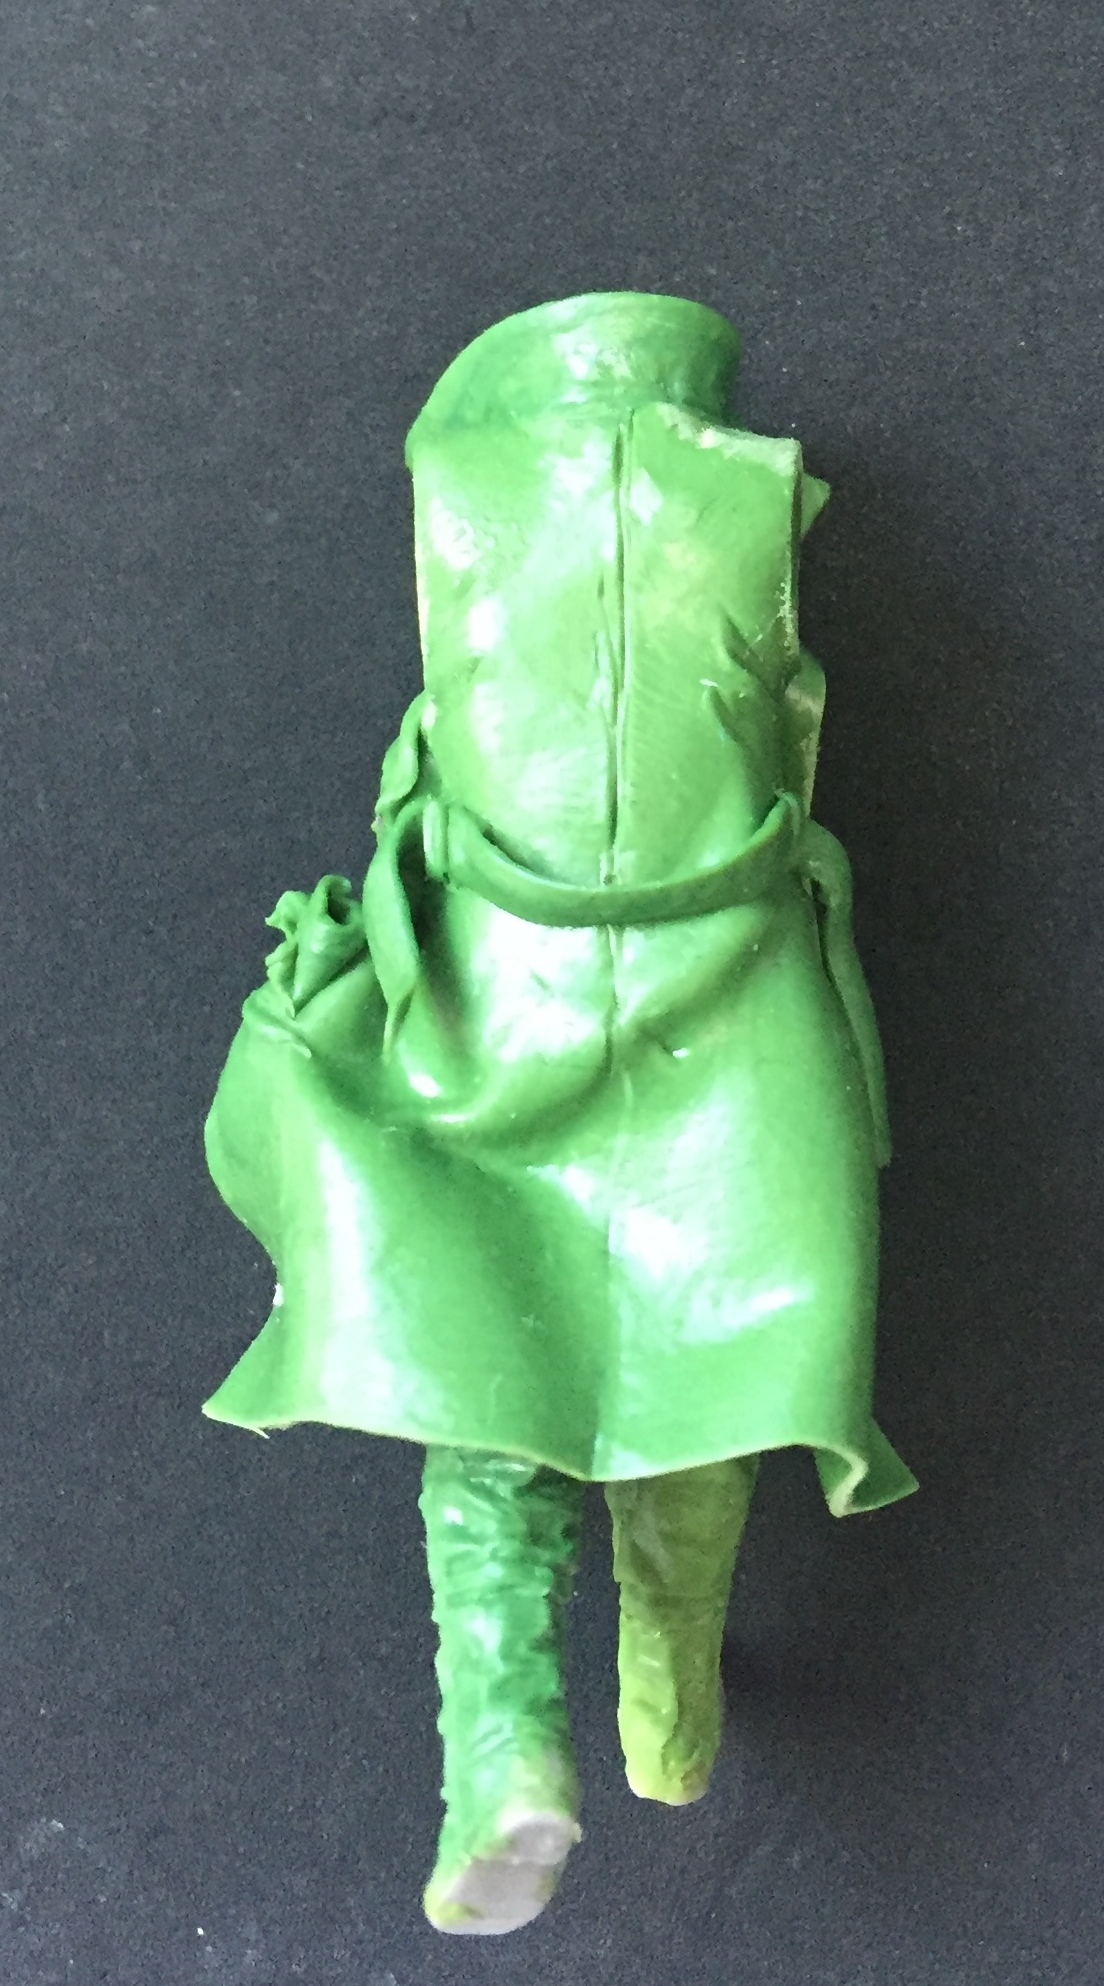
That's the status quo at the moment. I still have to finish this pilot and the Vauxhall staff car and add a driver, create the crashed LVG and at last I want to add a messenger with his (Aviattic) motorbike who watches the scene. Well, 9 months can go fast...
I hope you like it and it could be of any use for your projects. Please feel free to ask whatever you want!
Best wishes
Borsos
« Last Edit: July 01, 2017, 07:33:31 PM by Borsos »
"Deux armées aux prises, c'est une grande armée qui se suicide."
Barbusse.
"Ein Berg in Deutschland kann doch einen Berg in Frankreich nicht beleidigen. Oder ein Fluß oder ein Wald oder ein Weizenfeld."
Remarque.

Online lcarroll

  • Administrator
  • Hero Member
  • ******
  • Posts: 8547
Borsos,
    What incredible work, the details you are adding are nothing short of spectacular! I am transfixed by the "Fug" boots you've added to the pilots legs, again incredible detail. As our French Members say, "Chapeau"! I'll be following this Thread closely, just superb!
Cheers,
Lance

Offline FarEast

  • Sr. Member
  • ****
  • Posts: 443
Absolutely amazing! Thank you so much for sharing your techniques! It has really given me the confidence to grab a stack of 1:32 WWII figures and some "Green Stuff"

Also in one of the photos is a Blue Reference card showing 54mm body shapes - where did you get this from as I really need a reference guide.