Evening All,
Thanks to Manni, Des, Prez, Borsos, Bud and Ian for the very encouraging remarks - I really appreciate them, the more so when things do not go according to plan - as with the engine nacelles a couple of weeks ago! Manni - do give scratch building a go - it is not as difficult as you might imagine, (and certainly not as difficult as I had imagined). The freedom that it gives in terms of subjects that can be built is really exciting - I strongly recommend it to anyone. After all if something does not go to plan - start again!
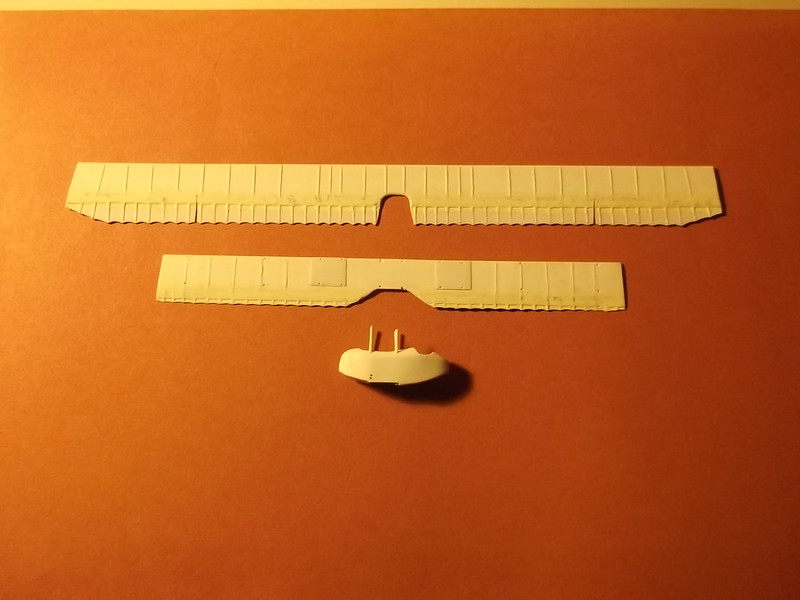
I have finished the wings at last - at least to my satisfaction. The rear of the wings on the real machines consisted of a single sheet of fabric and the ribs were exposed on the upper surfaces. The trailing edge of the upper fabric sheet was folded back on itself to form a slope about 3/4 of the chord of the upper wing and 7/8 of the lower wing. I had made the wings bu laminating a 20 thou sheet of card and a ten thou sheet and had sanded the rear of the 20thou sheet to try to reduce the step between the two card sheets. Originally I intended to make an even slop with filler but after experimenting with some scrap I found that I could not get the right slope and retain the exposed ribs, so I decided to sand the 20 thou card even more and leave a very small step which I intend to fill with paint. Not the best of jobs but hopefully it will suffice when the wings have been properly painted. The ribs were represented with 10 x 20 thou Evergreen strip sanded down. On the lower wing there were two metal plates under the engines to protect the fabric from the oil spewed liberally by the rotary engines - these are 10 thou card sanded to make them a bit thinner. I would liked to have used 5 thou card but I do not have any. The cut-outs on the trailing edges of the wings were removed and the edges sanded too. Holes have been drilled to take the struts at a later stage: the holes in the centre section of the lower wing are for the nacelle struts.
The training edge scallops were sanded by wrapping glass paper around a small dowel and gently rubbing. The slits in the upper wing were also cut out - they were to allow the outer wing trailing edges warp - these machines did not have ailerons.
I finished the fuselage nacelle interior by painting as per normal - and forgot to photograph it! The observers cockpit details were simply a seat and bulkhead at the rear, I also added a control column, throttle control and instrument panel for the pilot but did not bother with rudder pedals as they cannot be seen. The nacelle was then closed and a piece of clear acetate added under the nose for the observers lower window. The nacelle struts were shaped from 20 x 30 thou Evergreen strip and set into holes drilled in the nacelle. I also drilled two pairs of holes in the nacelle sides - these will be for control rods to the engines.
The next stage is to paint the sub-assemblies and add the markings. This will be an RNAS machine so will have the red outer rings and white centres. When that is done I can hopefully start to assemble these sub units and start to produce something vaguely resembling an aeroplane!
Thanks for looking.
Stephen.

