It's time I updated this project, it's been very slow going. I've finally completed the first stage, the cockpit module is done with the exception of seat belts which will be added before I close up the nacelle. The Kit is ,as with all the Wingnut Kits I've done, a marvel of quality and engineering. With the added information contained in the Albatros Publications Reference books it's been a very smooth Build, albeit slow and careful, not a Kit for the neophyte!
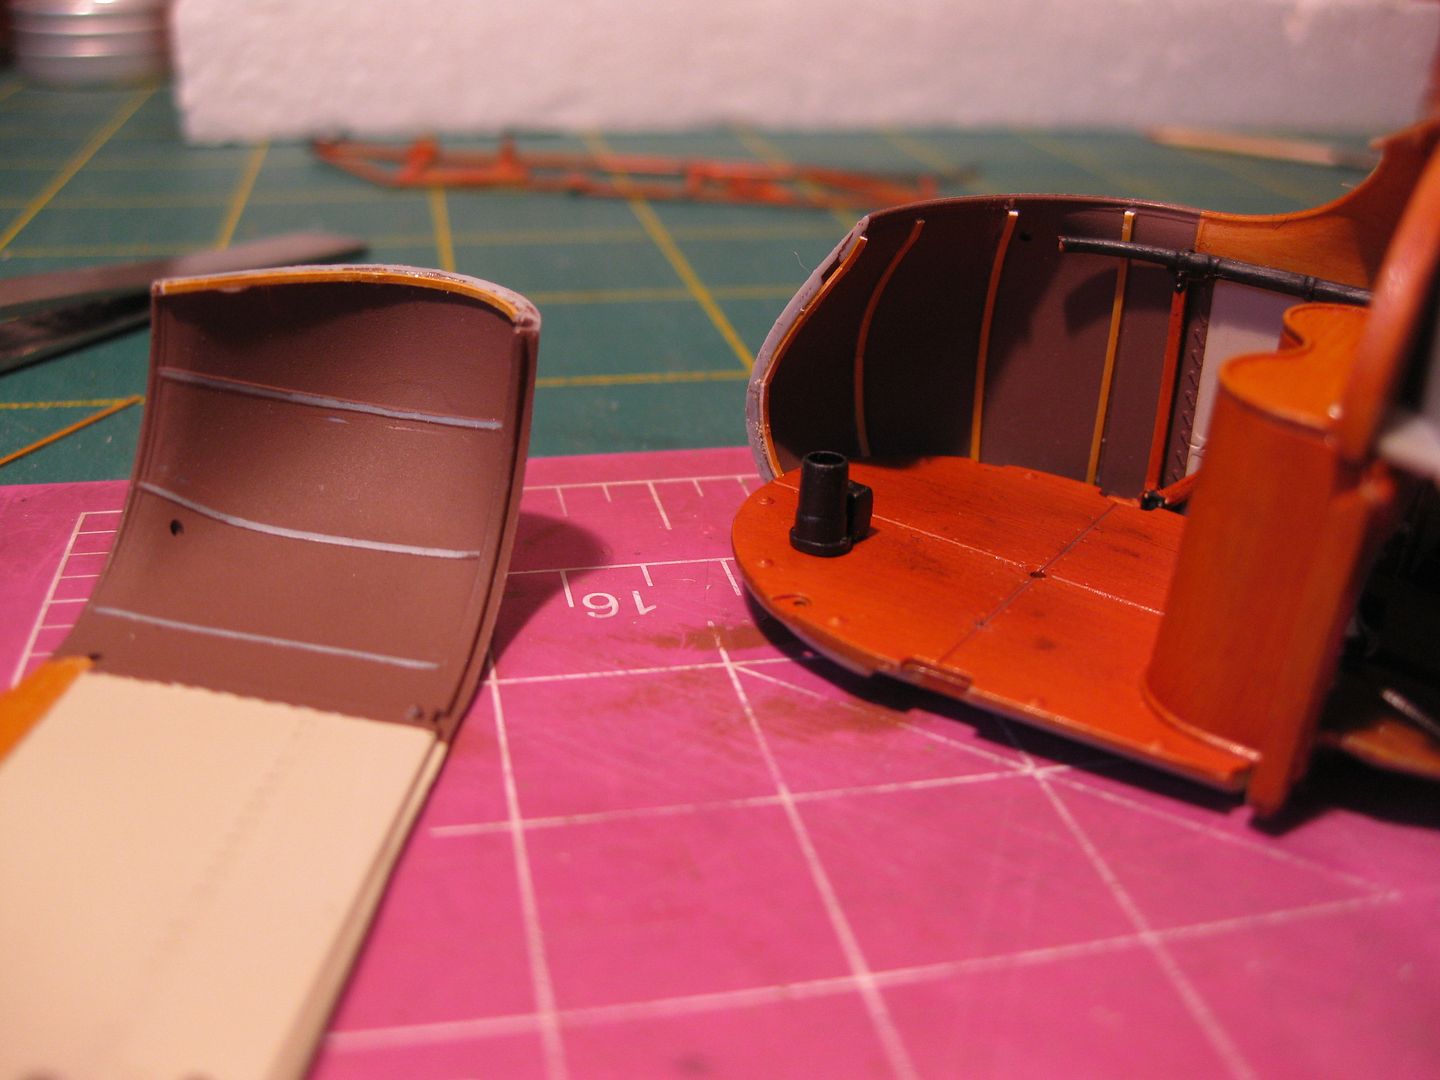
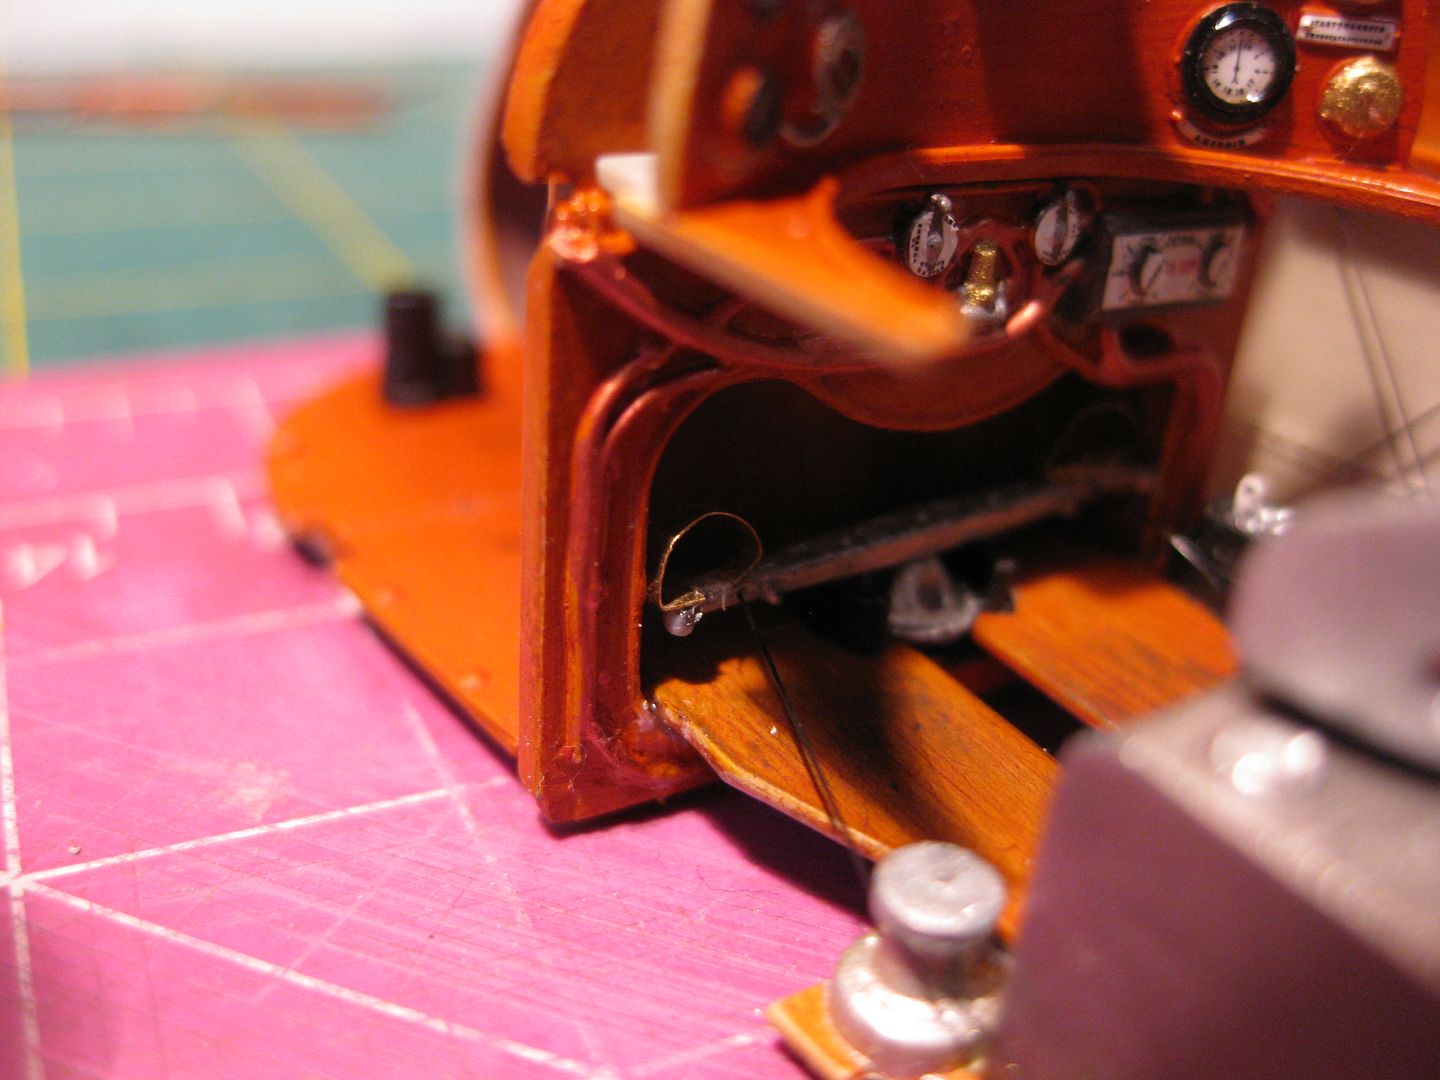
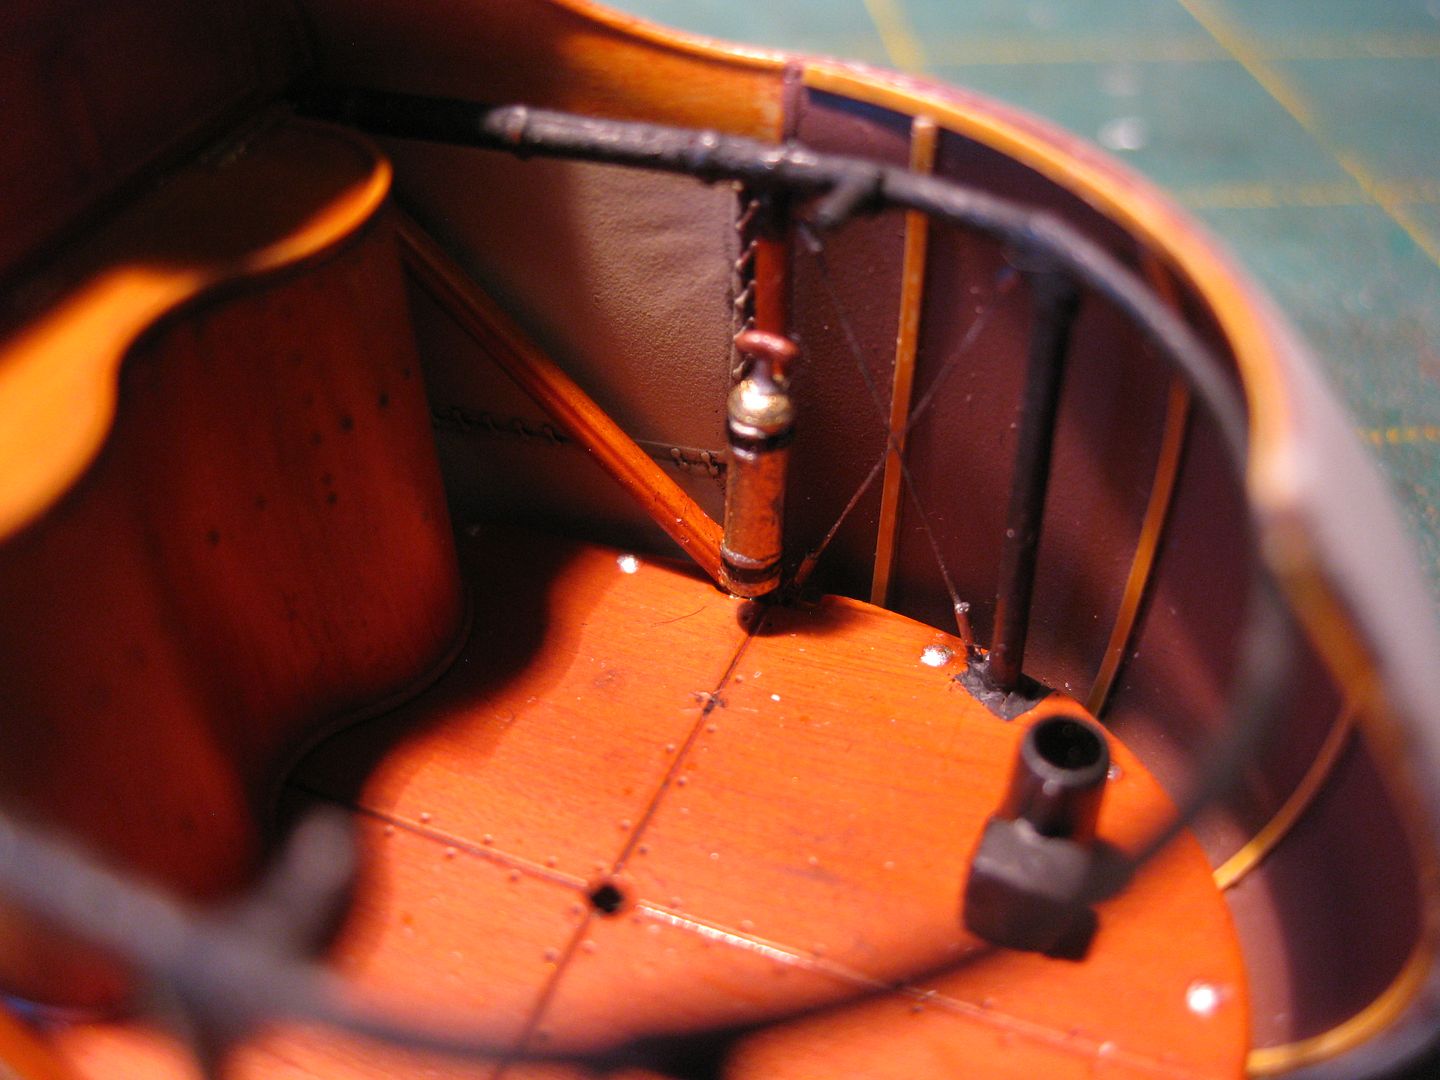
I've added a few items not contained in the Kit at this initial stage, and started with the frame members in the Gunner's forward cockpit in the laminated nose section, Evergreen strips being the solution.
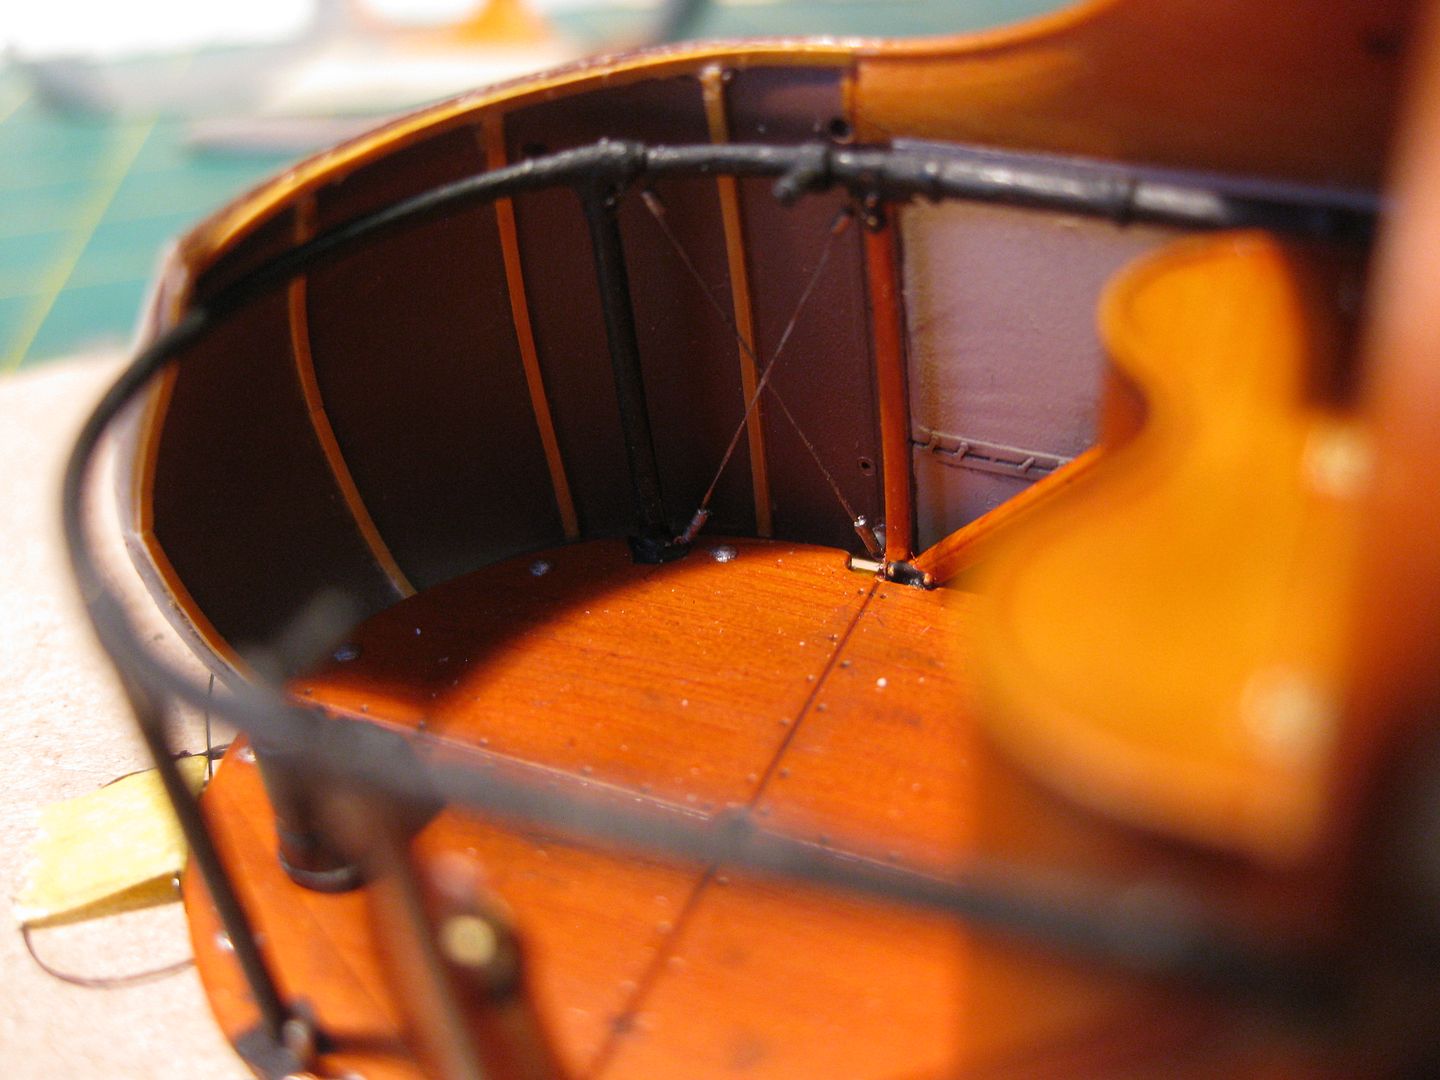
The side frame components were rigged with the finer 1:48 version of EZ Line and Bob's Buckles taking care to keep everything inside to prevent fit problems later.
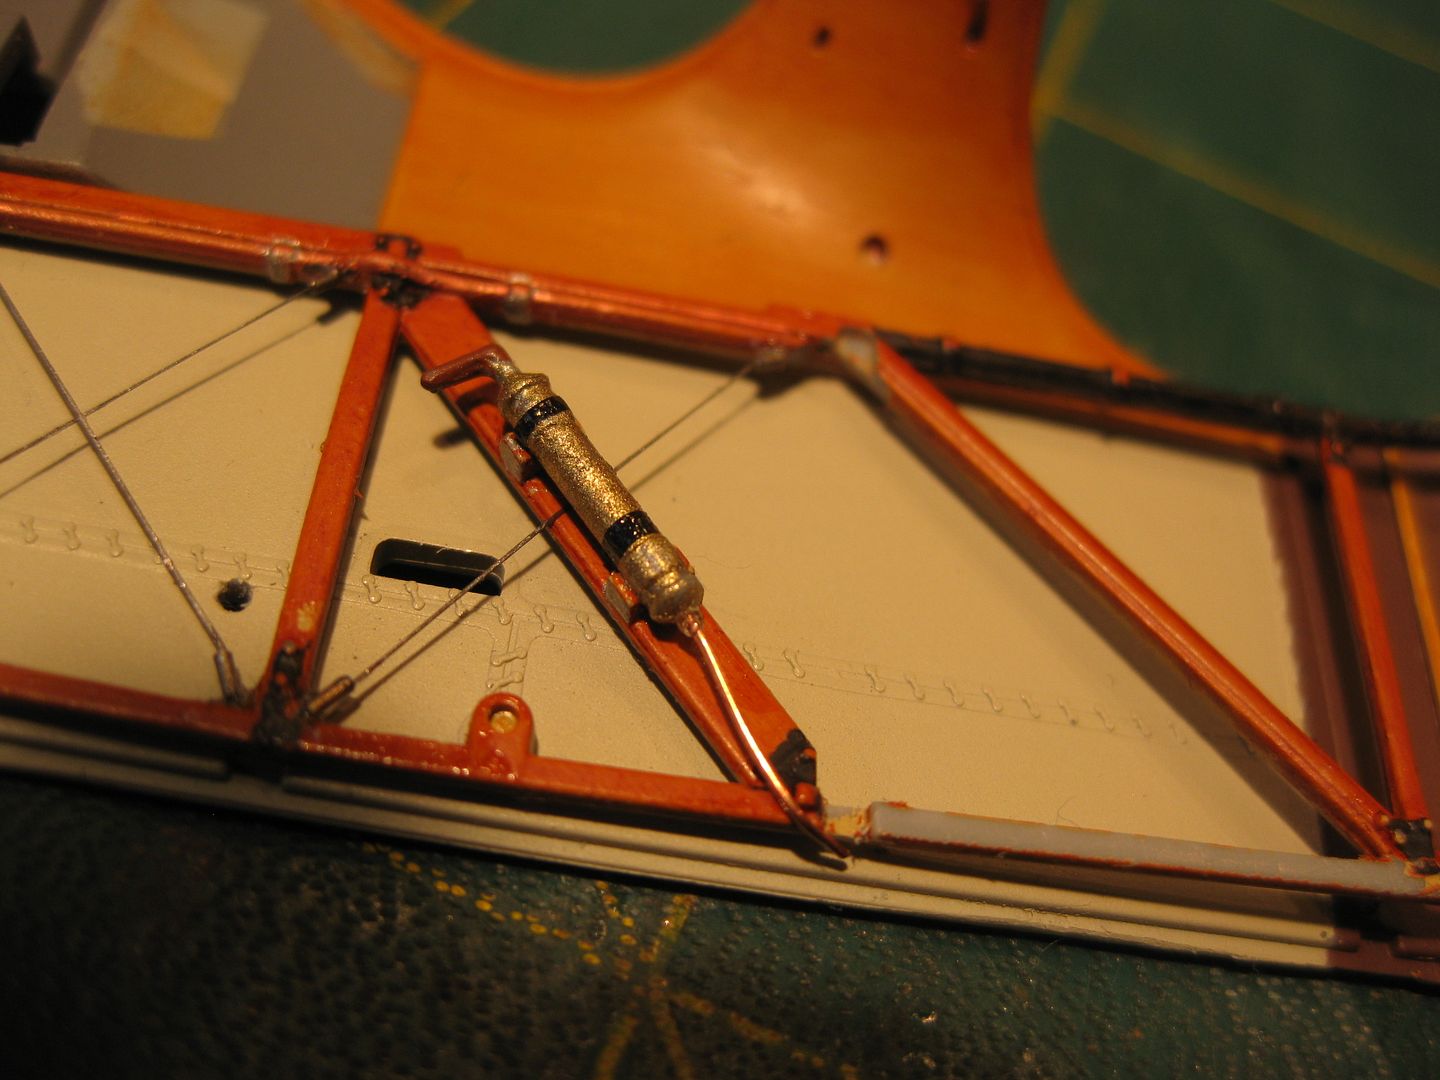
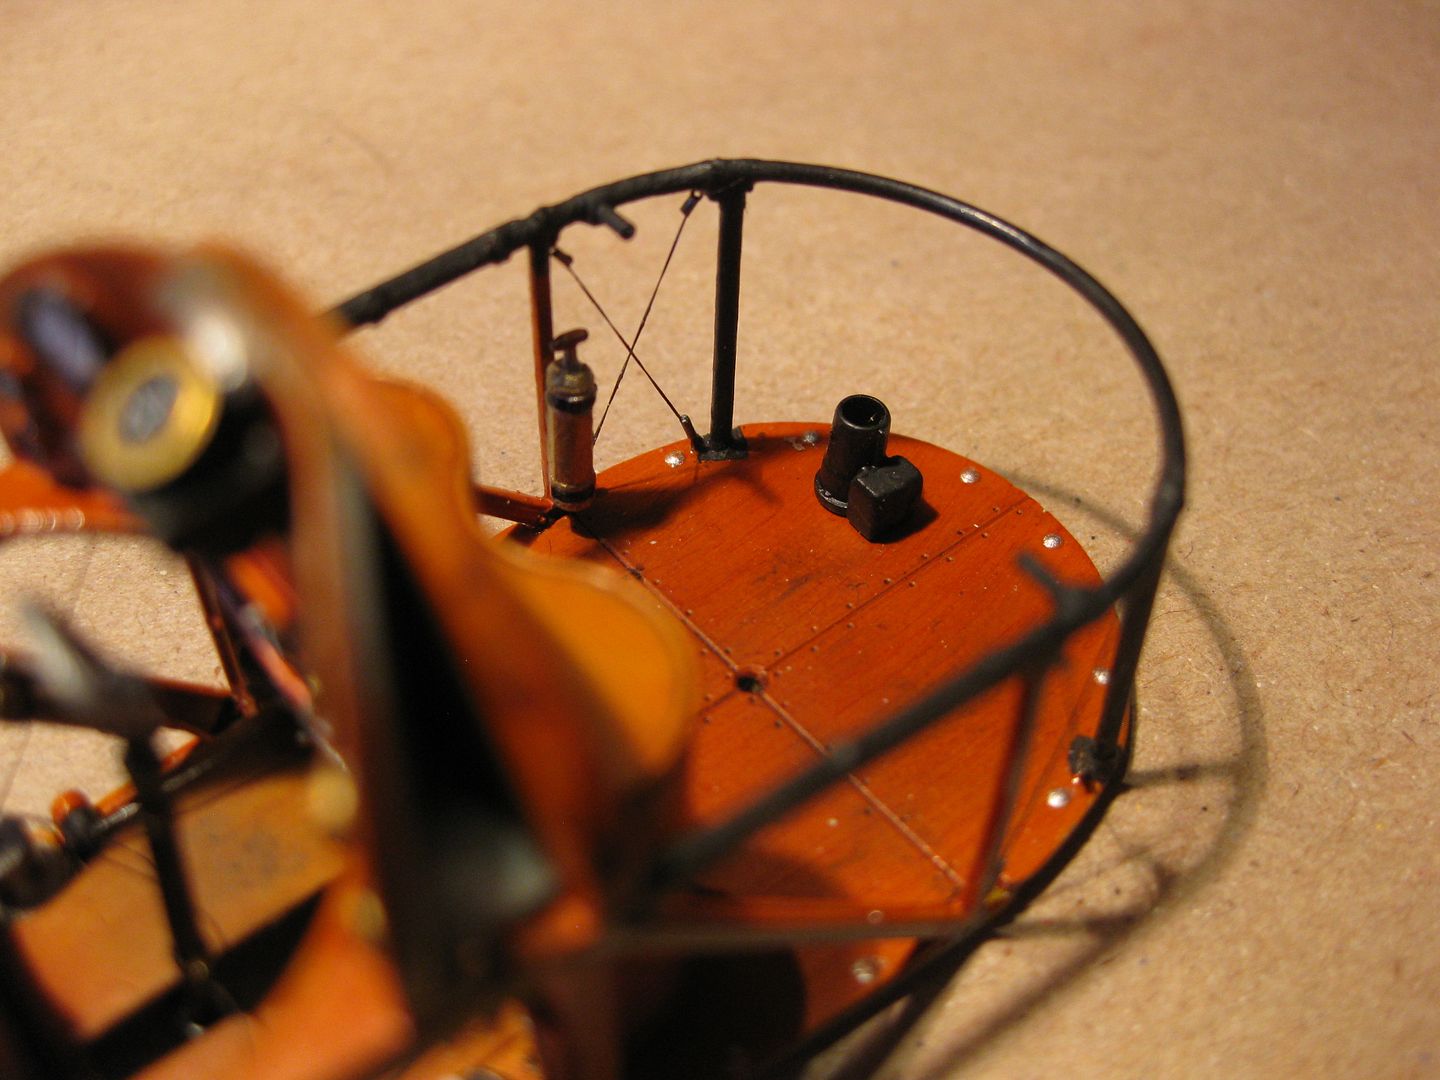
The air pump received a bit of plumbing once in place......
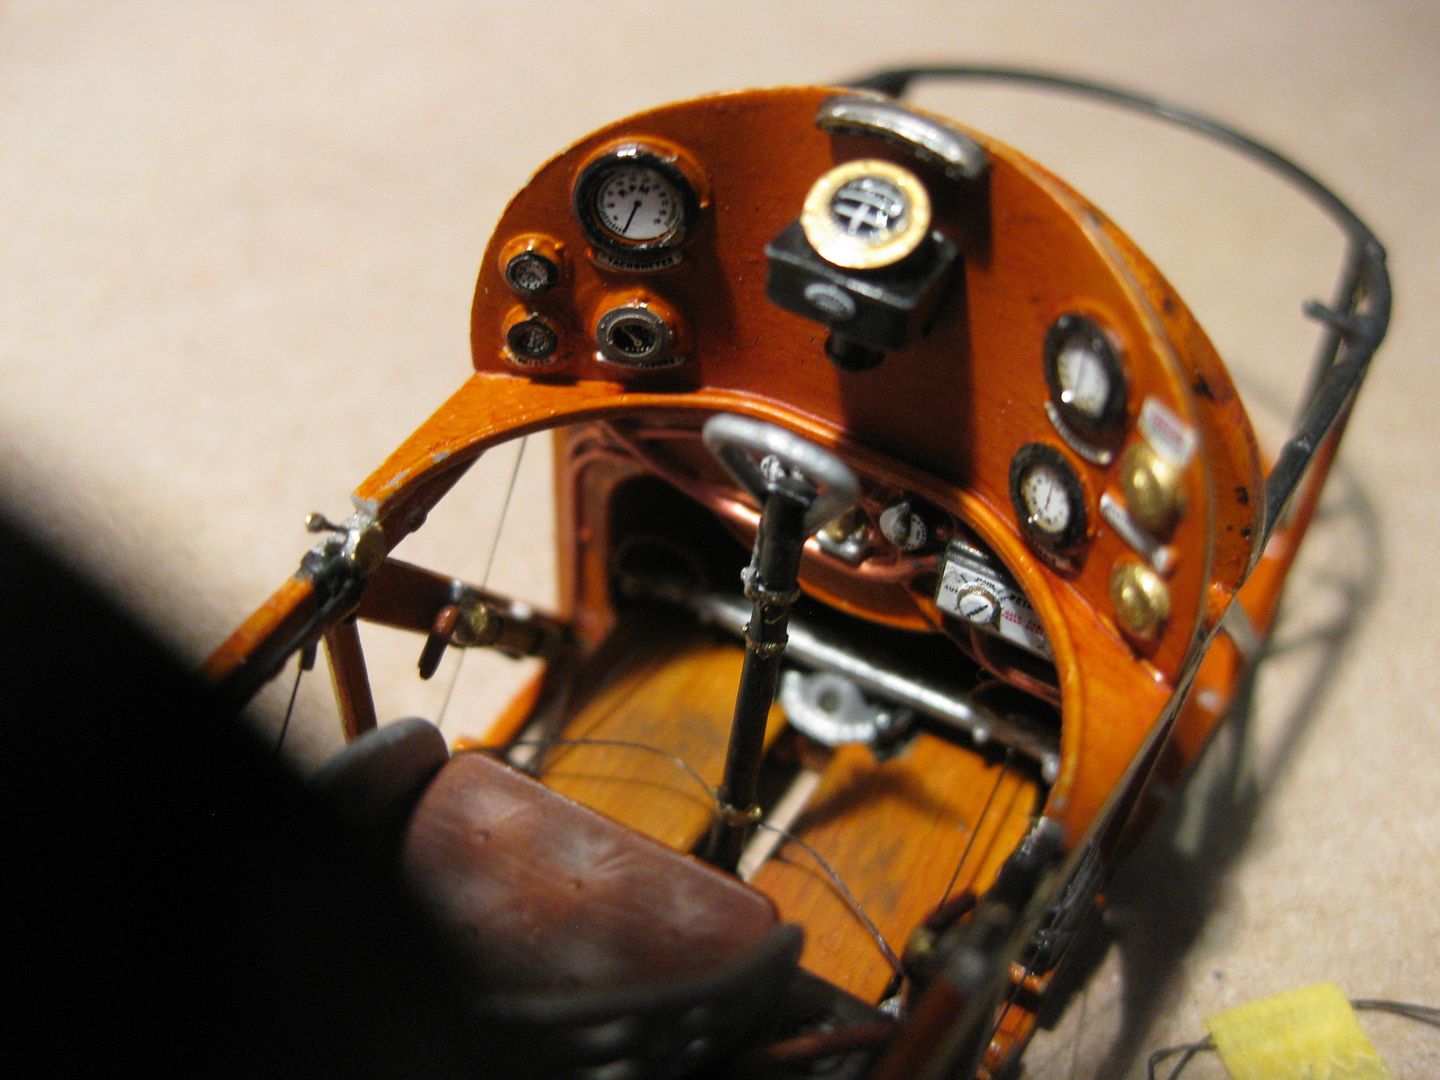
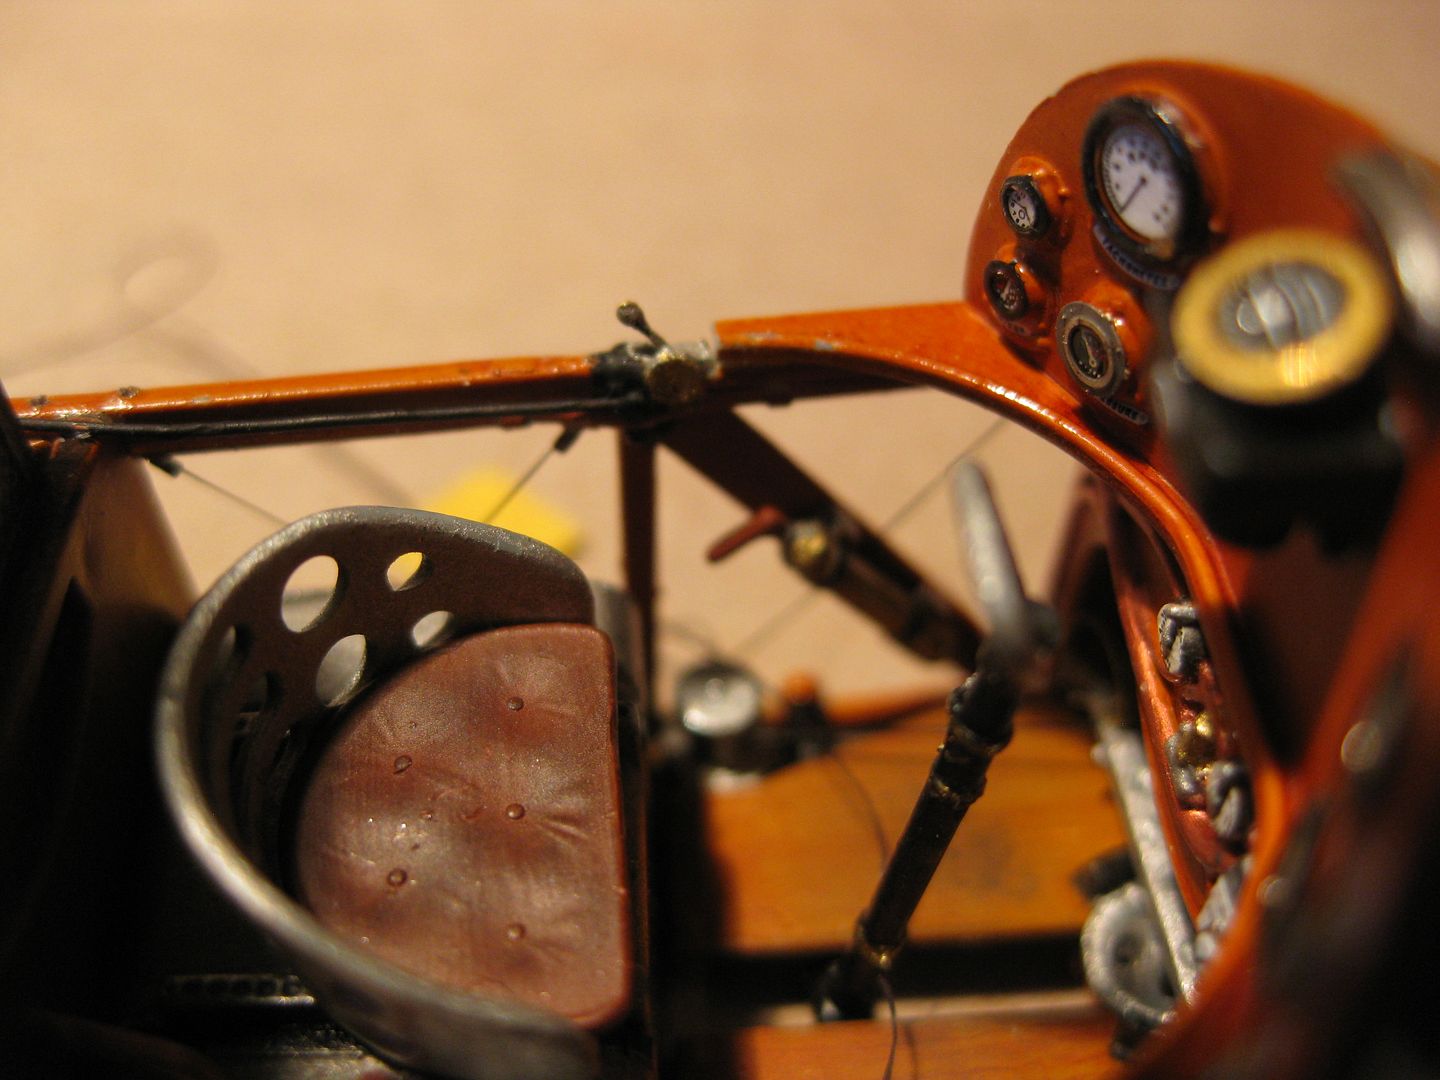
The instrument panel was completed using the Kit's excellent dial face decals and Aeroclub Bezils, some extra fuel lines were also added. Instrument glass was done with several applications of Future. The control stick was rigged for the aileron control cables and some highlights were added with painted clamps and detail.
I also added the rudder pedal foot grips/stirrups and rigged the rudder cables, again with EZ Line.
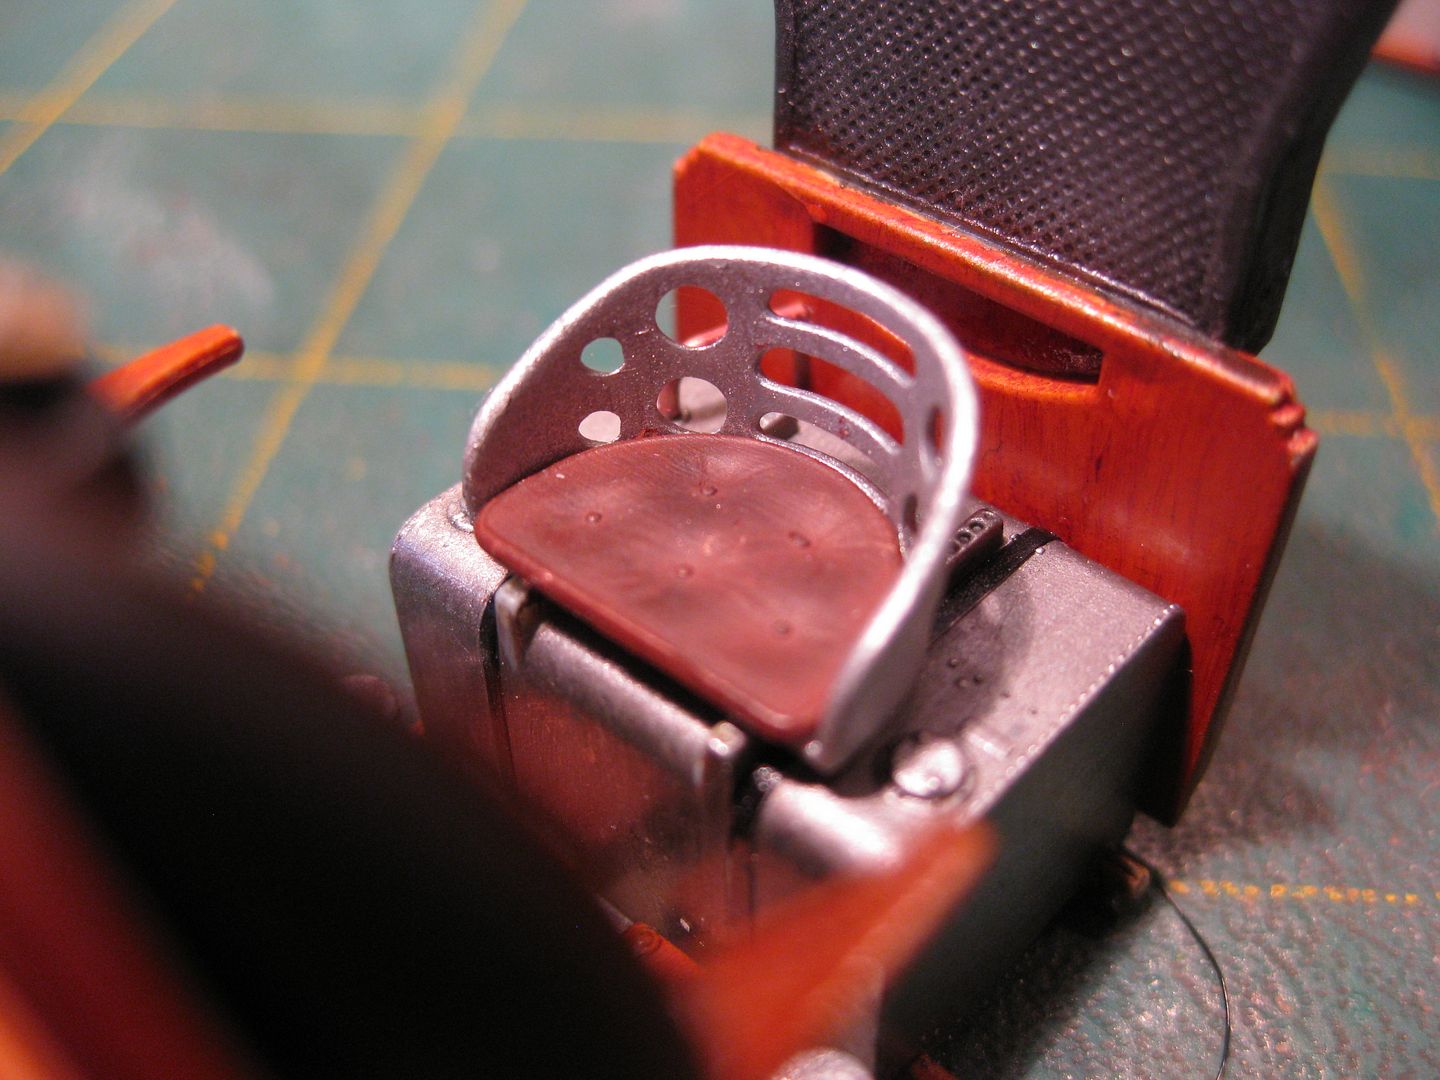
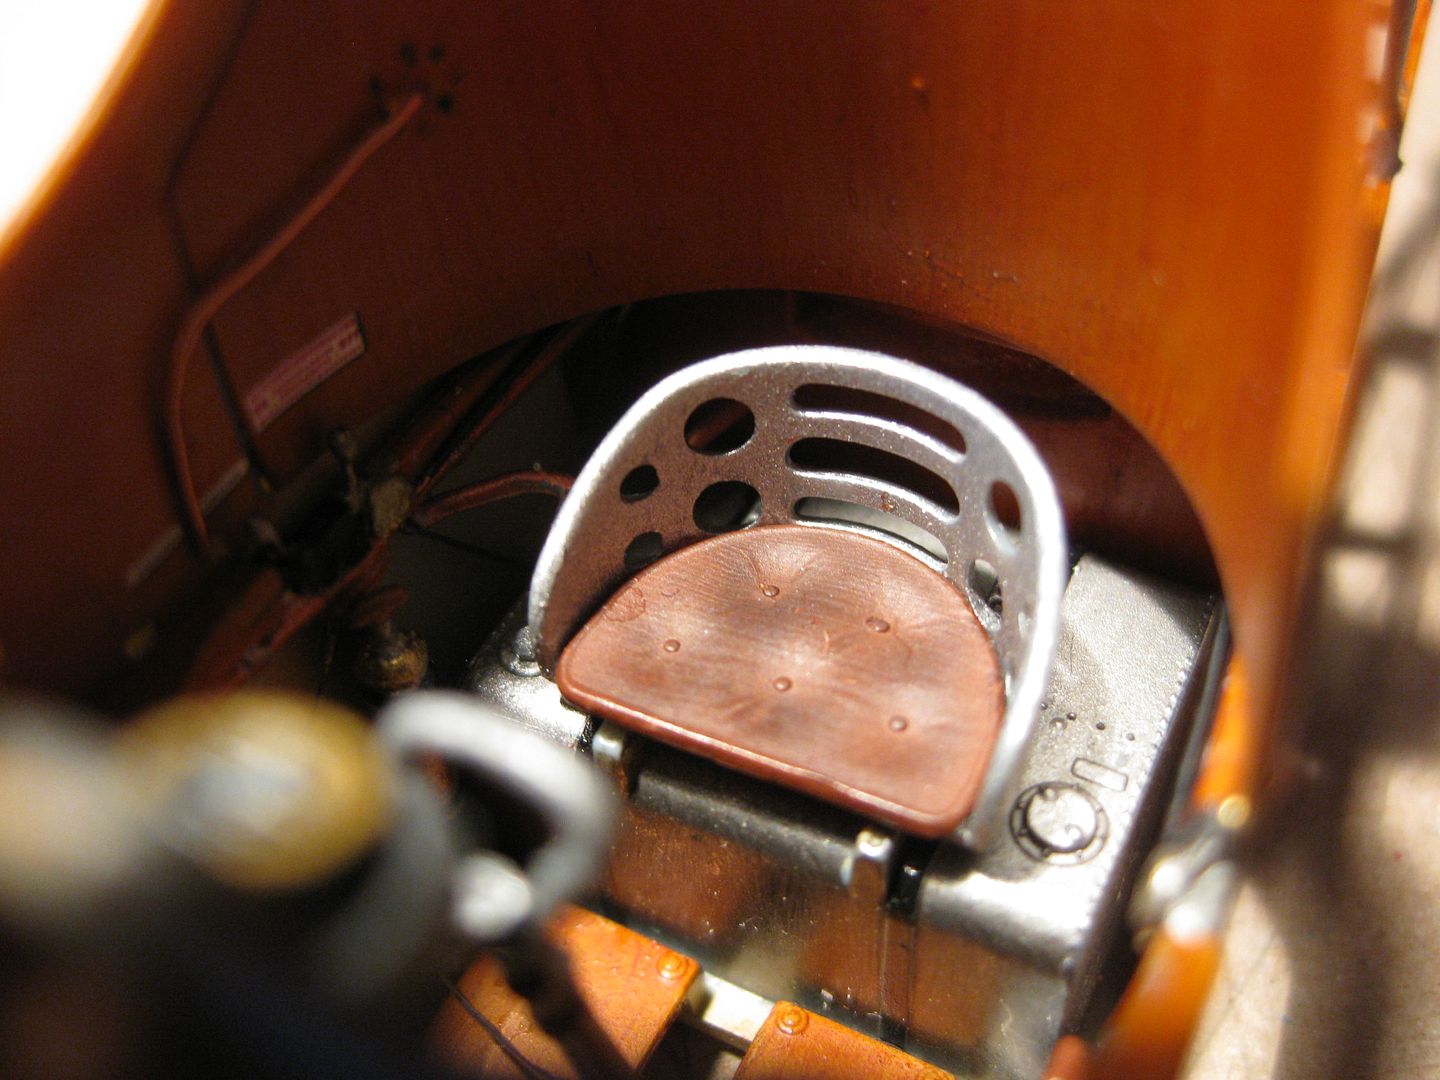
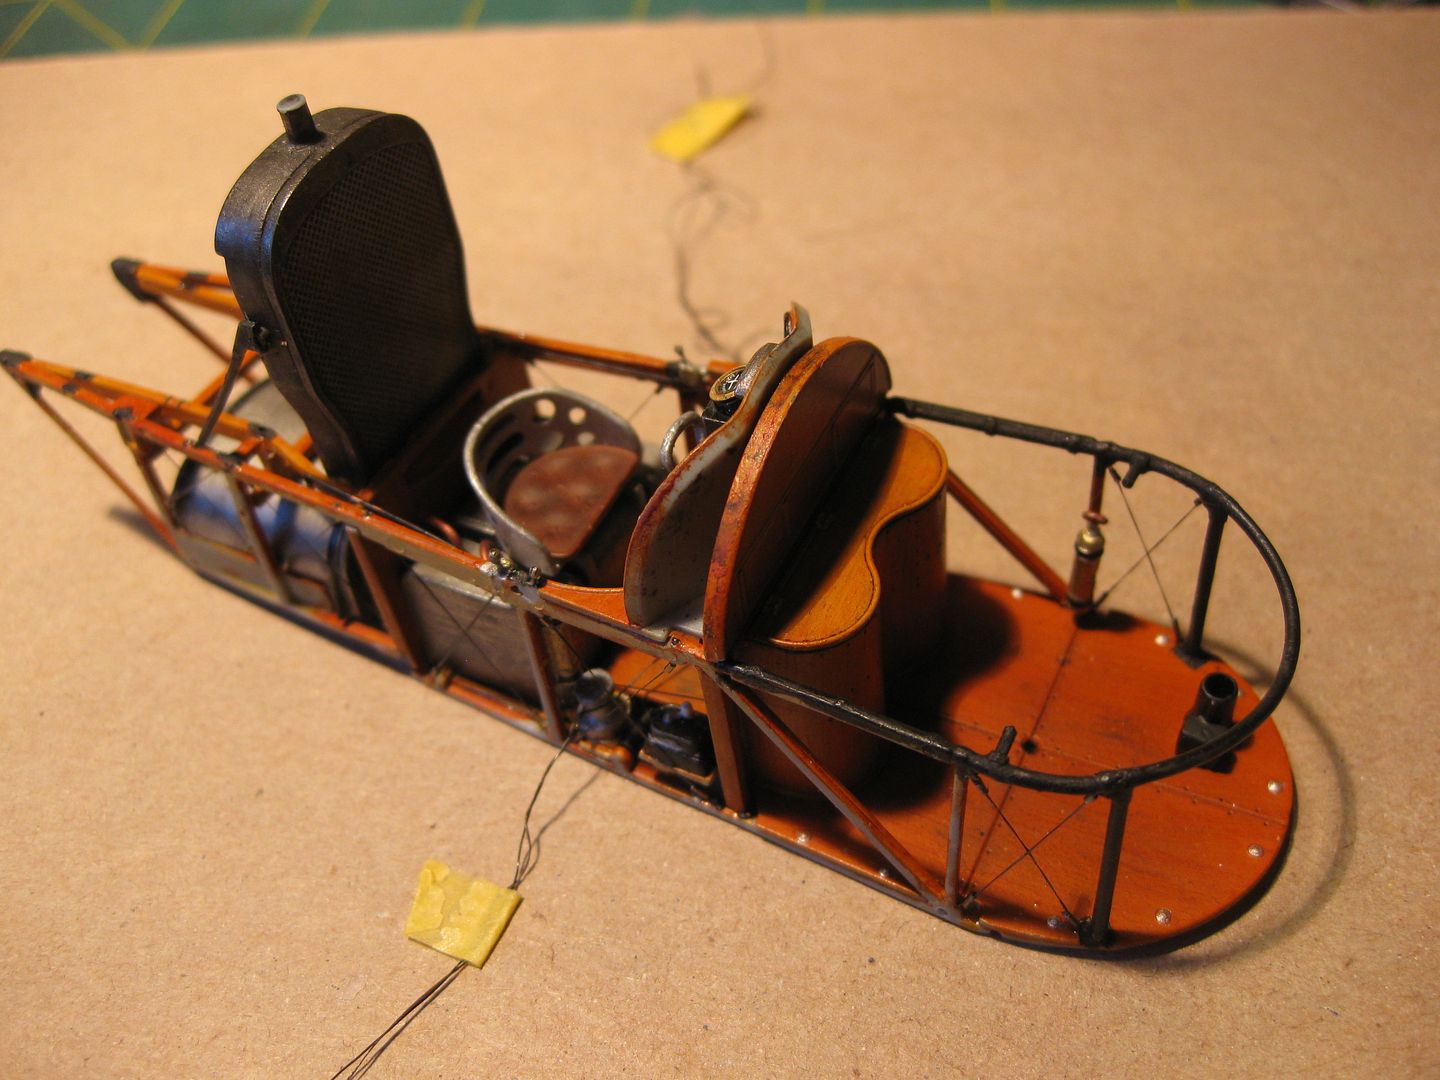
The fuel tank that the Pilot's seat is mounted on was done with Mr Metal Colour and a couple of washes, the Kit seat cushion is very nicely done and was painted with Modelmaster "Leather" enamel with some pastel highlights.
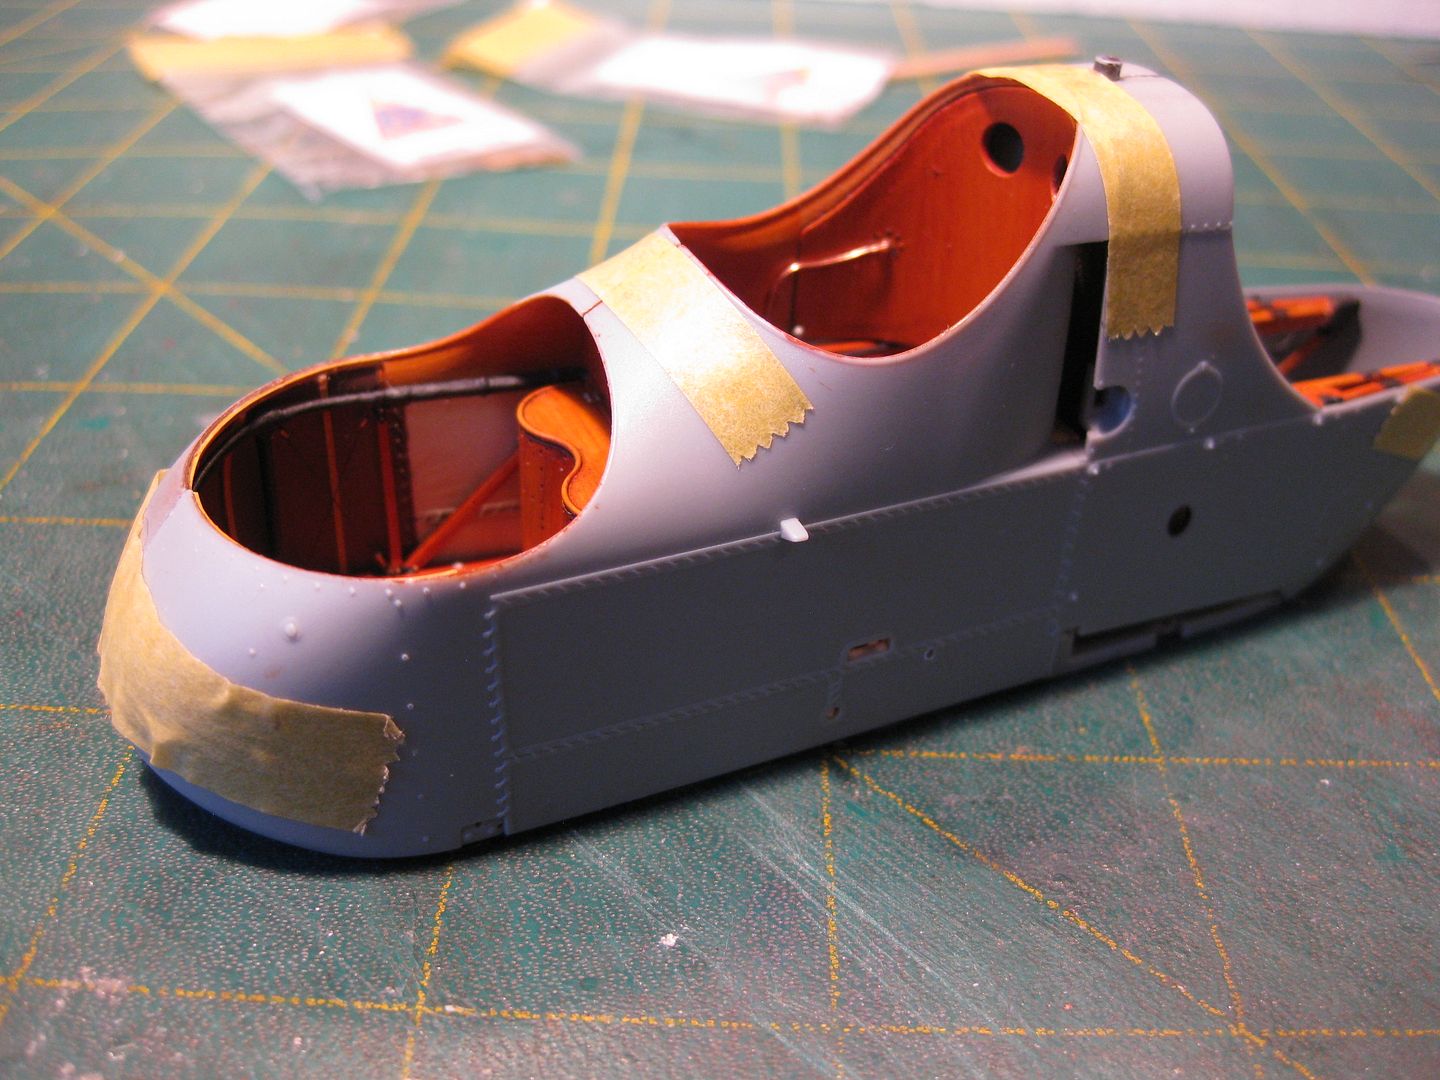
Now for the usual disclaimer regarding Photo Machro mode, it looks horrible up that close but, to my naked eye, appears very clean. Wonder dog is "blowing" his winter coat and the odd bit of fuzz appears beyond my control, please be kind in your views!
I've added the Spark Advance control on the left and Fuel Shut Off and Altitude Compensator (mixture?) levers to the right side with associated "plumbing". The Kit decals are absolute works of art and despite their tiny size, perfectly readable with the trusty Optivisor.


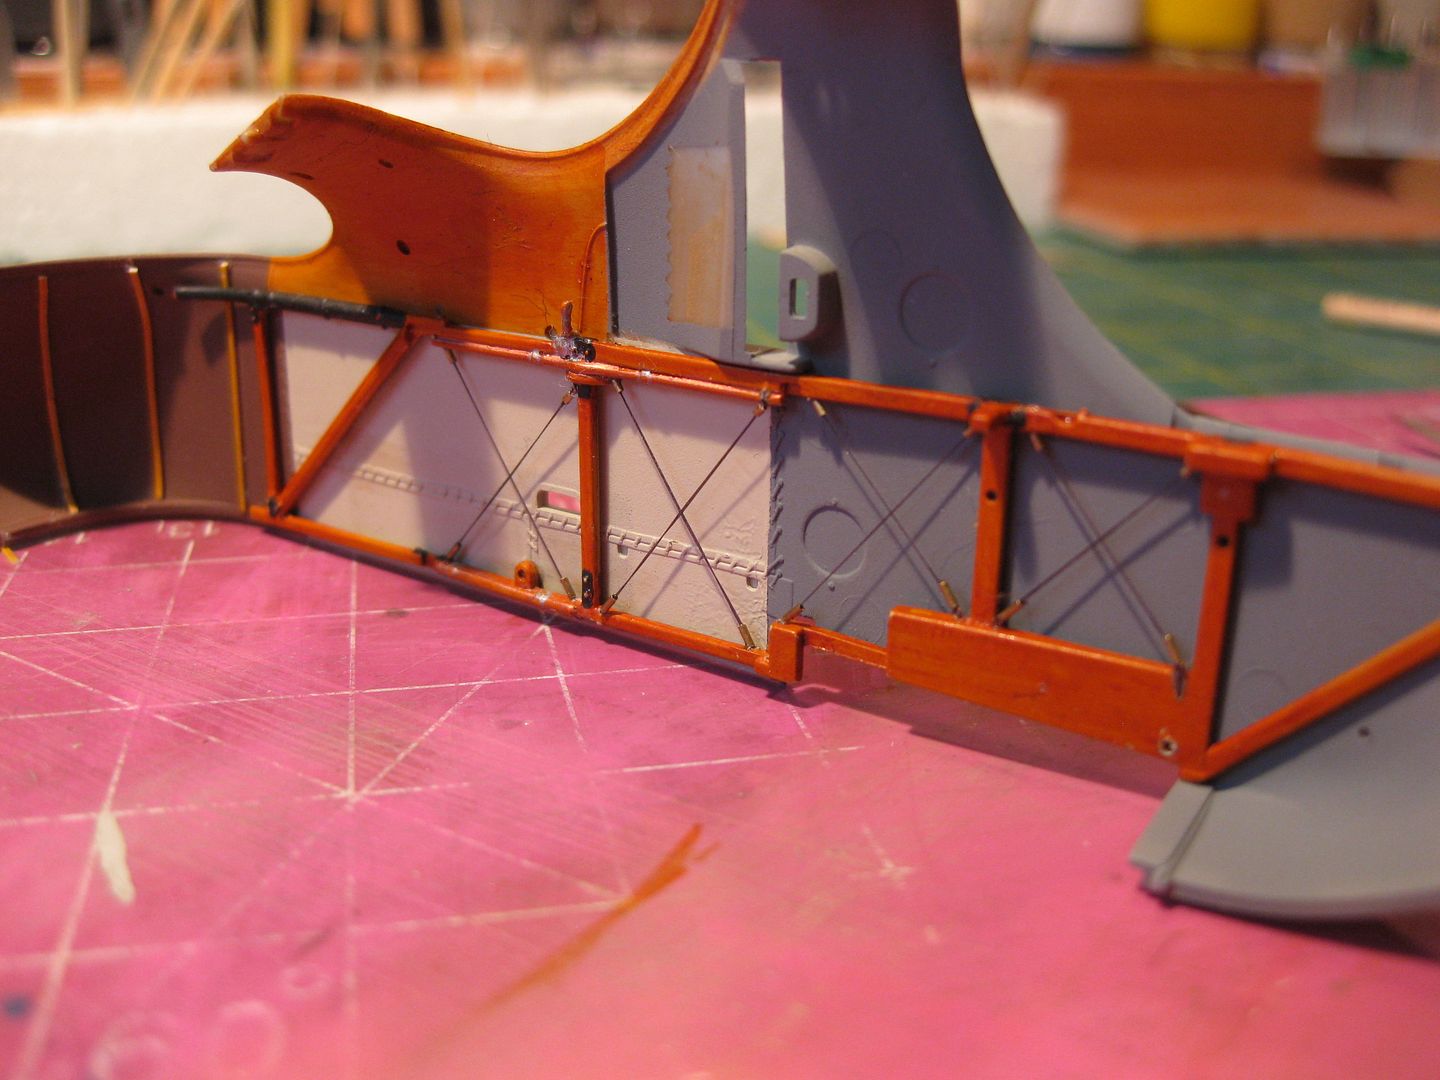
The plans booklet states that the 2 fire extinguishers supplied were not located in known locations, I elected for one in each cockpit in what a thought logical locations. At the Pilot's right in the preceding photo and on the Gunners left.
So here's a few overall shots to give the full effect, floor board and wood weathering was done with a combination of oil washes, soft pastels, and Tamiya Weatheringmaster Kits.

Prior to the final steps I dry fitted the nacelle halves, and all appears in order.
Now it's time for a quick cleanup and declutter of the bench prior to "step next", building a Beardmore!
Cheers,
Lance

