Author Topic: Francesco Baracca's Ni17/2614 Academy 1/32  (Read 14491 times)

Offline andonio64

  • Hero Member
  • *****
  • Posts: 1685
  • There's no hurry
Francesco Baracca's Ni17/2614 Academy 1/32
« on: October 07, 2014, 05:29:54 PM »
Hallo friends, my last project was not about ww1 therefore I started feeling homesick and I needed to take on a new project.


A tribute to the top Italian ace capt. Francesco Baracca was a project I had in mind since long time!

I wouldn't make the nth Spad XIII as seen so many times, so I chose the Nieuport 17.
He flew a Ni17 while serving in 70th Squadriglia, before joining the 91th where he scored 24 victories over his 34.
Most of the victories he scored in the 70th Squadriglia were on Ni 11 Bebè but the squadron was equipped in late 1916 / early 1917 with the 17s.


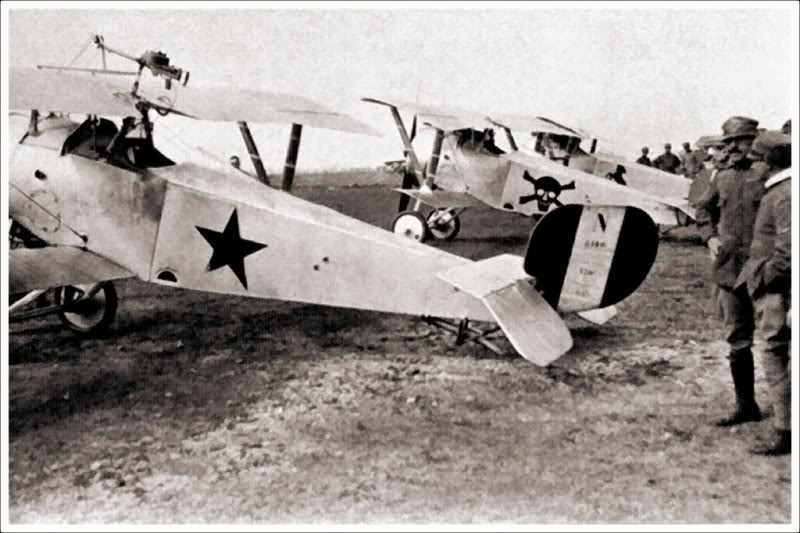
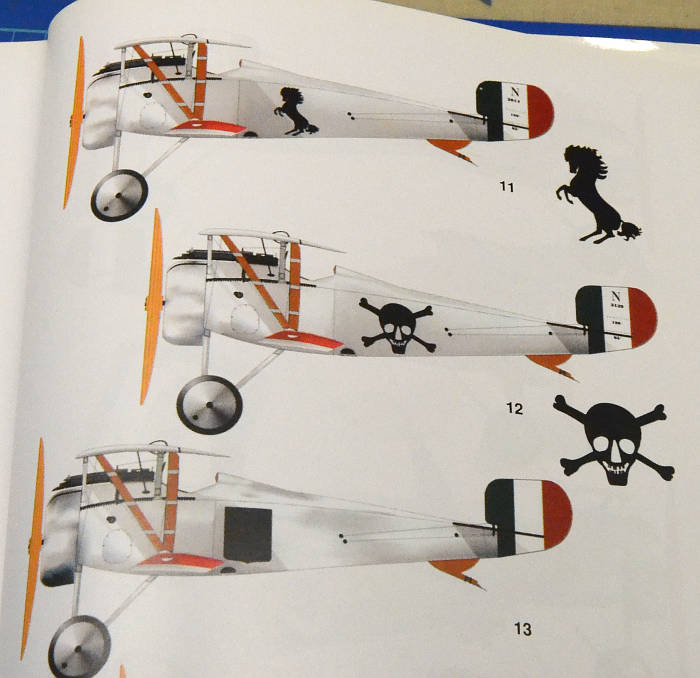
Here we clearly see the rampant horse peeping from behind the Skull and bones (Fulco Ruffo di Calabria) plane.


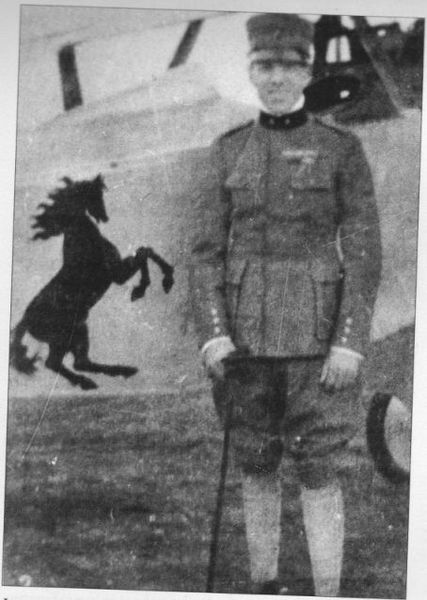
Here is Baracca portrayed in front of his  Nieuport.

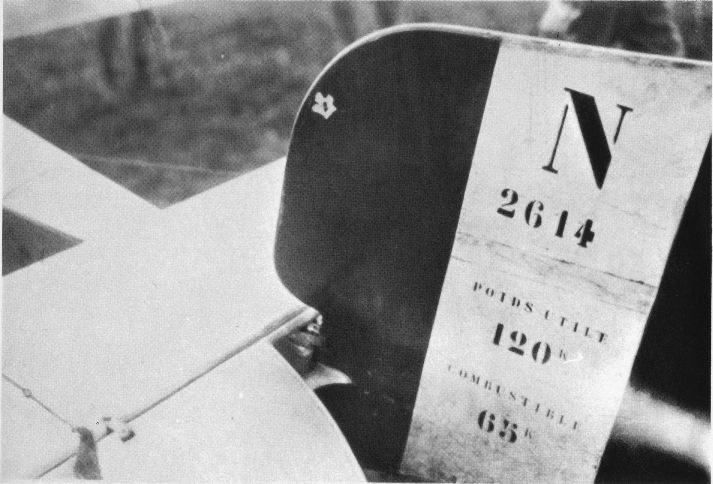
As reported in the fundamental book by Gentilli-Iozzi-Varriale, Gli Assi dell'aviazione italiana nella Grande Guerra (Ufficio storico AMI), (The Aces of the Italian Airforce in WW1 - published by the Italian Air Force historical office) the two victories credited to Francesco Baracca on his Ni 17 / 2614 date January 01 and February 11, 1917.
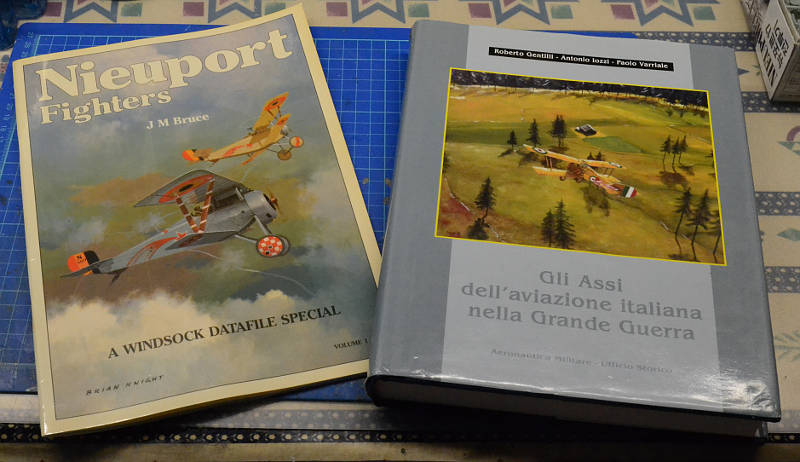
Here is the kit:

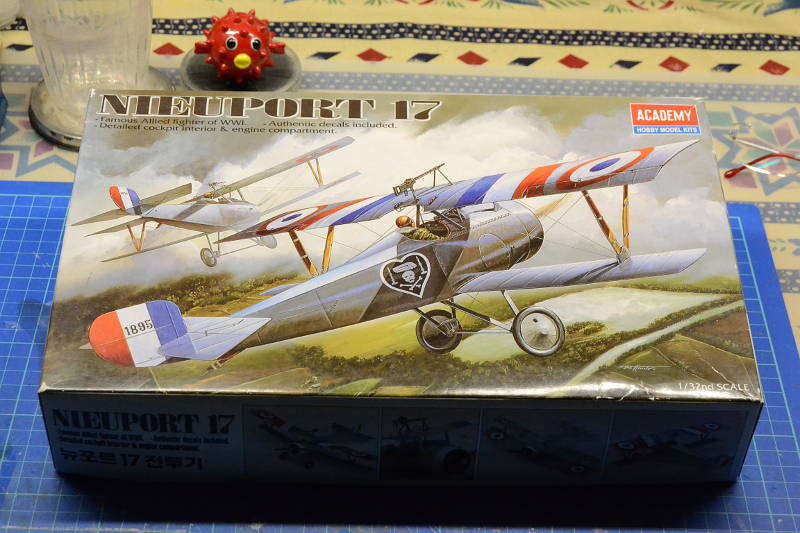
I bought this kit long time ago in a modeling shop, it's my first 1/32 kit.

Here is my analysis of the material I have:


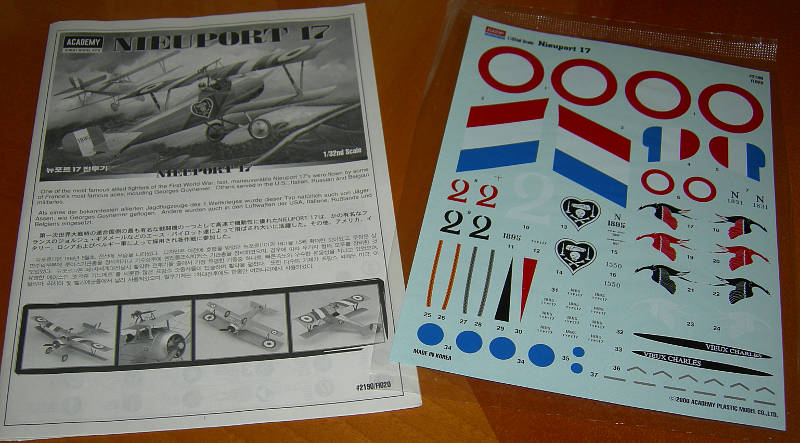
Instructions and decals, the decals are almost useless, I say almost because the Nieuports arrived to the Italian squadrons directly from France, and they were painted in aluminium dope with the French roundels. Nearly always the roundels were overpainted with Italian ones but in this case they probably were overpainted with aluminium paint.
As you see in the above picture with the line up of three planes, there is no roundel on the upper wing.
Therefore I was thinking to use the French decals and spray aluminium over them so that they can perceived a bit through the coat of paint...
I am only worried about the thickness of the decal sheet being visible over such an even surface.
What do you think?


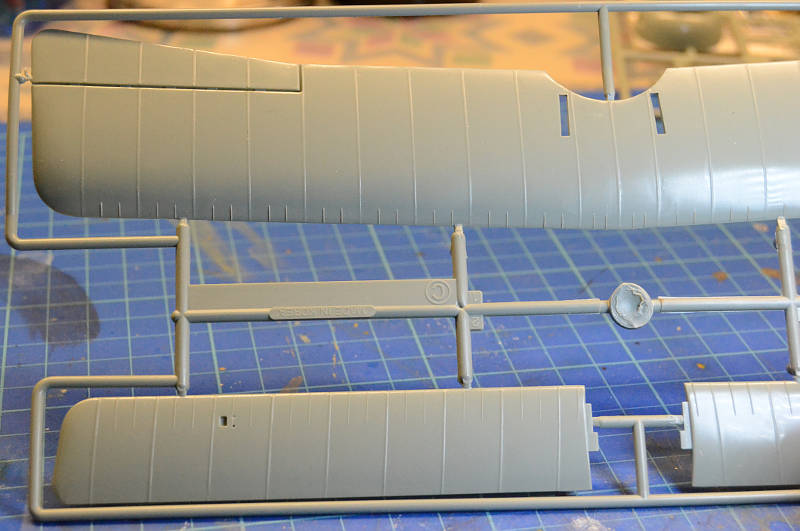
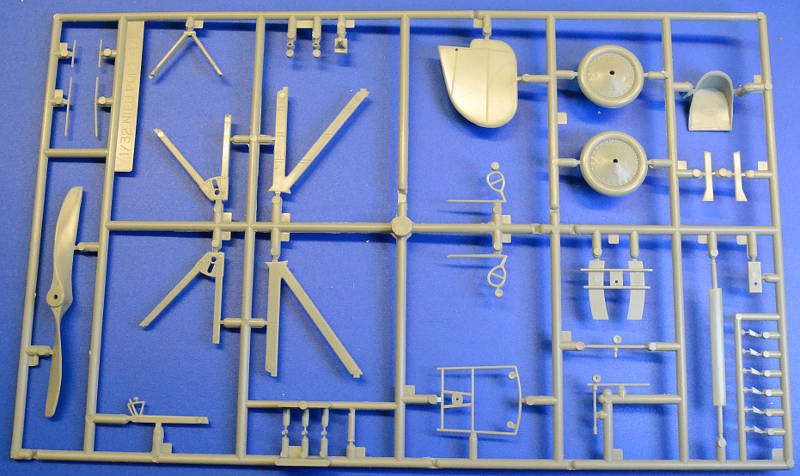
About the sprues: these are the wings, the shape seem s correct enough (to be sure I was searching for 1/32 plans but was not able to find them).
The ribs are simulated with a thin "positive" stripe, they don't either look as a rib tape or shape the wing canvas,
Any suggestion for improvements?
I think I should sand them off... but how to replace them?


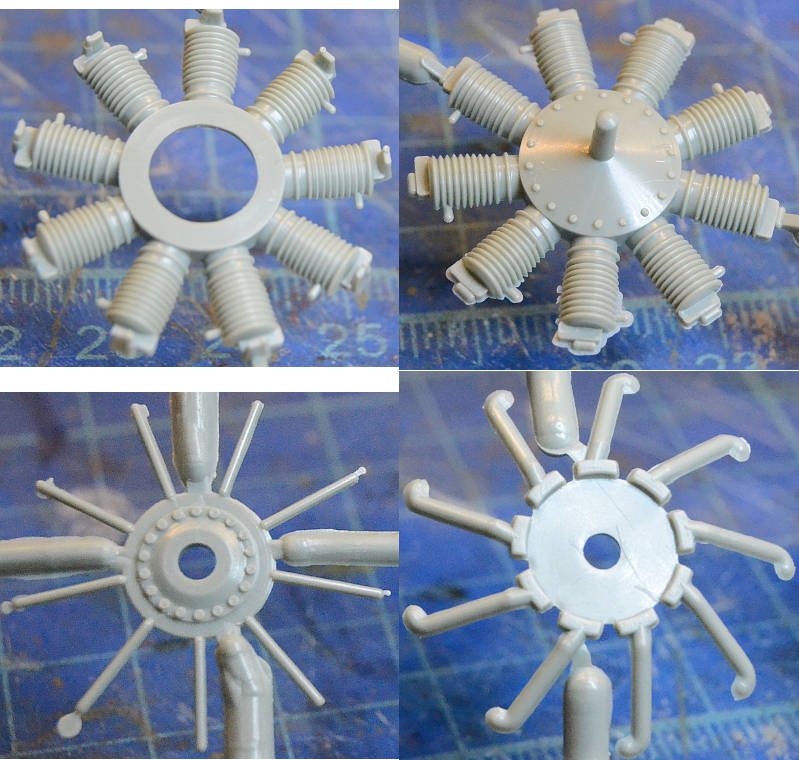
The engine is good enough although I don't agree with their choice to split the cylinder in halves, some plastic flashes but nothing difficult to manage.
Just in case do you have any indication about aftermarket 1/32 Le Rhône 9J 110hp engine?


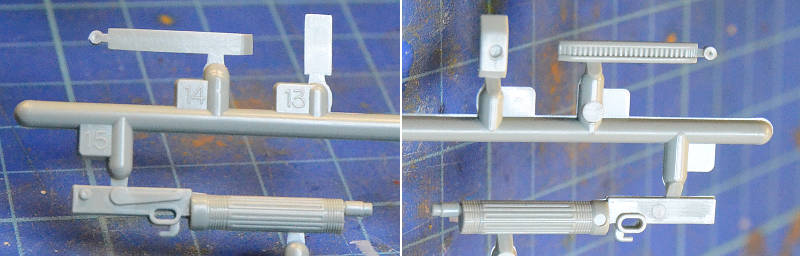
The Vickers mg is not  acceptable, I was thinking to buy the Gaspatch one.
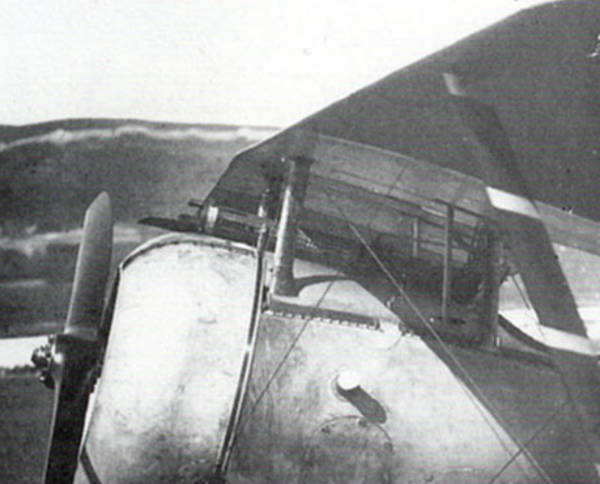
In this Macchi built / Nieuport 17 the Vickers is clearly seen.


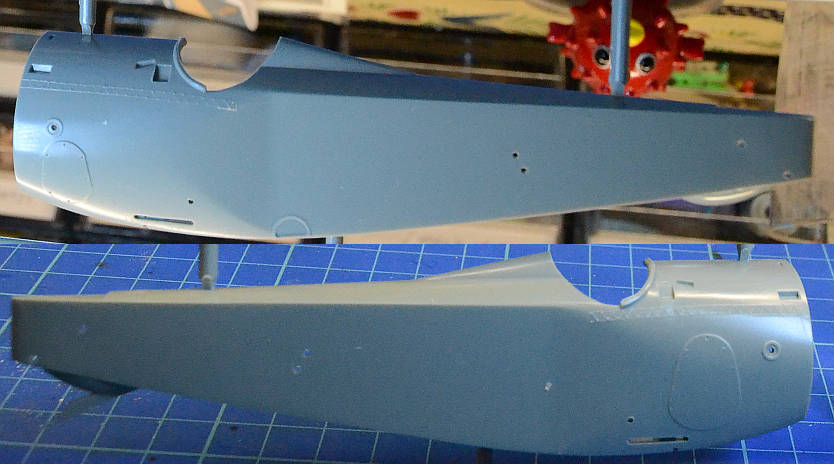
These are the fuselage halves, good looking on the outside clean and crisp detail...


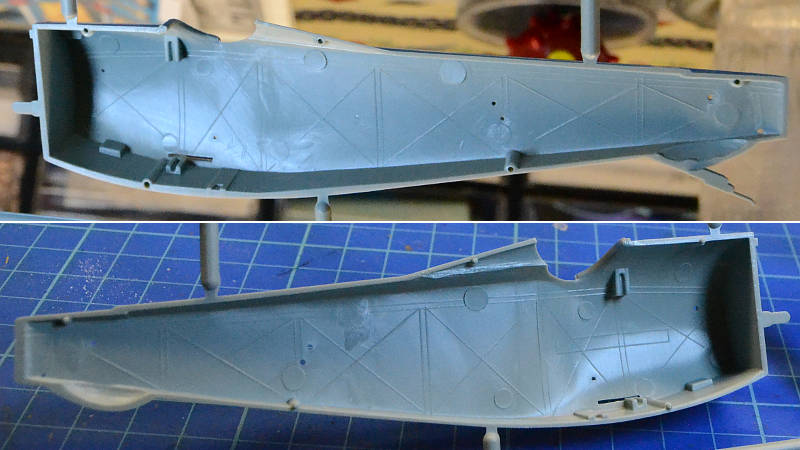
... but on the inside they cast those horrible strut traces and fake rigging... WHY????
And what about the injection marks???

Everything should come off completely.

When I bought the kit I also bought the Mastercaster improvement kit, but as far as the cockpit walls are concerned also here they casted the rigging in the piece.


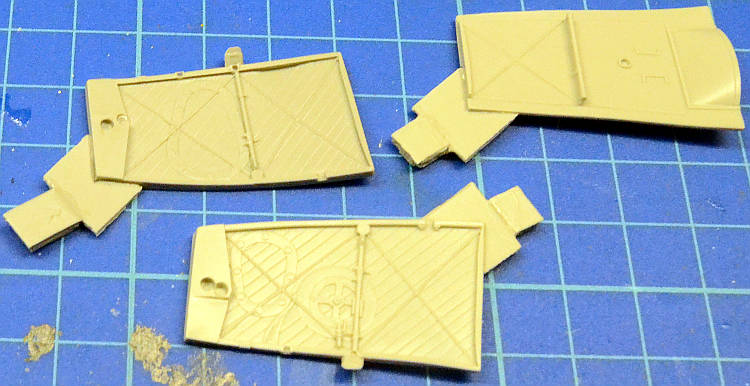
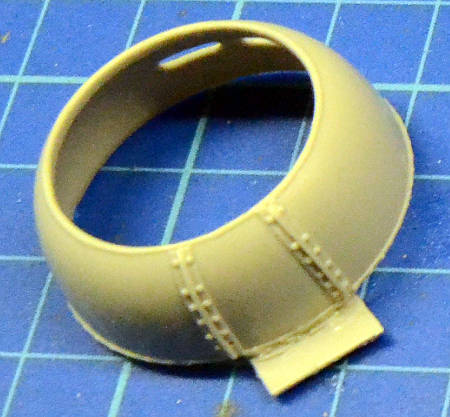
Apart from the cockpit sides and floor the set has a lot of great pieces that we'll see during the work here are the wheels

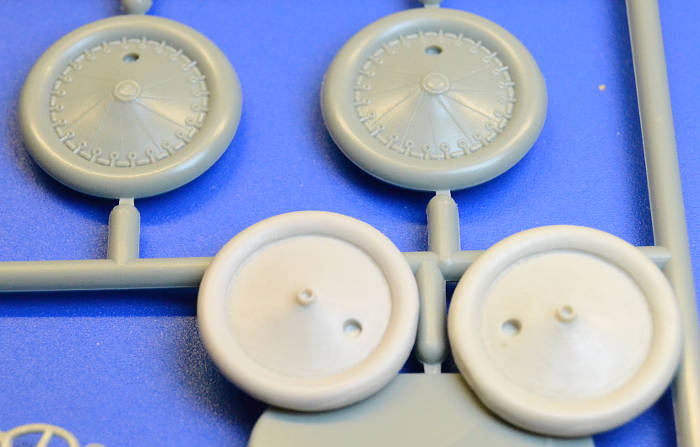
the wheels were shaped flattened to simulate the weight, but I don't like this so I will sand the tyres and try to make them even...
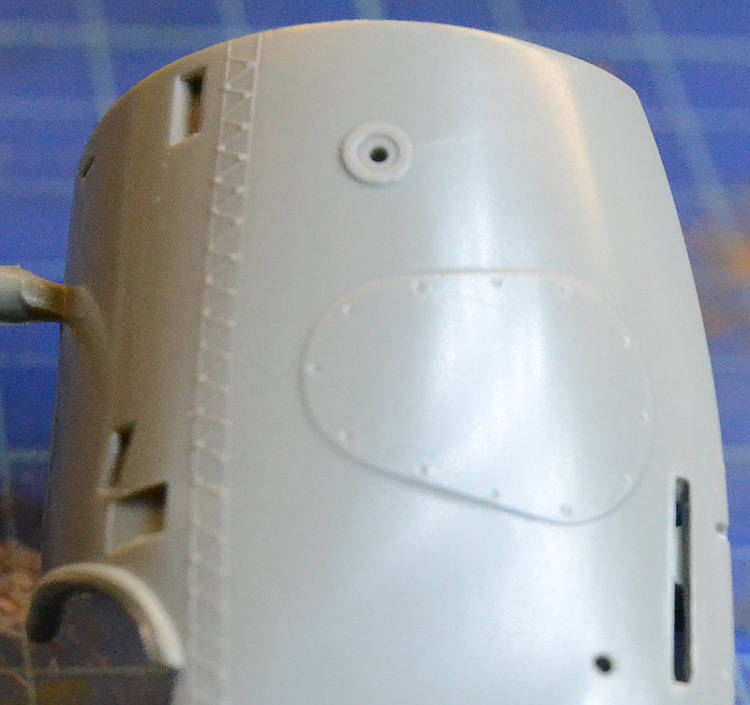
...and the cowling


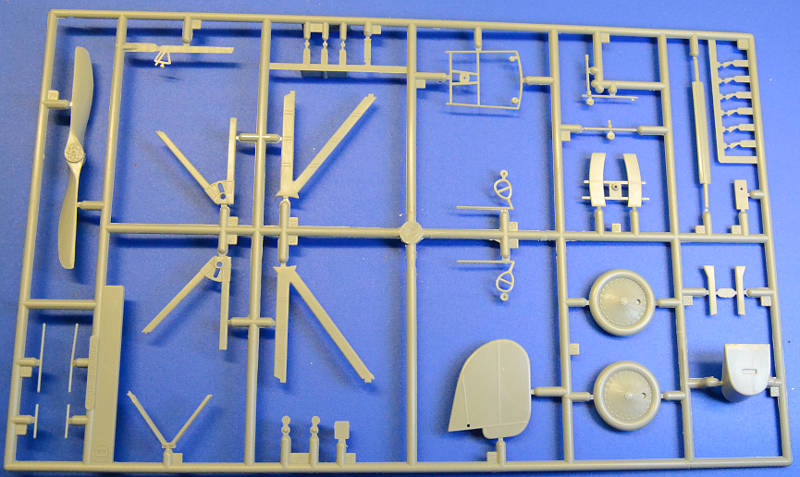
The other sprue (front and back):


The documentation I have so far:


The profile, very easy...

At the moment I am working on a vector drawing of the horse.

The stencils on the rudder will be homemade as well:


Here is another image of Baracca's Ni17 after a mission, you can see the roundels are missing. No trace of the underlying French markings seem to peep out...


OK, that's all for now, I look forward to getting any advice, warning and suggestion for improvement of the kit.

Thanks for your attention!

Antonio
« Last Edit: October 07, 2014, 06:28:41 PM by andonio64 »

Offline gcn

  • Sr. Member
  • ****
  • Posts: 425
Re: Francesco Baracca's Ni17/2614 Academy 1/32
« Reply #1 on: October 07, 2014, 06:09:31 PM »
I built this kit in the exact same markings and I created masks or my own decals. I think the bleed through of the French roundals can be argued either way, but I wouldn't use the kit decals. Academy decals have a reputation for being thick.

Your master casters resin looks better than the blob of junk I received so I scratched pretty much all the interior instead ( it isn't really that hard). I took my lead from an Italian modeller, who did something similar with the kit. Unfortunately his name escapes me as does the forum he posted on

I'm off sick in bed with nothing else to do so a google trawl gives :

http://www.theaerodrome.com/forum/showthread.php?t=51294&page=3

http://www.modellismopiu.it/modules/newbb_plus/viewtopic.php?topic_id=22963&forum=49

I'd also look at Mark Millers wonderful CAD images over at the Aerodrome

There are plans easily available as well, the irony is I can't remember where I put my build log.

I'd sand down the ribs and use the kit engine.

IMO it's a cracking model for the money and for a bit of effort really build up well.


Offline andonio64

  • Hero Member
  • *****
  • Posts: 1685
  • There's no hurry
Re: Francesco Baracca's Ni17/2614 Academy 1/32
« Reply #2 on: October 07, 2014, 06:41:23 PM »
I built this kit in the exact same markings and I created masks or my own decals. I think the bleed through of the French roundals can be argued either way, but I wouldn't use the kit decals. Academy decals have a reputation for being thick.

Your master casters resin looks better than the blob of junk I received so I scratched pretty much all the interior instead ( it isn't really that hard). I took my lead from an Italian modeller, who did something similar with the kit. Unfortunately his name escapes me as does the forum he posted on

I'm off sick in bed with nothing else to do so a google trawl gives :

http://www.theaerodrome.com/forum/showthread.php?t=51294&page=3

http://www.modellismopiu.it/modules/newbb_plus/viewtopic.php?topic_id=22963&forum=49

I'd also look at Mark Millers wonderful CAD images over at the Aerodrome

There are plans easily available as well, the irony is I can't remember where I put my build log.

I'd sand down the ribs and use the kit engine.

IMO it's a cracking model for the money and for a bit of effort really build up well.

Hi Gary,
thanks for your reply, I already saw your great WIP,  I also knew Starflyer's build from my earlier modeling activity, I still am in that forum but have no time to keep up to date everything, so, having to chose, I prefer strolling around this forum where I feel more "at home"... :-)

I think I will erase completely the interiors and use some of the Mastercaster pieces, not the cockpit panels.

I agree with most of your advice, I still will look for the 1/32 plans (I have the windsock but the drawings are maximum in 48th)... will google it more until I find it.

I also was able to see in the end the French roundels peeping on the top wings in both the pictures I posted... maybe I will paint them and then cover them, or maybe just a slightly darker metal circle would be enough...

I also agree in sanding off the "ribs" I shouls invent something to create them back after...
You did not sand them didn't you?

Ciao

Antonio


Offline RAGIII

  • Hero Member
  • *****
  • Posts: 18858
Re: Francesco Baracca's Ni17/2614 Academy 1/32
« Reply #3 on: October 07, 2014, 11:38:25 PM »
I am looking forward to your build! I have 3 of these kits in the stash....
RAGIII
"A man has to know his limitations": Harry Callahan

"Don't slop it on" Lynda Geisler

Offline gcn

  • Sr. Member
  • ****
  • Posts: 425
Re: Francesco Baracca's Ni17/2614 Academy 1/32
« Reply #4 on: October 08, 2014, 02:26:35 AM »
Hi Antonio

I think I took them back a touch, but it's a dull job and I probably could have done it better.

To my uncritical eye once paints on it's not too bad.

Offline andonio64

  • Hero Member
  • *****
  • Posts: 1685
  • There's no hurry
Re: Francesco Baracca's Ni17/2614 Academy 1/32
« Reply #5 on: October 08, 2014, 06:00:41 AM »
Hi Antonio

I think I took them back a touch, but it's a dull job and I probably could have done it better.

To my uncritical eye once paints on it's not too bad.

Yes it's dull indeed, I was thinking to sand them off not completely and try some shading to give the surface a bit more of "life".
How are you doing with your health? I hope you'll be out of bed soon!

Offline gcn

  • Sr. Member
  • ****
  • Posts: 425
Re: Francesco Baracca's Ni17/2614 Academy 1/32
« Reply #6 on: October 08, 2014, 06:40:41 AM »
It's just man flu,  hopefully I'll be right as rain in a couple of days. Thanks for asking

Offline BigBlue

  • Hero Member
  • *****
  • Posts: 640
Re: Francesco Baracca's Ni17/2614 Academy 1/32
« Reply #7 on: October 09, 2014, 11:11:37 AM »
Antonio,

I love the introduction to your build and am looking forward to watching it progress!

Chris

Offline mgunns

  • Hero Member
  • *****
  • Posts: 2255
Re: Francesco Baracca's Ni17/2614 Academy 1/32
« Reply #8 on: October 10, 2014, 03:29:44 AM »
Hello Antonio:

I too have built this kit and like Gary, just sanded down the 'ribs' a bit.  As he said, once painted and a little shading, they look alright.  I too bought the Master Caster kit and have yet to use it.  Like Gary, it is just as easy to sand off the fake stuff on the interior, put a few sticks of plastic, rig and away you go.  Some of the Master Caster stuff is useful, but not having used it will withhold judgement.
I will be checking in from time to time to see how you are doing on the build.  I am looking forward to it as there is hardly any Italian stuff out there.

Best

Mark
Mark

We few, we happy few.....

Offline Alexis

  • Hero Member
  • *****
  • Posts: 7947
  • Love the self
Re: Francesco Baracca's Ni17/2614 Academy 1/32
« Reply #9 on: October 10, 2014, 11:58:03 AM »
Looking forward to your build and in 32 scale !


Terri
Hurra ! , Ich Leben Noch
Body and life is a vessel we use to travel the planet . Femininity is the gift , The miracle comes from what we do with it .

Offline andonio64

  • Hero Member
  • *****
  • Posts: 1685
  • There's no hurry
Re: Francesco Baracca's Ni17/2614 Academy 1/32
« Reply #10 on: October 10, 2014, 03:20:48 PM »
Thanks guys and doll for stopping by and leaving your message, I have started yesterday evening by detaching the engine pieces from the sprues and started cleaning from the flashes.

I hope to post some picture by the weekend.

Ciao

Antonio

Online lcarroll

  • Administrator
  • Hero Member
  • ******
  • Posts: 8556
Re: Francesco Baracca's Ni17/2614 Academy 1/32
« Reply #11 on: October 10, 2014, 11:42:33 PM »
Antonio,   
I have the Hobbycraft version of this Kit and will be doing it as Bishop's B1566 eventually. I'll be following your Build closely, nice to see some Italian "flavour" here! I considered getting the Master Casters Package however found several reviews that were very unfavourable, so I'll be "scratching" the interior as well. Great scheme you've chosen. Also, the Gaspatch Vickers are truly outstanding products, highly recommend you get a set for this model.
Cheers,
Lance

Offline andonio64

  • Hero Member
  • *****
  • Posts: 1685
  • There's no hurry
Re: Francesco Baracca's Ni17/2614 Academy 1/32
« Reply #12 on: October 11, 2014, 12:33:11 AM »
Thank you Lance, I just got the Gaspatch Vickers yesterday and they are beautiful. I woul only make the hand lever from a round section wire because they are flat being carved on a PE fret.

The cockpit walls of the Master Caster package are very well sculpted but they have those inset wires I can't stand. Maybe I'll try to extract some details from them and re use...

Other pieces I have in my box also from that package are very nice and perhaps I will use them...


...here is a picture I found on the "drome" forum

More later during this weekend.

Ciao

Antonio

Offline andonio64

  • Hero Member
  • *****
  • Posts: 1685
  • There's no hurry
Re: Francesco Baracca's Ni17/2614 Academy 1/32
« Reply #13 on: October 20, 2014, 07:38:24 PM »
Hallo,
the progresses of this work are slow (as usual) but steady...

First of all I tried to pre-assemble the engine which - as said - is good enough, ...but

as you can see the exhaust tubes don't touch the heads of the cylinders, although most of the cylinder heads will be hidden by the cowling, from below some of the lower cylinders will be seen.
So I think I should operate on this.
Same problem can be seen for the rods departing from the centre towards the valves on top of the cylinders. They don't touch the cylinder, moreover they are too thick...

This is an example of the rear side of the engine.

I am considering to put tiny round slices of plasticard where needed to join the exhaust tunes to the cylinder head and replace the valve levers (I don't know their exact name) with thinner metal rods.

For the time being I put aside the engine working on other details.

Here is the tail surfaces, I matched them to some technical plans I found on finemodelworks.com, really big and well detailed, I reduced them to a scale very close to 1/32.


The shape of the aileron tips was too pointed, I know it's not an important detail, but the transformation was so easy I decided to go.


Then I sanded the ribs, cut away the ailerons, put some plasticard bits to simulate the hinges


Same work done on the rudder ribs, moreover I added a couple of pins to fix it to the fuselage being able to displace it to a side.
The stencil on the port side will show the complete S/N + weight and fuel indication, on the starboard side there will be only the 2614 code

Then I started working on the fuselage:
I traced (using a well known primary school method!) the two openings in the forward part of the cockpit (to be glued inside)

to replicate their shape which I decorated with nuts, I made them big hoping they will be visible after closing the fuselage.


Stepping forward to the inside of the fuselage: I got rid of the horrible internal rigging cast into the plastic and, not being able to make a perfectly shaped cage, I decided to stick the woodwork to the sides.

I glued square rods of plasticard to the walls but before gluing them I pierced the vertical ones on top and bottom to let the rigging go through.
The cockpit part that goes from the seat back to the engine firewall was made of metal and as the Mastercaster set states it was covered with diagonal wooden planking. I remember I had seen somewhere on the web an old photo where 
this structure was visible but am not able to find it anymore, in any case as I like this feature I decided to replicate it inside my model scribing some pieces of plasticard.
Some modellers (much better than me interpreted the diagonal pattern covering also the forward part of the cockpit but I thought it would be scarcely visible also because there will ba a lot of things there filling the available space, 
so I decided to stay just with one panel per side:


Some minor details on the fuselage outside:


I used a .8 mm diameter brass tube to replicate the exhaust on both the sides


letting them pass through inside, where the brass tubes will join the inner front assembly as shown in the 2 pictures following:


Maybe this will not be seen from the cockpit hole but in some way helped placing the round piece I took from the MasterCaster set

Here you can see the copper pins I put into the exhaust tubes and the white plasticard I put to let the support tube touch both the cockpit sides.


Here you can see on the left the piece that will close the space behind the pilot (the small holes are for the rigging and the big holes to let cables run towards the tail control surfaces.
On the right the floor piece I took from the MasterCaster set: I sanded it off, put a bigger rod to hold the plank behind the seat and made some tiny holes for rigging.


Here is a first try to set the cockpit structure, maybe the top corners should be further rounded to leave room for the headres piece that should be glued against the white plasticard piece


Here I tried to dry-close the fuselage, and the result is satisfying althugh not yet finished.

That's all for now.

More in the next days!

Ciao and thanks for stopping by and sharing your thoughts, tips and advice for improvement!

Antonio
« Last Edit: October 20, 2014, 08:23:18 PM by andonio64 »

Offline RAGIII

  • Hero Member
  • *****
  • Posts: 18858
Re: Francesco Baracca's Ni17/2614 Academy 1/32
« Reply #14 on: October 20, 2014, 07:42:55 PM »
Reall nice work on your Nieuport Antonio! Very well done so far!!
RAGIII
"A man has to know his limitations": Harry Callahan

"Don't slop it on" Lynda Geisler