Time for another (and Final) update. I completed her yesterday. I'll be taking a few more (hopefully better) photos in the next couple of days and will submit them on Completed Models to wrap this one up.
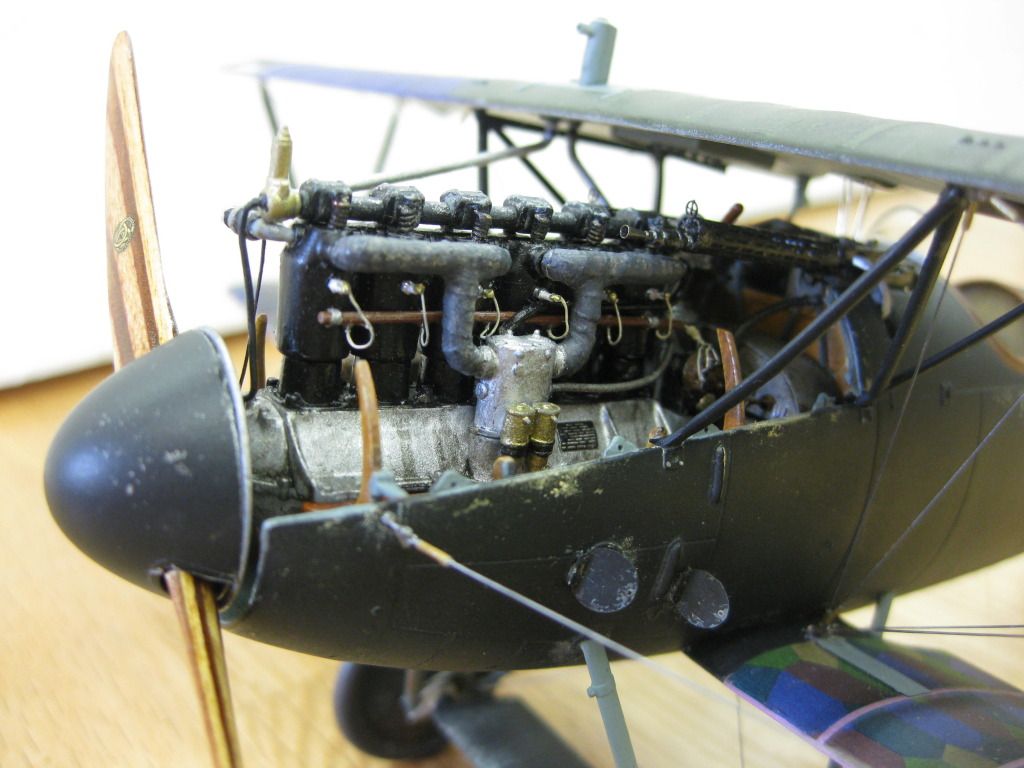
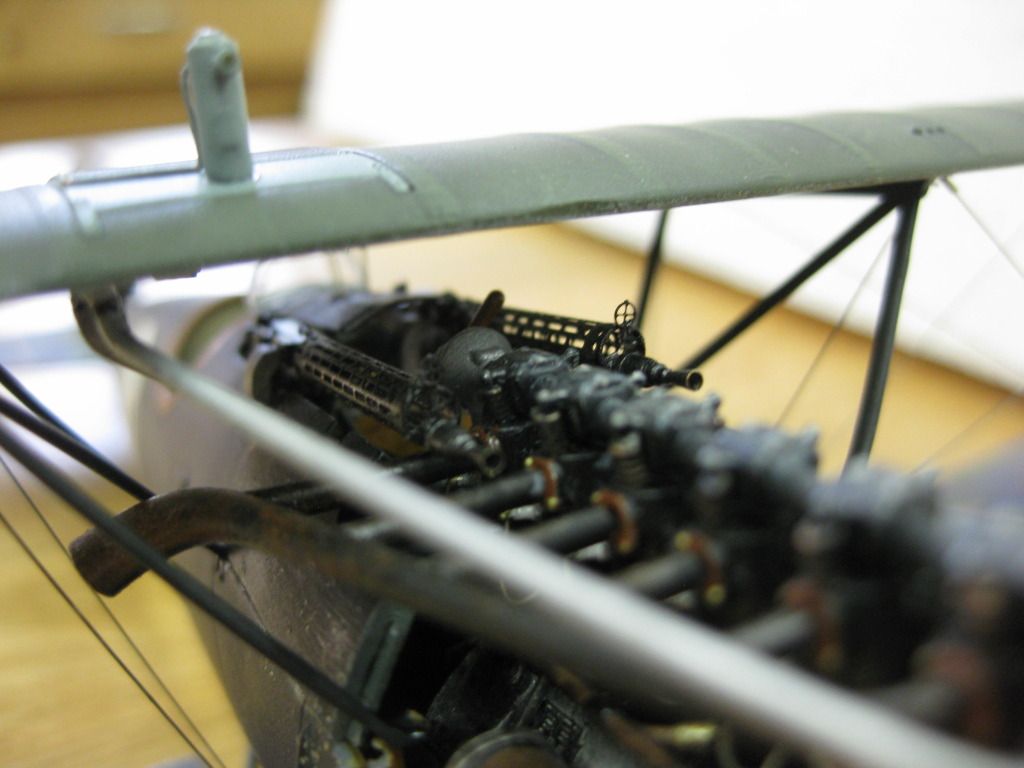
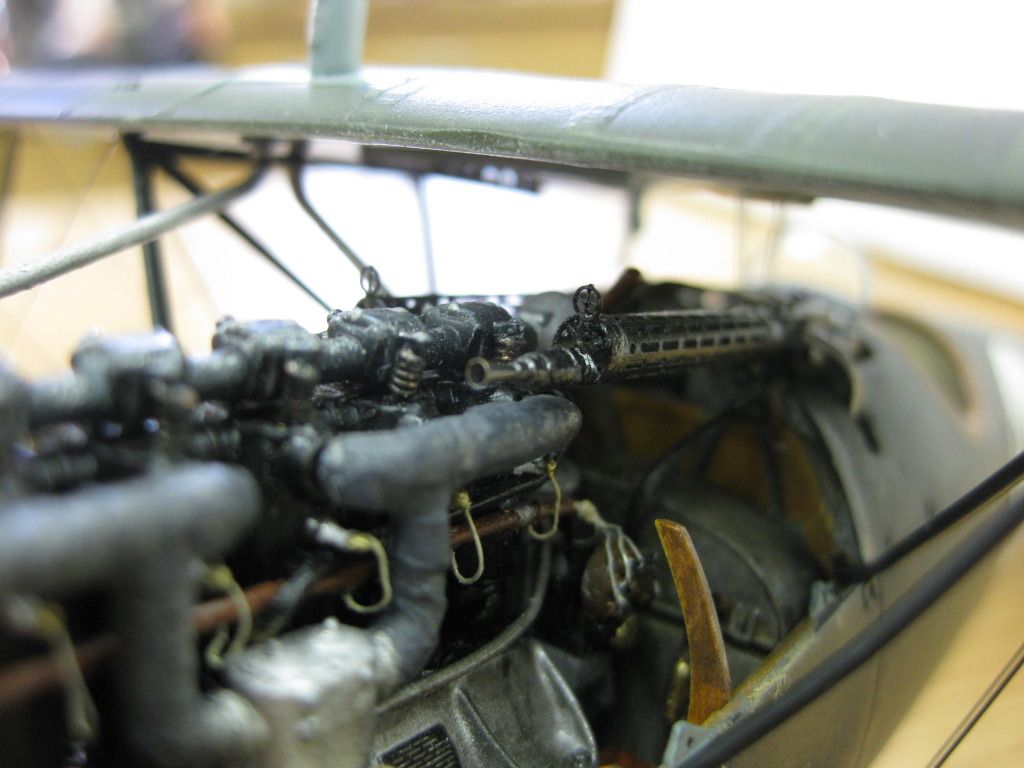
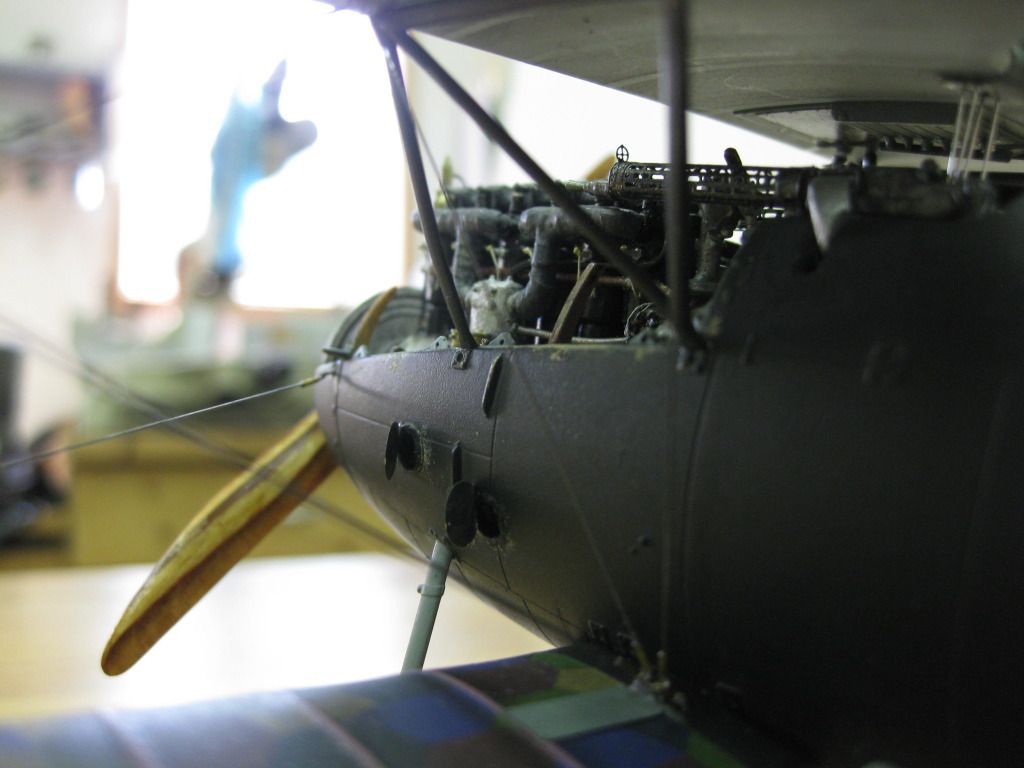
Since the last entry I finished off the engine area and the cowling panels (3 of 4 will be left "off/open") and added the last of the plumbing. Also installed the guns, added a scratch built radiator shutter control lever and also more detail to the pressure tank on the top. Guns are "Master" Spandaus, an excellent product. Last in this area the rad lines were installed, the larger of which I had to build after breaking the original, and I installed the 4 aileron control cables from the decking to the upper wing, the latter operation by "braile". (nasty operation but in the end I removed the PE "clip" on the top wing cockpit cutout, drilled down through the wing and inserted the wires, and then replaced the metal fairing and mirror on the wing)
Some shots of the forward section.......cover your eyes, Des and Jamo, I havn't had time to get into the Photo Tutorial!

The rigging was completed using 0.13mm fishing line and guitar wire for the elevator cables. The paint used was Mr Metal Colour Stainless, some darkened with Dark Iron and the hardware is Bob von I make perfect Buckles excellent products.
In keeping with my choice to go max. weathering and worn look I added some more pastels/pigments, some washes, and chipping to the wheel covers.
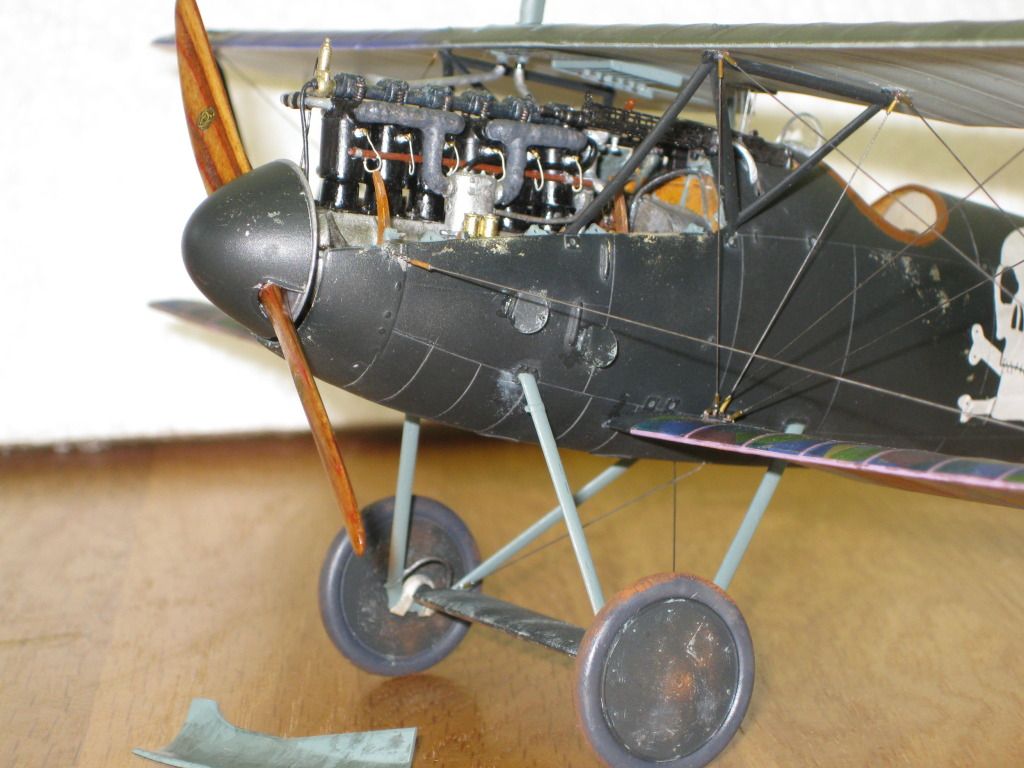

The last item was the three engine compartment access doors from the Eduard DIII Set, left open, stained, and chipped.

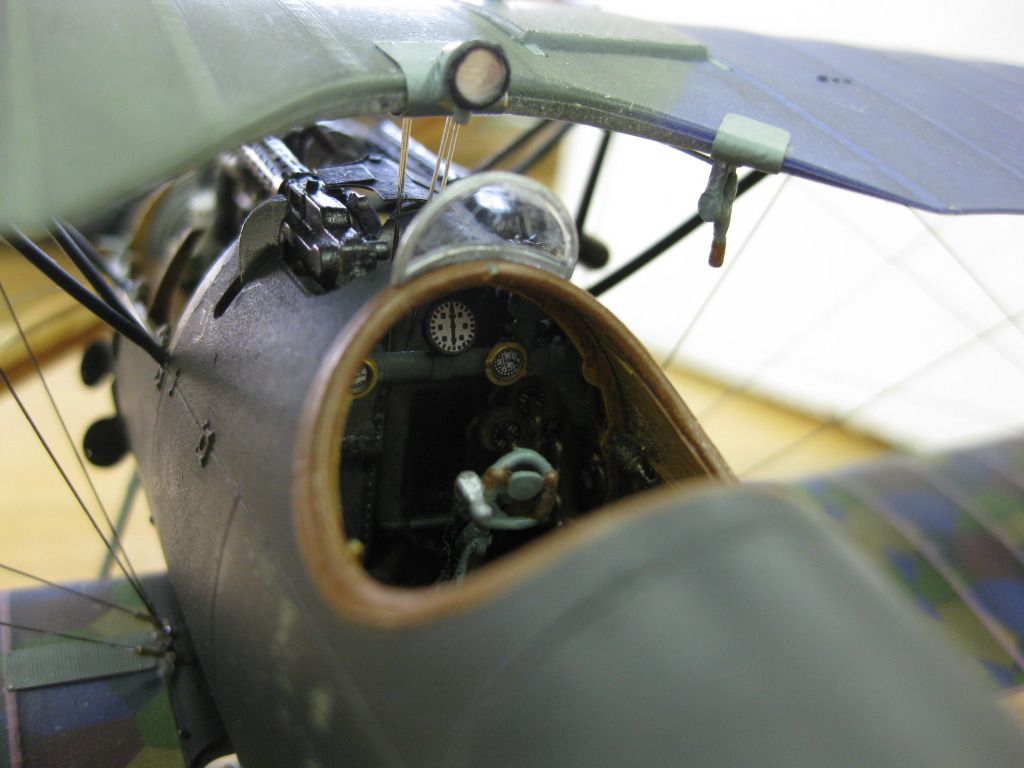
So here are a few overall views; the Albatross Purple appears more blue then in real life and I maximised the weathering and worn look as I like the effect.(I really don't seem to have the skills and steadiness to go for a crisp "clean" build any more regardless, easier to hide the "gaffs" this way!!)
OOps, my Photobucket just locked up, back with Part 2 once I hopefully clear this up!
Cheers,
Lance

