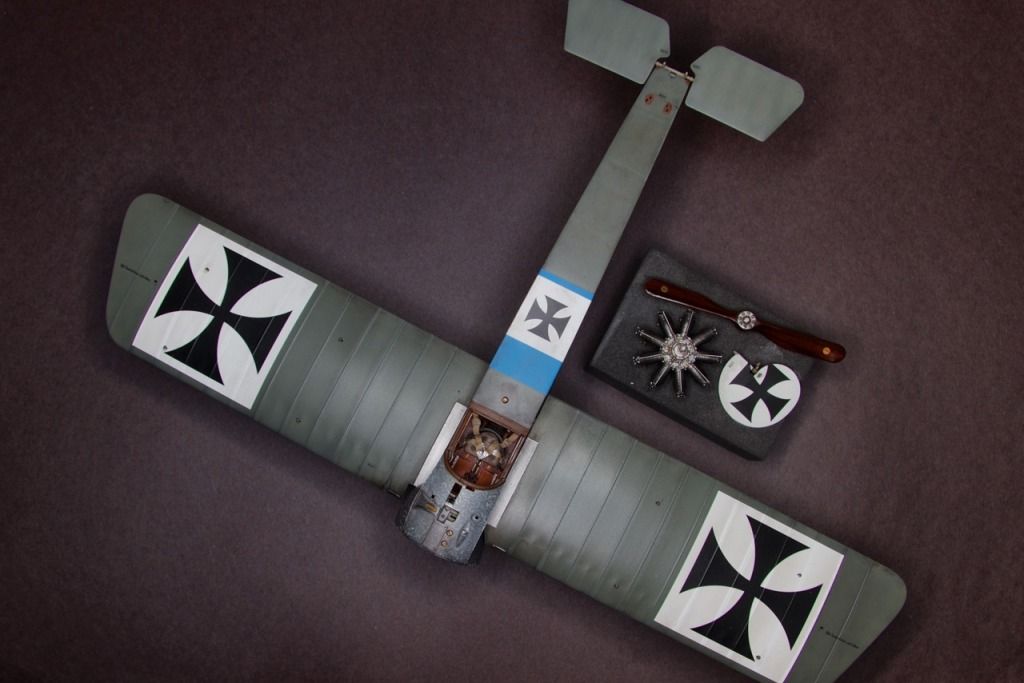
Author Topic: Wingnut Wings Fokker E.II/E.III Early  (Read 31499 times)

Offline lcarroll

  • Administrator
  • Hero Member
  • ******
  • Posts: 8660
Re: Wingnut Wings Fokker E.II/E.III Early
« Reply #105 on: October 09, 2014, 10:59:25 PM »
Chris,   
    Viewing the complexity of this little beauty I can understand your comment that you are not "eager to repeat the experience"! It may not be perfect result in your view but to my eyes it is a truly magnificent piece of work; you've done a beautiful job on it. The paint work, shading, and subtle "dirtying up" are perfect and this will be a very nice addition to an already impressive Build.
    Very nice work!!
Cheers,
Lance

Michael Scarborough

  • Guest
Re: Wingnut Wings Fokker E.II/E.III Early
« Reply #106 on: October 09, 2014, 11:41:52 PM »
I'm still finding my way around here and have only just now come across this build log....and I am sincerely glad I did! Really excellent work, Chris.

I think the way you built up the layers to achieve the effect you wanted on the fabric surfaces is brilliant. Likewise the work on the Taurus Oberursel...you have a great eye and a wonderfully deft touch with brushes - air and bristle.

When I got to the part in the log showing the opening seam my blood froze on your behalf. I make Japanese lacquer ware for a living and have had glued up pieces show a seam 6 months after finishing, so I can honestly say I feel your pain. I think Bo's suggestion may be the best and am wondering how you finally tackled the problem. If all else fails, do a figure of the pilot and have his coat sitting on that portion of the fuselage waiting to be donned. Or a chart with a helmet and goggles holding them down.

Best of luck with the rest of the build. I will certainly be using it when I finally get to an Eindekker.

Cheers from NYC,
Michael

Offline BigBlue

  • Hero Member
  • *****
  • Posts: 640
Re: Wingnut Wings Fokker E.II/E.III Early
« Reply #107 on: October 10, 2014, 01:16:18 AM »
Michael, thank you very much for your kind comments and helpful suggestions.  They are both very much appreciated.

I had not thought about the idea of using a figure, probably because despite your analysis, my brush painting skills are pretty iffy!  I have basically followed Bo's (and one or two others' suggestion) to attempt the repair via clear coat and sanding, and despite a bit of a setback (which I will detail in a future post... I am late for a meeting!) I am optimistic that I'm on the right path.  As I mentioned above, a new set of decals for this aircraft arrived yesterday from the folks at Wingnuts, so I will be putting my theory to the test in the near future.

Thanks again for your generous comments.

Chris

Offline mgunns

  • Hero Member
  • *****
  • Posts: 2255
Re: Wingnut Wings Fokker E.II/E.III Early
« Reply #108 on: October 10, 2014, 03:17:50 AM »
Hi Chris:

I think your engine looks great.  I can fully appreciate the challenges you faced with this engine kit.  I had been tempted to buy one and just try it, but; I doubt my patience or skill level is up to the challenge.  This will certainly add that extra "wow" factor on your finished model, which I am looking forward to seeing here.

Best

Mark
Mark

We few, we happy few.....

Offline radio

  • Hero Member
  • *****
  • Posts: 3952
Re: Wingnut Wings Fokker E.II/E.III Early
« Reply #109 on: October 10, 2014, 03:46:39 AM »
A very well done engine. Wait for the next update.
Martin

Offline Alexis

  • Hero Member
  • *****
  • Posts: 8092
  • Love the self
Re: Wingnut Wings Fokker E.II/E.III Early
« Reply #110 on: October 10, 2014, 11:57:08 AM »
Most impressive  :)


Terri
Hurra ! , Ich Leben Noch
Body and life is a vessel we use to travel the planet . Femininity is the gift , The miracle comes from what we do with it .

Michael Scarborough

  • Guest
Re: Wingnut Wings Fokker E.II/E.III Early
« Reply #111 on: October 10, 2014, 11:03:43 PM »
Hello, Chris,

I am glad you have decided to fix the seam and not cover it with camouflage of a three-dimensional sort. As I said, that should only be a last resort. I, for one, will have benefitted from your problem. Had it not happened, we'd not have had Bo's suggestion of chamfering the edges before filling. It's brilliant, so, thank you both.

Your anecdotes of working on the Taurus engine and the issues of holding small parts, magnification, sound really familiar, as I'm starting to encounter the same problems. It is nice to know that as we wade into the waters of Grad School model building there are upperclassmen who are so willing to help.

Cheers from NYC,
Michael

Offline BigBlue

  • Hero Member
  • *****
  • Posts: 640
Re: Wingnut Wings Fokker E.II/E.III Early
« Reply #112 on: October 11, 2014, 01:49:17 AM »
Thank you very much Lance, Mark, Martin and Teri.   Given the regard in which I hold your skills, I am very appreciative of your comments. (Lance, I apologize for missing your comment earlier, I was reading the thread on my phone, and just missed it!)

Mark, the kit engine is quite nice in its own right (as would be expected from the fine folks in New Zealand), and as you and others here have shown, builds up into a beautiful representation of the Oberursel.  My biggest issue with it was the seam lines on the cylinders, but even that wouldn't have been a non-starter for me.  I chose to go the Taurus route largely for the experience of building it, and I certainly got that.  If I build another Oberursel powered aircraft, I'd have to give some hard thought to how much that extra "wow" factor, as you called it, was worth to me in terms of time and well... frustration, particularly in light of how much of the engine is actually visible in the assembled aircraft.  Like I said before, for those with the aptitude and inclination (and cash): buy this kit and don't look back; it is a real beauty from a great little company.

Mike, I'm glad you are along for the ride.  I too have been very appreciative of the knowledge that Bo and many others have shared.  As I mentioned in my comment on your build thread, I think you will be happy that you found these forums; I know that I am. 

My family and I are traveling this week, so likely no updates for a few days.  I'm hoping to get some bench time Sunday night while watching the Giants game.   Thanks again to everyone for checking in,

Chris

Offline BigBlue

  • Hero Member
  • *****
  • Posts: 640
Re: Wingnut Wings Fokker E.II/E.III Early
« Reply #113 on: October 19, 2014, 12:57:33 PM »
Well, my pace has been terribly slow, but I have been working on my Eindecker, and have an update to share. 

As a reminder, a bit over a month ago I put up a picture (on page 6) showing that the seam along the top of the fuselage had re-appeared at some point after paint, decals and weathering.  I wound up waiting on replacement decals from the folks at WnW (which they were very kind to provide me.)  Here is the re-finished seam:
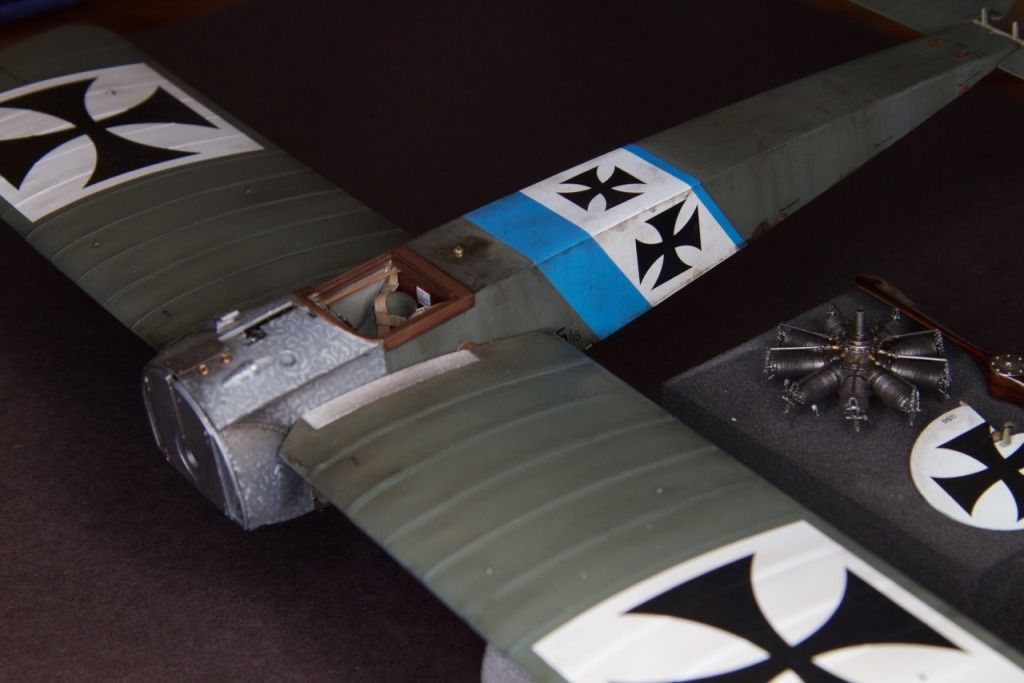


I took a couple of different approaches to dealing with the seam as follows.  For the gray-green fabric area ahead of the decals, I took the advice from Bo and others and built up the area with a number of coats of clear, and sanding between each one.  When it looked like I had a smooth finish, I used a bit of the AK Fuel Stains enamel that I had used for the stains around the fuel cap, and painted along the seam, which eliminated it from view. 

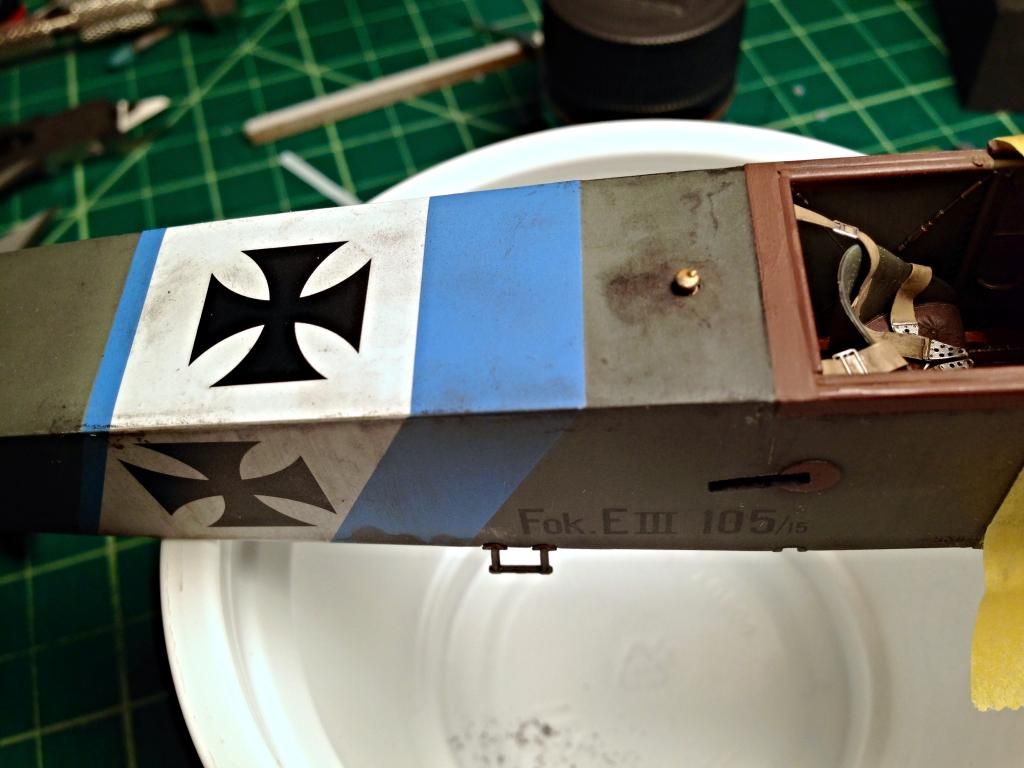
Because of some technical issues I had to do a bit more work on the decal area.  I decided to try a coat of Mr. Metal Primer... clear... primer... good, yes?  No.  For whatever reason, I got some really nasty orange peel that required quite a bit of sanding.  Fortunately, the issue was confined to the decal surface, and since I had a replacement coming, I figured I'd just strip that area down and use some actual putty (Squadron Green & Mr. Surfacer) to fill the seam.  I masked off the painted areas and sides to protect them, but still wound up with a bit of repair work to do along the upper edge of the starboard side.  Concerned that a strip of decal would be visible, I decided to paint the area and attempted to match that Bavarian blue.  I settled on Tamiya XF-18, Medium Blue, which while not a perfect match, looks like a smokier version of the stripe color, so blended in very nicely with the rest of the weathering:


Once I had finished the repairs, and applied the decals, I attempted to blend the new work in with the old with various oil washes and gave the whole area an additional coat of clear, followed by a coat of Alclad Matte to match the rest of the paint work.  I went over a couple of the oil stained areas with a thin coat of Tamiya Smoke to restore the oily sheen, and called it repaired.  It was a bit scary at times, but now that it is done, I am certainly glad to have eliminated the seam.

To celebrate finally getting back to where I was a month ago, I have now also attached the wings. 
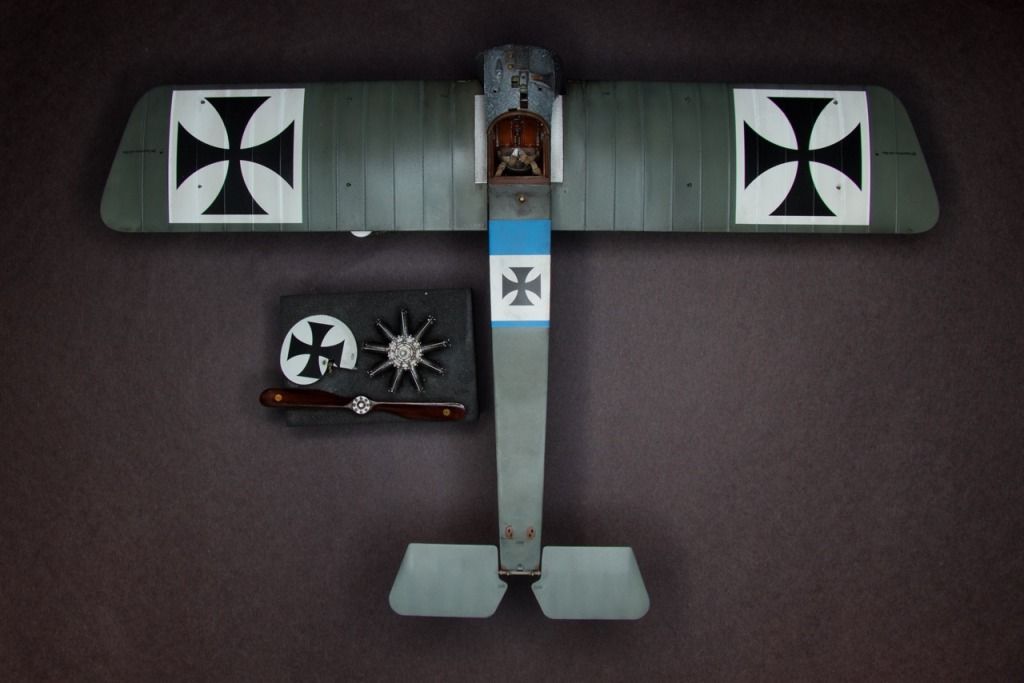


I will let the wings set overnight, and then will get the undercarriage underway tomorrow.

Thanks for checking in,

Chris

Oh, p.s. I have a quick question:  I have painted the exposed cartridges in the ammo feed chute brass as recommended by the instructions.  I am wondering, is this accurate, or would the bullets have been held within a canvas belt?  Thanks in advance.

Offline Ernie

  • Hero Member
  • *****
  • Posts: 3961
  • "Once more into the breach"
Re: Wingnut Wings Fokker E.II/E.III Early
« Reply #114 on: October 19, 2014, 01:45:01 PM »
Absolutely beautiful, Chris.  You have certainly made up my mind
on what version of the Eindecker to build, although not up to your
talents.  Yours is, besides being a great build to follow, an excellent
construction resource. :)

Cheers,
Ernie :) 
The new old guy, take two...

Offline Ssasho0

  • Hero Member
  • *****
  • Posts: 584
    • Scale Models Club Bulgaria
Re: Wingnut Wings Fokker E.II/E.III Early
« Reply #115 on: October 19, 2014, 05:43:04 PM »
Good job on repairing the top seam. The seam on my EIV also reappeared and i will have to repair it. At least there are no decals on Immelmann's Eindecker. Keep up the good work.
Sasho
Think globally, act locally!

Offline radio

  • Hero Member
  • *****
  • Posts: 3952
Re: Wingnut Wings Fokker E.II/E.III Early
« Reply #116 on: October 19, 2014, 07:29:38 PM »
Chris you make a very good job.
Martin
« Last Edit: October 21, 2014, 08:55:21 PM by radio »

Offline RAGIII

  • Hero Member
  • *****
  • Posts: 19694
Re: Wingnut Wings Fokker E.II/E.III Early
« Reply #117 on: October 19, 2014, 09:48:55 PM »
Outstanding work on repairing that seam! As for the stripe, the color match looks great to me!
RAGIII
"A man has to know his limitations": Harry Callahan

"Don't slop it on" Lynda Geisler

Offline stefanbuss

  • Hero Member
  • *****
  • Posts: 976
Re: Wingnut Wings Fokker E.II/E.III Early
« Reply #118 on: October 20, 2014, 05:04:11 PM »
Impressive repair job. Very well done. Congratulations. Let's hope that attaching and rigging the undercarriage happens without additional incidents.

Stefan

Michael Scarborough

  • Guest
Re: Wingnut Wings Fokker E.II/E.III Early
« Reply #119 on: October 20, 2014, 11:36:38 PM »
Congratulations, Chris.  I would think that accomplishing this repair in what looks like an effortless manner has led to a feeling of genuine satisfaction. To my eye, not only have you eliminated the seam, you have added a considerable amount of character...and seamlessly

You have an amazingly deft touch and I look forward to seeing you complete this build.....as well as more in the future.

Cheers from NYC,
Michael