From all the way back in page 4 of the "Under Construction" forum.... an update!
First I'd like to offer a
very belated thank you to Des, Guy, Ernie, Stefan and Rick for the kind comments; I have been negligent in responding to your kindness, but they are always appreciated.
Progress has been slow, even by my standards, but between down time due to a nasty winter cold, a bit of travel, work commitments and a ridiculously large amount of time spent shoveling snow, I have managed to move this build along. Not that I'd expect anyone to remember after all this time, but being unsatisfied with my efforts on applying the lozenges and painting markings on the wings, I had decided to strip them down and take a second pass at them. Here are the results:
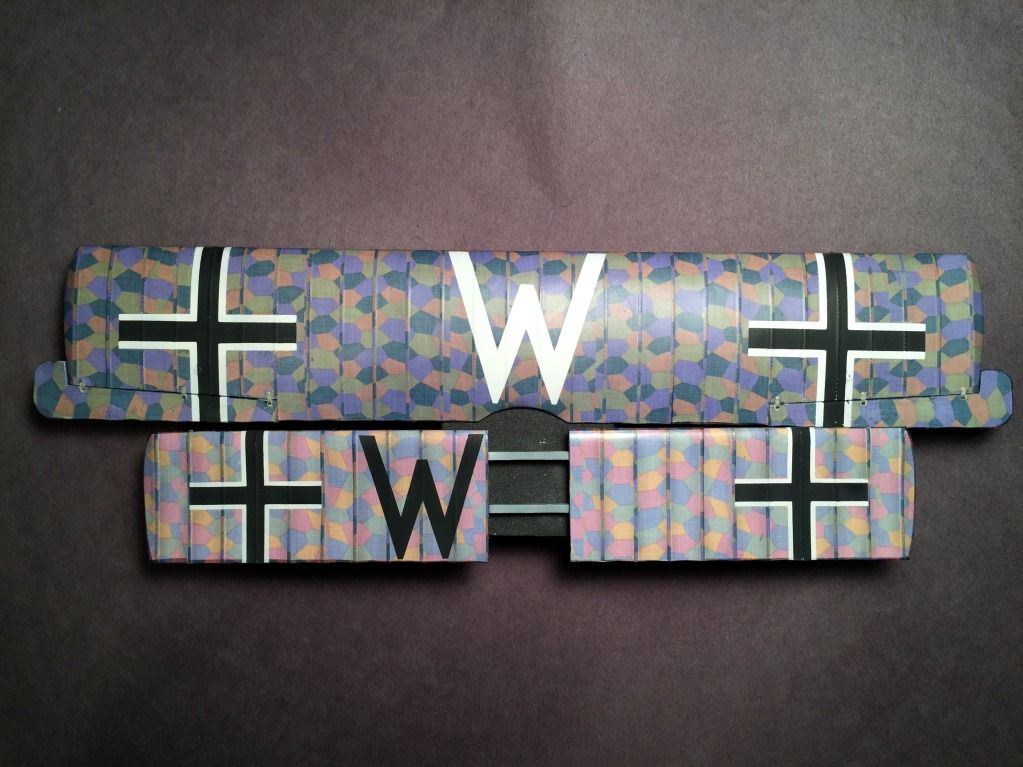
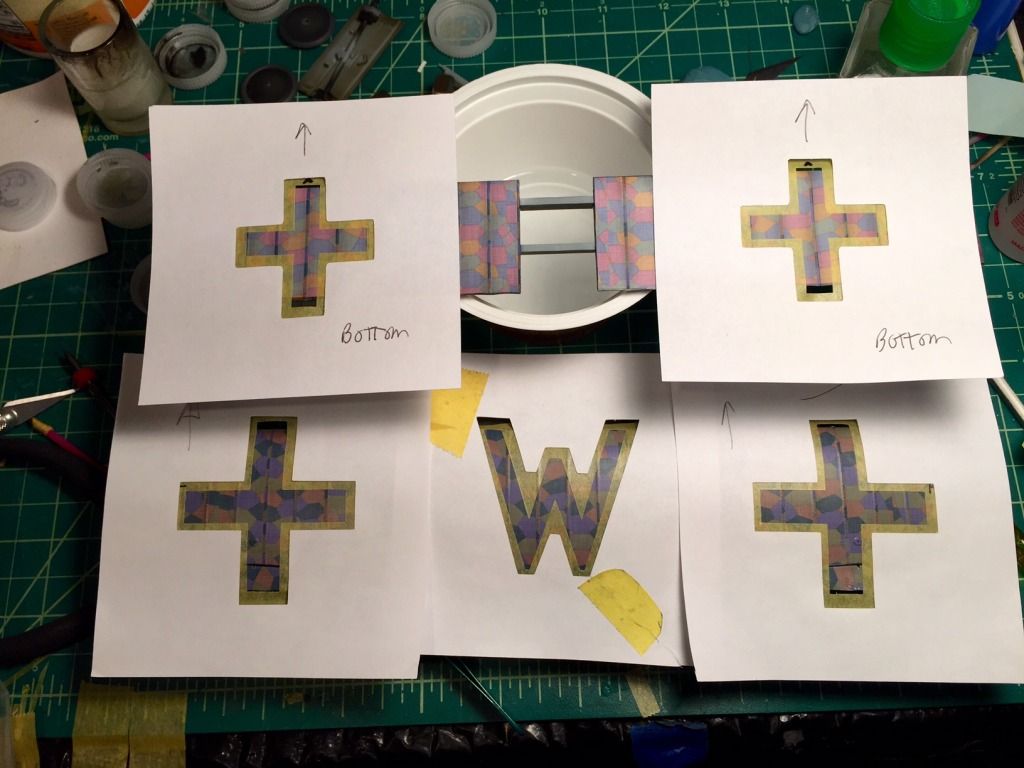
While they are by no means perfect, I am much happier with the results this time around. I was much more diligent about ensuring that the lovely Aviattic decals settled in without air pockets, and the improved results were immediately visible to me. I put my new Silhouette Portrait cutting machine to good use during the masking process, cutting 3 separate layers for each mask: a 4 mm wide mask for each shape cut from sheets of Tamiya tape, a broader mask cut from copy paper, and a piece of clear frisket film to use to transfer the mask to the work surface.
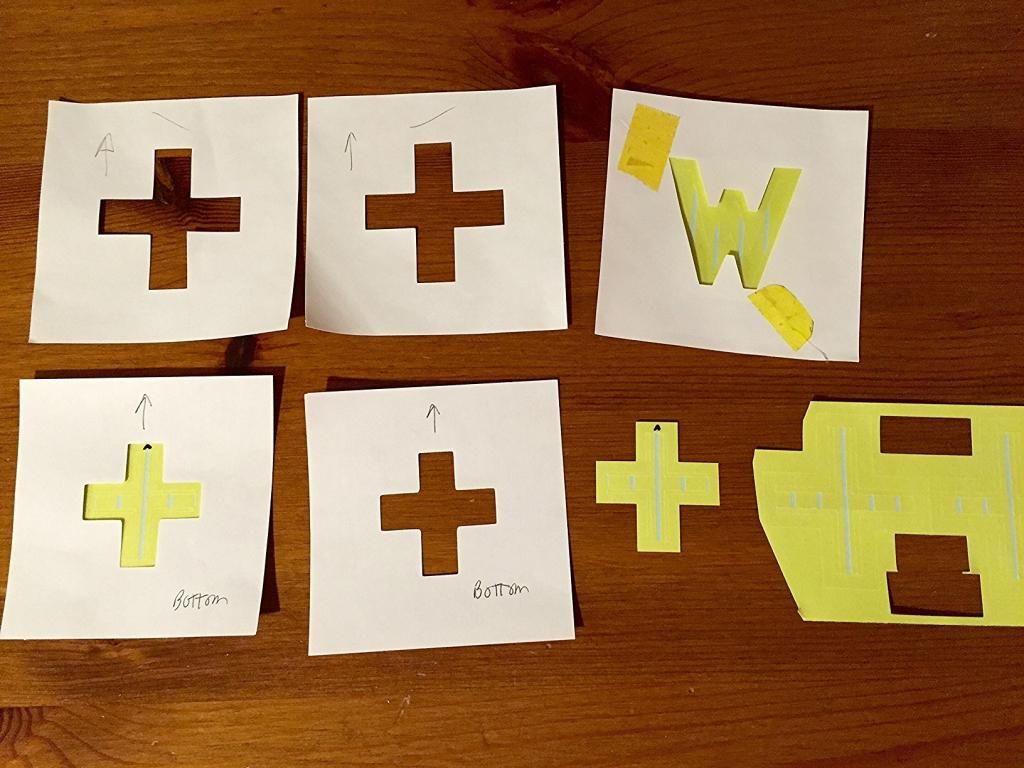
I used a bit of Scotch Repositionable glue stick along the inside edge of the paper mask to stick it to the tape mask like so:
Now that it is behind me, this was probably overkill, but my thinking was that I would minimize the opportunity to lift the lozenge decals by using only a thin outline of tape, and the protect the broader area with what amounted to a big custom shaped Post-It note. Using the tape for the actual mask edges gave me a much cleaner paint job than my previous attempt at using paper for the whole thing. As it turned out, proper application of the Aviattic decals and a handful of coats of clear meant that I had no issues with lifting.
The other issue I had with my original attempt at painting the markings was poor alignment due to the difficulty I had in judging mask placement with so much of the wing surface covered (see the effect with the paper masks in place above). In addition to the thin tape border and the clear transfer material to aid in visibility, I also cut guides out of the portion of the mask which would be removed for painting. I removed strips which corresponded to the rib tapes (seen in the 2nd picture above), and by aligning the ribs with the open areas in the mask, had an easier time getting passable results. Again... not perfect, but significantly better to my eye than my first attempt.
Beyond the wings, everything is now painted and ready for assembly other than the exhaust pipe and propeller (the former because I mistakenly finished the wrong version for my chosen build, and the latter because it requires some kind of dark arts as far as I can tell.) Despite Stefan's wise advice, I opted to add all the Taurus cowl nuts to the various pieces prior to adding them to the model, thinking it would be more difficult to attach and paint them in situ. Yes I have lost a few (I have made the most of replacements crafted from stretched sprue), but still tell myself that my logic was sound. As you can see below, I have yet to add the side cowl panels, so there is still opportunity to regret my decision.
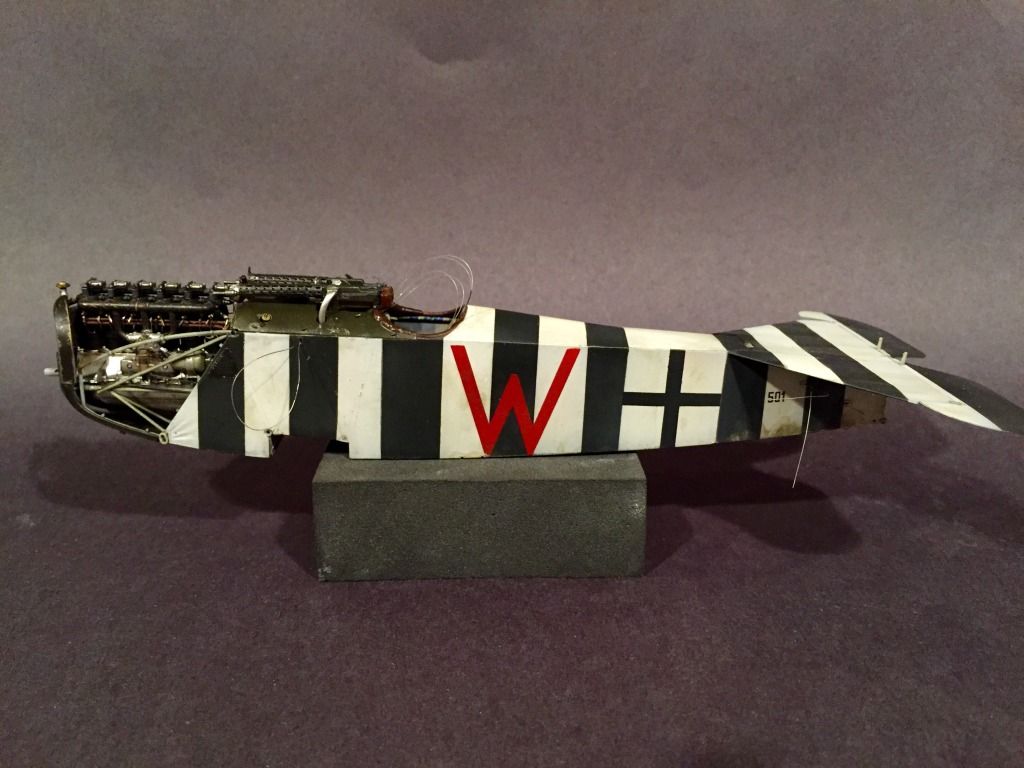
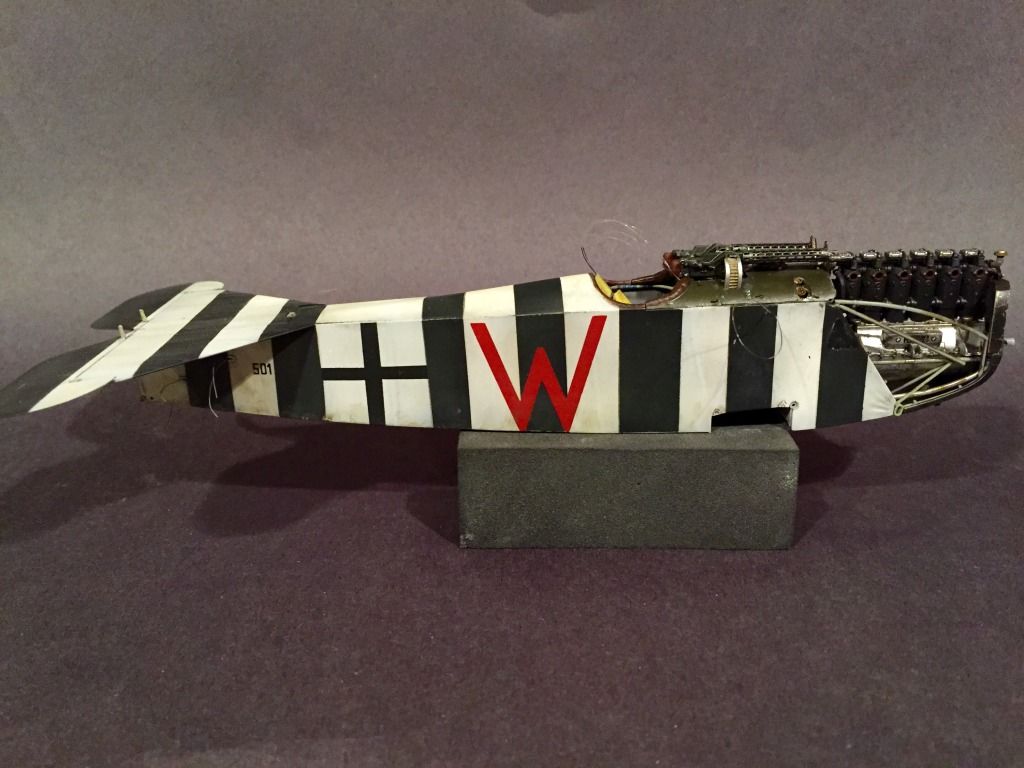
The fuselage and wings received some light (I think) weathering with oil paints of various shades. Additionally, I tried out the Tamiya Weathering Master materials to muddy up the aircraft's belly. Once I have everything assembled, I may add a few unifying touches, but otherwise this is about the extent of the weathering I am planning for this build.
The engine dropped in without issue, the radiator assembly, while fiddly to line up, seems to be ok as well. This build doesn't use the upper cowlings, so that is one less thing to worry about lining up. I will be a bit more relaxed about alignment once mounting the upper wing is behind me (the edges of the fuselage are a bit proud of the green cockpit cover...). Aligning the pair of machine guns, never my strong suit, was complicated a bit since I am using the Gaspatch Spandaus. I snipped off the kit's molded front mounts, and had to build up the mounts I fashioned using a bit of .75mm styrene rod. After spending time making the synchronization cables from twisted wire and brass tubing, I erroneously left them off when mounting the guns. The reality is it is too crowded in there to have seen them anyway, but I liked the way they looked! I am still a bit hung up on the slight misalignment between the two guns, so there is a small chance my obsessive nature will overtake me and I will rip the guns out...
Other than showing you the various sub-assemblies waiting to go, that pretty much catches us up. The perfect build still eludes me, but I can live with my efforts. I think the finish line is near (I never said
which Group Build deadline I'd hit...)
Thanks again to all for checking in on this. Hopefully the remaining posts will come a bit quicker now.
Chris

