Author Topic: WnW Fokker D.VII F (501/18 "Red W")  (Read 20673 times)

Offline Gisbod

  • Hero Member
  • *****
  • Posts: 2438
Re: WnW Fokker D.VII F (501/18 "Red W")
« Reply #75 on: February 03, 2015, 06:37:42 PM »
Just catching up on this Chris,

I share your pain on the little glitches  :P can't really offer any advice.. But great job anyway  :)

You've painted the Spandau's beautifully!

Guy
“Oh! I have slipped the surly bonds of Earth -
Put out my hand, and touched the face of God.”

P.O. John Gillespie Magee 1941

Offline Ernie

  • Hero Member
  • *****
  • Posts: 3961
  • "Once more into the breach"
Re: WnW Fokker D.VII F (501/18 "Red W")
« Reply #76 on: February 03, 2015, 10:08:05 PM »
Chris, I applaud your perseverance and look forward to the
"new and improved" lozenge. :D  In the meantime, your
paintwork on the Spandau's is bloody marvelous!  Well
done, my friend.

Cheers,
Ernie :)
The new old guy, take two...

Offline stefanbuss

  • Hero Member
  • *****
  • Posts: 976
Re: WnW Fokker D.VII F (501/18 "Red W")
« Reply #77 on: February 11, 2015, 04:41:58 PM »
Incredible work on the MG's. I am very envious.

Stefan

Offline RAGIII

  • Hero Member
  • *****
  • Posts: 19694
Re: WnW Fokker D.VII F (501/18 "Red W")
« Reply #78 on: February 12, 2015, 05:08:32 AM »
Your Spandaus are looking awesome!
RAGIII
"A man has to know his limitations": Harry Callahan

"Don't slop it on" Lynda Geisler

Offline BigBlue

  • Hero Member
  • *****
  • Posts: 640
Re: WnW Fokker D.VII F (501/18 "Red W")
« Reply #79 on: March 15, 2015, 02:07:31 AM »
From all the way back in page 4 of the "Under Construction" forum.... an update! 

First I'd like to offer a very belated thank you to Des, Guy, Ernie, Stefan and Rick for the kind comments; I have been negligent in responding to your kindness, but they are always appreciated.

Progress has been slow, even by my standards, but between down time due to a nasty winter cold, a bit of travel, work commitments and a ridiculously large amount of time spent shoveling snow, I have managed to move this build along.  Not that I'd expect anyone to remember after all this time, but being unsatisfied with my efforts on applying the lozenges and painting markings on the wings, I had decided to strip them down and take a second pass at them.  Here are the results:
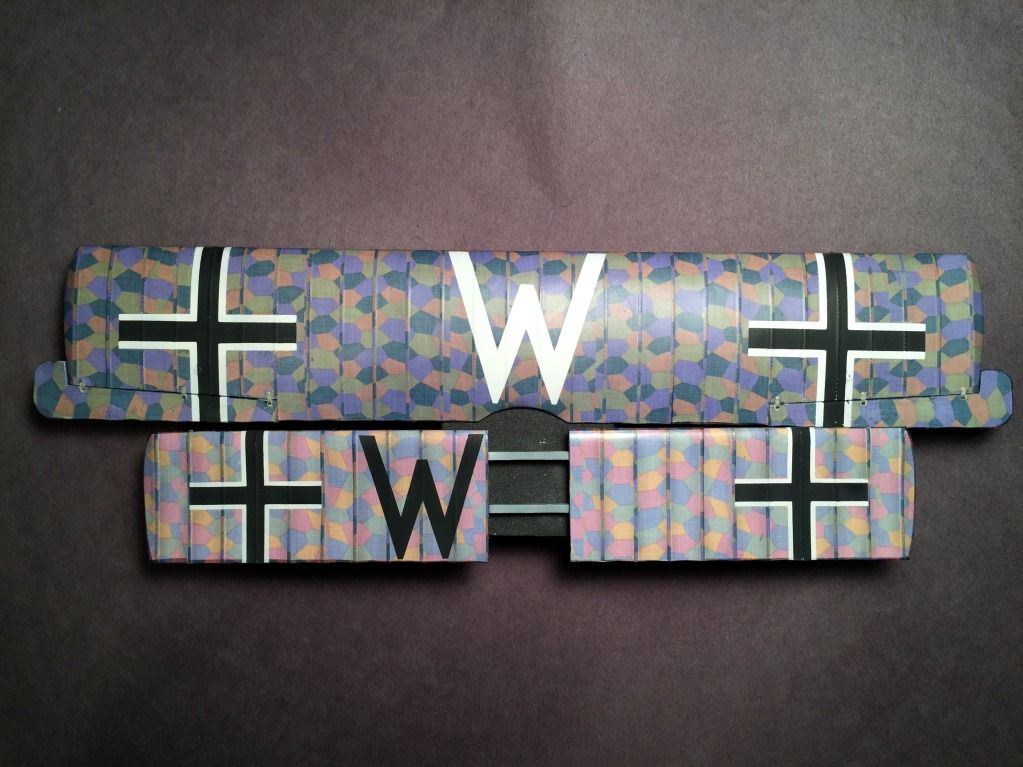


While they are by no means perfect, I am much happier with the results this time around.  I was much more diligent about ensuring that the lovely Aviattic decals settled in without air pockets, and the improved results were immediately visible to me.  I put my new Silhouette Portrait cutting machine to good use during the masking process, cutting 3 separate layers for each mask: a 4 mm wide mask for each shape cut from sheets of Tamiya tape, a broader mask cut from copy paper, and a piece of clear frisket film to use to transfer the mask to the work surface. 
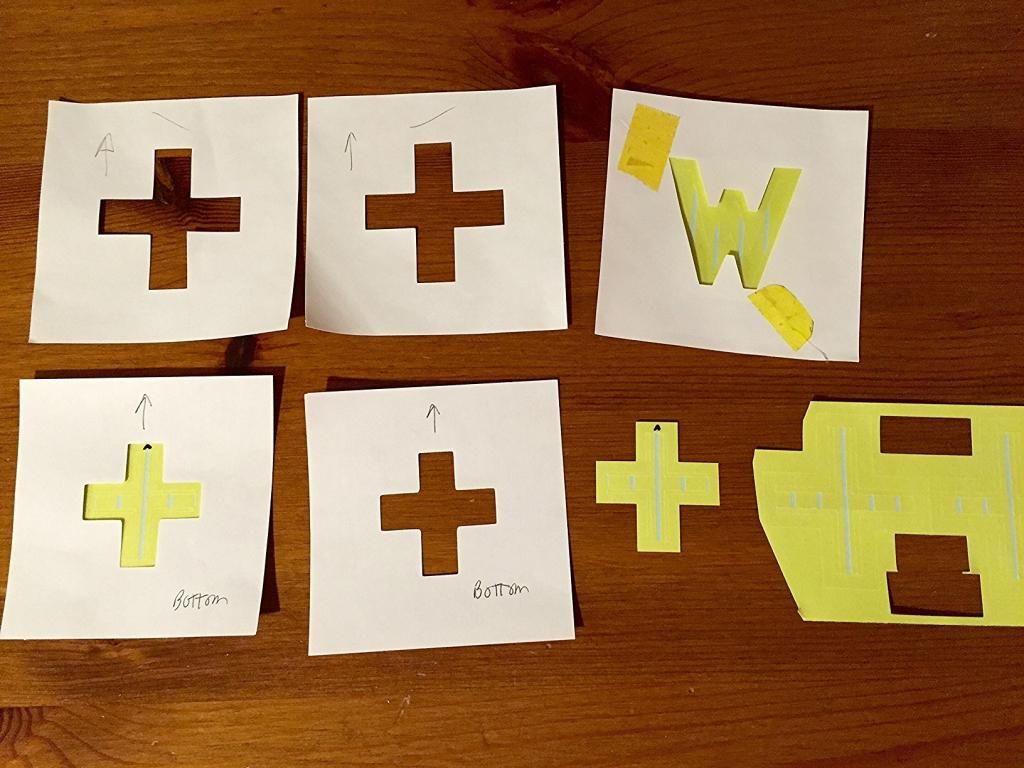


I used a bit of Scotch Repositionable glue stick along the inside edge of the paper mask to stick it to the tape mask like so:
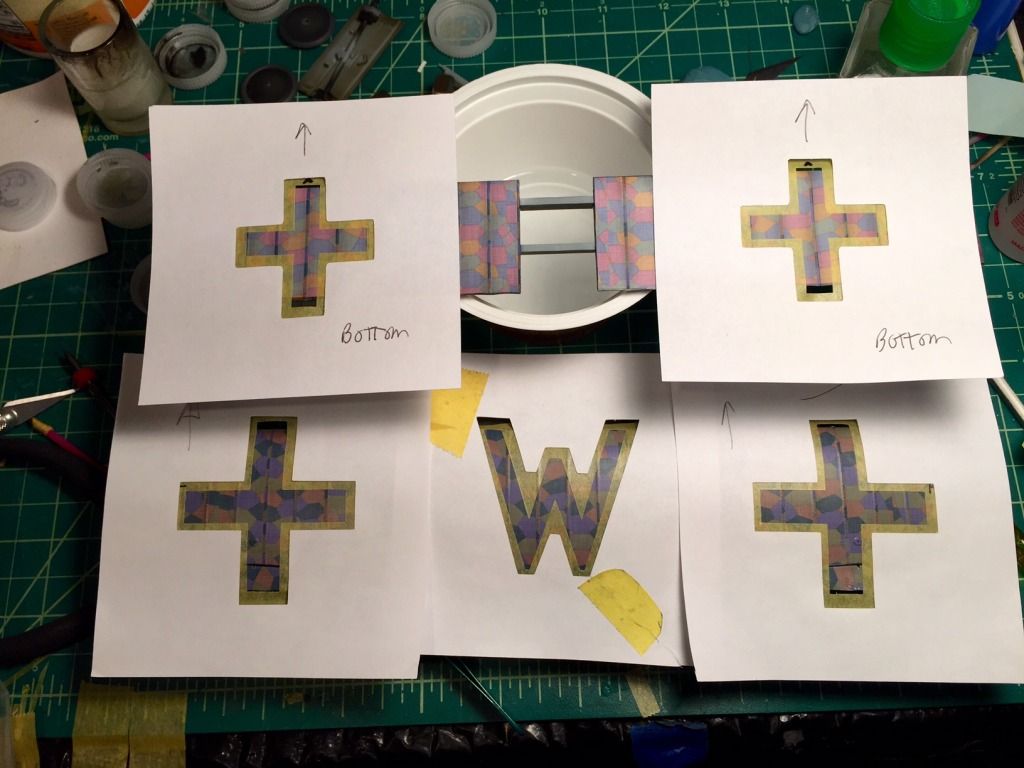


Now that it is behind me, this was probably overkill, but my thinking was that I would minimize the opportunity to lift the lozenge decals by using only a thin outline of tape, and the protect the broader area with what amounted to a big custom shaped Post-It note.  Using the tape for the actual mask edges gave me a much cleaner paint job than my previous attempt at using paper for the whole thing.  As it turned out, proper application of the Aviattic decals and a handful of coats of clear meant that I had no issues with lifting.

The other issue I had with my original attempt at painting the markings was poor alignment due to the difficulty I had in judging mask placement with so much of the wing surface covered (see the effect with the paper masks in place above).  In addition to the thin tape border and the clear transfer material to aid in visibility, I also cut guides out of the portion of the mask which would be removed for painting.  I removed strips which corresponded to the rib tapes (seen in the 2nd picture above), and by aligning the ribs with the open areas in the mask, had an easier time getting passable results.  Again... not perfect, but significantly better to my eye than my first attempt.

Beyond the wings, everything is now painted and ready for assembly other than the exhaust pipe and propeller (the former because I mistakenly finished the wrong version for my chosen build, and the latter because it requires some kind of dark arts as far as I can tell.)  Despite Stefan's wise advice, I opted to add all the Taurus cowl nuts to the various pieces prior to adding them to the model, thinking it would be more difficult to attach and paint them in situ.  Yes I have lost a few (I have made the most of replacements crafted from stretched sprue), but still tell myself that my logic was sound.  As you can see below, I have yet to add the side cowl panels, so there is still opportunity to regret my decision.
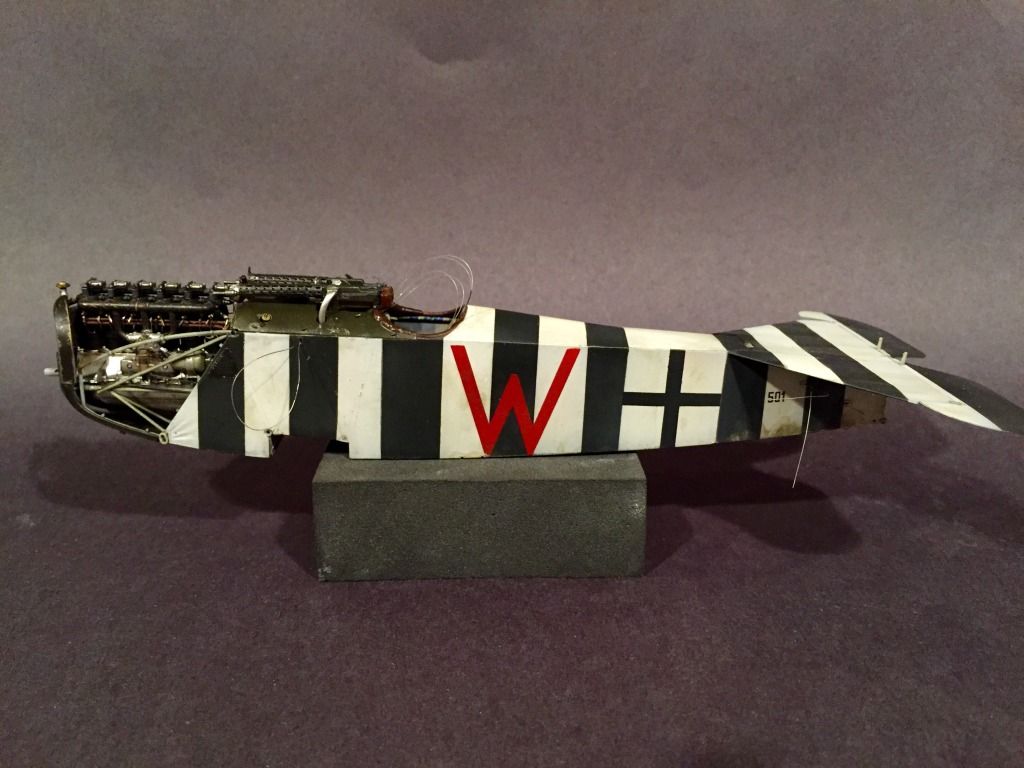
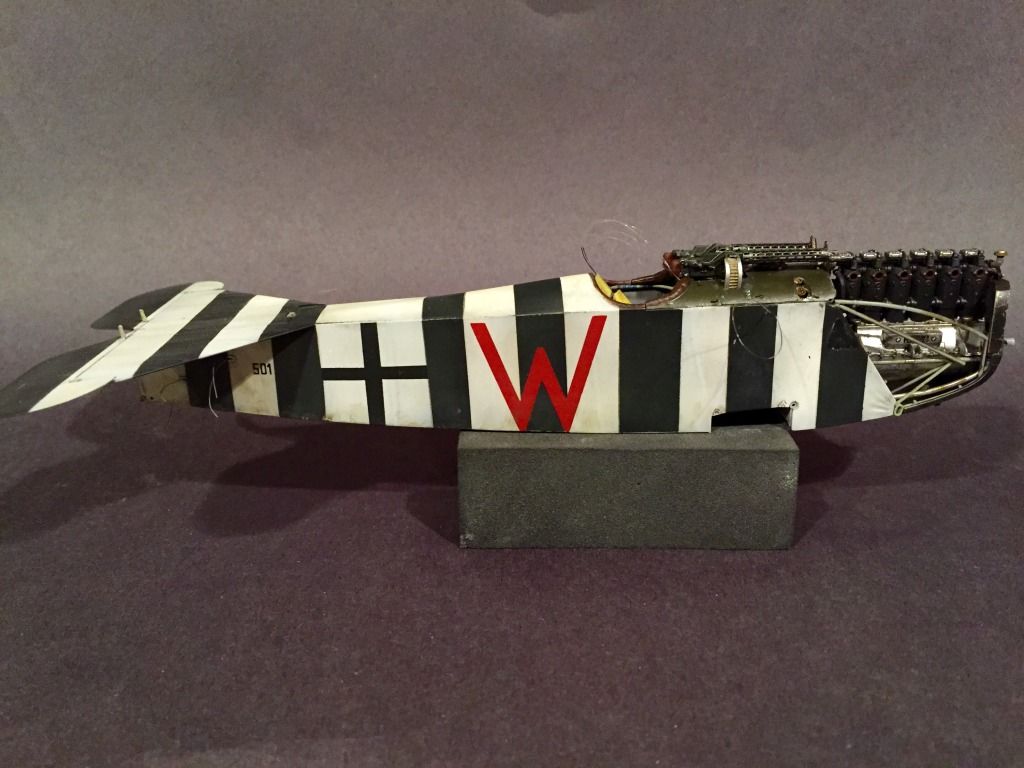

The fuselage and wings received some light (I think) weathering with oil paints of various shades.  Additionally, I tried out the Tamiya Weathering Master materials to muddy up the aircraft's belly.  Once I have everything assembled, I may add a few unifying touches, but otherwise this is about the extent of the weathering I am planning for this build.

The engine dropped in without issue, the radiator assembly, while fiddly to line up, seems to be ok as well.  This build doesn't use the upper cowlings, so that is one less thing to worry about lining up.  I will be a bit more relaxed about alignment once mounting the upper wing is behind me (the edges of the fuselage are a bit proud of the green cockpit cover...).  Aligning the pair of machine guns, never my strong suit, was complicated a bit since I am using the Gaspatch Spandaus.  I snipped off the kit's molded front mounts, and had to build up the mounts I fashioned using a bit of .75mm styrene rod.  After spending time making the synchronization cables from twisted wire and brass tubing, I erroneously left them off when mounting the guns.  The reality is it is too crowded in there to have seen them anyway, but I liked the way they looked!  I am still a bit hung up on the slight misalignment between the two guns, so there is a small chance my obsessive nature will overtake me and I will rip the guns out...

Other than showing you the various sub-assemblies waiting to go, that pretty much catches us up.  The perfect build still eludes me, but I can live with my efforts.  I think the finish line is near (I never said which Group Build deadline I'd hit...)

Thanks again to all for checking in on this.  Hopefully the remaining posts will come a bit quicker now.

Chris


Offline Ernie

  • Hero Member
  • *****
  • Posts: 3961
  • "Once more into the breach"
Re: WnW Fokker D.VII F (501/18 "Red W")
« Reply #80 on: March 15, 2015, 02:21:33 AM »
I am absolutely in awe of your work on this project, Chris.
You mention being short of perfection, but I think you are
darn near there.  A wonderful update and I am looking forward
to the next.  Well done, my friend!

Cheers,
Ernie
The new old guy, take two...

Offline Nigel Jackson

  • Hero Member
  • *****
  • Posts: 2608
Re: WnW Fokker D.VII F (501/18 "Red W")
« Reply #81 on: March 15, 2015, 02:25:58 AM »
Beautiful work, Chris.

Best wishes
Nigel

Offline BigBlue

  • Hero Member
  • *****
  • Posts: 640
Re: WnW Fokker D.VII F (501/18 "Red W")
« Reply #82 on: March 15, 2015, 03:03:51 AM »
Thank you, Ernie and Nigel... you are both very kind, and far too generous.  Yet another reminder of what a supportive community we have here.

Offline Umlaufmotor

  • Hero Member
  • *****
  • Posts: 1123
Re: WnW Fokker D.VII F (501/18 "Red W")
« Reply #83 on: March 15, 2015, 04:38:07 AM »
Absolutely great built, @BigBlue
Love Aviattic's Tarnstoff on the wings - a very realistic interplay with the outstanding weathering and aging on the fuselage.
« Last Edit: March 15, 2015, 04:50:33 AM by Umlaufmotor »

Offline Des

  • Administrator
  • Hero Member
  • ******
  • Posts: 9325
    • ww1aircraftmodels.com
Re: WnW Fokker D.VII F (501/18 "Red W")
« Reply #84 on: March 15, 2015, 07:21:32 AM »
Looking absolutely gorgeous Chris, a stunning model.

Des.
Late Founder of ww1aircraftmodels.com and forum.ww1aircraftmodels.com

Offline BigBlue

  • Hero Member
  • *****
  • Posts: 640
Re: WnW Fokker D.VII F (501/18 "Red W")
« Reply #85 on: March 15, 2015, 09:38:49 AM »
Richard, Bertl, Bo, Des and Big Mike from Queens: I am truly honored by your comments; you have my sincerest gratitude.

Offline RAGIII

  • Hero Member
  • *****
  • Posts: 19694
Re: WnW Fokker D.VII F (501/18 "Red W")
« Reply #86 on: March 15, 2015, 10:06:29 AM »
Sorry I am a little late with my reply. Your masking of the crosses and Ws turned out absolutely terrific! Lovely work on that fuselage and the Lozenge works well with the markings. Well Done!
RAGIII
"A man has to know his limitations": Harry Callahan

"Don't slop it on" Lynda Geisler

Offline Kreston

  • Sr. Member
  • ****
  • Posts: 385
Re: WnW Fokker D.VII F (501/18 "Red W")
« Reply #87 on: March 15, 2015, 12:46:18 PM »
Your build looks just great!  Nice work!
I shall never forget my admiration for that German pilot, who single handed, fought seven of us for ten minutes. I saw him go into a fairly steep dive and so I continued to watch, and then saw the triplane hit the ground and disappear into a thousand fragments...James McCudden

Offline BigBlue

  • Hero Member
  • *****
  • Posts: 640
Re: WnW Fokker D.VII F (501/18 "Red W")
« Reply #88 on: March 19, 2015, 10:49:25 PM »
Thank you (belatedly) for the comments and support, Rick, Kreston, and Justin.

Small update to share:


I hollowed out the opening using the grinding bits shown in the picture and a pin vise.  Alclad Aluminum base with an uneven over coat of Mr. Metal Stainless Steel.  Tamiya Flat Clear, followed by various pigments, including MIG Old Aluminum to represent the lead around the exhaust's opening.  I thinned Model Master Acryl Rust significantly with water and used it as a wash around the seams.  A finishing Flat coat and and some very light sanding with fine grain Micromesh to expose the underlying metal layers.

I had a small setback when I went to attach the rudder: the Tamiya Thin Cement I used decided to spread and made a hash of the paint, requiring repair.  There isn't much interesting to discuss in that process other than to point out that it is difficult to match an off-white color that has been weathered a bit, both through underlying base coats, and washes/materials applied after the fact.  I got it as close as I could, repainted the crosses and it now awaits attachment.  C/A this time I think.

That's all for now; hopefully more soon.  Thanks again for checking in on this,

Chris

Offline Pgtaylorart

  • Hero Member
  • *****
  • Posts: 1480
Re: WnW Fokker D.VII F (501/18 "Red W")
« Reply #89 on: March 20, 2015, 12:20:03 AM »
Really impressive painting and weathering! I agree with everyone, the metal on the exhaust looks great.

George