Thank you again people, this one is nearing the rigging more and more with every day and I will be on that favorite stage of mine pretty soon!
@Terri: Alclad Aqua Glos is actually an acrylic gloss and it is very thin. I haven't worked with Future floor polish as this product is not available in my country, but according to the guys in my club that used both products, Aqua Gloss is a little bit thicker, but still the thinnest acrylic gloss available around here. I usually put some in a small cup and dip the canopies and other clear parts in it and then let them dry. For normal parts I just airbrush it, but at the first pass it makes the surface grainy (maybe it is the pressure or something) and you have to add one more heavy layer to make it glossy. I sometimes dip small non clear parts as the results are excelelnt and it is easier than airbrushing 10sec and cleaning 10mins :-/. Ofcourse it distorts the shine of Alclad, but this is normal and cannot be avoided. I just prepare the surface before alclad and make it more shiny than required, so after the gloss it bacomes as shiny as I want it. The better you prepare the surface, the shinier the result, unfortunately on small parts with many curves etc it is not always possible. Still Aqua gloss distorts the shine less than any other gloss I have tried up to now and generally it is an excellent product.
@youngtiger: if you mean the swirls, those are handpainted

@Dave in Dubai: yes, I crushed them a little bit and I will have to straighten them somehow. Probably I will have to remove the gunsights and use thin metal rod to push the jackets from the inside. This damage was done while while I was working on the underside of the fuselage and didn't handled the model carefully

Unfortunately the parts were already glued and detaching them completely is not possible. Thanks for the tip with the cold water!
I started working on the tail skid, the undercarriage and the tail. There is one comment that I would liek to make. I really like the clever engineering of WnW kits and I'm sure they are really proud with it - it is visible from the kits. Still, sometimes this urge for clever design of the parts fails them and they are going to the desired effect by a longer way than the way easier and staright forward "classic' way. Why am I saying all this, you may wonder - well the tail (sorry I don't know the right English words, but I will try to describe it) where the control cables are exiting the fuselage and going to the tail control surfaces, WnW decided to add small part in a "hole". This all sound pretty clever and everything, but mating the small part and the fuselage without a trace is quite upsetting. It is not hard just annoying, but while you spend few putty - sanding sessions you start to wonder "Why?". Ofcourse, there is a lot of fault on me, as I left this for after painting instead of doing this on an earlier stage as it is in the instructions, still it would have been way easier if those were just part of the halves. Rant over!
ANyway this is a very minor issue, even thou a bit frustrating and will be dealt with on my 4th putty - sanding session tonight
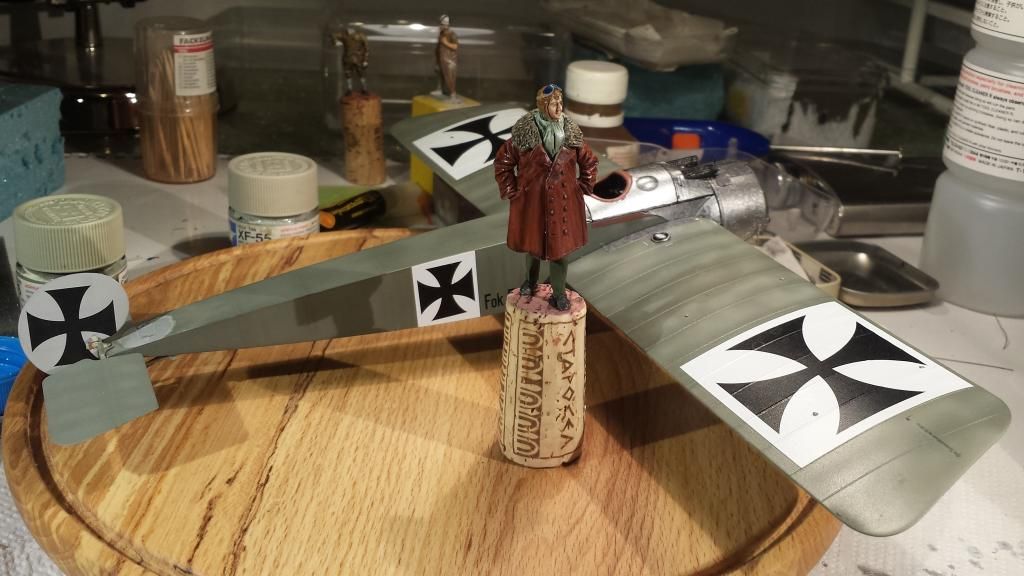
Meanwhile here is a picture of the model as it is right now
Please excuse the mess on my working bench, but I had no time for decent session this morning before going to work. The wings and tail details are not glued.
Additional question for the figure painters: how do you paint realistically looking gogles?