Author Topic: Hand Carved Wooden Props  (Read 44939 times)

Offline Pete Nottingham

  • Hero Member
  • *****
  • Posts: 906
  • I chose the wrong week to stop sniffing glue
Re: Hand Carved Wooden Props
« Reply #30 on: May 20, 2012, 02:48:12 AM »
Hi Lance'

I wasn't thinking about Balsa wood for the prop I was thinking along the lines of possibly light and dark marquetry veneer.

Cheers

Pete.

Offline lcarroll

  • Administrator
  • Hero Member
  • ******
  • Posts: 8546
Re: Hand Carved Wooden Props
« Reply #31 on: May 20, 2012, 03:59:47 AM »
Hey Pete,
   Take a look back at the first or second part of this article; I do use veneers to make my own "stock' however on this particular build the veneer one failed miserably (my fault) and was eliminated right at the beginning. Matter of my choice of the order I arranged the different colored veneers.
Cheers,
Lance

Offline Lyle

  • Jr. Member
  • **
  • Posts: 67
Re: Hand Carved Wooden Props
« Reply #32 on: May 31, 2012, 01:15:35 AM »
Lance,
Fantastic tutorial and one that really makes me think of doing one or two someday--nothing looks like wood like wood. 
Lyle

Offline lcarroll

  • Administrator
  • Hero Member
  • ******
  • Posts: 8546
Re: Hand Carved Wooden Props
« Reply #33 on: May 31, 2012, 09:15:10 AM »
Lyle,
   Thanks for the positive comment. Try it, you'll like it! ..and feel free to ask if you have any questions.
Cheers,
Lance

Offline coyotemagic

  • Hero Member
  • *****
  • Posts: 7710
  • "Here's to not buggering it up." -Winston Chuchill
    • My Models
Re: Hand Carved Wooden Props
« Reply #34 on: July 17, 2012, 06:41:23 AM »
Just saw this, Lance.  Brilliant!  Looks like I owe you a beer or two, as well.
Cheers,
Bud
"All men dream: but not equally. Those who dream in the dark recesses of the night awake in the day to find all was vanity. But the dreamers of day are dangerous men, for they may act their dreams with open eyes, and make it possible." -T. E. Lawrence

Offline lcarroll

  • Administrator
  • Hero Member
  • ******
  • Posts: 8546
Re: Hand Carved Wooden Props
« Reply #35 on: July 20, 2012, 01:43:18 AM »
Just saw this, Lance.  Brilliant!  Looks like I owe you a beer or two, as well.
Cheers,
Bud

Hey Bud, I think it's a pretty sweet deal all round! I'll update my WNW DVa Thread with photos once I apply your shading technique, assuming it goes well with my limited skills........??
Cheers,
Lance :-\

Offline jknaus

  • Hero Member
  • *****
  • Posts: 1121
Re: Hand Carved Wooden Props
« Reply #36 on: August 11, 2014, 08:07:32 AM »
Thats fantastic Lance. Gorgeous props. Not sure if I have the patience to try this my self but you never know. Thank you very much.
James

Offline lcarroll

  • Administrator
  • Hero Member
  • ******
  • Posts: 8546
Re: Hand Carved Wooden Props
« Reply #37 on: August 11, 2014, 09:28:57 AM »
Wow James, I'd forgotten about this article. Hope you enjoyed it and it proves of some use.
Cheers,
Lance

Offline Snowy

  • Full Member
  • ***
  • Posts: 125
Re: Hand Carved Wooden Props
« Reply #38 on: August 11, 2014, 06:23:13 PM »
Thank you Lance for taking the time back then to do such a helpful tutorial. Thanks also James for drawing it to my attention.

Lance, do you still use this technique today?

Offline lcarroll

  • Administrator
  • Hero Member
  • ******
  • Posts: 8546
Re: Hand Carved Wooden Props
« Reply #39 on: August 11, 2014, 11:42:24 PM »
Thank you Lance for taking the time back then to do such a helpful tutorial. Thanks also James for drawing it to my attention.

Lance, do you still use this technique today?


Snowy,
   Certainly do! I find that most British props don't display the wood grain pattern quite as clearly as the German manufactured versions thus most are the Kit versions with a bit of woodgrain added and a good covering of clear orange and yellow. Here's my last two German subjects with hand laminated and carved wooden props made the same way as outlined in the Tutorial.
    WNW Fokker D.VII(OAW) with Niendorf Prop:


and WNW Pfalz DIIIa with Axial Prop:


   I find the more I do the easier they get, like most things I guess.
Cheers,
Lance

Offline Chris Johnson

  • Hero Member
  • *****
  • Posts: 1959
Re: Hand Carved Wooden Props
« Reply #40 on: August 12, 2014, 12:10:08 AM »
It's good to see this thread bumped forward again as I just spent a few minutes going through the tutorial again . . . but I still have cold feet when it comes to trying it myself!  ;D

The props all look gorgeous Lance.

Cheers,

Chris
You can have it good; You can have it fast; you can have it cheap. Pick any two, but all three are impossible.

Offline Snowy

  • Full Member
  • ***
  • Posts: 125
Re: Hand Carved Wooden Props
« Reply #41 on: August 12, 2014, 09:40:55 AM »
Thank you very much Lance for posting those photos of the beautiful wooden props on your two beauties. Great work all round!

Offline lone modeller

  • Hero Member
  • *****
  • Posts: 5300
Re: Hand Carved Wooden Props
« Reply #42 on: March 10, 2016, 07:39:03 AM »
Evening All,

As an inveterate scratch-builder I have been experimenting with carving props for God's Own Scale models from plastic for a long time, but I have also been carving from wood more recently and I thought that the results of some recent experiments might interest modellers who work in braille scale. Some of my results are not as good as I would like - I did say that I have been experimenting and am still in the process of refining the technique so please do not expect the standard of Lance's work.

In my first attempts to carve propellors from wood I used a tropical hardwood strip 18mm wide x 2mm thick (11/16inch  x 60 thou inch) which I think is rahmin. (I am not sure because it was given to me by my late father over 30 years ago and I forgot to ask him what it was!). I can get three propellors from one length of strip - the propellors are carved along the grain. This wood is easy to work with and I can get the blades almost as thin as with plastic. When varnished the propellors look realistic enough for me at least. There is no trace of lamination of course, but these would represent propellors covered by thick tinted varnish.


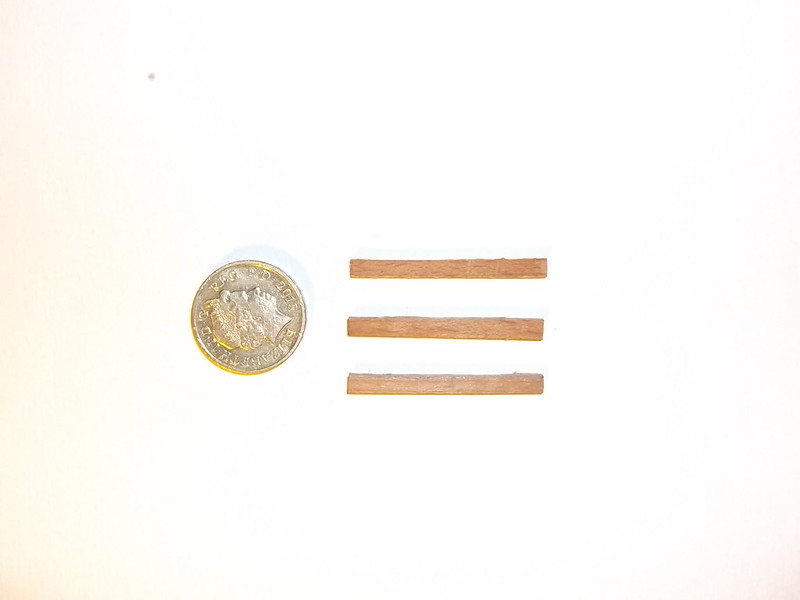
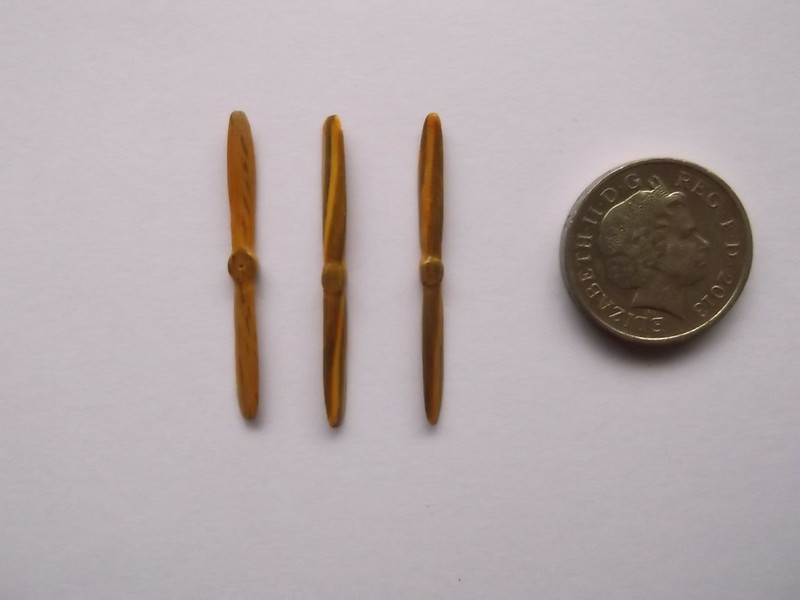
These are three pieces roughly cut from a single piece of strip. The shape of the propellor is drawn on each one, including the boss which I mark out with a pair of dividers.

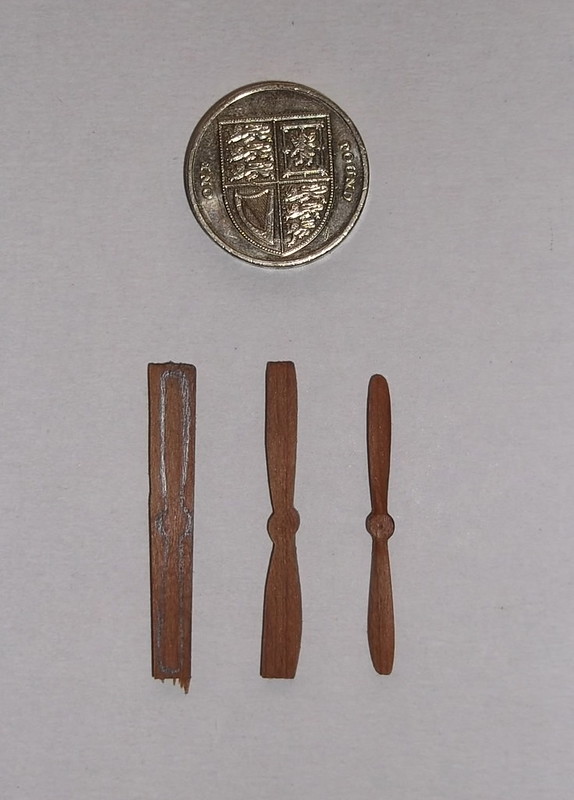
This shows the blank, partially carved and complete propellor.


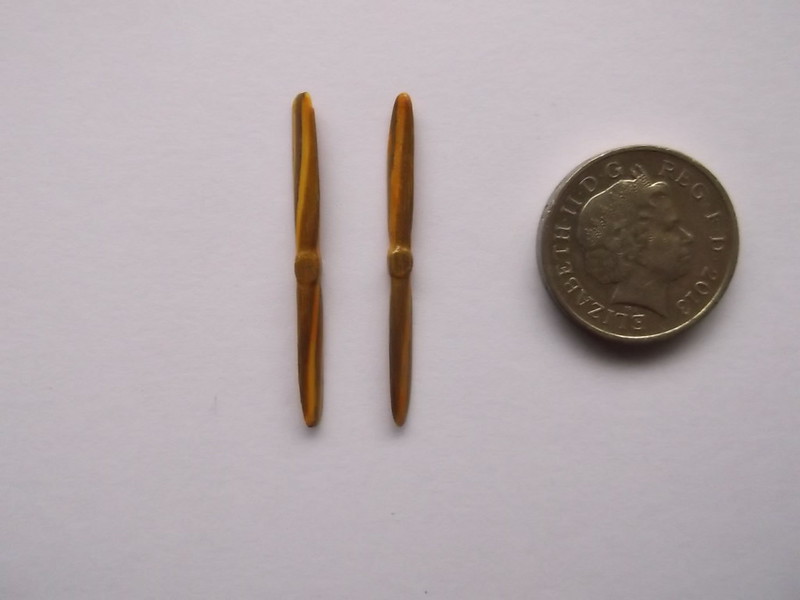
A batch of three completed props. These are still unvarnished.


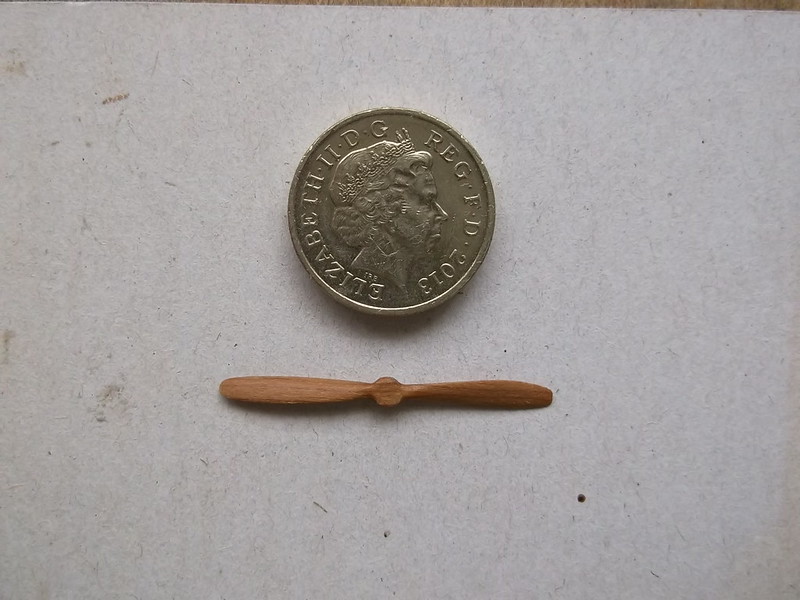
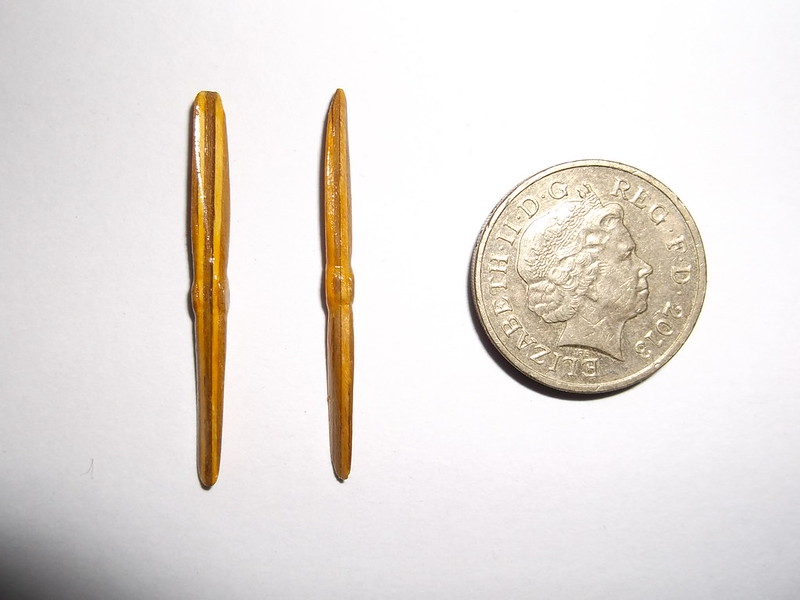
An unvarnished example showing the centre boss: this particular propellor is now on my scratch-built Ago C II(W).


   I have also used beech strip of the same dimensions as above but because of the grain in the beech I found that it is not really suitable, although it is a lovely wood to work with. This propellor was coated with clear orange varnish.


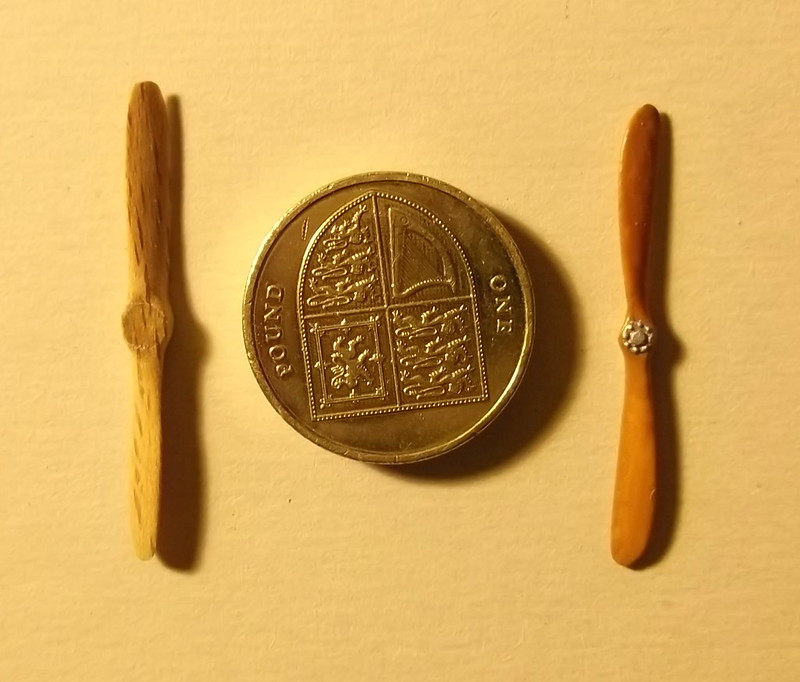
The beech prop is on the left and a plastic kit prop on the right for comparison. I think that it is clear that the grain in the beech is unsuitable for a prop but it is lovely wood to carve!

   I have recently tried using thin laminate available from Cornwall Model Boats. This is 3mm wide x 0.5mm thick but it is also available in 4mm widths which I think would be better because it allows the central hub to be properly carved which the 3mm strip does not. For my first attempt I used 5 pieces of Tanganyka and lime with 2 strips of lime sandwiched between three strips of the darker wood held with CA. This was a little too thick to be realistic so I then tried 4 strips, 2 light and 2 dark and lightly sanded each strip before glueing them together. It is very important to make sure that plenty of CA is used because when carving the laminates tend to part if not properly glued together. In the case of the 4 laminates the thickness of the resultant propellor was good. I varnished these props with clear orange which certainly toned down the lime but I still think that it is probably too light. I now intend to use two darker woods such as walnut and Tanganyka to see if I can get the laminate effect but one which is more realistic because the lighter bands will not be too light. One important point to note is that different woods are of different hardnesses and therefore respond to filing and sanding differently - it is important to experiment to find out exactly how the woods will behave when being worked. 


The 5 laminate prop is on the left in the photos: the top photo shows that it is too deep. The 4 laminate prop had the wood lightly sanded before I glued it together. These props have been varnished with clear orange (three thinned coats).


These are the same as above with a rah min prop added on the left to enable comparison. The slightly wider rahmin prop allowed me to carve a better centre boss.

   Please remember that these laminated propellors were made as a proof of concept - I may use the 4 laminate propellor on an upcoming project, but as indicated I am still experimenting and may yet come up with a better set of units. 

Good luck to all who have a go at carving your own: as with all of these things it is easier than you may think. (At least it was so in my case!)

Stephen.
« Last Edit: August 01, 2017, 06:03:37 AM by lone modeller »

Offline lcarroll

  • Administrator
  • Hero Member
  • ******
  • Posts: 8546
Re: Hand Carved Wooden Props
« Reply #43 on: March 10, 2016, 08:56:56 AM »
    Nicely done Stephen! I'm amazed at the results you've achieved in "Braille" Scale. I've done a few in 1:48 Scale and found them more difficult then in 1:32. I've pretty well eliminated the drum sander from the procedure of late; I now prefer to hand carve the entire sequence with a #11 blade until ready for sanding as on the SSW D.III recently. I'd more or less forgotten about this thread, I'm very pleased that you found it useful.
Cheers,
Lance

Offline Manni

  • Hero Member
  • *****
  • Posts: 1768
    • Der Militärmodellbauer
Re: Hand Carved Wooden Props
« Reply #44 on: July 04, 2016, 05:29:24 PM »
Great! Thank you for this useful thread. I will definitely try that.
Manni
« Last Edit: July 05, 2016, 03:52:37 AM by Manni »
"Ich hab' da mal was vorbereitet.": Jean Pütz
"Warum noch mehr Bausätze?!?": meine Frau