Author Topic: Wingnut Wings Junkers J.1 Progress Build  (Read 10068 times)

Offline Gisbod

  • Hero Member
  • *****
  • Posts: 2438
Re: Wingnut Wings Junkers J.1 Progress Build
« Reply #30 on: November 18, 2013, 05:58:35 AM »
Hi Phillip,

Great thread!

I like the subtle, clean look you're producing. Nice photography too  ;)

Regards

Guy
“Oh! I have slipped the surly bonds of Earth -
Put out my hand, and touched the face of God.”

P.O. John Gillespie Magee 1941

Offline Zabu

  • Hero Member
  • *****
  • Posts: 681
Re: Wingnut Wings Junkers J.1 Progress Build
« Reply #31 on: November 19, 2013, 12:52:25 PM »
Hi Phillip.

The Junkers it's looking fantastic. I love that subtle weathing all around, very very nice indeed.

Thank you for sharing your technique too.

Cheers

Offline Phillip1

  • Newbie
  • *
  • Posts: 40
Re: Wingnut Wings Junkers J.1 Progress Build
« Reply #32 on: November 25, 2013, 02:51:28 PM »
Gisbod/Zabu-thanks for the compliments,

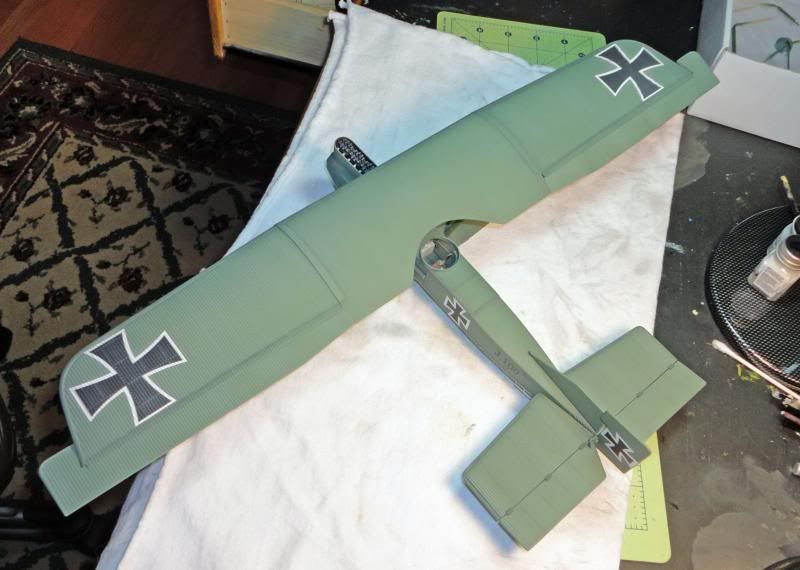
1st image:  Finally the upper wing is attached.  If it is not obvious from this photo-let me make it clear this is a huge model!


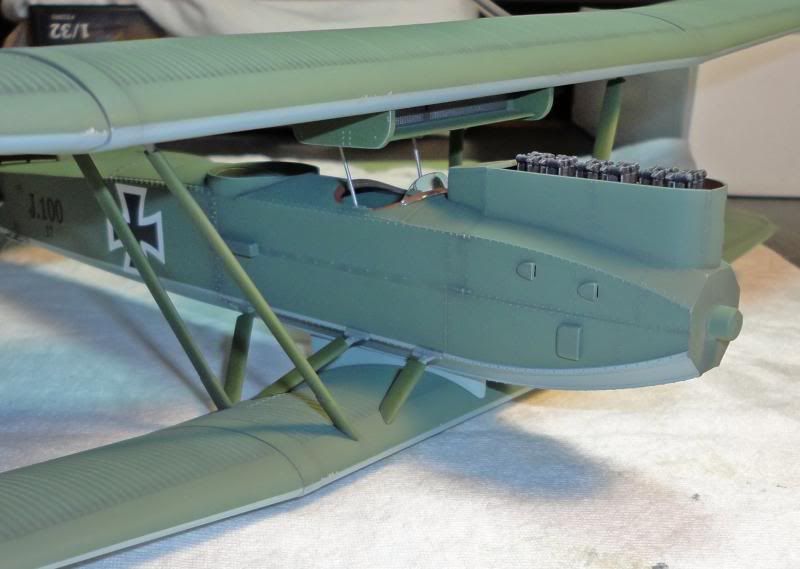
2nd Image: A close up shot of the attached upper wing.  The upper wing was VERY wobbly with only four struts in place, but became sturdy by the time all eight were added.  After all the struts were in place, I measured the upper and lower wings for alignment and straightness and confirmed they were nearly perfect.  I credit this more to the kit’s design and injection process than my modeling skills.


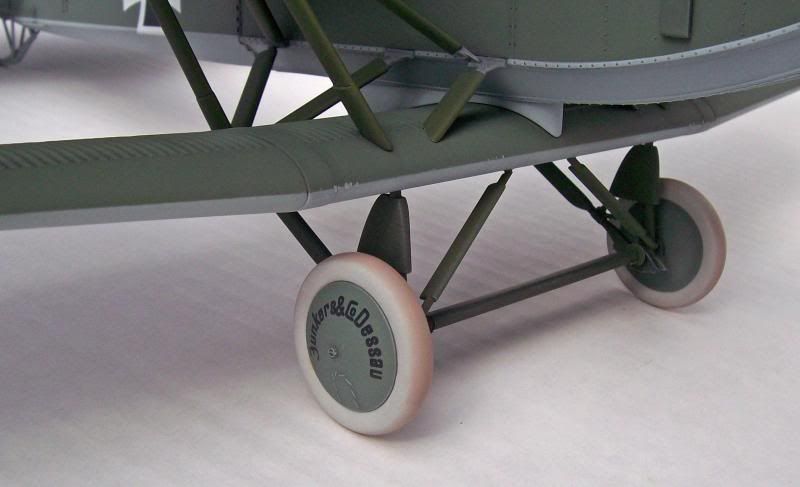
3rd Image: A penny and masking tape were used to create painting masks to cover the wheel hubs.  The tires were painted Model Master Light Gray and then weathered with dark gray and brown pastel dust.


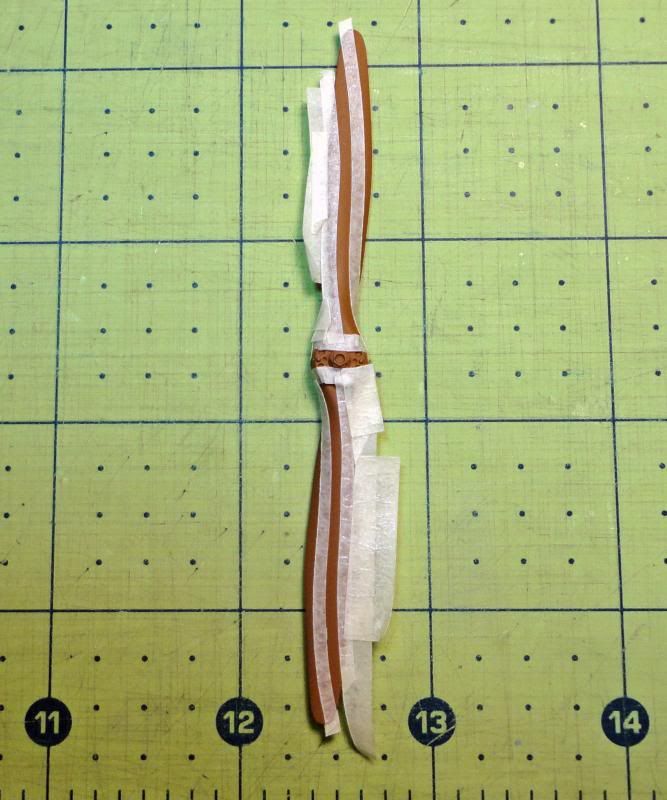
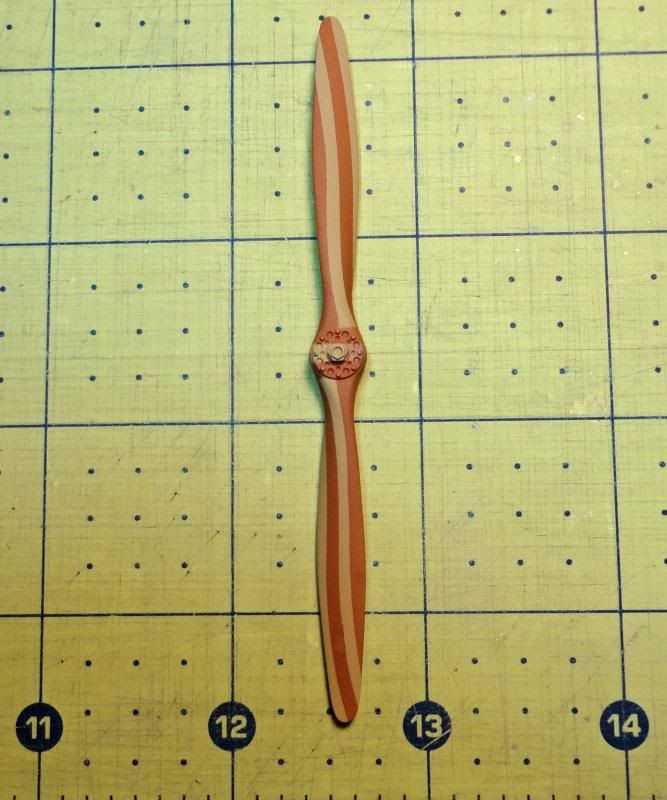
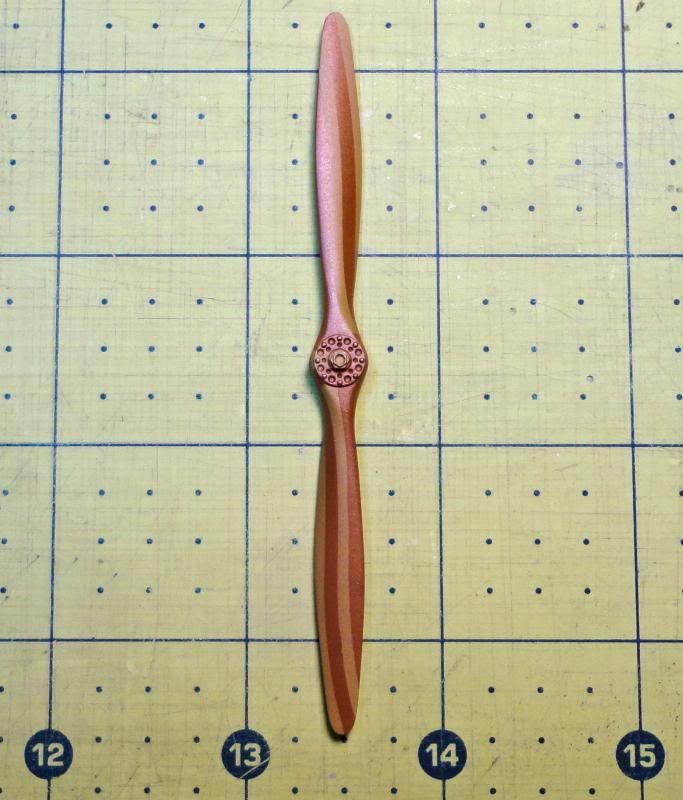
4th through 7th Image: How I painted the propeller is shown in four steps.  The first color used was Model Master Wood.  After this dried, masking tape strips were put in place.  Then, Model Master Military Brown was applied.  Next, reddish-brown pastel powder was brushed over the part to tone down the contrast.  Finally, a heavy coat of Future was applied for a semi-gloss finish.  I know there are better, more complicated techniques that produce more realistic results, but this method let me get done in less than two hours.


8th Image:  Here is the final construction photo.  The elevator and rudder control cables are being added using .005” diameter wire.  Once I had the exact length, I used slow set superglue on one end, and white glue on the other to secure it in place.


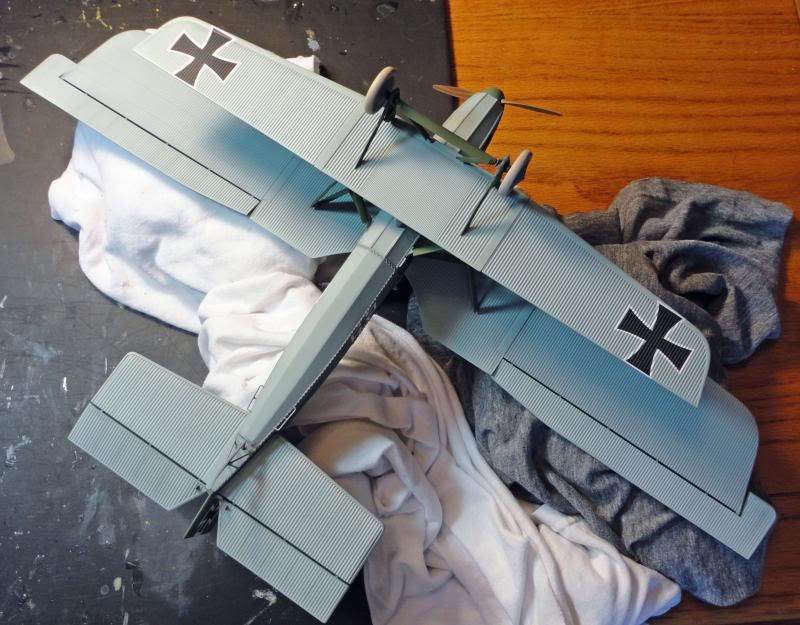
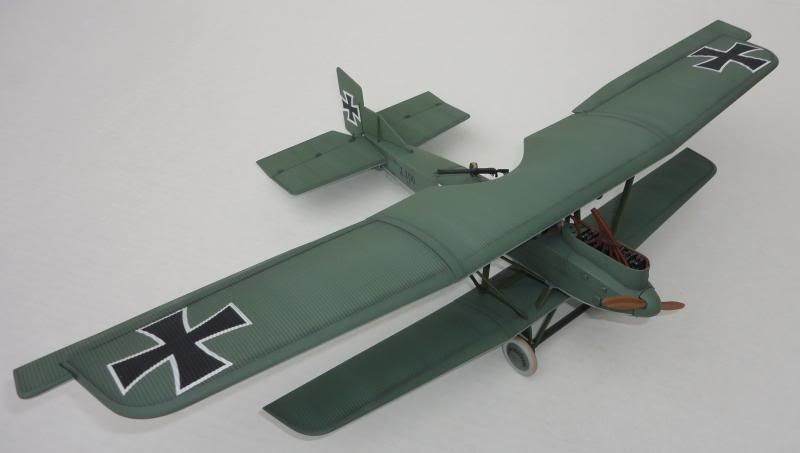
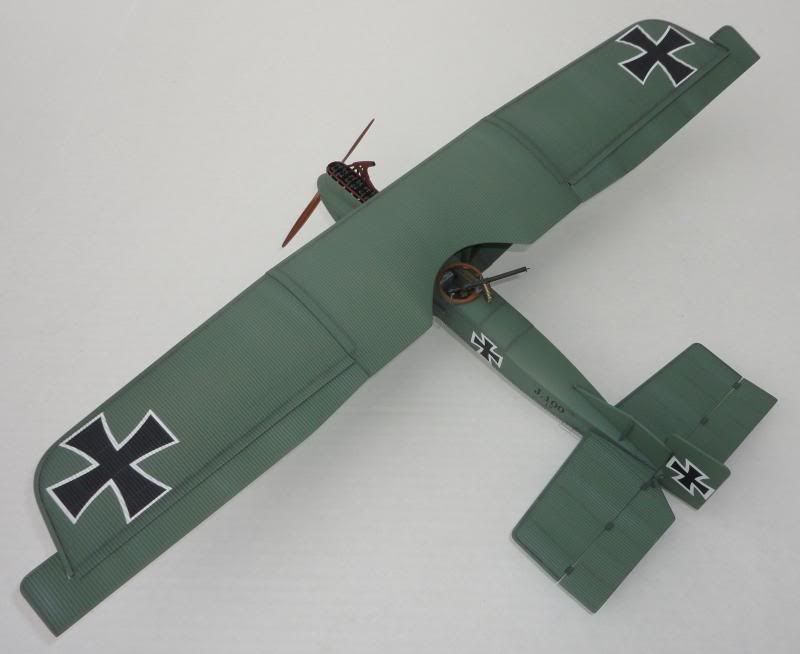
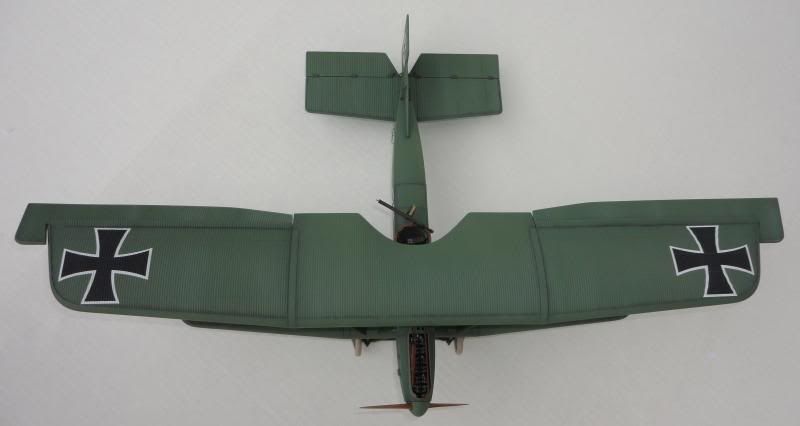
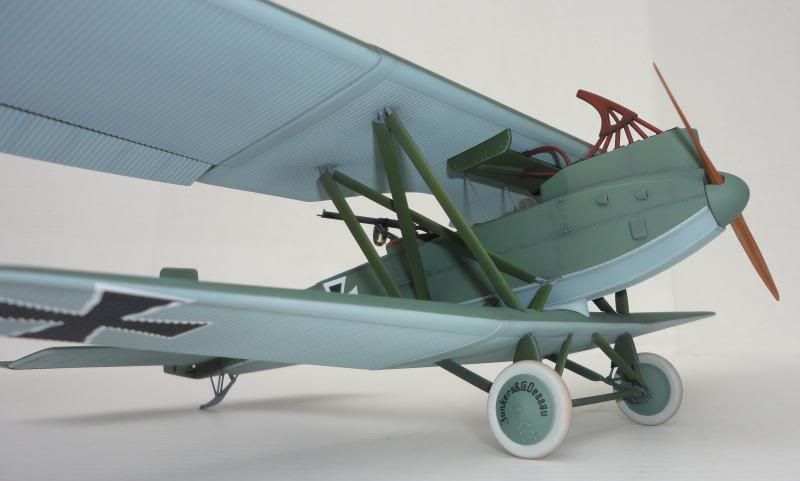
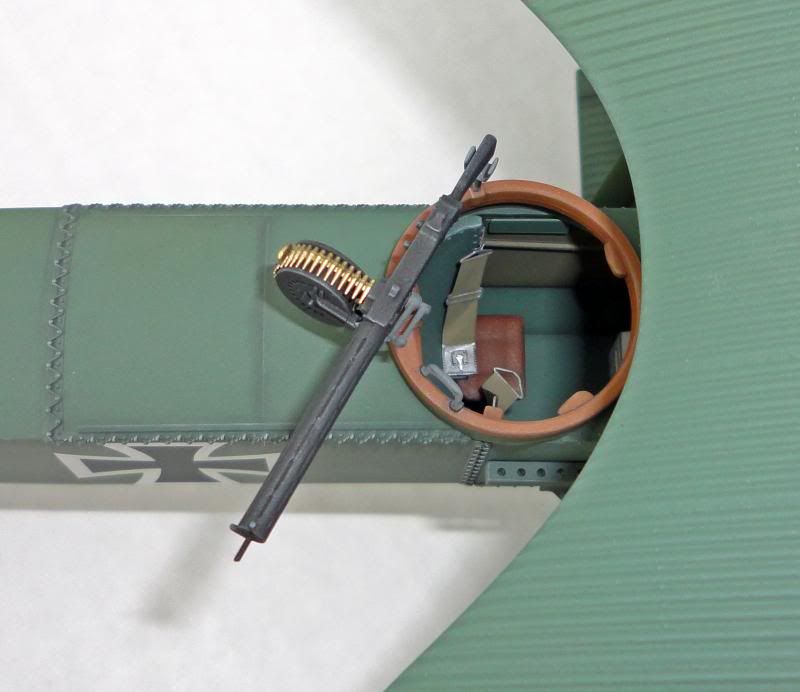
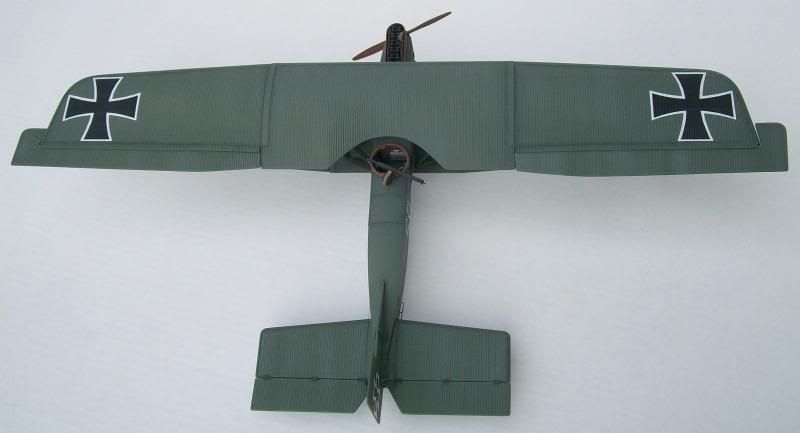
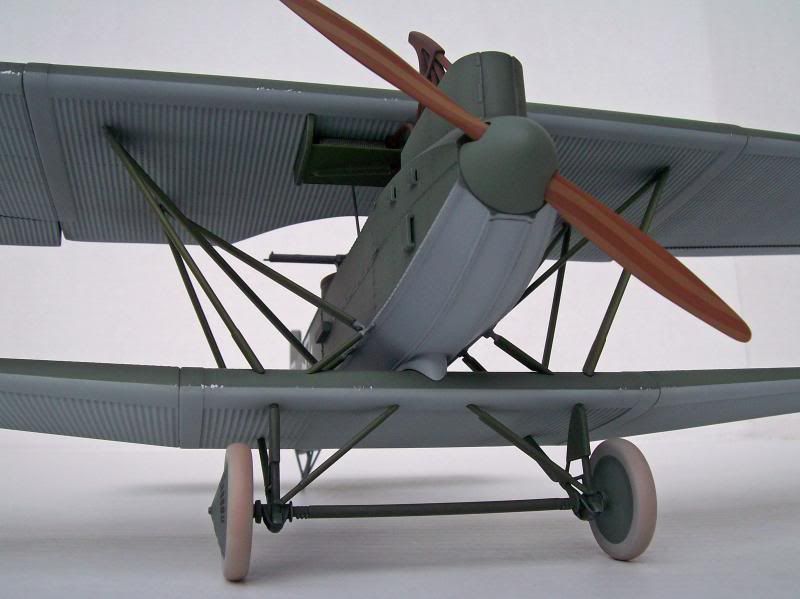
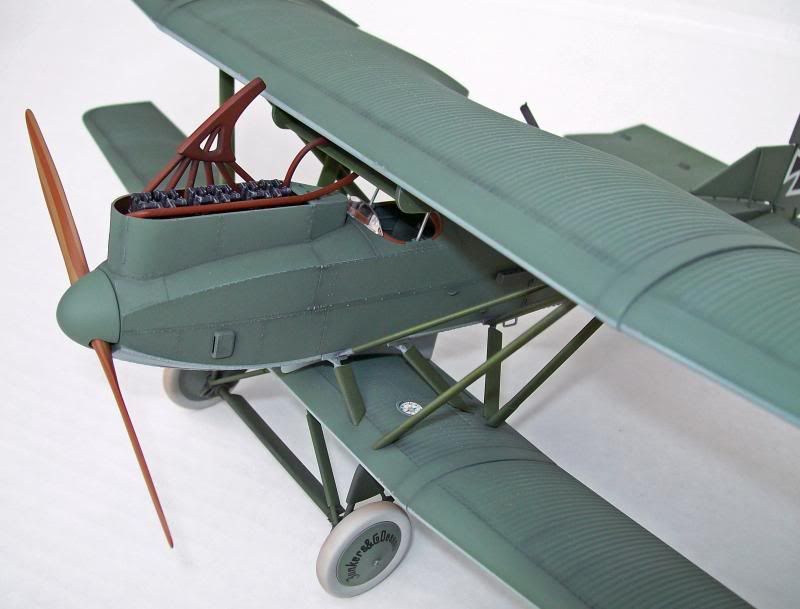
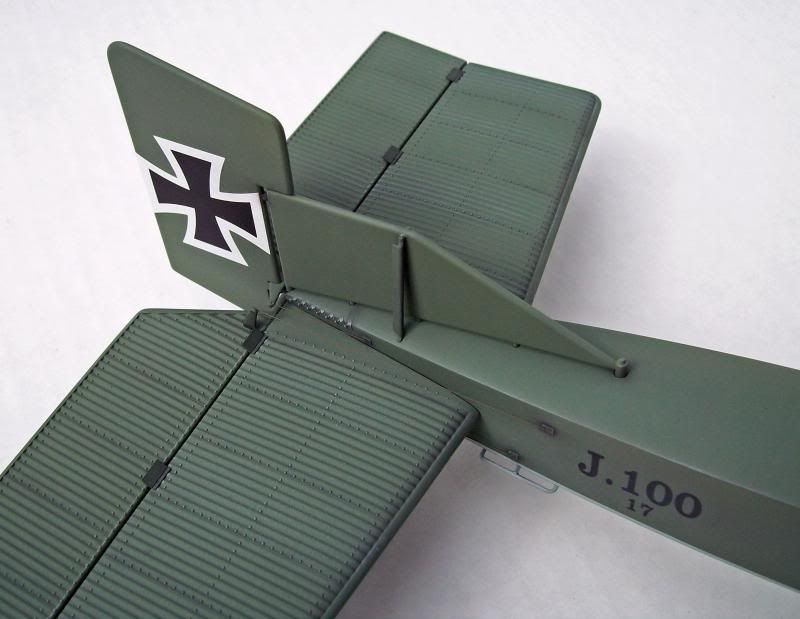
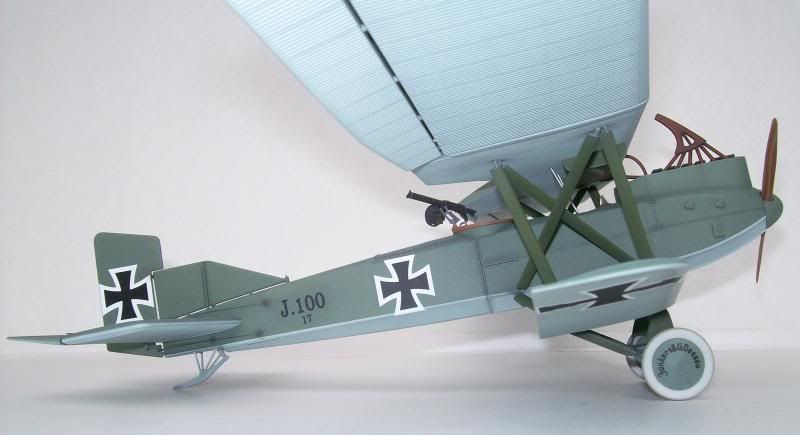
9th through 20th image: Finished!  The J.1 was completed today.  Here are some photos of the model.  It turned out to be the simple project I was hoping it would be.  My build was straight from the box and took about 108 hours, which is pretty quick for me.  It is a very well engineered kit that required only a few small “tweaks”.  Thanks for the support during the build and letting me share this.  I will take some additional photos and post them in the complete model section. 


Thanks

Phillip

Offline Nigel Jackson

  • Hero Member
  • *****
  • Posts: 2608
Re: Wingnut Wings Junkers J.1 Progress Build
« Reply #33 on: November 25, 2013, 06:08:11 PM »
Hi Philipe, this is a beautiful piece of work. Well done!

Best wishes
Nigel

Offline stefanbuss

  • Hero Member
  • *****
  • Posts: 976
Re: Wingnut Wings Junkers J.1 Progress Build
« Reply #34 on: November 25, 2013, 06:17:58 PM »
Very well done. You really managed to break up the monotone green colour.

Stefan

Offline IFF1418

  • Hero Member
  • *****
  • Posts: 1541
Re: Wingnut Wings Junkers J.1 Progress Build
« Reply #35 on: November 25, 2013, 07:23:57 PM »
Hi Phillip,

Growing nicer and nicer. This is a very neat and clean build, meticulous too. Very nice color. Congratulations.

Kind regards
Patrick

Offline RAGIII

  • Hero Member
  • *****
  • Posts: 19694
Re: Wingnut Wings Junkers J.1 Progress Build
« Reply #36 on: November 25, 2013, 09:42:08 PM »
Beautiful paint work! Your construction is clean and FLAWLESS!
RAGIII
"A man has to know his limitations": Harry Callahan

"Don't slop it on" Lynda Geisler

Offline Ernie

  • Hero Member
  • *****
  • Posts: 3961
  • "Once more into the breach"
Re: Wingnut Wings Junkers J.1 Progress Build
« Reply #37 on: November 25, 2013, 11:07:43 PM »
Well done, Phillip.  Your paintwork is first-rate!  It really is a much
larger aeroplane than I thought.  Great work!

Cheers,
Ernie :)
The new old guy, take two...

Offline James

  • Hero Member
  • *****
  • Posts: 586
Wingnut Wings Junkers J.1 Progress Build
« Reply #38 on: November 26, 2013, 12:37:31 AM »
That is one beautiful looking Junkers. Well done.
Axes Grind and Maces Clash

Offline lcarroll

  • Administrator
  • Hero Member
  • ******
  • Posts: 8659
Re: Wingnut Wings Junkers J.1 Progress Build
« Reply #39 on: November 26, 2013, 01:46:13 AM »
Beautiful finish Phillip. Crisp, clean, and most pleasing overall. Like Ernie I'm impressed by the size, I saw one in a Show several years ago and had forgotten how big it was; it wasn't nearly as nice as yours either!
Cheers,
Lance

Offline coyotemagic

  • Hero Member
  • *****
  • Posts: 7710
  • "Here's to not buggering it up." -Winston Chuchill
    • My Models
Re: Wingnut Wings Junkers J.1 Progress Build
« Reply #40 on: November 26, 2013, 03:50:52 AM »
Brilliant, Phillip!  For an ugly aeroplane, she sure is gorgeous.
Cheers,
Bud
"All men dream: but not equally. Those who dream in the dark recesses of the night awake in the day to find all was vanity. But the dreamers of day are dangerous men, for they may act their dreams with open eyes, and make it possible." -T. E. Lawrence

Offline olfogey

  • Jr. Member
  • **
  • Posts: 69
  • Jim J. -- "Great Plains", U.S.A.
Re: Wingnut Wings Junkers J.1 Progress Build
« Reply #41 on: November 26, 2013, 09:58:44 AM »
VERY NICELY DONE!  :)
I am a newcomer, both to the forum and to WWI aircraft modeling.
It is my intent to get this model from "WnW" as my first build............your build thread has given me great insight.
"Thank You"..............Jim J. -- "olfogey"

Offline Zabu

  • Hero Member
  • *****
  • Posts: 681
Re: Wingnut Wings Junkers J.1 Progress Build
« Reply #42 on: November 26, 2013, 12:49:26 PM »
Beautiful model Phillip, looks terrific.

Cheers

Offline Cimmerian

  • Sr. Member
  • ****
  • Posts: 356
Re: Wingnut Wings Junkers J.1 Progress Build
« Reply #43 on: November 26, 2013, 07:10:41 PM »
That is, as everybody has said, a beautiful model.
Regards, Ken

It's not worth doing something unless someone, somewhere, would much rather you weren't doing it.”

Offline Des

  • Administrator
  • Hero Member
  • ******
  • Posts: 9325
    • ww1aircraftmodels.com
Re: Wingnut Wings Junkers J.1 Progress Build
« Reply #44 on: November 26, 2013, 07:29:03 PM »
Very nicely done Phillip, you have produced a superb example of the Junkers J.1.

Des.
Late Founder of ww1aircraftmodels.com and forum.ww1aircraftmodels.com