Author Topic: Wingnut Wings Junkers J.1 Progress Build  (Read 6578 times)

Offline Phillip1

  • Newbie
  • *
  • Posts: 40
Wingnut Wings Junkers J.1 Progress Build
« on: November 05, 2013, 11:09:56 AM »
Fellow Modelers,
I posted a progress build on this site about a year ago when I built my first Wingnut’s kit, a Rumpler C.IV (Early).  I got a lot of help and encouragement from the participants here.  With my modeling, I try to alternate between more challenging and easier projects.  I just finished Italeri’s 1/35 PT-109 Boat, which was 27.5” long and contained nearly 500 pieces. It’s a great kit, but now I want something a little easier and quicker.  For my second Wingnut Wings kit, I have decided to build a Junker’s J.1.  I selected the J.1 because I followed several internet progress builds of the model and thought it was a really cool looking aircraft.  I also loved the fact it has no rigging! What follows is my experience building yet another impressive kit from Wingnut Wings.

1st Image: The box top.  The yellow-orange background colors remind me of the old Aurora model box tops (is my age showing?)


2nd Image: The interior fuselage sides are shown after painting (rust/wood/light green).  As with my last build, I do not go over the base color with oil paint to replica the wood grain.  My technique is to use pastel powders for shading and dry-brushing to accent high lights.


3rd and 4th Image: The finished pilot instrument and radio operator panels are shown.


5th through 7th Image: The finished pilot seat is shown.  It has really good detail.  The seat and arm rests were painted Model Master Leather.


8th Image: The right side fuselage is shown with some details added.  Honestly, it’s a pretty sparse cockpit.


9th through 11th Image: Finally, the fuselage halves are glued together.  The fuselage sides resisted closing all the way but I put that on my shoulders, possibly caused by the pilot’s seat being located a little out of place. 


12th Image: I knew from the start of this project that the left and right engine cover panels would be permanently glued in the closed position.  I think the model looks a lot better with them closed.  Because of this about 90% of the engine is hidden, so I put very little effort into building/painting it.  This is the only photo I took of the engine exposed.


13th Image: I did a fair amount cutting, bending and sanding on the engine cover panels to get a near perfect fit to the fuselage.       


Until next time…

Phillip

Offline Des

  • Administrator
  • Hero Member
  • ******
  • Posts: 9325
    • ww1aircraftmodels.com
Re: Wingnut Wings Junkers J.1 Progress Build
« Reply #1 on: November 05, 2013, 11:22:39 AM »
You are making excellent progress with your build Phillip, what you have done so far is extremely well done.

Des.
Late Founder of ww1aircraftmodels.com and forum.ww1aircraftmodels.com

Offline RAGIII

  • Hero Member
  • *****
  • Posts: 18860
Re: Wingnut Wings Junkers J.1 Progress Build
« Reply #2 on: November 05, 2013, 11:23:18 AM »
A  A very impressive start to this build! I am looking forward to your progress! Your interior looks great, very clean and neat work!!!
RAGIII
"A man has to know his limitations": Harry Callahan

"Don't slop it on" Lynda Geisler

Offline Jacek

  • Hero Member
  • *****
  • Posts: 643
Re: Wingnut Wings Junkers J.1 Progress Build
« Reply #3 on: November 05, 2013, 04:38:59 PM »
Beautifully painted cockpit, master class !
I am already curious what will be referred to as.

Offline PrzemoL

  • Hero Member
  • *****
  • Posts: 4893
  • There was Eru... and he made first the Ainur...
    • Przemysław Litewka
Re: Wingnut Wings Junkers J.1 Progress Build
« Reply #4 on: November 05, 2013, 05:20:46 PM »
Very very fine. Sharp details, realistic colours. I like it very much.
Ash nazg durbatuluk, ash nazg gimbatul,
Ash nazg thrakatuluk, agh burzum-ishi krimpatul.

Offline Ernie

  • Hero Member
  • *****
  • Posts: 3961
  • "Once more into the breach"
Re: Wingnut Wings Junkers J.1 Progress Build
« Reply #5 on: November 05, 2013, 05:38:53 PM »
This is becoming a beautiful model, Phillip.  I like the oil stains on the engine
block...very convincing.  Very good work on the interior as well.  I look forward
to your next updates.

Cheers,
Ernie :)
The new old guy, take two...

Offline Nigel Jackson

  • Hero Member
  • *****
  • Posts: 2608
Re: Wingnut Wings Junkers J.1 Progress Build
« Reply #6 on: November 05, 2013, 06:29:39 PM »
That's very nice painting Phillip; most effective.

Best wishes
Nigel

Offline lcarroll

  • Administrator
  • Hero Member
  • ******
  • Posts: 8558
Re: Wingnut Wings Junkers J.1 Progress Build
« Reply #7 on: November 06, 2013, 02:01:29 AM »
Beautiful work Phillip, looking like a real winner already. Your painting results are masterful, and the "repairs" to the cowling are very nicely done.
Cheers,
Lance

Offline coyotemagic

  • Hero Member
  • *****
  • Posts: 7710
  • "Here's to not buggering it up." -Winston Chuchill
    • My Models
Re: Wingnut Wings Junkers J.1 Progress Build
« Reply #8 on: November 06, 2013, 02:39:39 AM »
Outstanding job on the cockpit, Phillip.  Your work with pastels is top drawer.
Cheers,
Bud
"All men dream: but not equally. Those who dream in the dark recesses of the night awake in the day to find all was vanity. But the dreamers of day are dangerous men, for they may act their dreams with open eyes, and make it possible." -T. E. Lawrence

Offline Phillip1

  • Newbie
  • *
  • Posts: 40
Re: Wingnut Wings Junkers J.1 Progress Build
« Reply #9 on: November 10, 2013, 01:24:38 PM »
Des, RAGlll, Jacek, PrzemoL, Ernie Parsons, Nigel Jackson, lcarroll, coyotemagic,

Thanks for the kind words.  They are appreciated.

1st Image: Work has moved to building the wings.  The biggest “internet” complaint about this model is the “missing” sections on the rear center wing.  These missing corrugated areas (5/8” long X 1/8” wide”) are very noticeable and need to be filled in.  Fortunately, the kit provides two spare corrugated parts that are not required (shown in the photo), and just happen to match the pattern on the wings (very odd)! 
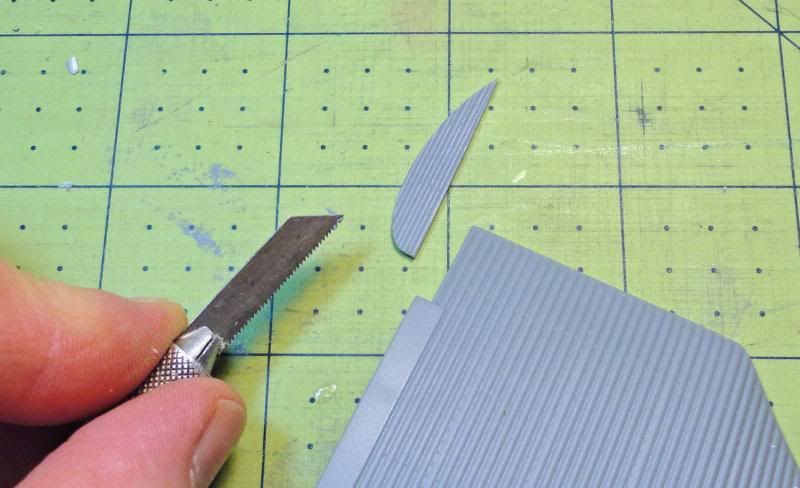

2nd Image: The first step was cutting the top piece and gluing it in place. Care was taken not to make a careless cut, since there was barely enough extra parts to get the job done.
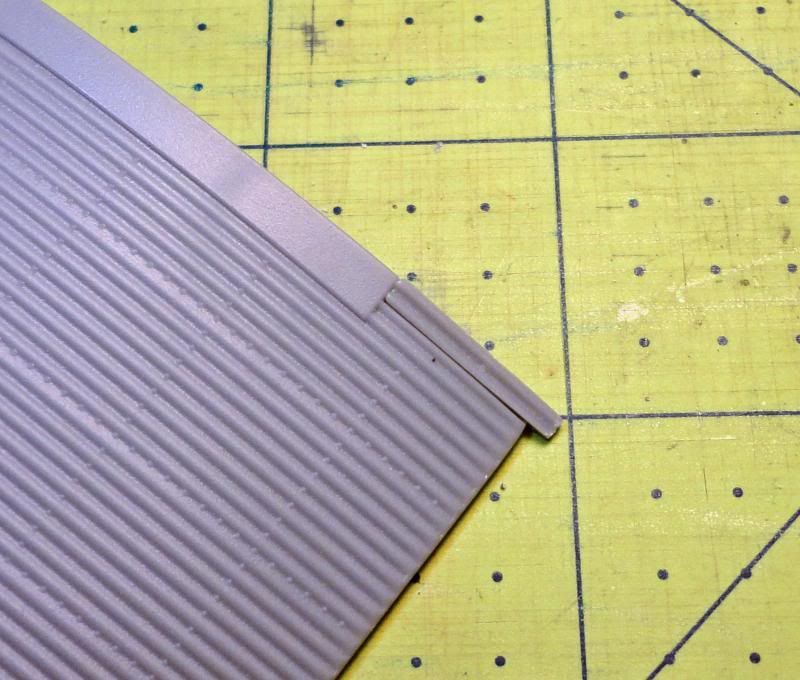

3rd Image: The newly glued part was cut off and sanded even with the wing trailing edge.
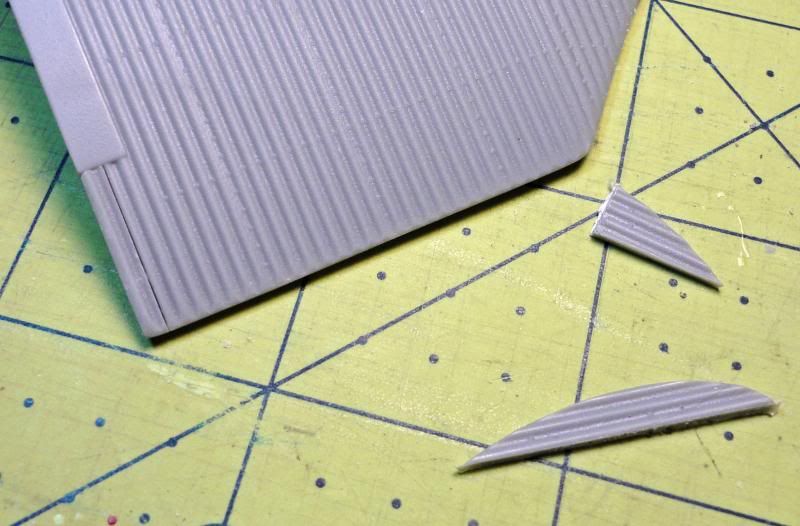

4th Image: The wing was turned over and the lower piece was cut from what remained.
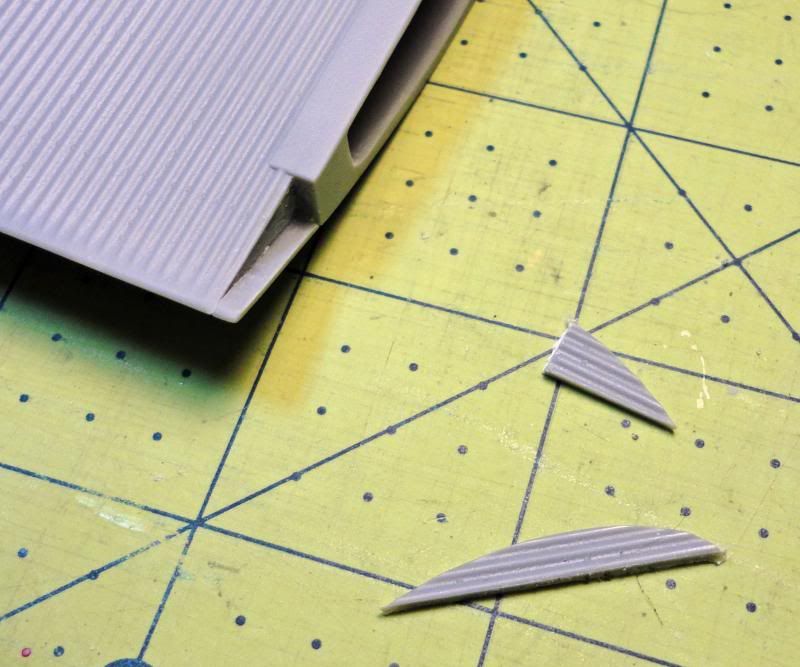

5th Image: The lower piece is shown in place. The last step was adding a triangle shape styrene piece between the top and bottom pieces.
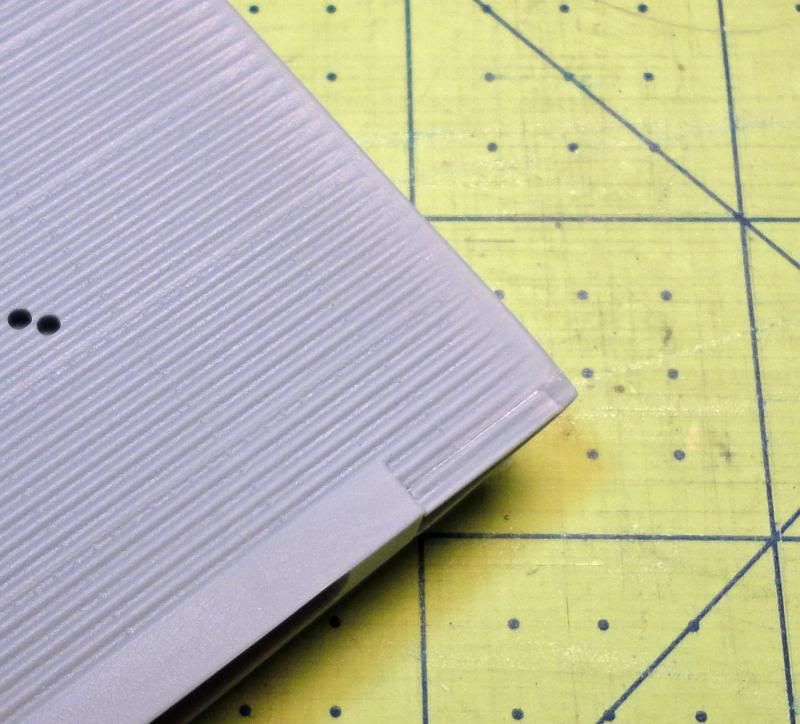

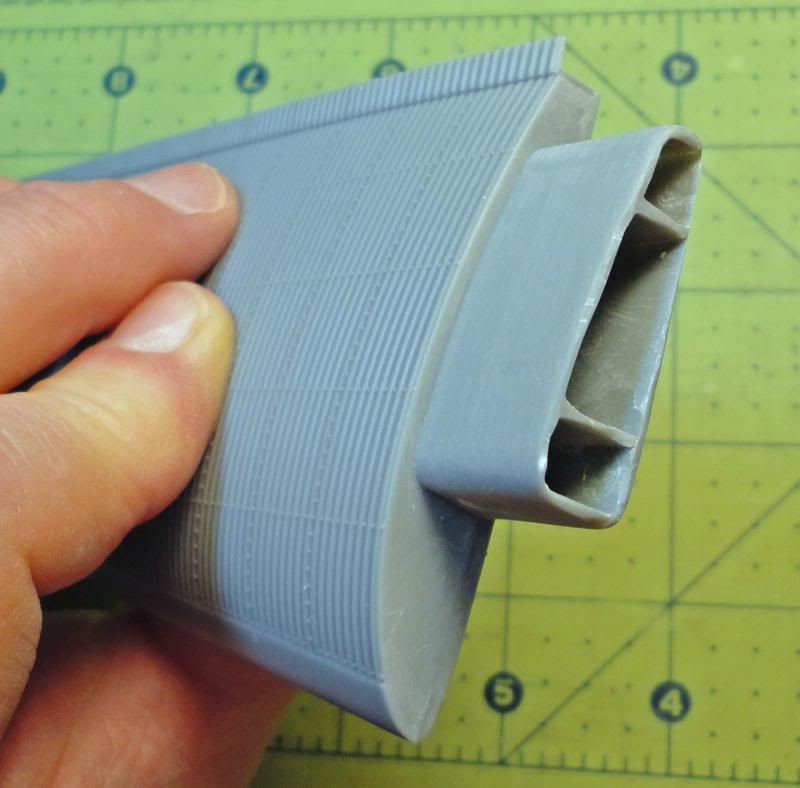
6th Image: Another common complaint about the kit (that I agree with) is how the fit between some of the parts is too tight.  The two worst areas are where the lower wing joins to the lower fuselage, and where the left and right outer wings join to the main wings.  In all of these areas it appears the size of the mating tabs are the exact same size of the mating slots, producing a fit that is difficult to work with.  I did some serious sanding and cutting on all of the outer wing tabs to get an acceptable fit.

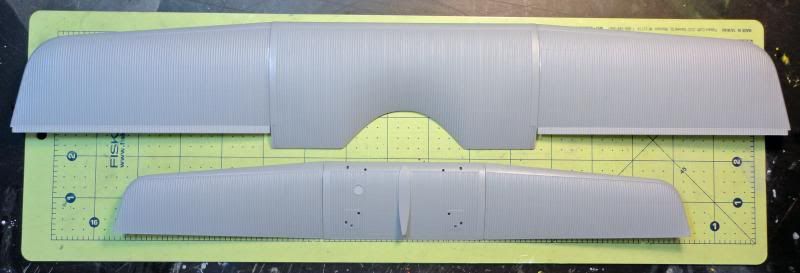
7th Image: The upper and lower wings are shown completely assembly and ready for painting.  The instruction said to attach all of the outer sections after the center sections were attached to the fuselage, but I decided not to do that.  I wanted to be able to fill in the gaps between the sections with 5-minute epoxy, and completely paint/decal the wings before final attachment.  Notice how large the upper wing is (18.25” without the ailerons and 19.50” with them!).  After the Gotha, does anybody know if this is the largest combat plane the Germans used in WWI?

8th Image: Time to paint!  This image is from the kit instructions and shows the color scheme I am I going to use.  I know many will think these markings a bit dull, but I really like them.  In fact this was the only option I considered doing.   


9th Image: All of the major components are shown after the basic exterior colors have been applied.  For the upper surfaces I used Model Master SAC Bomber Green.  For the lower surfaces I made a special mix, combining Model Master Hellblau (100 drops) and Testors Flat White (75 drops).     
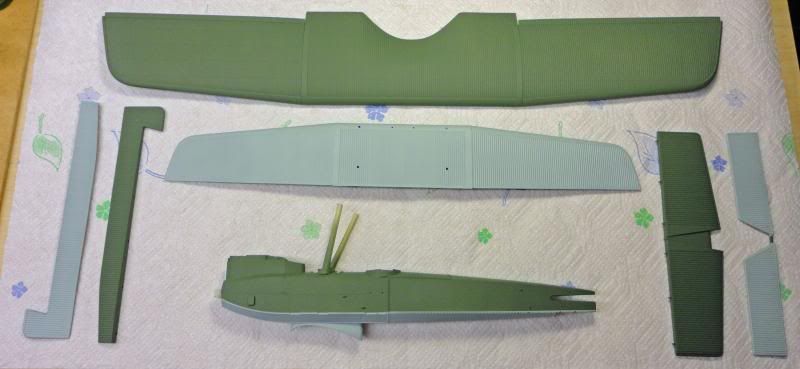

10th Image: After the light green and light blue were applied, painter’s tape was laid over the underside color so a sharp demarcation line could be created.
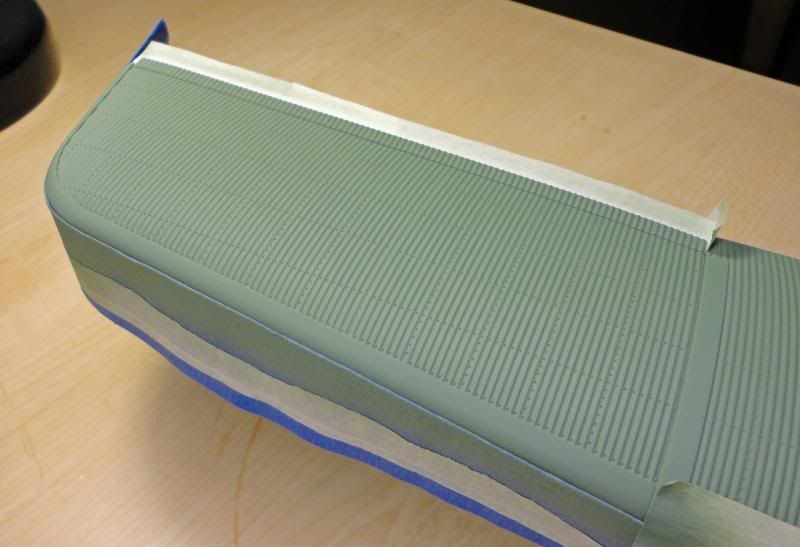

11th Image: Weathering began by applying dark gray pastel dust over specific areas of the airplane using a small, pointed brush.  Next, most the dust was brushed away with a thick, soft make up brush. 
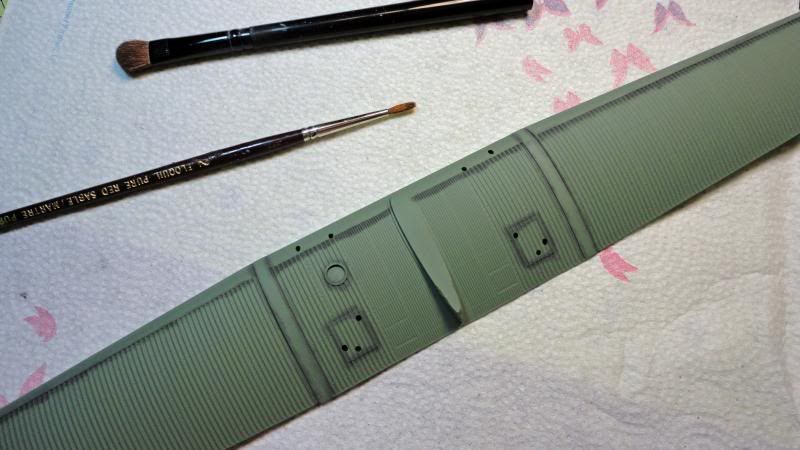

12th through 14th image:  Dry-brushing was applied to highlight some of the raised edges and corrugations.  Model Master Dark Ghost Gray was the color used.  Doing this helped break up the single color and made the finish more interesting. 


13th Image: The same weathering technique was used on the fuselage, starting with the canvas stitching.
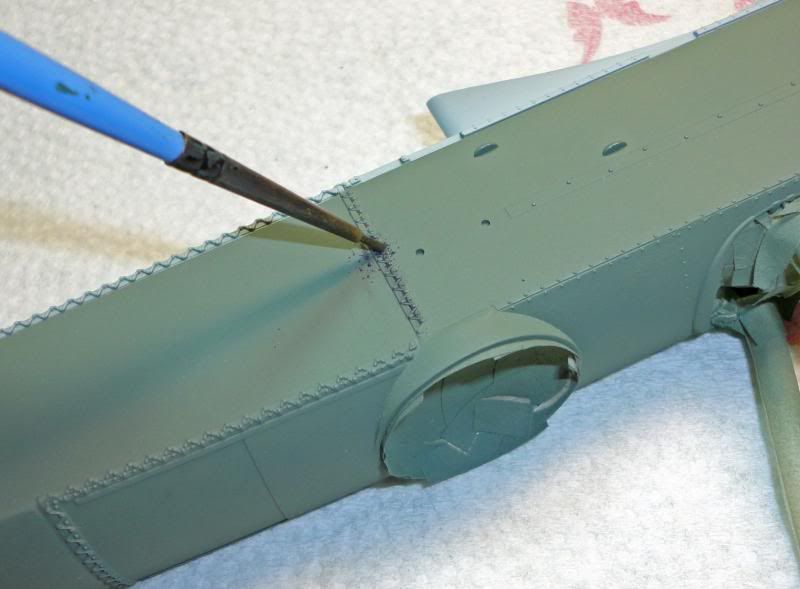

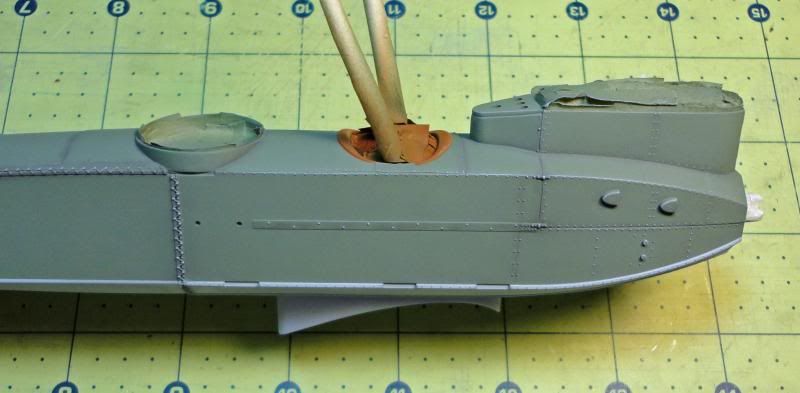
14th Image: This photo shows the fuselage after adding the pastel dust and dry-brushing. 

Until next time…

Offline coyotemagic

  • Hero Member
  • *****
  • Posts: 7710
  • "Here's to not buggering it up." -Winston Chuchill
    • My Models
Re: Wingnut Wings Junkers J.1 Progress Build
« Reply #10 on: November 10, 2013, 02:08:01 PM »
Beautiful work on the weathering, Phillip!  Gotta love those pastels.
Cheers,
Bud
"All men dream: but not equally. Those who dream in the dark recesses of the night awake in the day to find all was vanity. But the dreamers of day are dangerous men, for they may act their dreams with open eyes, and make it possible." -T. E. Lawrence

Offline Ernie

  • Hero Member
  • *****
  • Posts: 3961
  • "Once more into the breach"
Re: Wingnut Wings Junkers J.1 Progress Build
« Reply #11 on: November 10, 2013, 08:16:02 PM »
Amazing work, Phillip!  That was really a good job on the wing problem.
Your paint and weathering looks wonderful.  You are making terrific progress.
Looking forward to the next updates.

Cheers,
Ernie :)
The new old guy, take two...

Offline Andi Little

  • Full Member
  • ***
  • Posts: 182
Re: Wingnut Wings Junkers J.1 Progress Build
« Reply #12 on: November 10, 2013, 08:23:47 PM »
It's like a flying tank!! ............... I'll be watching closely as a whole new set of techniques are going to open up I suspect.

Great job so far - I appreciate you documenting the wing corrections - something I would never of known, and kicked myself for missing.

KBO ............. Andi.

Offline Des

  • Administrator
  • Hero Member
  • ******
  • Posts: 9325
    • ww1aircraftmodels.com
Re: Wingnut Wings Junkers J.1 Progress Build
« Reply #13 on: November 10, 2013, 08:31:19 PM »
Great work so far Phillip, your wing repair is very good and an excellent tip for those who have not built this kit. Your use of pastels for the weathering is turning out great, this is shaping up to be a superb model.

Des.
Late Founder of ww1aircraftmodels.com and forum.ww1aircraftmodels.com

Offline stefanbuss

  • Hero Member
  • *****
  • Posts: 976
Re: Wingnut Wings Junkers J.1 Progress Build
« Reply #14 on: November 10, 2013, 09:16:45 PM »
Thank you for your detailed photos of the wing's fix.
To answer your question on aircraft sizes: even the Gotha's where not the largest planes used in the war. Those were the Riesenflugzeuge - now haven one of those Riesen in 1:32 would pose very serious problems of where to put the finished model. The Staaken RVI would have a wingspan of 1.32 meters...

Stefan