Hi all,
I just realised yesterday when looking at another scratchbuild on here that I hadn't posted my Blériot. So for those that may have missed it, here is the build. It won a Silver Medal in Scratchbuilt open class, and Best WWI Aircraft, at the Chicopee, Massachusetts IPMS meet earlier this year......
I started with an Eastern Express Blériot XI kit, thinking it would be an interesting addition and knowing I'd have to do a fair bit of work to it....how much? Let's just say the kit is a horrible waste of good plastic! Upon opening the box I realised I'd have to scratchbuild the fuselage - the kit one looks as though it's made of scaffold planks and 4x4! I started thinning the wings, then I got my copy of the Datafile and realised that not only were the wings too thick, they were too short spanwise, and too narrow chordwise - good job Eastern Express!!
Oh well, by now I'd become sufficiently interested so came to the obvious conclusion - to scratchbuild the whole thing...something I'd never attempted before! I decided to build the aircraft on display at the Italian Air Force Museum as I liked the more colourful appearance. This post was originally done in December 2011 so the present tense needs to be changed to past.....hope you enjoy it!


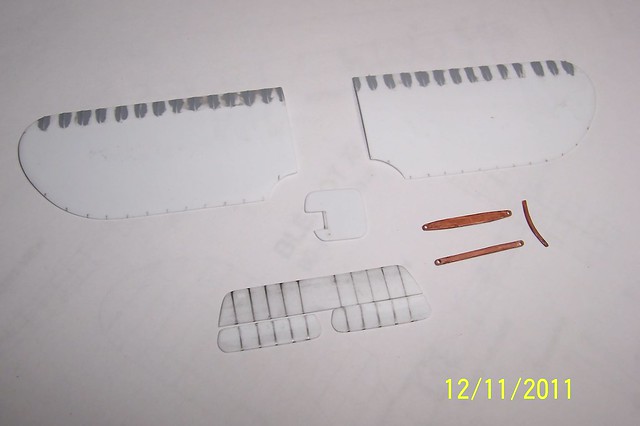
The wings are from one piece of plastic sheet, carefully bent for the shape, sanded for the profile and ribs added from strip. I still have to add rib and spar pre-shading (something else I've never done before). Tail surfaces similarly made.

The fuselage got me thinking - how to build it and rig it by pre-drilling without making it all too weak. In the end, I built up the fuselage sides and pre-drilled them, (from underneath and the top, either side of the vertical supports, for the side bracing, and from the side, through the vertical supports, for the cross fuselage bracing). I then cut the upper and lower cross-members, pre-drilled those for the top and bottom bracing and threaded them loosely. They were then pinned to the plans in the correct positions, ensuring I gave one twist between each to cross the bracing wires, and the fuselage sides were attached and pinned in place to dry. The wires were then pulled tight and secured once the structure had dried.


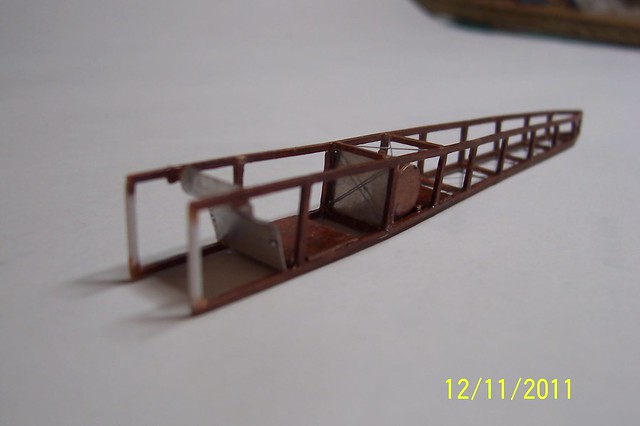
The fuel tank is in, as are the floors, firewall and bulkhead in front of the tank - the latter 2 being made form a beer can. Next up is to add the top rear section and rigging in the same way as the underside.
Thanks for your interest!
Ian

