Author Topic: Painting figures 101  (Read 42756 times)

Offline Repainted

  • Jr. Member
  • **
  • Posts: 55
Painting figures 101
« on: June 13, 2013, 02:10:46 AM »
or just my way. ;D
Hi Folks I´m been asked about a tutorial on how I paint my figures and here I will give it a try. So first thing first as they say, this is what you need for the job. Most off it you already have I guess.


•   A nice figure you’ll want to paint.
•   White Spirit, This is my favourite medium to dilute the Humbrols and oils paint with. It´s easy to get a new bottle from grocery and comes sheep.
•   Humbrol paints in different colours and shades, I´ will give you some kind off the most common colours I use.
•   Brushes, if you will go sheep that’s okay and always choose the good brush at your own local hobby shop, if the tips is broken the brush is useless. Synthetic brushes are okay but they weir down rather quick so you have to get new one for the next figure. If you go for little bit more expensive brushes I recommend “Colinkski´s” They are good and last for six, seven figures before they get tired. You need brushes from size 0000 to 4- 5. Remember to use a big brush for big areas and small for the small areas.
•   Cotton glove can you get at the pharmacy, but if you have an old T-shirt that will do just fine anyway. I use this glove to moisten the brush with. A brush filled with paint will be rinsed in the first cup off spirits. This cup with spirit will soon get a dirty so using the second cup of spirits I´ll can see if the brush is clean, When the brush is full of spirit it’s just too much and by gentle touch the glove with the tip you can get rid of the excess off the spirits and the brush is just moistened and perfect to work on the wet Humbrol paint..
•   Matches, just something to stir up the paint with. The old Humbrols before the “super enamels” was thicker than the Super enamel´s so the old ones I stirred up real good before using them. Nowadays with the less pigmented “Super enamels” I almost never stir up the paint, I just pick up a lump off paint from the bottom off the can with a match and use White spirit to dilute it.
•   Airbrush or rattle can with primer. I use Humbrols flat white 34 and grey (64 50/50%), using an airbrush for the first coat of primer. You can use a rattle can if you don´t have excess to an airbrush just beware that you don´t get to much paint on the figure, that´s common with these rattle cans. I use the grey/white mix because my eyes like to see the figure and the shadows that’s comes alive when putting the figure under the work lamp. That’s the first hint off where the shadows will be painted so just play around a bit to see the shadows changing.
•   A good work lamp. Check your light bulb man!!!!!! Make sure that you have a light bulb that gives you “daylight” otherwise you end up with some mysterious colours' on you figure. Cold white is no good..

This is for a starter and hoping that you got any question, comments. Sorry if my English are somewhat rusty, you’ll have to live with it if you follow this thread.

Regards
LarsaQ

Offline Des

  • Administrator
  • Hero Member
  • ******
  • Posts: 9325
    • ww1aircraftmodels.com
Re: Painting figures 101
« Reply #1 on: June 13, 2013, 08:05:15 AM »
Thanks very much LarsaQ for starting this topic, I am so much looking forward to learning from you.

Des.
Late Founder of ww1aircraftmodels.com and forum.ww1aircraftmodels.com

Offline lawman56

  • Full Member
  • ***
  • Posts: 123
  • What about a pointed stick?
Re: Painting figures 101
« Reply #2 on: June 13, 2013, 08:10:45 AM »
Thanks for starting this, I love to learn and improve my skills!
Joe Clark

"Illegitimi Non Carborundum"

Offline michael

  • Sr. Member
  • ****
  • Posts: 464
Re: Painting figures 101
« Reply #3 on: June 13, 2013, 06:02:03 PM »
great stuff, looking forward to the rest of the tutorial  :)

michael
“An ounce of action is worth a ton of theory.”

Offline Eudgen

  • Newbie
  • *
  • Posts: 17
Re: Painting figures 101
« Reply #4 on: June 13, 2013, 06:49:52 PM »
Subscribe to the topic. Especially because MiniArt will soon release 1/16 Ernst Udet figure.

Offline Repainted

  • Jr. Member
  • **
  • Posts: 55
Re: Painting figures 101
« Reply #5 on: June 14, 2013, 02:33:27 AM »
Thanks for your response guys, this will be fun for me and a challenge for my English skills.
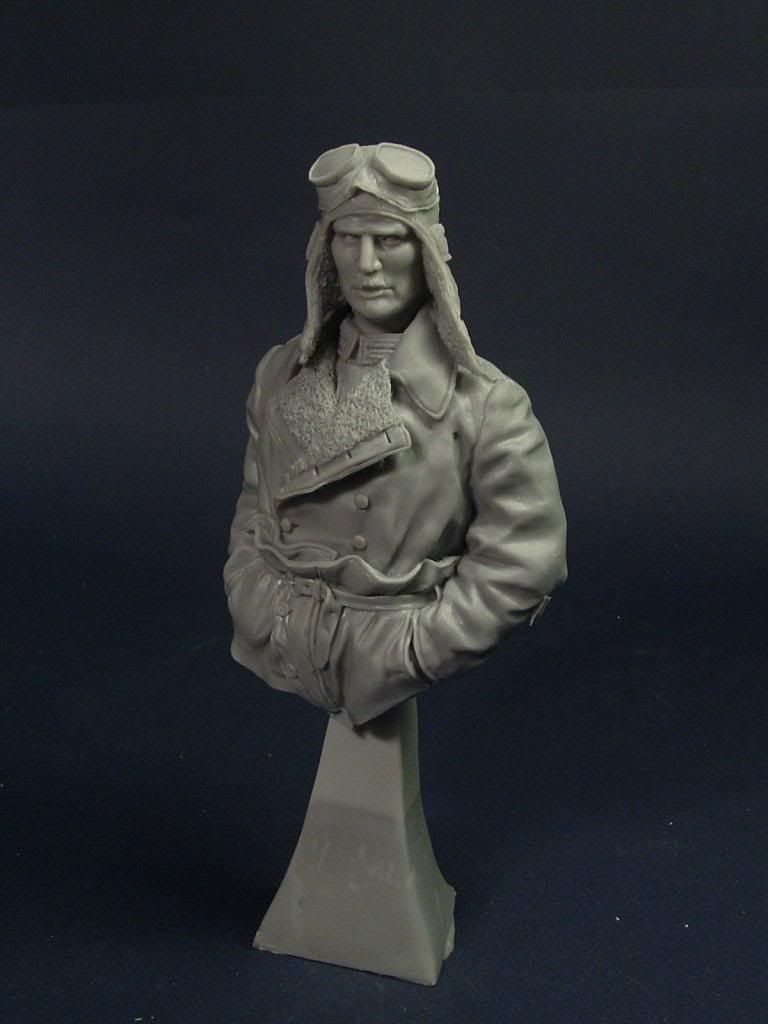
Have you chosen your figure yet? I have and my obvious choice is the bust from Stormtrooper “Josef Mai”. The reason for choosing this is simple, it´s the only figure I have in hand today and if I´ll have to order a new one (54mm) you have to wait and we don’t want that.

So preparing the figure for painting is the game now. There´s some stuff to know here, first I´ll often give my figure a good bath with soap and water to get rid of any kind off grease from the moulds. As you maybe know the figure is casted in silicon moulds and when the moulds get older they dry up and one way to get more money out of a mould is to give more oils to soften the silicon.
With fresh moulds you get fine mould lines around the figure and with older moulds you got heavier mold lines. So here´s the tip, remember get the figure when its new on the market if you want a good one almost every figures is short productions and as long the master and mould are workable copies off the master hits the market.
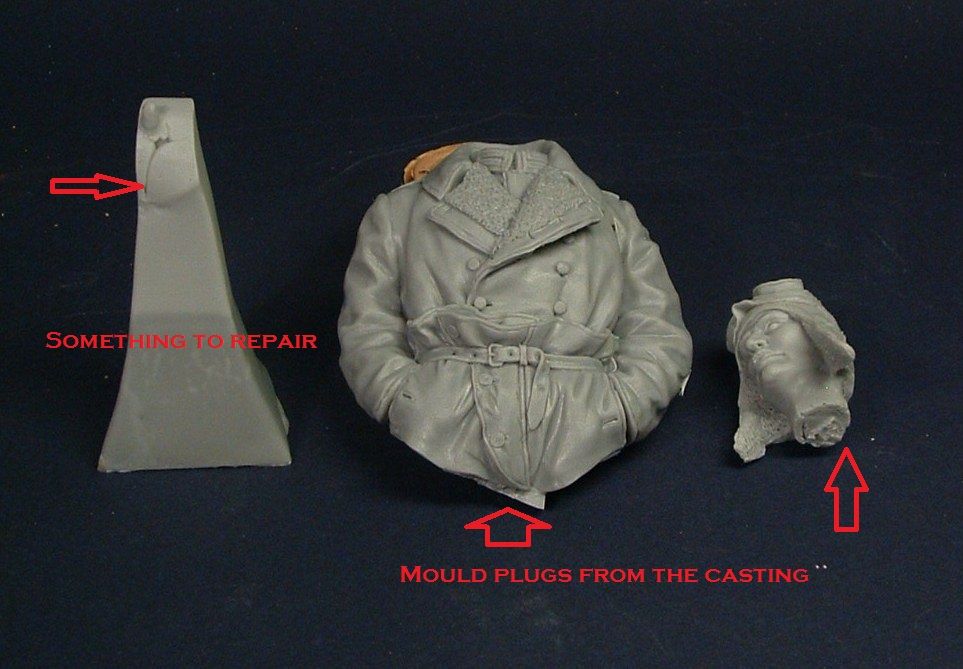
On my bust there is some resin inlets and some bubbles to fix before the first primer is top go on. This will be fixed with some emery paper, needle files, and a good hobby knife.


 If you’re into a full figure you will need to drill a tiny hole in one off the feet and insert a short pin or paperclip. This pin or paperclip will give you to fix the figure on a pinvise or painting plinth. this is only for easy painting.
When the figure is painted and done this pin will secure the figure to the base.


Okay back to the bust again, when the bust is cleaned in soap and water give it the night to dry, then you can start the preparing it for primer. Any inlets or mould lines are/is removed gently work with your hobby knife and emery paper to get rid of the lines. If you trouble to find them give the figure a thin coat of primer and they will appear if they are there. As I mentioned before, a mix of grey and white Humbrol is a good colour to see and find these lines before you got the paints on the figure.

When all preparing is /are done give the figure a new thin coat of primer. This primer will hold the paint as a canvas for you to paint on.

The last tip for today is this
Say you have a figure where the painting skill is not up to your expectations. Here comes my best friend ordinary house hold pluming cleanser.

You can get this at your grocery store and with some hot water in plastic bowl add some cleanser to the water and mix it, you have a real good paint stripper here. Just be outside here or well ventilated areas and use rubber gloves from the pharmacy. In an hour get your figure back without the old paint, just restart the paint again. This works fine with humbrols and my guess is that you can find similar tricks for acrylics.

Enough for tonight folks, questions, critics and comments are welcome.
Best Regards
LarsaQ

Offline Repainted

  • Jr. Member
  • **
  • Posts: 55
Re: Painting figures 101
« Reply #6 on: June 23, 2013, 05:59:27 PM »
Hi folks
I have prepared the bust and got it primed. The mix of Humbrol White 34 and grey 64 is dry and now we can paint. I will use these pics as guide for the putting in the shadows and highlight.


I told you earlier that I will use an airbrush for this bust and we start up first thing. So first up will be the Face and Jacket, because it will have the same base colour so why not fix them at the same time.
Painting the flesh
Painting the flesh on a figure many say it´s the hardest thing and I agree on that. It makes or breaks the whole figure. So a good role is to start with the face and hands first. If you’re not satisfied with the face you can always start over again, if this happens you won´t need to clean off everything. 
The colour I use here is a base for the flesh. Humbrol´s Flesh 61, Sand 63 and 29 Dark earth. I Mix these colours on estimated ratio 80%, 10% and 10%. This is not any exact, and that’s because you can’t use the same mix for every figure, you have to alter the base colour from figure to figure to get the skin tones to be at variance. Mixing in 63 and 29 into the 63 flesh will take away that brightness of the flesh 61 and helping you later on in the painting.
With this mix loaded in the double action airbrush, I´ll trim in the settings on the airbrush to give me fine lines and using a low pressure. Starting to cover up the face on the bust.


I use the remaining paint in the airbrush on the Jacket to. Giving the jacket a thin cover of the mix and pay attention for the highlights. By adding little 62 leather in to the mix I worked on the shadows on the jacket little more.
Taking care to not paint over the highlights.
Before cleaning up the airbrush I mixed in some black 33 into the mix and started to give the jacket black tone. So with this done the bust had to get dry so today Ill can take the first pics on it again so 
See u

LarsaQ

Offline Des

  • Administrator
  • Hero Member
  • ******
  • Posts: 9325
    • ww1aircraftmodels.com
Re: Painting figures 101
« Reply #7 on: June 30, 2013, 11:42:06 AM »
Thanks LarsaQ for the tip on an easy paint stripper, removing enamels without damaging the plastic can be quite difficult. The figure is looking good so far, what scale is it?

Des.
Late Founder of ww1aircraftmodels.com and forum.ww1aircraftmodels.com

Offline Repainted

  • Jr. Member
  • **
  • Posts: 55
Re: Painting figures 101
« Reply #8 on: June 30, 2013, 04:46:27 PM »
Thanks LarsaQ for the tip on an easy paint stripper, removing enamels without damaging the plastic can be quite difficult. The figure is looking good so far, what scale is it?

Des.

Hi Des, It's Stormtroopers Josef Mai in 1/9 scale so its a big one.Next updates will be up in a few  days.
Regards
LarsaQ

Offline Mac

  • Newbie
  • *
  • Posts: 15
Re: Painting figures 101
« Reply #9 on: August 05, 2013, 03:10:15 AM »
Following this with great interest thank you.  :)
Regards Pam

Offline Repainted

  • Jr. Member
  • **
  • Posts: 55
Re: Painting figures 101
« Reply #10 on: August 05, 2013, 08:13:17 PM »
Following this with great interest thank you.  :)

Hi
Just back from a week in Greece and still having vacation I´m a bit slow with the hobby, but don´t you think I´m planning to end this one, just have some patience update will come.

Cheers
LarsaQ

Offline Repainted

  • Jr. Member
  • **
  • Posts: 55
Re: Painting figures 101
« Reply #11 on: August 07, 2013, 05:33:27 PM »
Hi folks
Sorry for been slow and lazy now under the summer but I´m a hobby gardener and working up my own tan while giving the flower some TLC. So painting skintones here it is.
Working with the Humbrols and white spirit, the technique is to work with two jars of spirits. One for cleansing the brush from paint and the other ones for moisten the brush so with the clean brush the stroking/stippling technique can be done without putting on more colour from a badly cleansed brush. I often replace the spirits in the jars so I always have more or less clean spirits
The base color is already on the face and the first shadows are next to put in place. The shadow applied is the subtlest one, using a mixture similar used for the face, but more darken, so less flesh Hu 61 in the mixture. The mixture is very thin – transparent in fact and applied in the hollow under the cheekbones, along the fold beside the nose and on each side of the nose, in the temples, beneath the lower lip, and under the eye bag. After these areas are blocked out, the EDGES are blended into the base colour using a very gentle stroking/stippling motion. The intent here is to pull the two colors together along the “border” so that one seems to fade into the other. Great care is taken to ensure that two distinctively coloured areas remain, each fading into the other, and not a single colour made from a combination of the two.

from here it’s the next darker shadow and the same technique is repeated for three darker tones.

When coming to the highlights it’s just the same kind of job on the cheekbones, the bone above the eyebrows, the bridge of the nose, the nostrils, the top of the chin, above the upper lip, at the top of the eye bags and along then diagonal ridge going from the inner eye towards the corner of the jaw. All highlights are carefully blended into the adjoining colour. So from here you can add more highlight each time a little bit lighter than the privies.
Next thing is to paint in the eyes and lips and for this one I don’t have to do the hair. When you're done and happy with the result you seal the face with a semi gloss varnish (I use an acrylic) that will bring the skin “to life”.


Cheers
LarsaQ

Offline Repainted

  • Jr. Member
  • **
  • Posts: 55
Re: Painting figures 101
« Reply #12 on: August 07, 2013, 06:53:53 PM »
So
I´ll worked in more shadows here and have the last and darkest to add, the camera did not pick up the job in the best way so sorry.


But you can see the colours are blended into each other. Working with the Humbrols I wait for twenty to thirty minutes between each layers so I don´t disturb the different coats off paint.

more to come

Cheers
LarsaQ

Offline Repainted

  • Jr. Member
  • **
  • Posts: 55
Re: Painting figures 101
« Reply #13 on: August 07, 2013, 07:30:08 PM »
The head is back on the bust without glue, just to check where I am in the painting. Checking out the harmony of the whole bust.


Cheers

LarsaQ

Offline Zabu

  • Hero Member
  • *****
  • Posts: 681
Re: Painting figures 101
« Reply #14 on: August 08, 2013, 08:35:12 AM »
I'm... i'm... i'm...!

I'm lacking words. Your skill to paint figures it's beyond adjectives imo, so i'll just say... thx for those pics.

Cheers