Author Topic: OEFFAG D.III "2" & "5" - 7th Kościuszko Sqn M. Cooper & E. Corsi | Lukgraph 1/32  (Read 5662 times)

Offline Boch

  • Full Member
  • ***
  • Posts: 158
Oeffag D.III - Workshop Update

Dry fitting wings and stabilizers - the airframe comes together
Over the past few days, work on the Oeffag has been moving steadily forward. I've now reached one of the more delicate and critical stages - dry-fitting the wings. It?s a good moment to share some photos and thoughts on the process.


🔧 Preparing the Struts
I started with prepping all the structural components. Here's a full set of struts for one of the Oeffags, already reinforced with metal rods. These stabilizing pins should help ensure a strong and clean assembly later on - no surprises, hopefully!


Drilling the Wing Mounts
Next, I drilled precise holes in the wings to accommodate the rods in the struts. The fit needed to be just right to allow the whole structure to come together without unnecessary tension.


Dry-Fitting the Wings
Then came the big step: placing the upper wing. Everything was assembled dry, no glue used at this point. After a few careful attempts, I managed to get the wing into position and secured it with tape. The construction held firm - a good sign for later stages when the paint and final glue-up come into play.


The rods between the wings and fuselage provided excellent stiffness and proper geometry. This allowed me to evaluate the overall alignment and plan for any small adjustments down the line.


Tail Assembly
I also prepared and test-fitted the horizontal stabilizers and elevator. The resin parts look great - sharp detail, no serious flaws. Some light sanding will remove tiny surface blemishes.


To mount the stabilizers, I drilled straight through the fuselage and inserted a 0.4 mm steel rod. I used masking tape to mark exact placement, then carefully fine-tuned the fit. Again - no major issues here.


First Look at the Full Airframe
At this point, everything is assembled dry, even without masking fluid. But the airframe already looks solid and aligned - and above all, it?s starting to reveal its distinctive Oeffag silhouette. The model is really starting to come alive on the bench!


Final Thoughts
I'm genuinely happy with the progress so far. The kit from Lukgraph is a joy to work with - they've done a fantastic job on this release. The resin parts are clean and the engineering is solid. The build has been both enjoyable and rewarding, and I'm really looking forward to the next steps.

In the next post, I'll return to the historical part of this build - and continue the story of Merian C. Cooper and Edward J. Corsi, two American airmen who found their way to a newly reborn Poland.

Thanks for looking!
Lukasz
« Last Edit: April 13, 2025, 04:22:04 AM by Boch »

Offline Umlaufmotor

  • Hero Member
  • *****
  • Posts: 1100
Nice pictures - it's always a pleasure to see an Albatros grow, no matter what type.

I was able to see and photograph Koloman's D.III live in Oberschleissheim in December 2011, shortly before its maiden flight in April 2012.
I have this kit on the shelf myself - unfortunately some things are not right on the model out of the box.
I am also curious whether the nail heads can be realized with a rivet wheel with this material.

But back to your build - now it's time to make the missing screw connection at the root of the elevator.


Servus
Bertl

Translated with DeepL.com (free version)

Offline Boch

  • Full Member
  • ***
  • Posts: 158
Nice pictures - it's always a pleasure to see an Albatros grow, no matter what type.

I was able to see and photograph Koloman's D.III live in Oberschleissheim in December 2011, shortly before its maiden flight in April 2012.
I have this kit on the shelf myself - unfortunately some things are not right on the model out of the box.
I am also curious whether the nail heads can be realized with a rivet wheel with this material.

But back to your build - now it's time to make the missing screw connection at the root of the elevator.

Thanks a lot for your attention and comment. I think that if you plan to do the smallest details, you will be working on each kit.

As for the rivets, I will try 3D decals with rivets. I ordered a few sheets and we will see how the tests go.

Lukasz

Offline Boch

  • Full Member
  • ***
  • Posts: 158
Merian C. Cooper - The Road to Poland

The Great War was over, but Merian C. Cooper had no intention of returning to the United States. He left service as an officer known for his experience and bravery. I've already mentioned in an earlier post that he refused the Distinguished Service Order (DSO) for saving his observer's life. In the end, however, he was awarded the Purple Heart.


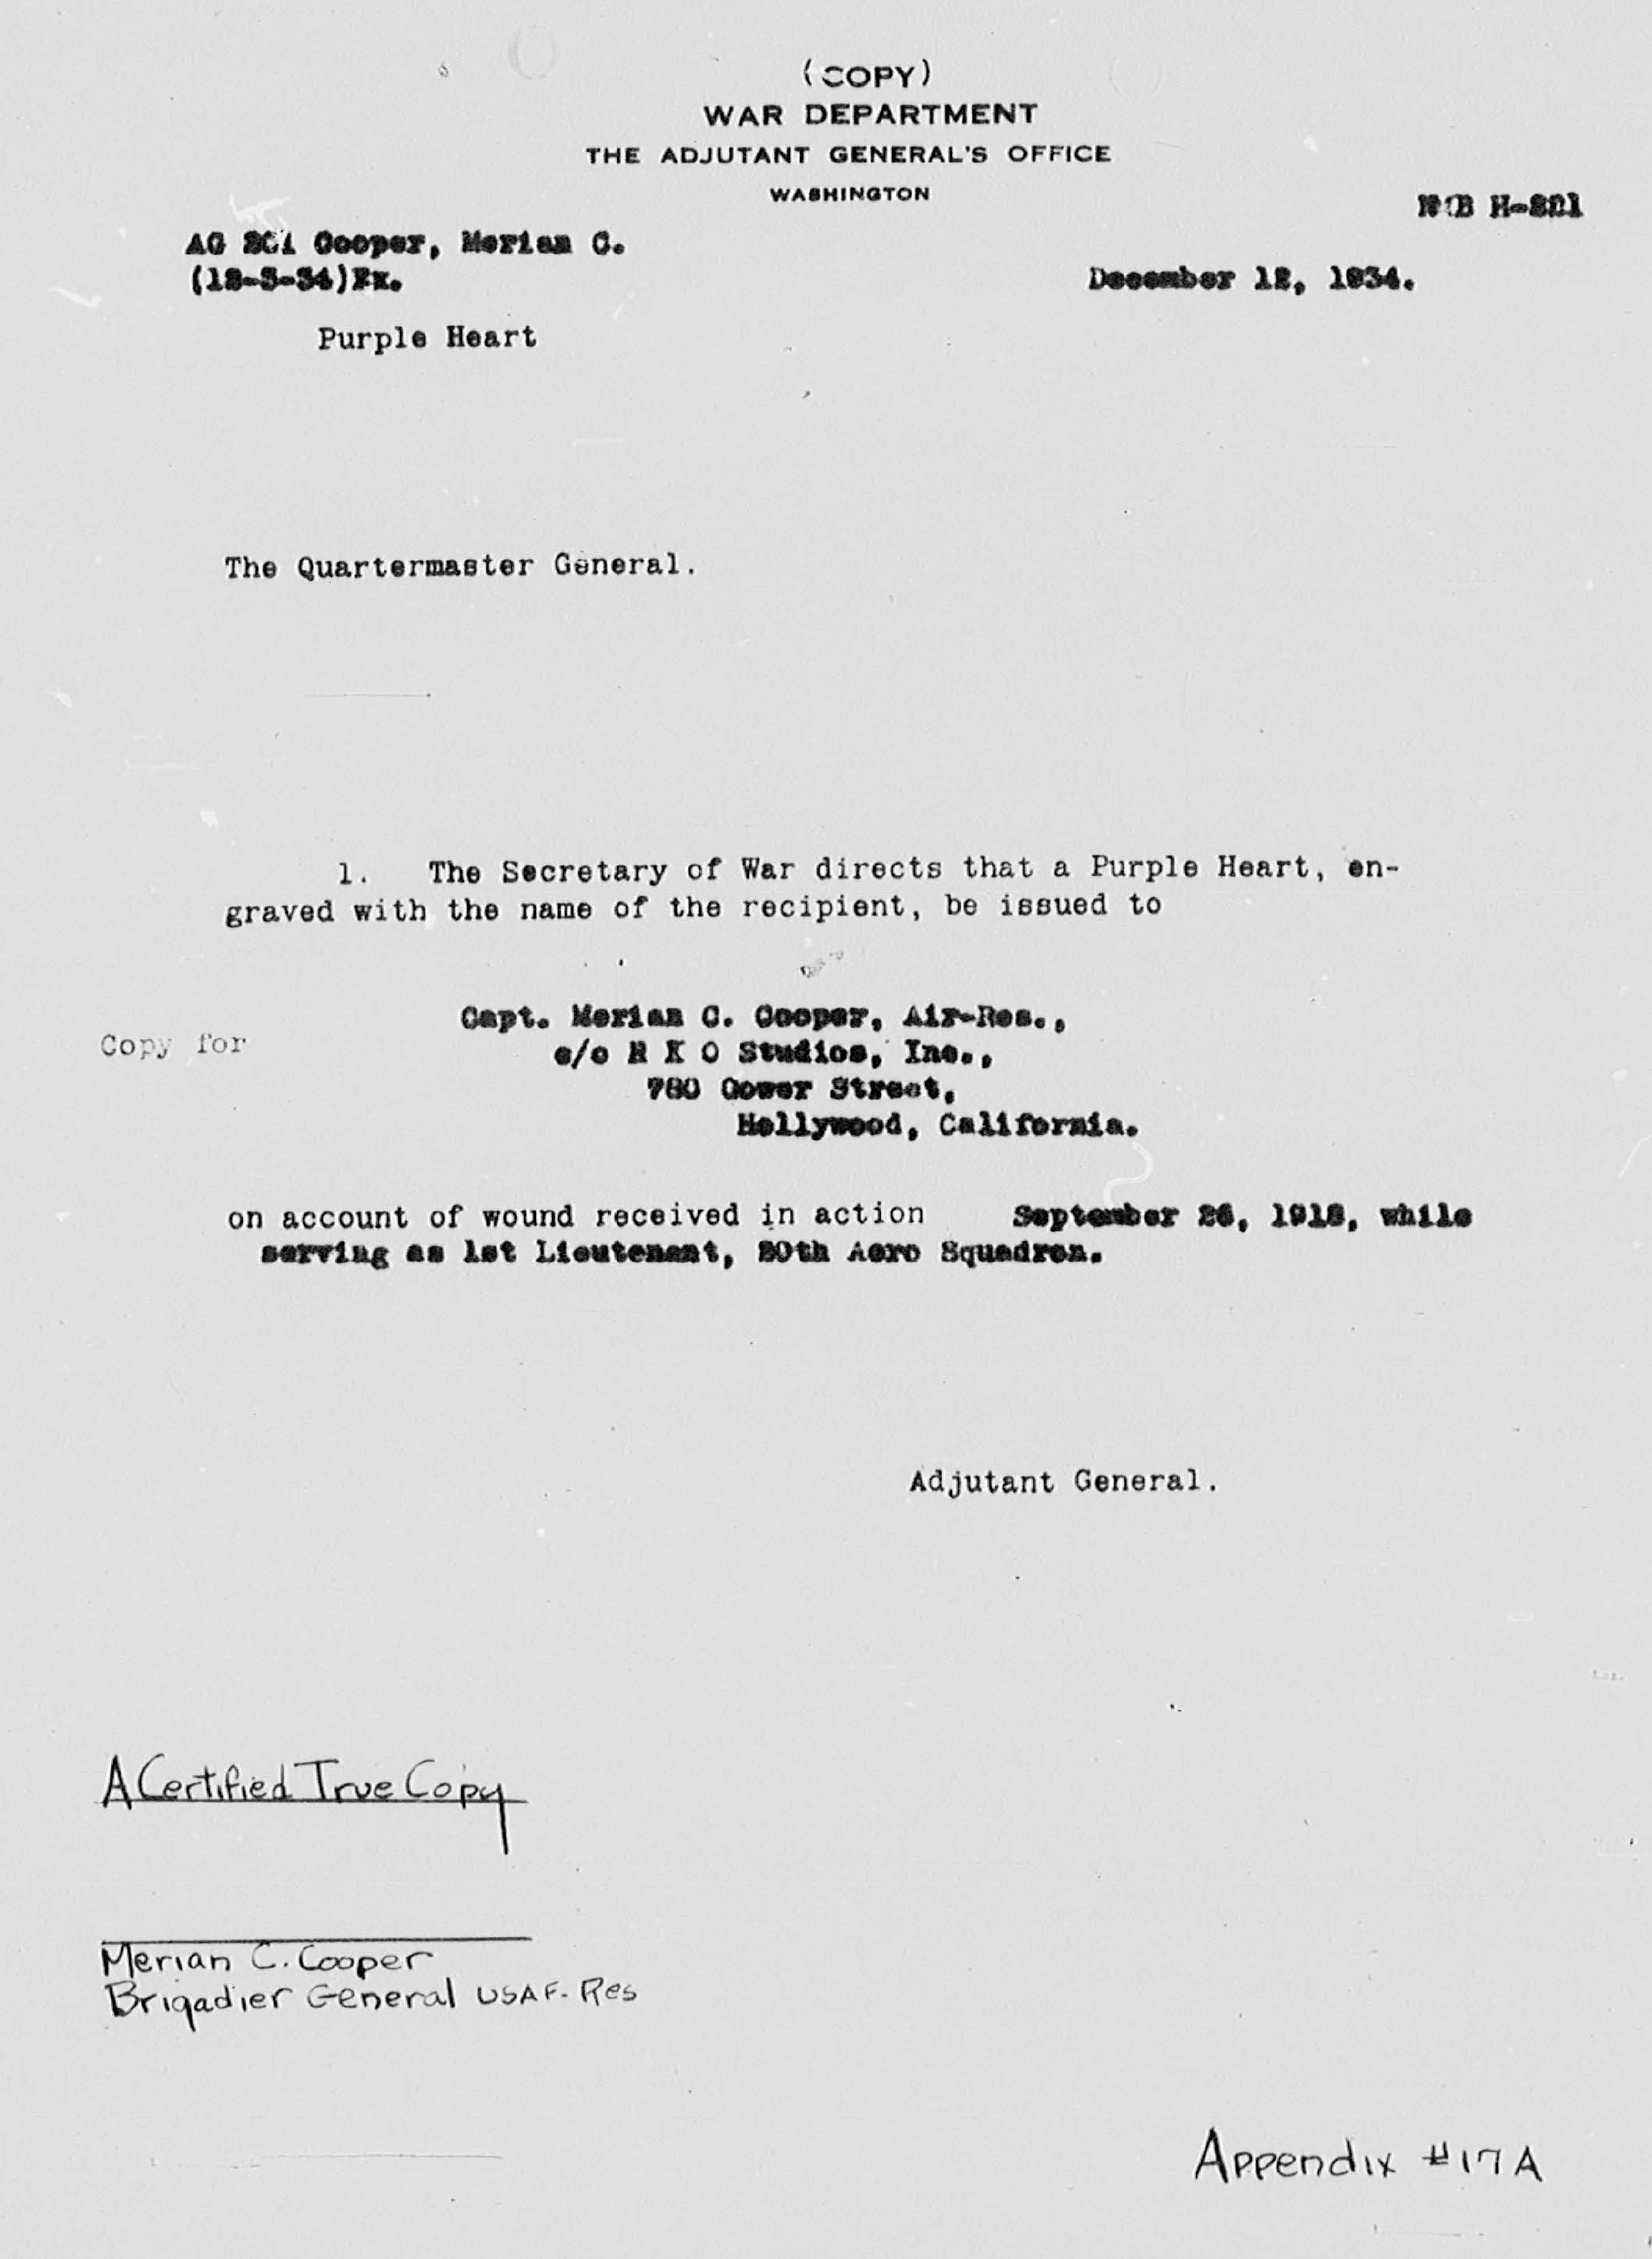
📜 Document granting Merian C. Cooper the Purple Heart


Cooper's attention soon turned to the work of the American Relief Administration, which had just launched a mission in the newly reborn Poland. The ARA was led by Herbert Hoover, who had visited Polish lands as early as 1913. In 1915, he sent Vernon Kellogg to evaluate the situation of civilians in war-ravaged territories.

The devastation was staggering - some regions had seen the front line cross them as many as seven times. Infrastructure was destroyed, agriculture had collapsed, and poverty and hunger were widespread. The worst affected were the poorest and the children.
Following the restoration of Polish independence in late 1918, the country faced not only military but also humanitarian challenges. Food prices soared, coal was rationed, and epidemics spread.

In response, on January 24, 1919, Congress passed a bill allocating $100 million for humanitarian aid - a figure that was later increased several times. It's a little-known chapter of Polish history, but this assistance saved hundreds of thousands of lives, especially among children.


🎨 Easter Market at Bernardyński Square in Lw?w (Lviv), painting by Tadeusz Rybkowski, 1895

When the first ARA representatives arrived in January 1919, they estimated that of the 27 million citizens, at least 4 million were starving, and millions more were undernourished. The situation in Lw?w (Lviv) was among the worst.

Lwiw, a predominantly Polish city, had been surrounded by Ukrainian villages. On November 1, 1918, with support from retreating Austro-Hungarian forces, Ukrainian units attempted to take the city by force and proclaimed the West Ukrainian People's Republic. The Polish population - mostly children, teenagers, women, and the elderly - offered fierce resistance. It took weeks of street fighting to drive the Ukrainians out, and the conflict continued until the summer of 1919.
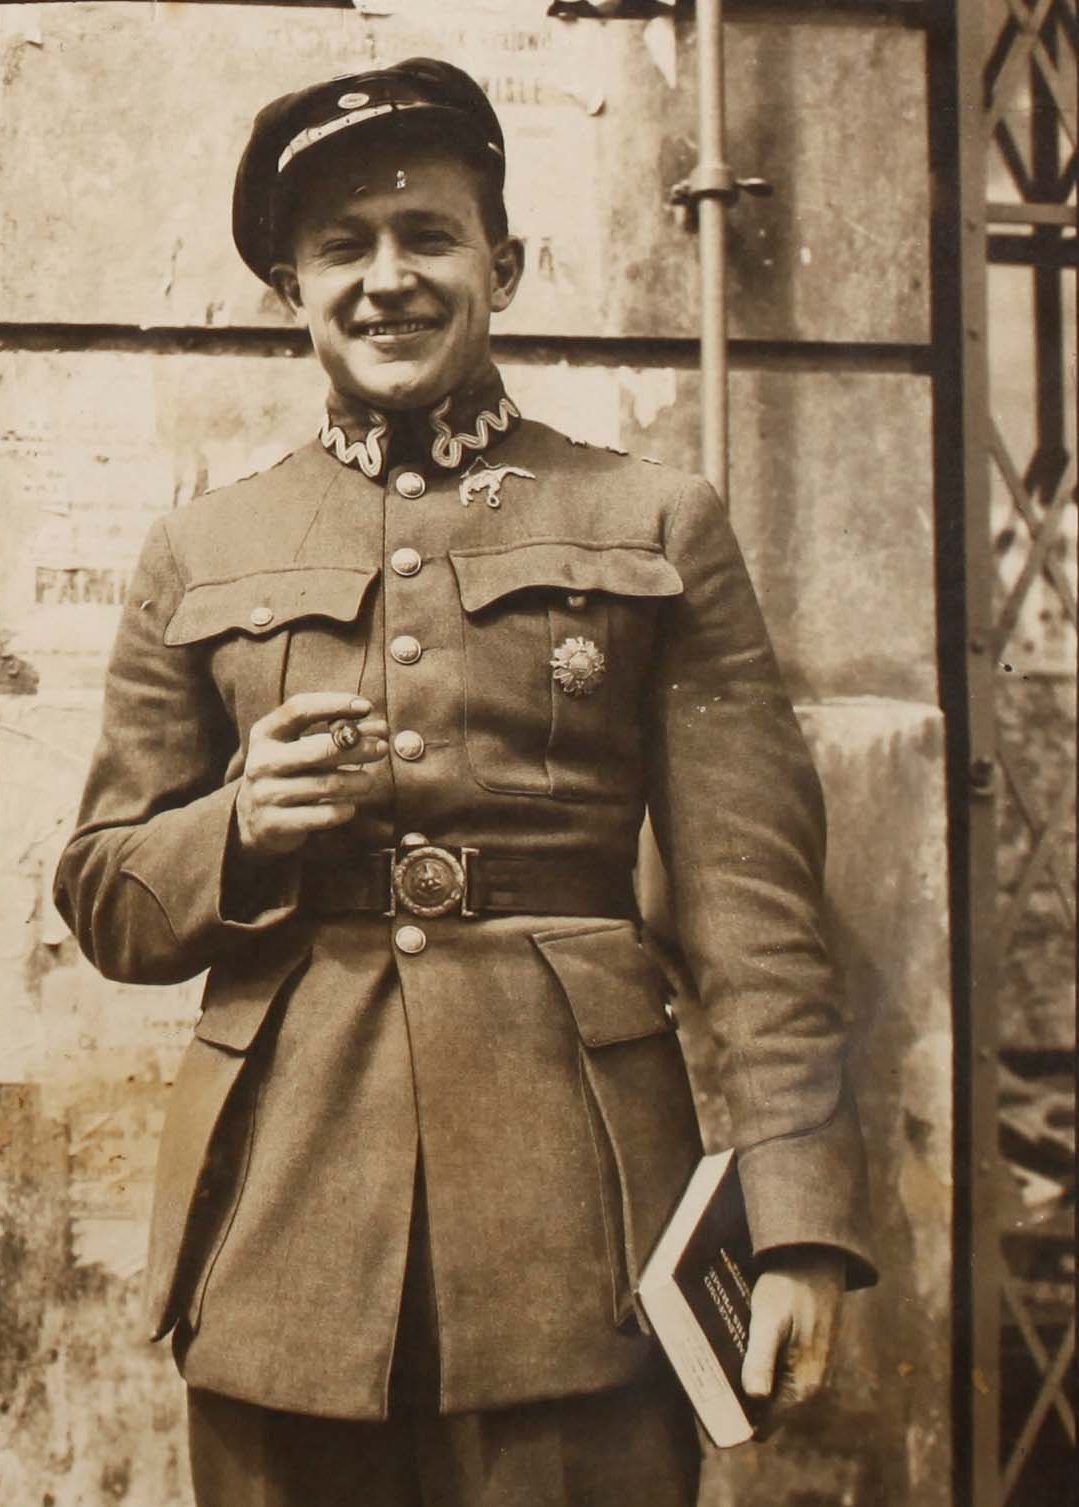

Merian C. Cooper

During the siege, Lw?w was cut off from supplies. There was no electricity, no medicine, and the only route from Przemyśl - known as the "railway of life" - was constantly under fire. Delivering aid to Lw?w became a priority for the ARA, and at the head of this mission stood Merian C. Cooper.

While no direct documentation has survived to explain why Cooper was chosen for the Lw?w post, evidence suggests that he volunteered, seeking to go where help was needed most. His determination and selflessness would show again and again.

Cooper officially joined the mission on February 12, 1919, and just two days later, he left Italy via Austria for Warsaw, and from there immediately on to Lw?w by train. It must have made a strong impression: he saw a war-torn city, crossed the front line under military escort, and shortly after arriving, witnessed a young woman die from a grenade blast.
Based in the Potocki Palace - later also the scene of a Kościuszko Squadron tragedy - Cooper led relief efforts with incredible energy. He personally delivered food to the most dangerous districts, fought corruption and theft, and was recognized as a skilled and fearless organizer.


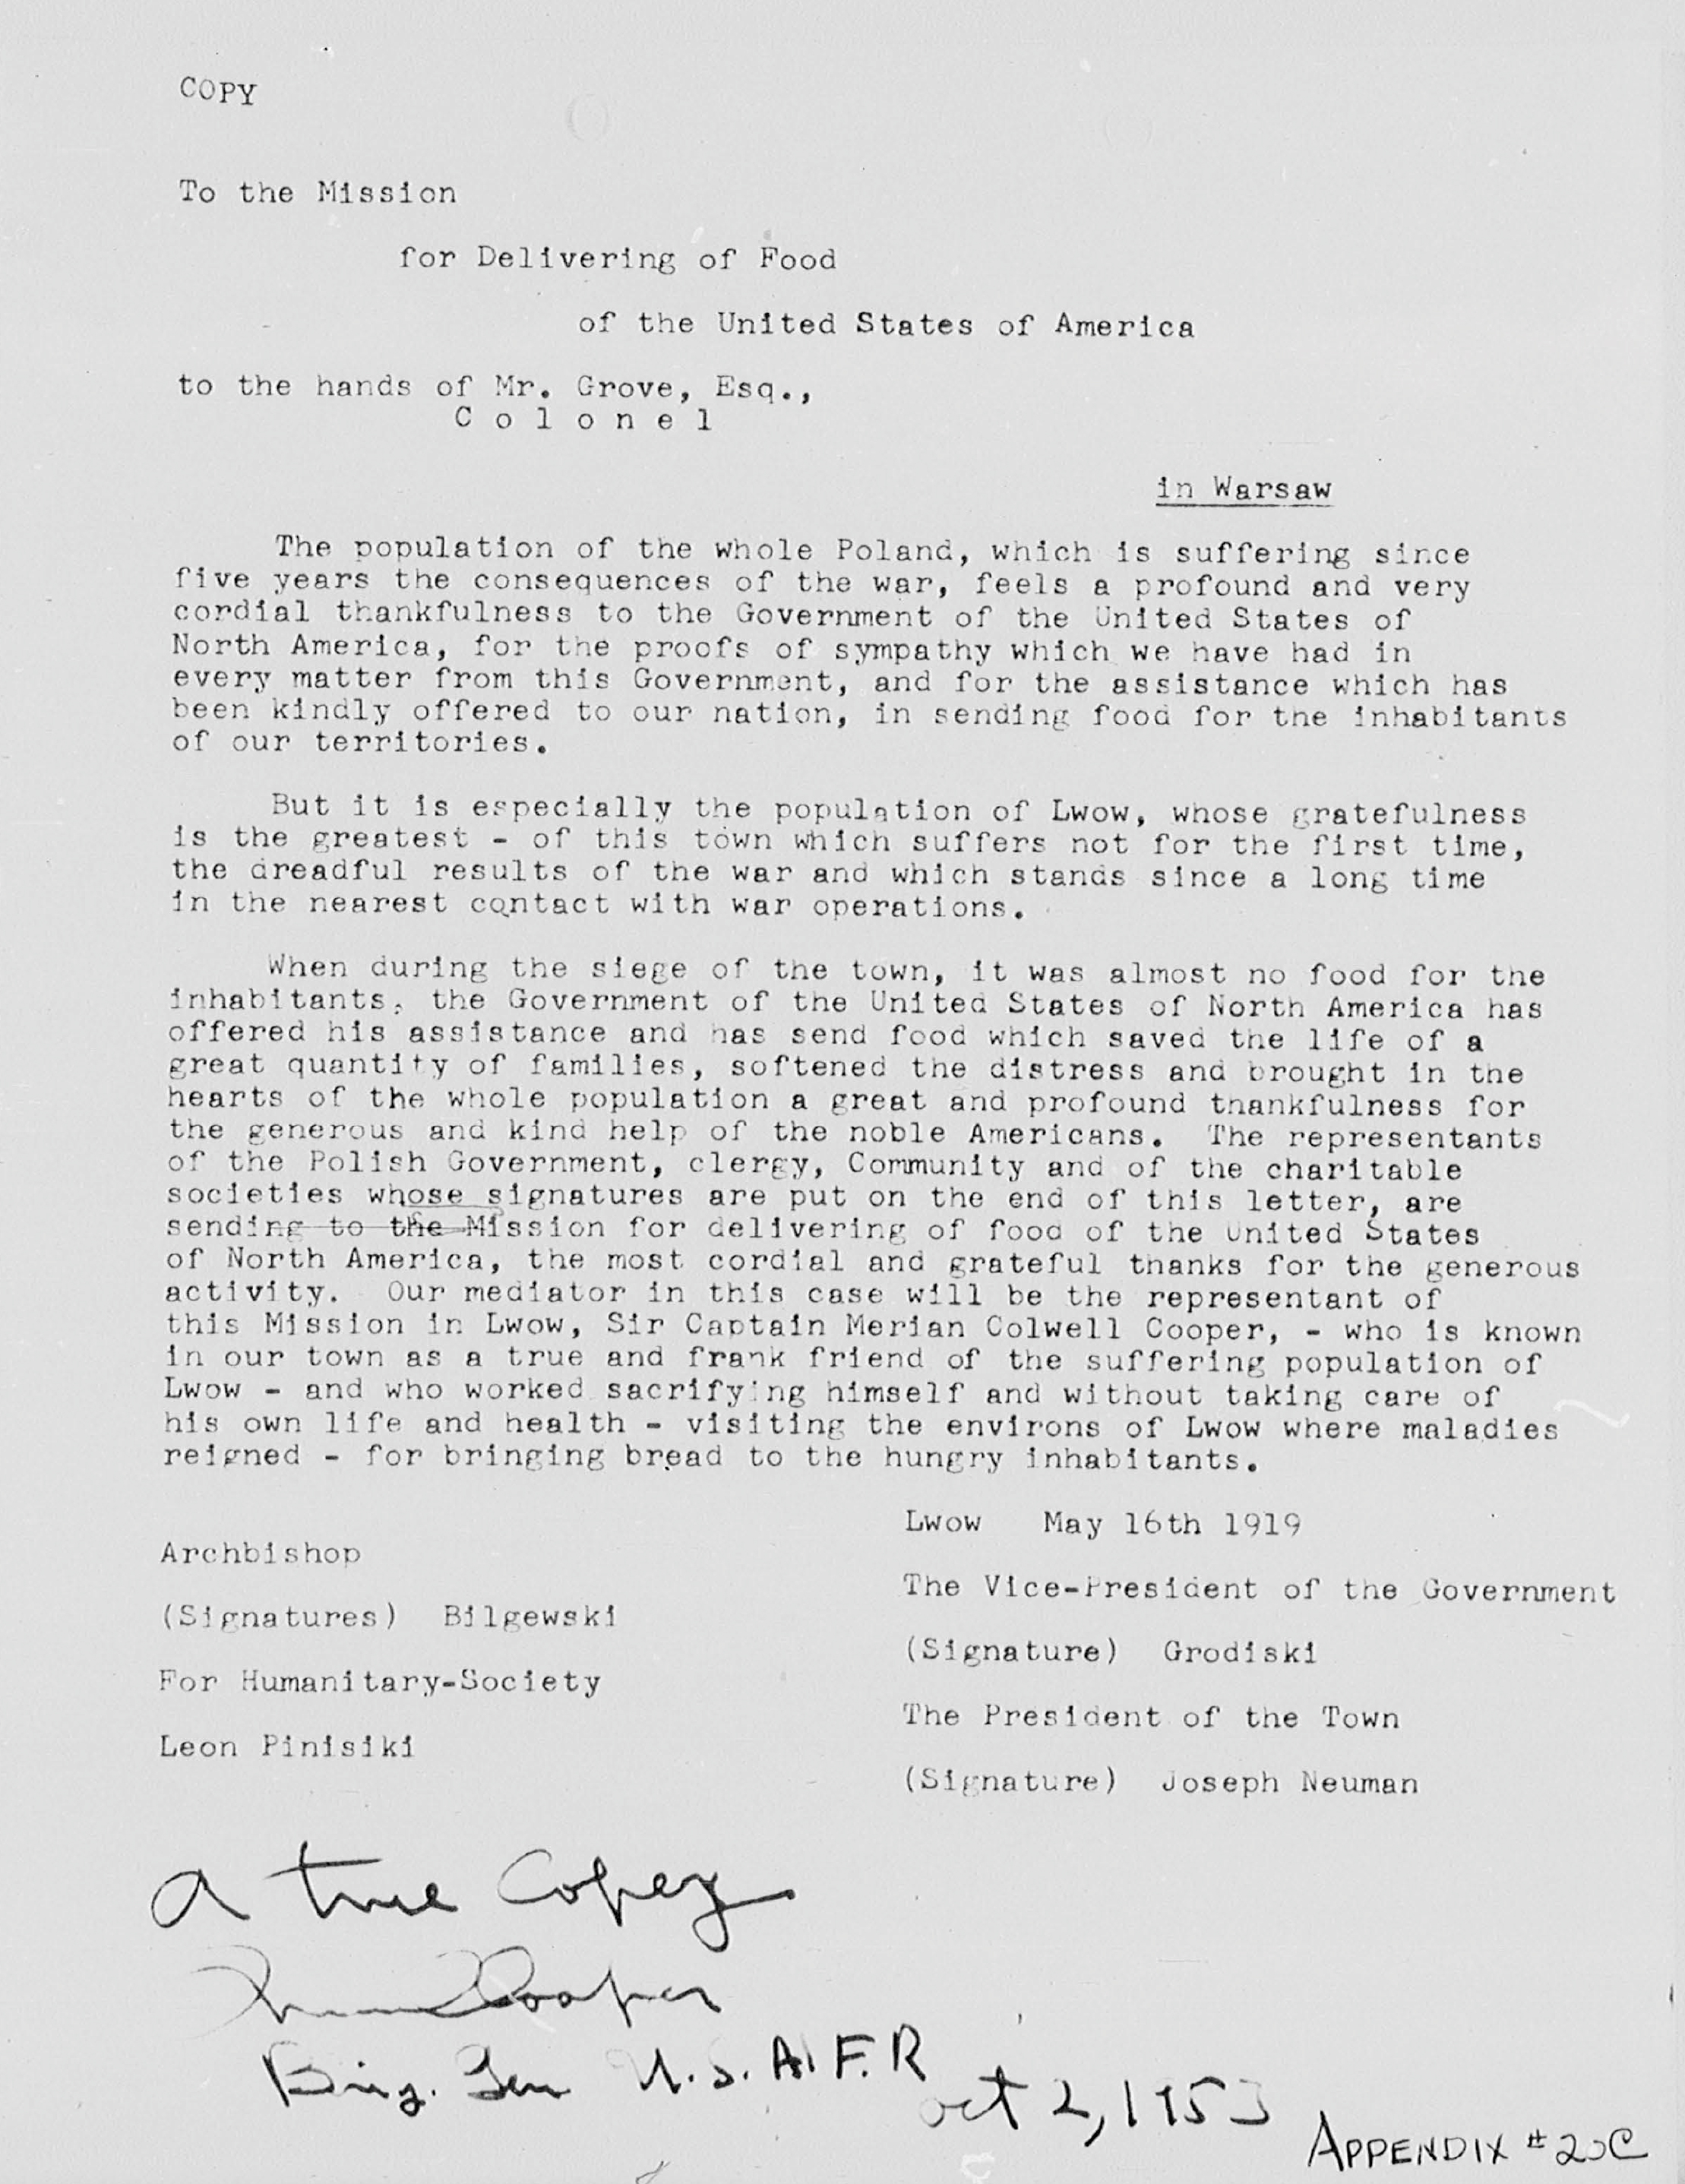
Today we know Cooper mainly as a soldier and pilot, but we must not forget his role as a humanitarian. In May 1919, the people of Lw?w wrote to the U.S. relief mission:


It's estimated that across Poland, U.S. food aid saved up to 1.5 million lives. Today, few remember that.

After three months of intense relief work, conditions in Lw?w began to stabilize. The war with Western Ukraine was ending, but a new threat loomed: the Bolsheviks. Cooper decided his humanitarian mission was complete - and it was time for more decisive action.
At that time, Eastern Galicia was under the command of General Tadeusz Jordan Rozwadowski, whom Cooper almost certainly knew personally. The two began discussing Cooper's possible enlistment in the Polish Army to fight the coming threat.


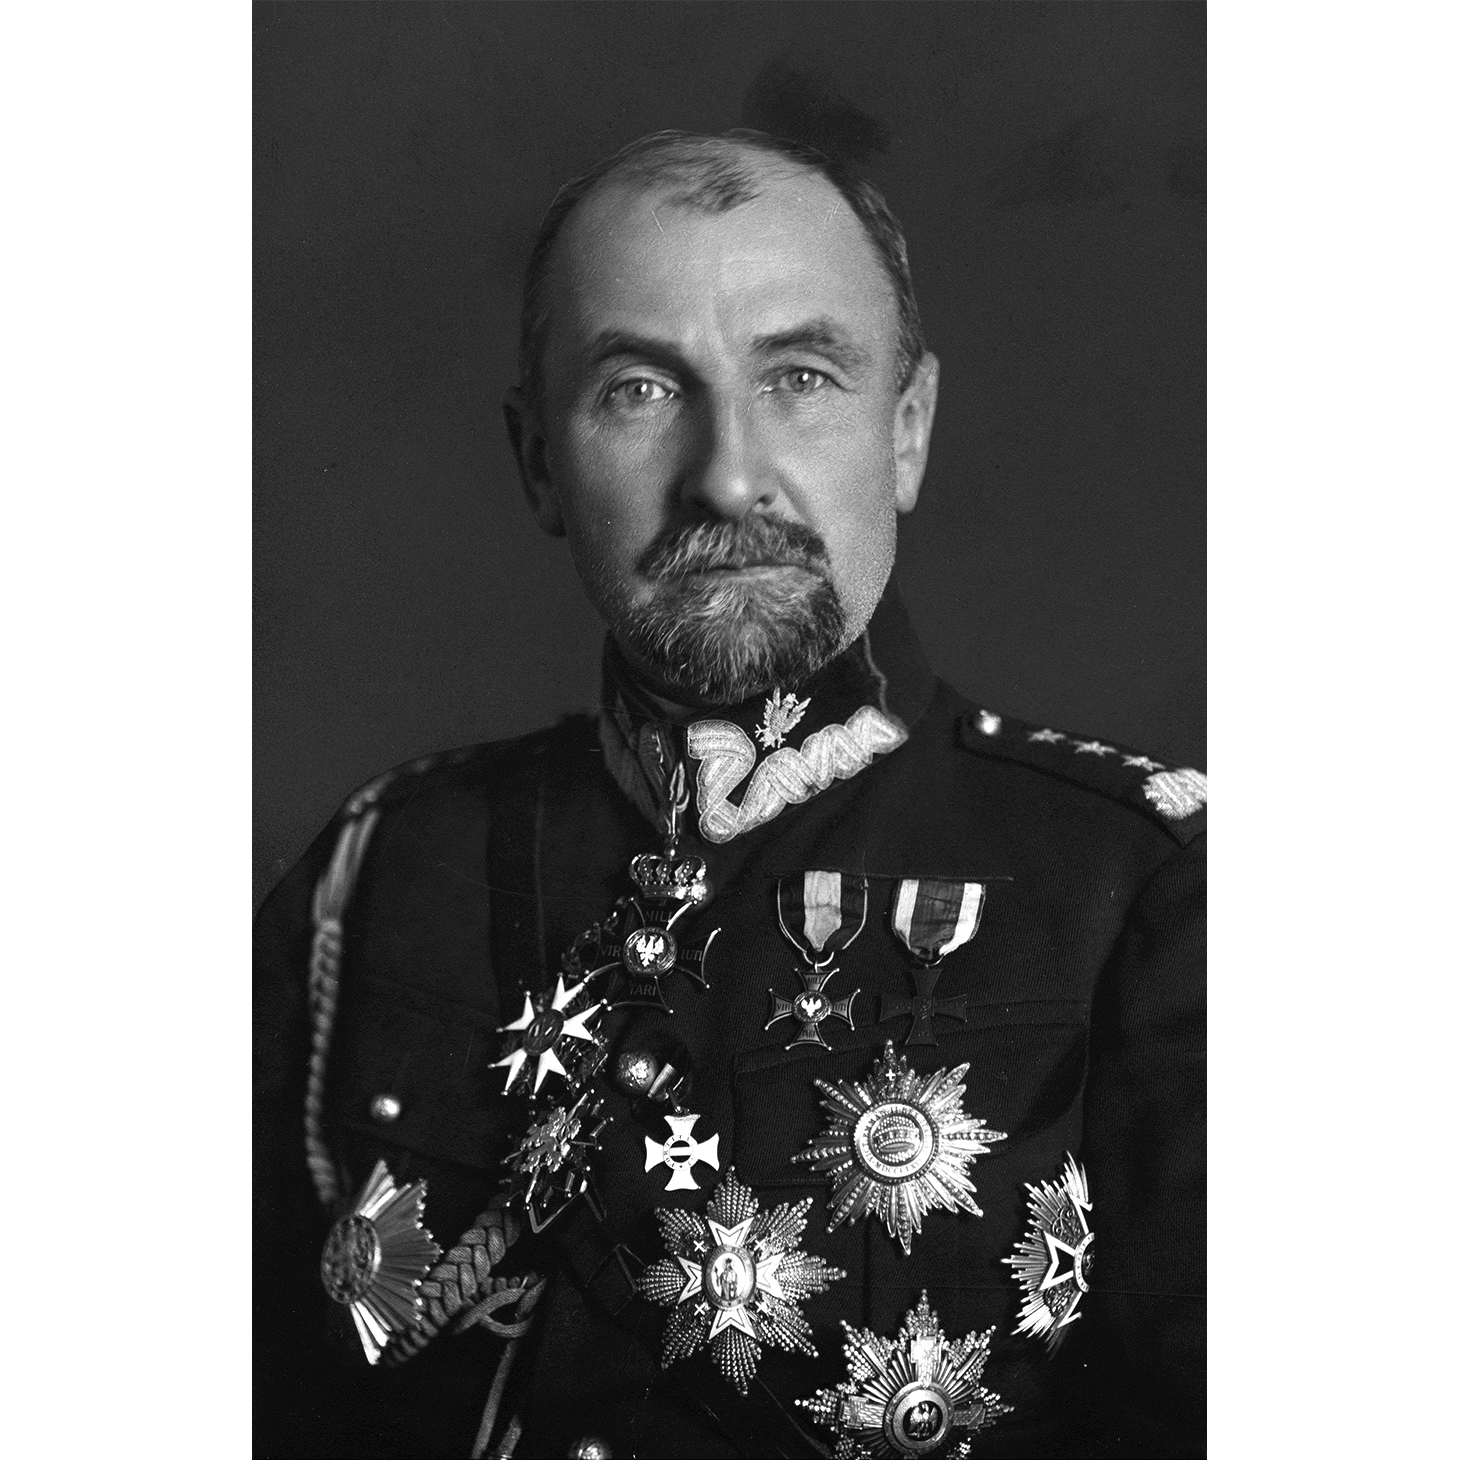
Gen. Tadeusz Rozwadowski

The idea of the Kościuszko Squadron was still in its infancy - but the first step was gaining the approval of J?zef Piłsudski.

To be continued...

____________________________________________________________________________________________________________________________________________________________________________________

Workshop update - Fuel tanks


The past few days I've mostly been working on the documentation for this model, preparing for the upcoming Moson Show. So not much happened in the workshop itself - but I did manage to make progress on one element: the fuel tanks.
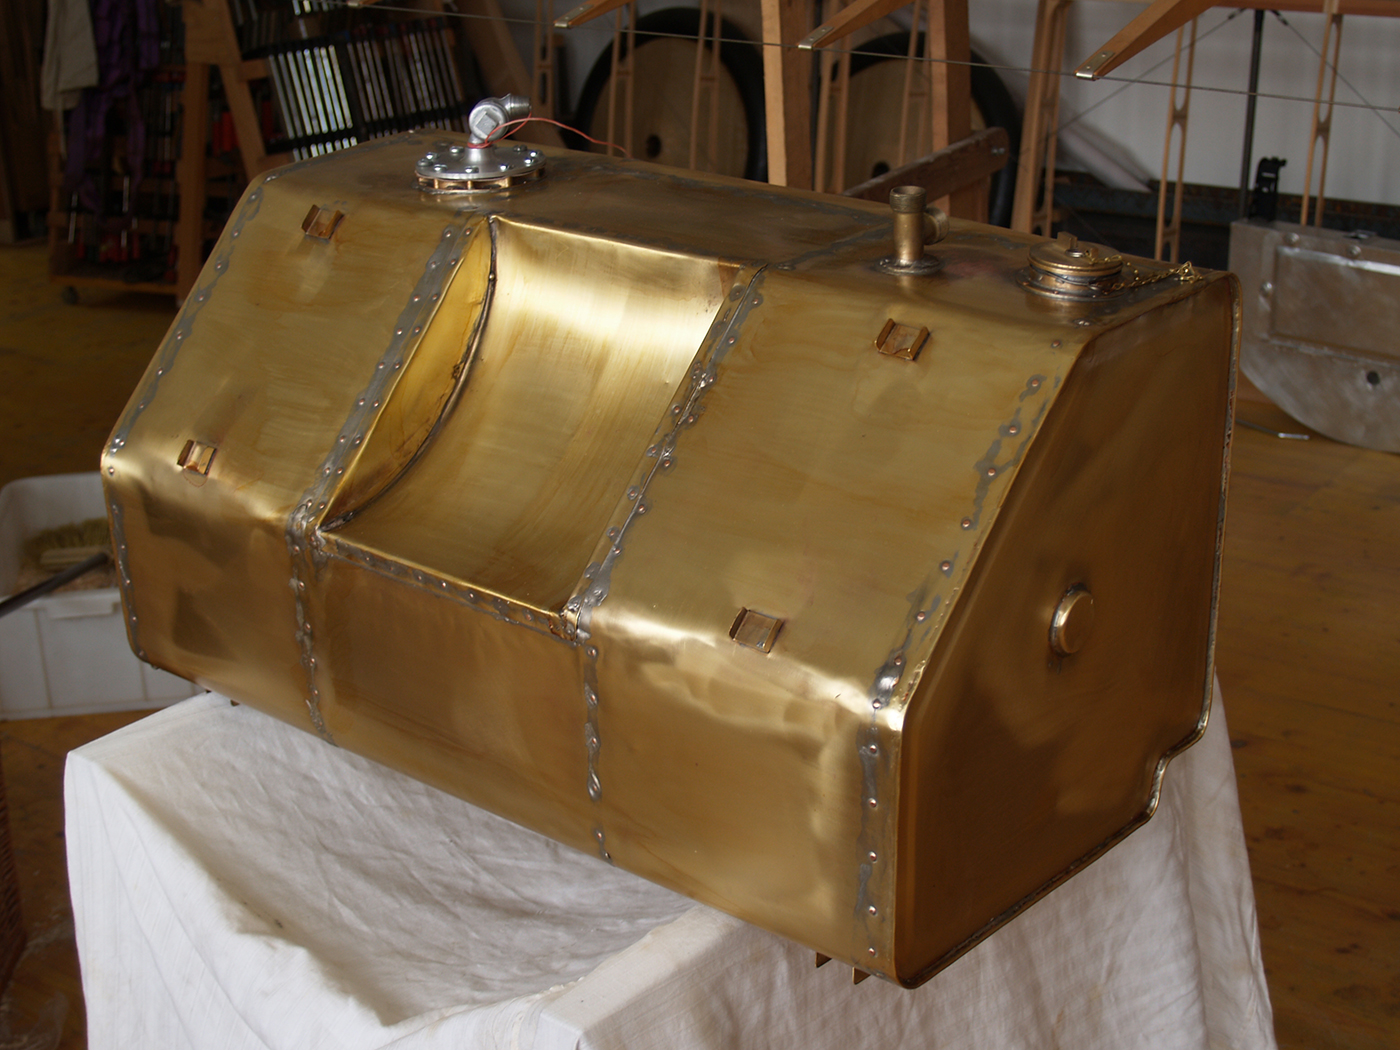
The rear tank, located deep behind the engine, will be barely visible in the finished model. The kit doesn't include it at all. Still, I decided to build it - mostly thanks to the excellent reference photos I received from Craftlab (huge thanks!).


Since I'm documenting this build thoroughly, even hidden details like this are worth doing.

I started by sketching the tank and the general fuel system layout - although I'll tackle the system itself later. For now, the focus is just the tank.


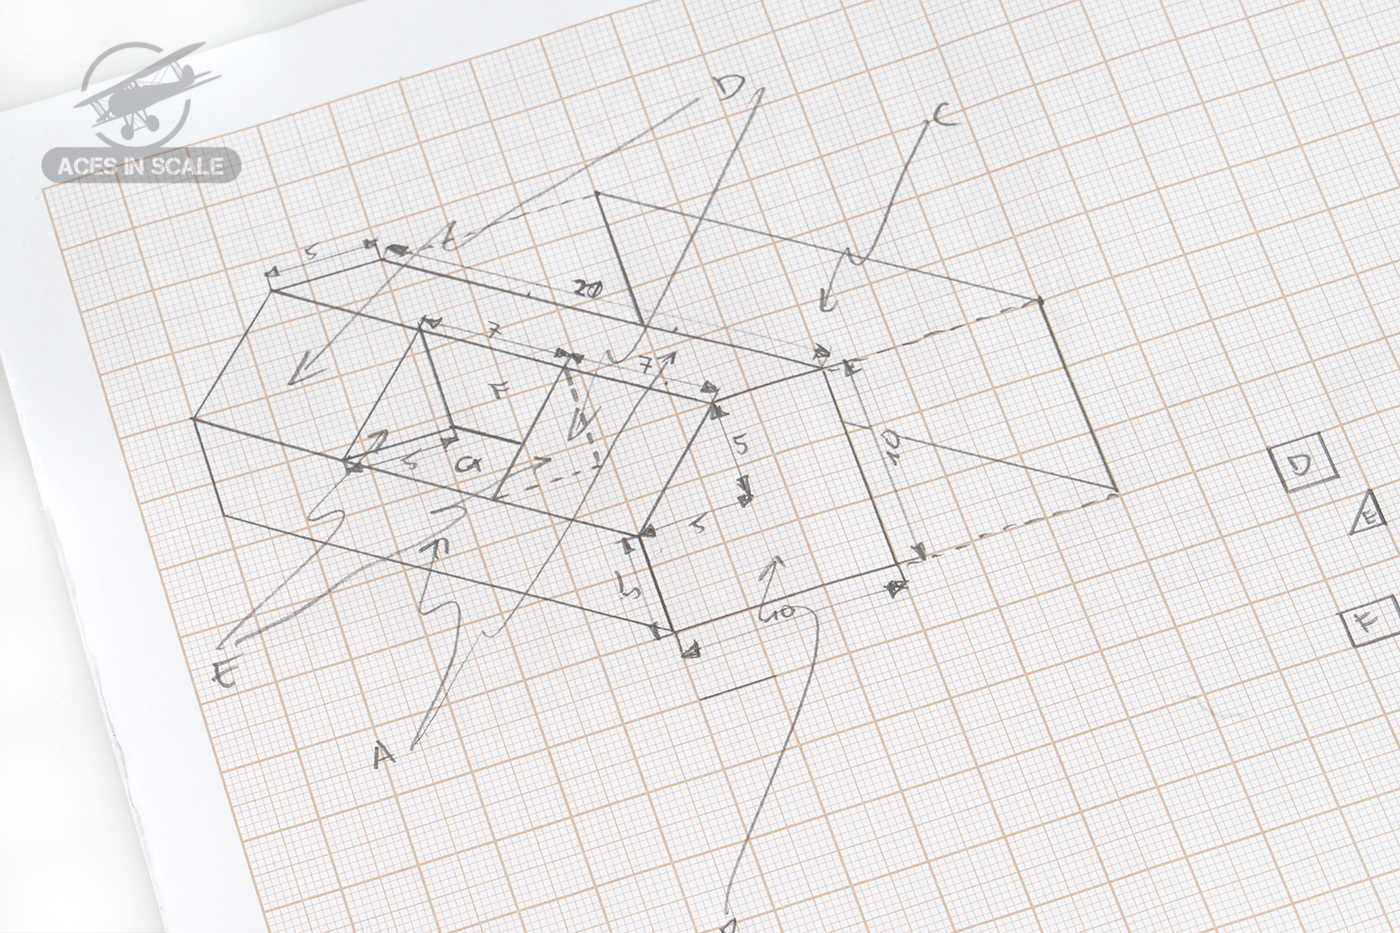
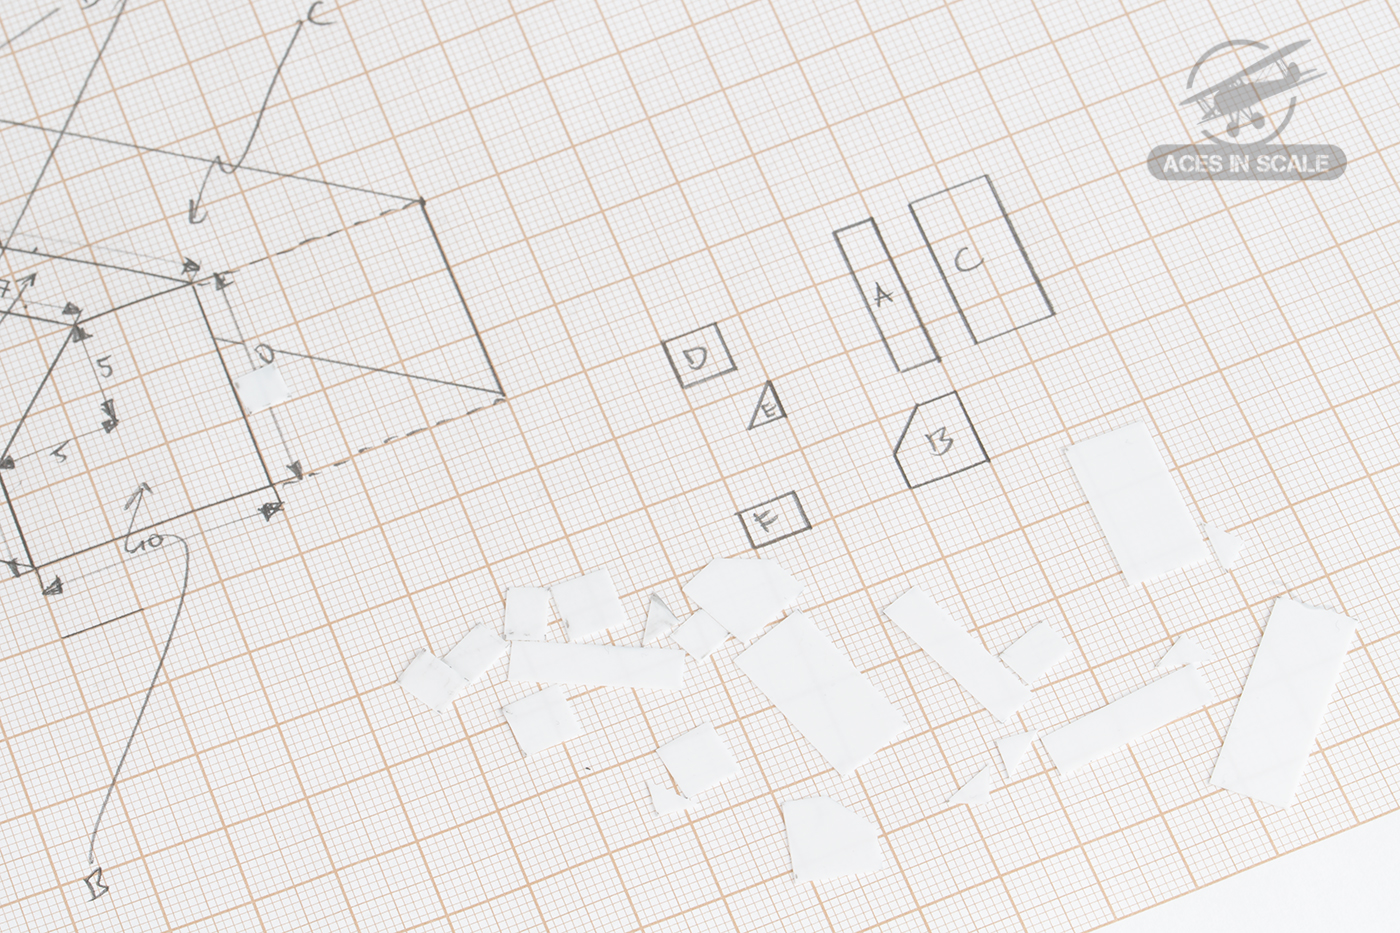
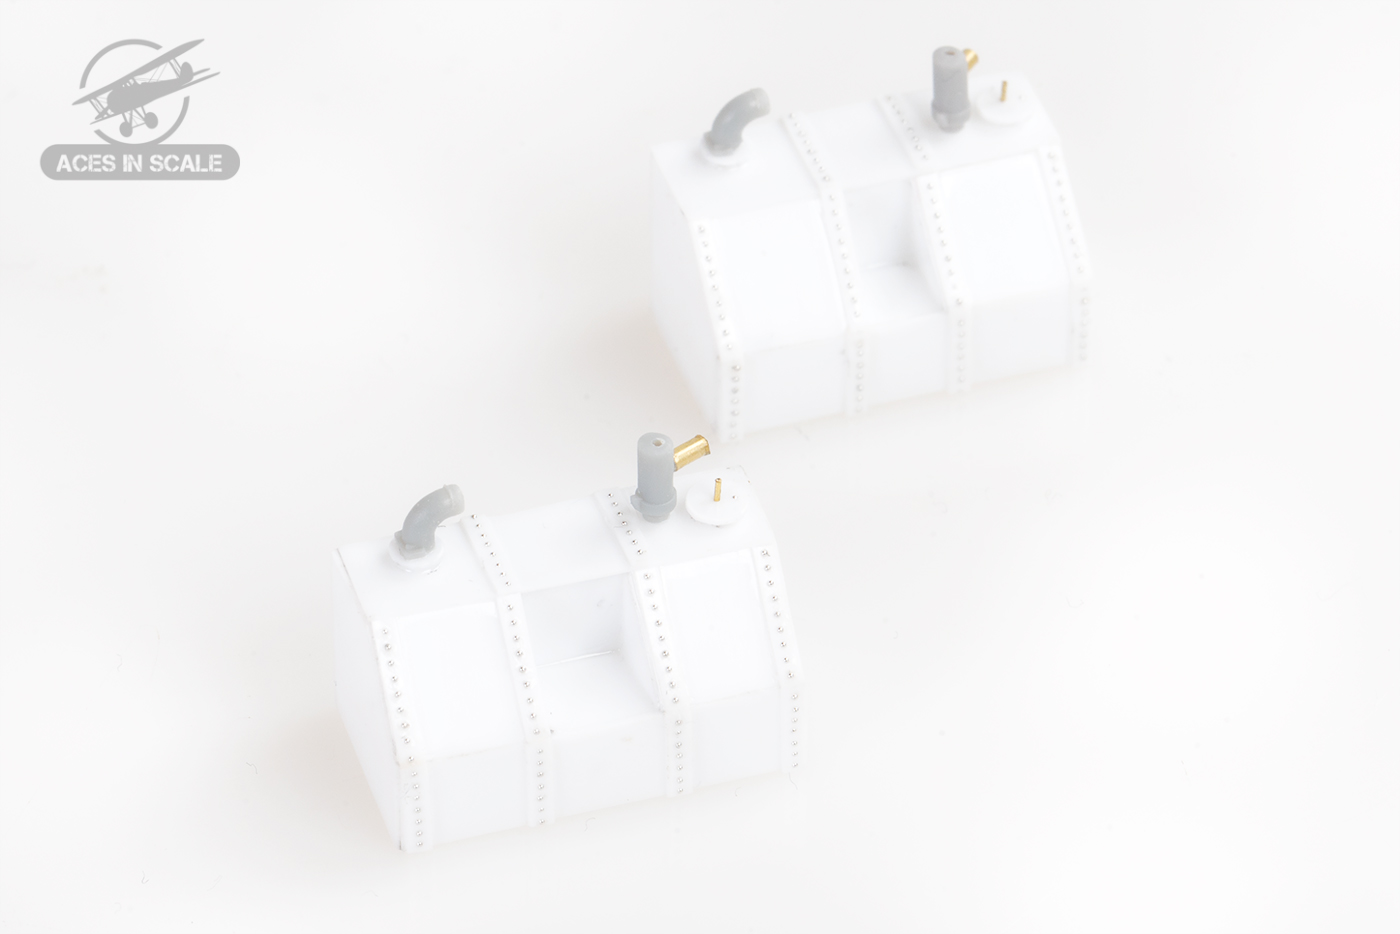
I cut all the necessary parts from polystyrene sheets of various thicknesses and began the painstaking box assembly. I simplified the curved recess in the center into a more angular shape for practicality.


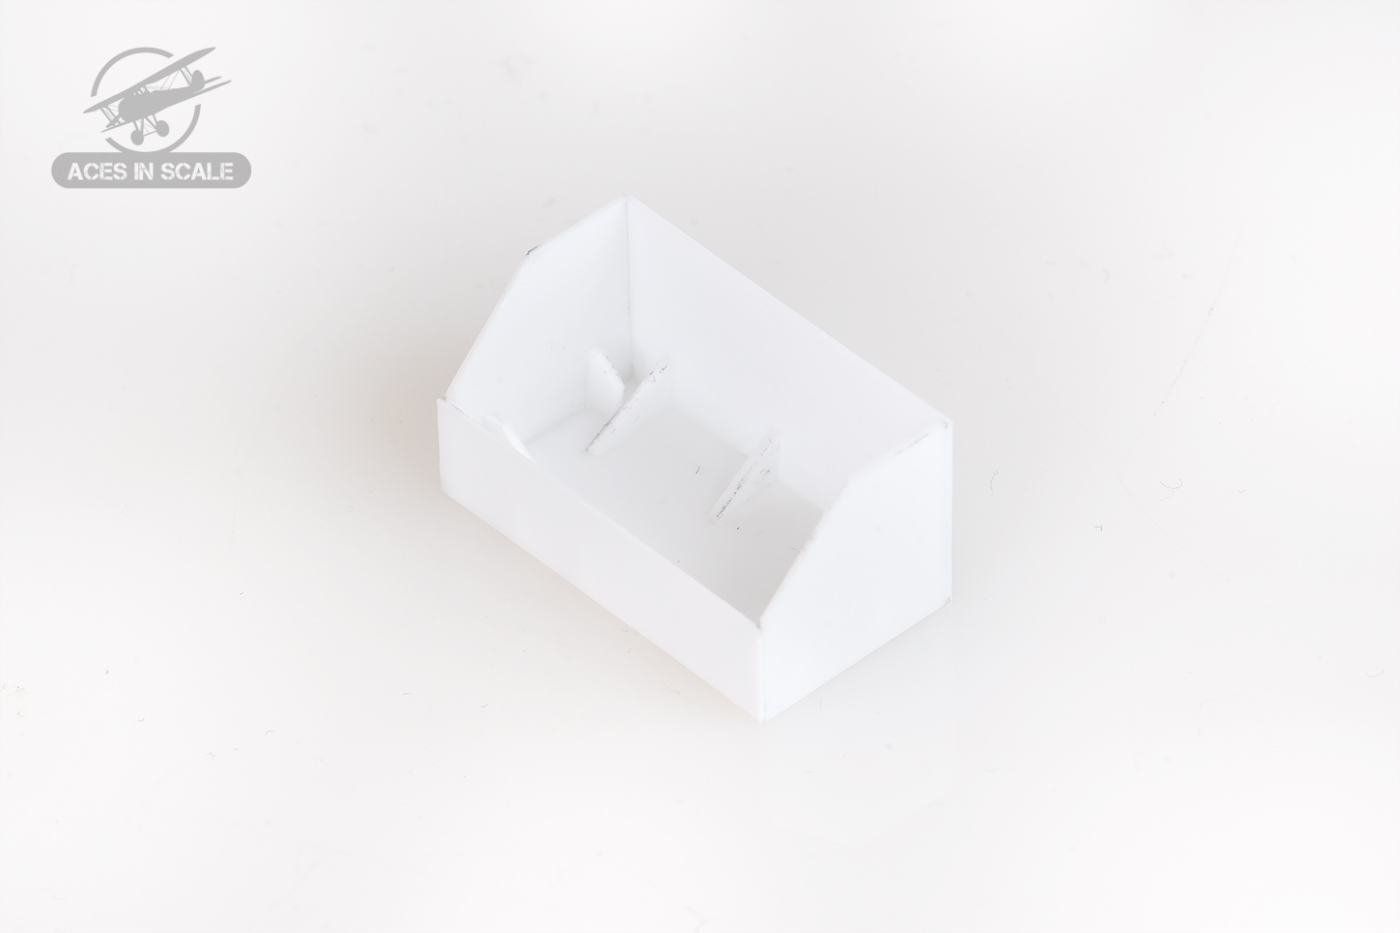
I reinforced the inside with braces to prevent collapse and ensure the structure was rigid. I also added fuel line connectors - leading to the gauges on the left side of the cockpit, the central area, and the engine. I scratch-built the filler cap using punches, scrap bits, and brass tubing.


Finally, I added clamps, filled the seams, and drilled all the rivet holes. First I marked them with a rivet tool, then drilled each one by hand. Then came the slow part - riveting both tanks.


That's it for today!

Cheers,
Łukasz
« Last Edit: April 22, 2025, 06:48:38 PM by Boch »

Offline FAf

  • Hero Member
  • *****
  • Posts: 1208
Thorough work on history and construction! Very interesting to read and see.
/Fredrik

Offline Boch

  • Full Member
  • ***
  • Posts: 158
Thorough work on history and construction! Very interesting to read and see.
/Fredrik

Thank you for reading. That's my goal. I want the construction of these models to serve some purpose. My small contribution to honoring the memory of those people.

Regards
Lukasz

Offline NigelR

  • Hero Member
  • *****
  • Posts: 1863
Excellent work and very interesting historical background.

Offline Boch

  • Full Member
  • ***
  • Posts: 158
Excellent work and very interesting historical background.

Thanks for reading. I'm glad you liked it all.

Regards
Lukasz

Offline AngryJazz

  • Hero Member
  • *****
  • Posts: 531
    • @AngryJazz_Models
Very impressive how you are making this kit come together with your modifications. Everything well thought out and planned  :)
//Ben - @AngryJazz_Models

Offline Boch

  • Full Member
  • ***
  • Posts: 158
Very impressive how you are making this kit come together with your modifications. Everything well thought out and planned  :)

Thank you verru much  ;)

Lukasz

Offline Boch

  • Full Member
  • ***
  • Posts: 158
Workshop update - Oeffag D.III

Moson threw me off the modeling track for a while - preparing documentation and the trip itself effectively pulled me away from the Oeffags. Luckily, I've recently had a few calm days in the workshop, which means it's time for a fresh update on the build of the two Oeffag D.III kits.

For quite a while, I've been analyzing the fuselage structure and eventually decided to make some small corrections - unfortunately, this required re-scribing all the panel lines. I've already gone through this painful process with the WnW Halberstadt Cl.II, where I had to scratch-scribe all the lines from scratch. The original model was completely bare in this regard, and the layout was complicated - many curved lines crossing tricky surfaces, often running parallel to planned rivet lines. Only the Almighty knows how many hours I spent on it... I was left with some memories and a mild trauma.


Still, I decided it was worth using that hard-earned experience - and deepening it further. In this scale, precise scribing is just part of the game, and Oeffags without nail lines simply don't feel right. The method for doing them was still an open question, but I had a better idea of where to begin.


I started by prepping a test fuselage in the final layout - one afternoon and evening of sanding, the next morning of scribing. To my surprise, the resin proved very friendly - no unexpected blade slips. That said, the success rate on the first pass was maybe 50%. With that optimistic knowledge in hand, I moved on to the actual fuselage halves - two came out nearly perfect, two needed adjustments. And so, the Halberstadt nightmare returned: putty, sanding, and retrying. In the end, after two full days, all the lines were re-scribed - except for those running across the joins, which I'll finish once the fuselage is closed.


The test fuselage had one more use - rivet wheel trials. The Oeffag is a real minefield of rivets - singles, doubles, triples, symmetrical, staggered... At this stage, I just wanted to see how the tool handled the quite hard resin. The answer: it's doable, but tricky and time-consuming. To get a better result, I hand-drilled each hole afterwards - and with 300 rivets times two models, this quickly became tedious. So, for now, I'm opting for decals - waiting for sheets from two different producers. We?ll revisit the rivet story later.

If you want to see a short video of the scribing process, you'll find a link in my footer- I've posted it on my socials.


Once the fuselage work reached this stage, I was finally able to start the long-awaited interior painting. This is a key moment - without properly finished interiors, I can't build the cockpit. The surface was thoroughly sanded - I try to eliminate all imperfections that could spoil the final effect.

The Oeffag interior is mainly plywood, with some metal parts near the cylinders. First up - grey primer 1500. Painting interiors is always a pleasant stage - if something goes wrong, it won't really show, and it's a great time for experimenting. That was the case here as well. But before getting into the experiment - I painted the interior in two shades of sand. Why two - Because aircraft of the era rarely had perfectly matched wood tones, and slight color variation adds life to the diorama, even if subtly. I used old AK paints (under their previous branding) - shades visible in the photos.


Now it?s time for shading - and this is where the experiment begins. I'll be doing the wood grain using oils. Oil paint is a mighty, underrated medium in scale modeling. In my opinion, it's a powerhouse for building surface depth - not just for streaks or wood simulation. With oils, you can paint wood using dozens of techniques. I'll use a method I've recently refined - based on an acrylic base. The shading will build contrast and a sense of wear similar to traditional painting, but the selection of tone and intensity is still being fine-tuned. I previously tested several shades, and I think there's still room for improvement. This time I'll use the fuselage interior to test - Dark Tan.


That's all for today...


Cheers,
Lukasz


« Last Edit: May 05, 2025, 08:50:48 PM by Boch »

Offline AngryJazz

  • Hero Member
  • *****
  • Posts: 531
    • @AngryJazz_Models
Rescribing a whole fuselage - wow! I can only imagine the time and effort. Scribing is one of the things I find the hardest, so I do see why you would get flashbacks  ;D
Looks incredible though  ;)
//Ben - @AngryJazz_Models

Offline NigelR

  • Hero Member
  • *****
  • Posts: 1863
More superb attention to detail, rescribing two fuselages is a lot of work, so well done!!

A question, and I don't mean to sound critical, but why did you not remove those clumsy locating lugs on the fuselage interior? They were one of the reasons I decided to put a pilot figure in mine (when I do it), because I was worried you would be able to see them through the cockpit opening. Are you happy they will be hidden by the rest of the cockpit details?

Offline Boch

  • Full Member
  • ***
  • Posts: 158
Rescribing a whole fuselage - wow! I can only imagine the time and effort. Scribing is one of the things I find the hardest, so I do see why you would get flashbacks  ;D
Looks incredible though  ;)

Yes, Halberstadt gave me a hard time. Fortunately, it went smoothly here so far, most of the lines were drawn, I just had to correct them. The most difficult was the one along the entire hull in an arc, but I managed. Thank you very much for your comment.

More superb attention to detail, rescribing two fuselages is a lot of work, so well done!!

A question, and I don't mean to sound critical, but why did you not remove those clumsy locating lugs on the fuselage interior? They were one of the reasons I decided to put a pilot figure in mine (when I do it), because I was worried you would be able to see them through the cockpit opening. Are you happy they will be hidden by the rest of the cockpit details?

Many thanks for the kind words. As for the strips positioning the cockpit elements, I know that they will not be visible. Here, dry assembly of the model pays off. Thanks to this, I managed to clarify many things before the actual painting and assembly. Everything that will be in the cockpit will be mounted in such a way that nothing will be visible. Nevertheless, positioning the elements in the cockpit makes assembly quite easy, so you can calmly think this over during your build.

Regards
Lukasz

Offline gedmundson

  • Hero Member
  • *****
  • Posts: 1760
Fabulous work & research, Lukasz.
Cheers,
Gary