Author Topic: Airfix DH4 with Blue Rider DH9 conversion, and Pegasus DH4 double build  (Read 10175 times)

Offline IanB

  • Hero Member
  • *****
  • Posts: 2435
I'm starting a double build on another site as part of a De Havilland group build, so thought I'd post it here too.
I'll be on vacation back home in UK from 26th until May 16th so I'll get an initial post done now as there will be no updates until after my return.

Geoffrey De Havilland was born in my hometown of High Wycombe, in Buckinghamshire so I've always had a soft spot for his aircraft. Wycombe was, historically, a furniture town and most of the factories were converted to aircraft parts manufacture for the duration. Obviously there was a good supply of skilled woodworkers in the town, and many more came in from other areas.

His father was a church minister, and Geoffrey was born at Magdala House, (now Terriers Green House) at Terriers, near Hazlemere on 27th July 1882.

(reference "High Wycombe's Contribution to Aviation" by David Scott and Ian Simmons, 

My subjects (yes, I'm going to attempt 2!) are:

First, the Airfix (actually MPC boxing) of the DH4, with the Blue Rider DH9 conversion.


This will be built as a 144Sqn aircraft based in Ramleh, Palestine (now Ramla, Israel) in September 1918


My reference:


and some after market goodies in the form of Miniworld guns and Gaspatch pilot's seat

So what do we have to be going on with?

I'm sure most of us are familiar with the old Airfix kit. It's actually pretty accurate shape wise, but unfortunately when I pulled it out to check it, I noticed that the wings were a little warped....


Taking into consideration the amount of work required to remove all the surface detail and fill the strut attachment points I decided it would be easier and quicker to scratch build the wings - I don't think much of this kit is going to be used! 

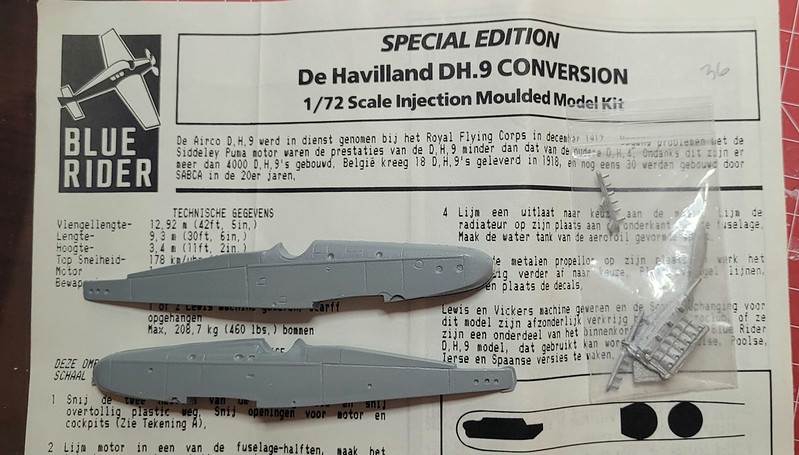
The Blue Rider fuselage is, to put it politely, a tad thick....


but the detail is nice and it matches plans, so that's a bonus!

I've made a start on preparing the fuselage and making new wings as those tasks represent quite a bit of work before construction can even begin, although no construction will be done until after the build start date.

First the fuselage:

Blue Rider do provide a template for the engine and cockpit openings


so that was photo copied and cut out. The fuselage halves were taped together and the template was attached to give me the guide I needed to mark the plastic that needed removing.


I marked the edge of the black areas with a fresh number 11 blade. The plastic is quite soft so that was easy enough and that gave me my cutting references.

I started with the engine as for some reason I thought that would be easier. No idea why I thought that!

Cutting the plastic away was fairly easy. As mentioned above the plastic is fairly soft so I used a micro saw to cut the ends then scribed it with the blade just within the lines until eventually I could snap it out. It was then shaped with blades and files to the correct outline. Once the shape was complete, I had to thin the edges considerably. Much cutting out of lumps and scraping with a curved blade eventually reaped results.


getting there.....


With both sides done it was then fine tuning to get the engine to fit.


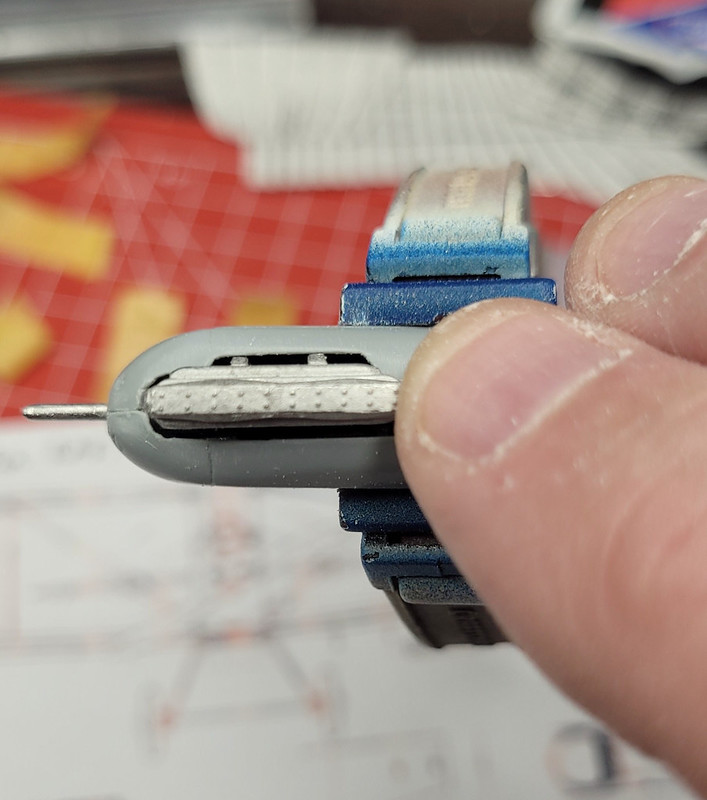
That will do! The engine will be detailed later as part of the build proper.

Then it was time to attack the cockpits. Again saw cuts front and rear, and careful scribing with a blade until I could snap the main piece of excess plastic away, and then fine tune with blades and files as before, followed by much scraping of the fuselage insides to reduce their thickness!

One side done


and completed.


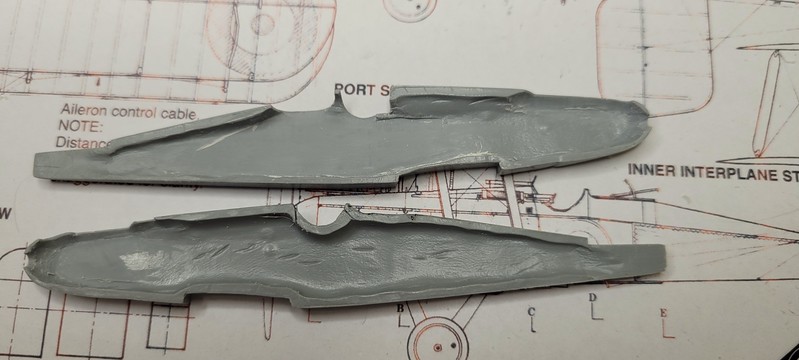
I also removed the step under the fuselage where the wings would mount.

  a) because my scratch built items won't need it, and b) because it increases the depth of the interior, also making it flatter. The gap will be filled and the wings attached seperately with brass pins. I had started to adjust the gap to fit the wings before it struck me which is why one is slightly bigger than the other!

Wings were cut from 1mm sheet and shaped by sanding and filing. I am still in the process of thinning the trailing edges.


That is the end of play until return from hols.

The second build will be the Pegasus DH4 kit.


This will be built as a Liberty-engined US aircraft, Number 6, of 50th Aero Squadron. The pic below is number 5 but is basically the same except 6 didn't have the name on the nose.


This was the aircraft flown by 1st Lt Harold E Goettler and 2nd Lt Erwin R Bleckley in their final resupply mission to the "Lost Battalion" (which was neither lost, nor a Battalion, but they were surrounded) and during which they both lost their lives. Both were posthumously awarded the Medal of Honor.

 It should be noted that this was not their usual machine, that being Number 2, but that had been so badly damaged in previous resupply missions earlier in the day that it had to be retired, hence they borrowed number 6, the usual mount of Lt Floyd M Pickrell and Lt Alfred C George.

References:


What I have to build from:


That's it for now, see you mid May for the continuation of this madness!


Ian

Offline lone modeller

  • Hero Member
  • *****
  • Posts: 5300
Not one but two very interesting projects here Ian: I will be following along.

Stephen.

Offline DaddyO

  • Sr. Member
  • ****
  • Posts: 473
Also going to join in with the DH cookup on the other channel (not sure what yet but probably the old DH6 vacform I picked up recently)  ::)

Progress on these two looking good so far Ian. (I may have the old Pegasus kit in the stash which I'll have a look for)

Cheers
Paul
There cannot be a crisis today, my schedule is full

Offline Rip Van Winkle

  • Sr. Member
  • ****
  • Posts: 369
I will be watching too. Your posts are extremely informative and helpful.

Offline Tim Mixon

  • Hero Member
  • *****
  • Posts: 819
  • Main focus is 1/72 WWI
I’m watching with great interest as well Ian. I’ve built the Pegasus DH-4 but it got busted up pretty bad during a move several years ago.
The Blue Rider conversion is very nice and your doing a first rate job with it.  Looking forward to your next post. 
Hoping you have a very relaxing vacation!

All the best,
Tim

Offline Tim Mixon

  • Hero Member
  • *****
  • Posts: 819
  • Main focus is 1/72 WWI
What is the other site BTW?

Offline IanB

  • Hero Member
  • *****
  • Posts: 2435
Thanks for the interest gents!
Tim, the other site I post on is Britmodeller. A very friendly and helpful site with lots of good advice/feedback, similar to here.

Ian

Offline KiwiZac

  • Global Moderator
  • Hero Member
  • *****
  • Posts: 2589
    • My Linktree
I am very interested and excited! A great start and fascinating to follow - I'm a DH fanboy so always happy to see that family pop up. I'm eager to see your scratchbuild wings for the 9, and to see how the 4 goes together (one of those kits I've lusted after but never quite pulled the trigger on).

Offline RAGIII

  • Hero Member
  • *****
  • Posts: 18793
I am just joining in on the party! I always enjoy watching your processes on these old kits and you are Not disappointing Me with these two!
RAGIII
"A man has to know his limitations": Harry Callahan

"Don't slop it on" Lynda Geisler

Offline IanB

  • Hero Member
  • *****
  • Posts: 2435
Right, where were we?
First of all, a huge thank you to Colin@freightdogmodels for sending me his newly printed decals for the Pegasus DH4. Totally unexpected, and very welcome!

I had to extend my stay in UK as my Uncle passed away while I was in Guernsey with my brother and sister. We didn't have a will so my sister and I had to go through the house searching for one. Not found, so now she has to take on the tasks of getting everything sorted.

Today I finally got back to the bench and made a little more progress on these two. First the 9:

The gap in the fuselage halves where I'd removed the moulded attachment points was filled with plastic card and then given a coat of PPP to smooth it all out. Then I smoothed off the inner surfaces of the fuselage sides and added a false floor to hide the seam,


The recesses for the main landing gear legs were filled with UV resin and cured with my mini light sabre, then PPP was added to finish it off. Final finishing will be done once the fuselage halves have been mated.

I then took a look at the Pegasus DH4 fuselage. It too needs a bit of work!


Lots of flash, and the insides need thinning a little around the cockpit edges but nothing major there. The main issues here are:
a) The rear fuselage is too deep at the tail end.

b) The pilot's cockpit is only correct for the RAF 3a engine version. For the RR Eagle and Liberty engines the cockpit was a little further back so that will have to be changed.                     

Plus, of course, I will have to chop the nose off and replace it with the Liberty engine nose, but that will be done once the fuselage has been joined. Or, that is the plan at present anyway!
I made a start on the first of those issues this afternoon. This is what needs changing.


The slope on the rear fuselage aft of the observer's position was also increased to meet the tail end correctly.
Here I have one half done and compared to the original.


That's it for now, slow but sure!
Thanks for looking in!

Ian
« Last Edit: May 26, 2023, 04:36:08 AM by IanB »

Offline KiwiZac

  • Global Moderator
  • Hero Member
  • *****
  • Posts: 2589
    • My Linktree
Thanks for sharing this update Ian - I really want to get examples of the Airfix and Pegasus DH4s for myself - although I'm very sorry to read of your uncle's passing and the unfortunate consequences.

Offline RAGIII

  • Hero Member
  • *****
  • Posts: 18793
Sorry to hear of your Family's Loss Ian.  It is great to see you back on this project. Your work to date is excellent as always!
RAGIII
"A man has to know his limitations": Harry Callahan

"Don't slop it on" Lynda Geisler

Offline pepperman42

  • Hero Member
  • *****
  • Posts: 4431
  • Sergeant, my brown pants.......
First off, sorry for your loss. I hope your family can sort things out the best they can. Secondly it's fun watching you take Palaeolithic Airfix kits and combine them with Mesolithic conversion kits.

Steve

Offline lone modeller

  • Hero Member
  • *****
  • Posts: 5300
My condolences to you and your family Ian concerning your recent loss.

It looks as though you are giving your usual close attention to very small details that are a hallmark of all of your models. I remember converting the Airfix DH 4 to a DH 9 using an Airfix Magazine article a very long time ago and it was nothing like as accurate as yours will be. Looking forward to more updates.

Stephen.

Offline IanB

  • Hero Member
  • *****
  • Posts: 2435
Many thanks to all for your thoughts. Things are progressing as well as can be expected and my sister has the reins, as it were.

I have been fairly quiet modelling wise of late, but I have managed a little more these last couple of days.
Further progress on the DH4 fuselage....

I decided after trial fitting of the nose that it would be better to remove it prior to joining the fuselage halves as the new nose pieces are not exactly matched in length. Another factor is that the kit nose is slightly off square


I checked the fuselage against plans and it appears the error is the forward face of the nose, not the upper panel, that is off square, so the cut was made perpendicular to the top of the fuselage using my mitre box, after first overlaying the new nose piece and marking the cut line with a fine marker. Of course I cut on the waste side of the line like a good woodwork student was taught at school!

 I have cleaned up the replacement nose pieces, thinned the rear lower edge which should be open, and opened up slots for the cooling gills with a razor saw.


I'm happy with that! Another thing I found is that the nose pieces are slightly narrower than the fuselage. Fortunately the error is with the fuselage so the two sides were gently sanded on their mating surfaces to get them the same as the nose. It will be easier I think to fit the nose after the fuselage has been joined. I will leave the front of the fuselage forward of the cockpit unglued so I can get the best possible fit and minimize the need for filler. I have already taped the parts together and sanded them to get a square fit - I really don't want a bent nose!

I previously mentioned the need to move the cockpit aft slightly and work has started on that too.


You can see here how much off it was.

I tried to use UV resin to extend the forward edge. It went on OK, or so I thought. I had to add it with a toothpick then zap it with the light for just a fraction of a second to set it, then twist the toothpick to separate it. It was built up fairly quickly but I noticed how thick it was getting.


This stuff is a pain to sand and in the end I just snapped the whole lump off and started again with my faithful Mr Dissolved Putty. It takes longer and can be easily broken off later if handled badly, but it works well. Once it's all done I'll give it a thin coat of thin CA to add a little more strength.


Does anyone know what can be added to Mr Dissolved Putty to thin it once the pot starts drying out? It's expensive stuff to have to bin it after less than half a pot has been used!

That's where I am at the mo' and I'm off work today. Since the new cockpit is drying I may take a look at the DH9 wings.

Thanks for looking in!


Ian