Author Topic: 1/32 Royal Aircraft Factory BE 2a  (Read 13265 times)

Offline lone modeller

  • Hero Member
  • *****
  • Posts: 5300
Re: 1/32 Royal Aircraft Factory BE 2a
« Reply #105 on: March 06, 2023, 06:23:00 AM »
Evening All

Thanks Riche, Dave and Zac for dropping by - your kind comments are much appreciated.

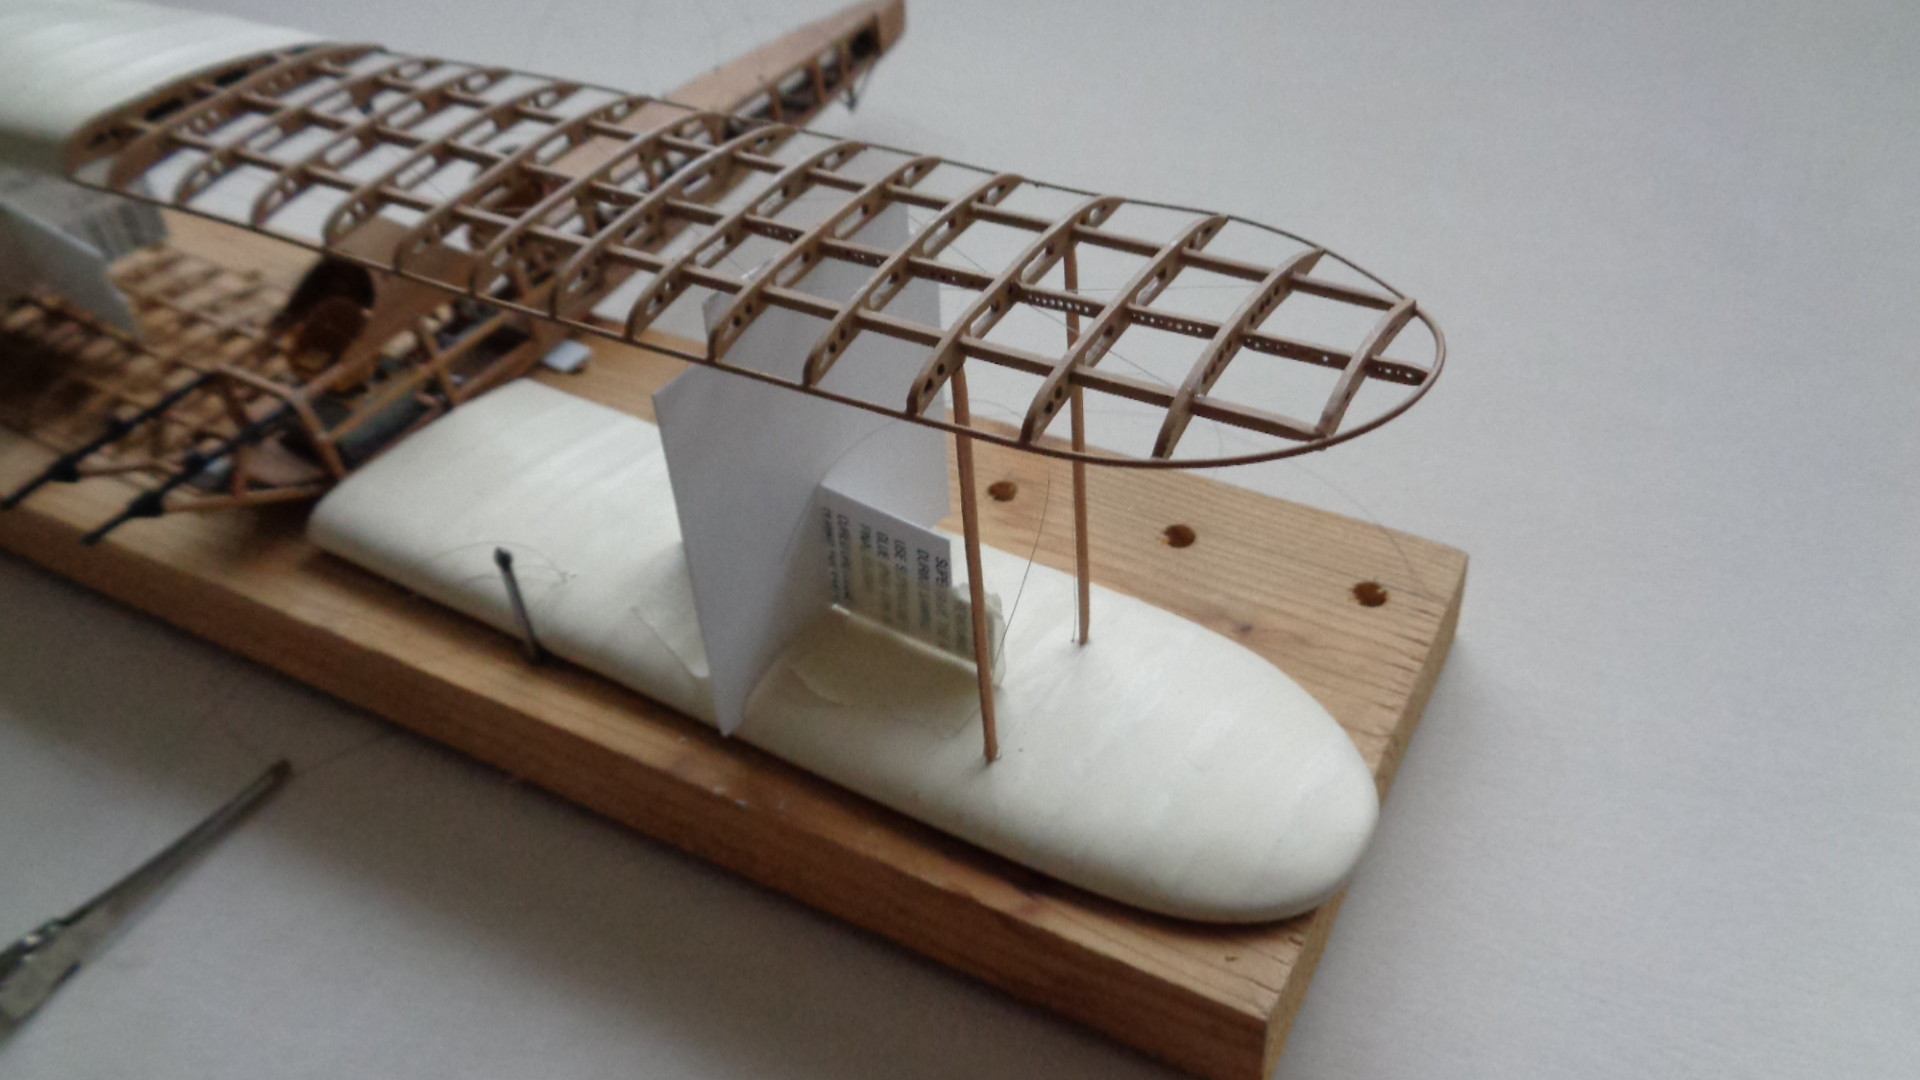
I wanted to drill the upper fuselage decking so that I could insert the cabane struts later, but when I started to work on the wood it split.... It had dried out since I steamed it to shape (see earlier post), and I was unsure what to do. I tried twice to cut and start to shape a new piece of wood but they split as well, so I decided to do what I had intended to do after I had originally made the piece - I put in a piece of 10 thou clear acetate and glued the two halves together. I was then able to drill the holes for the struts using a new drill bit and a fine round file. I also reduced the size of the struts where they entered the holes to keep the holes as small as possible. Two very narrow strips of wood were CA'd to the top of the fuselage frame and the decking CA'd to the wood strips and frame.


  And then I realised that I had not put in the instrument board......aaaaarrrrrggggghhhh! After a lot of filing and fiddling I managed to get the board into place under the decking: it cannot be seen very clearly which is just as well as it is not quite in the correct place, but as they say in scratch building, close enough is good enough, (especially when it is partially obscured!)


   Adding the top wing is probably the most trying part of building biplanes in any scale, and with a model as large as this one, jigs are necessary. The model also needs to be stable while fitting struts and wings, so I dug out my old jig which I had used previously for my Gunbus and D. H. 1A: a board with three nails in it. The spar on the exposed lower wing can be slotted over the nails and a third nail used to lock the leading edge of the covered wing: the model was then rigid and stable. Two card jigs were cut to support the upper wing while struts were put into place. The struts were made from two laminated sheets of marquetry wood: individual struts were cut as strips and then shaped with a file and glass paper:


    I am using the same sheet of wood for all of the wood parts on this model which is why I was concerned about the upper decking on the fuselage: I have a relatively limited supply left and I still have to cut the fuselage frame pieces behind the pilot's cockpit.

   One end of the struts was drilled so that I could insert a thin wire to fit into holes drilled in the solid parts of the wings: the other end was CA'd straight on to the exposed ribs. I put the four outer struts in first to create a stable structure:


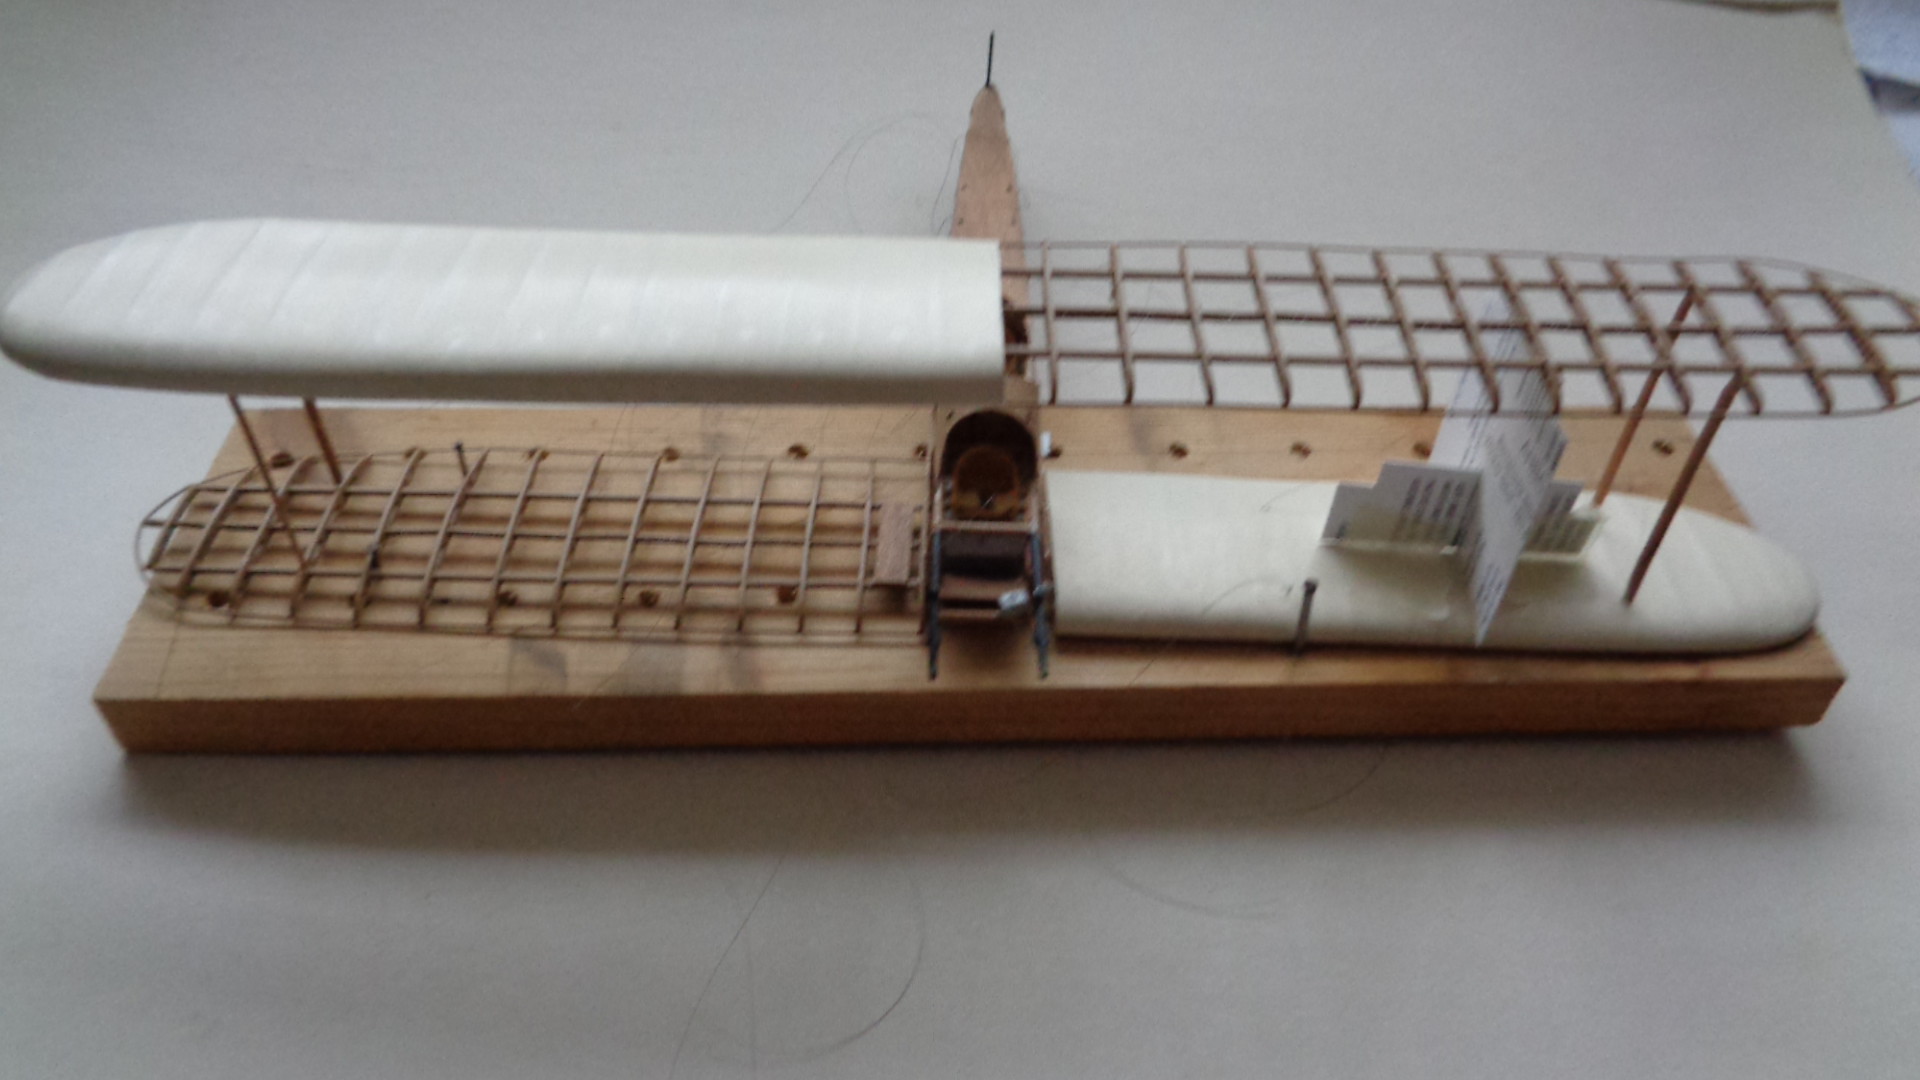
The inner wing struts made the structure stronger and more stable, and finally the cabanes were fixed to complete the strut work:


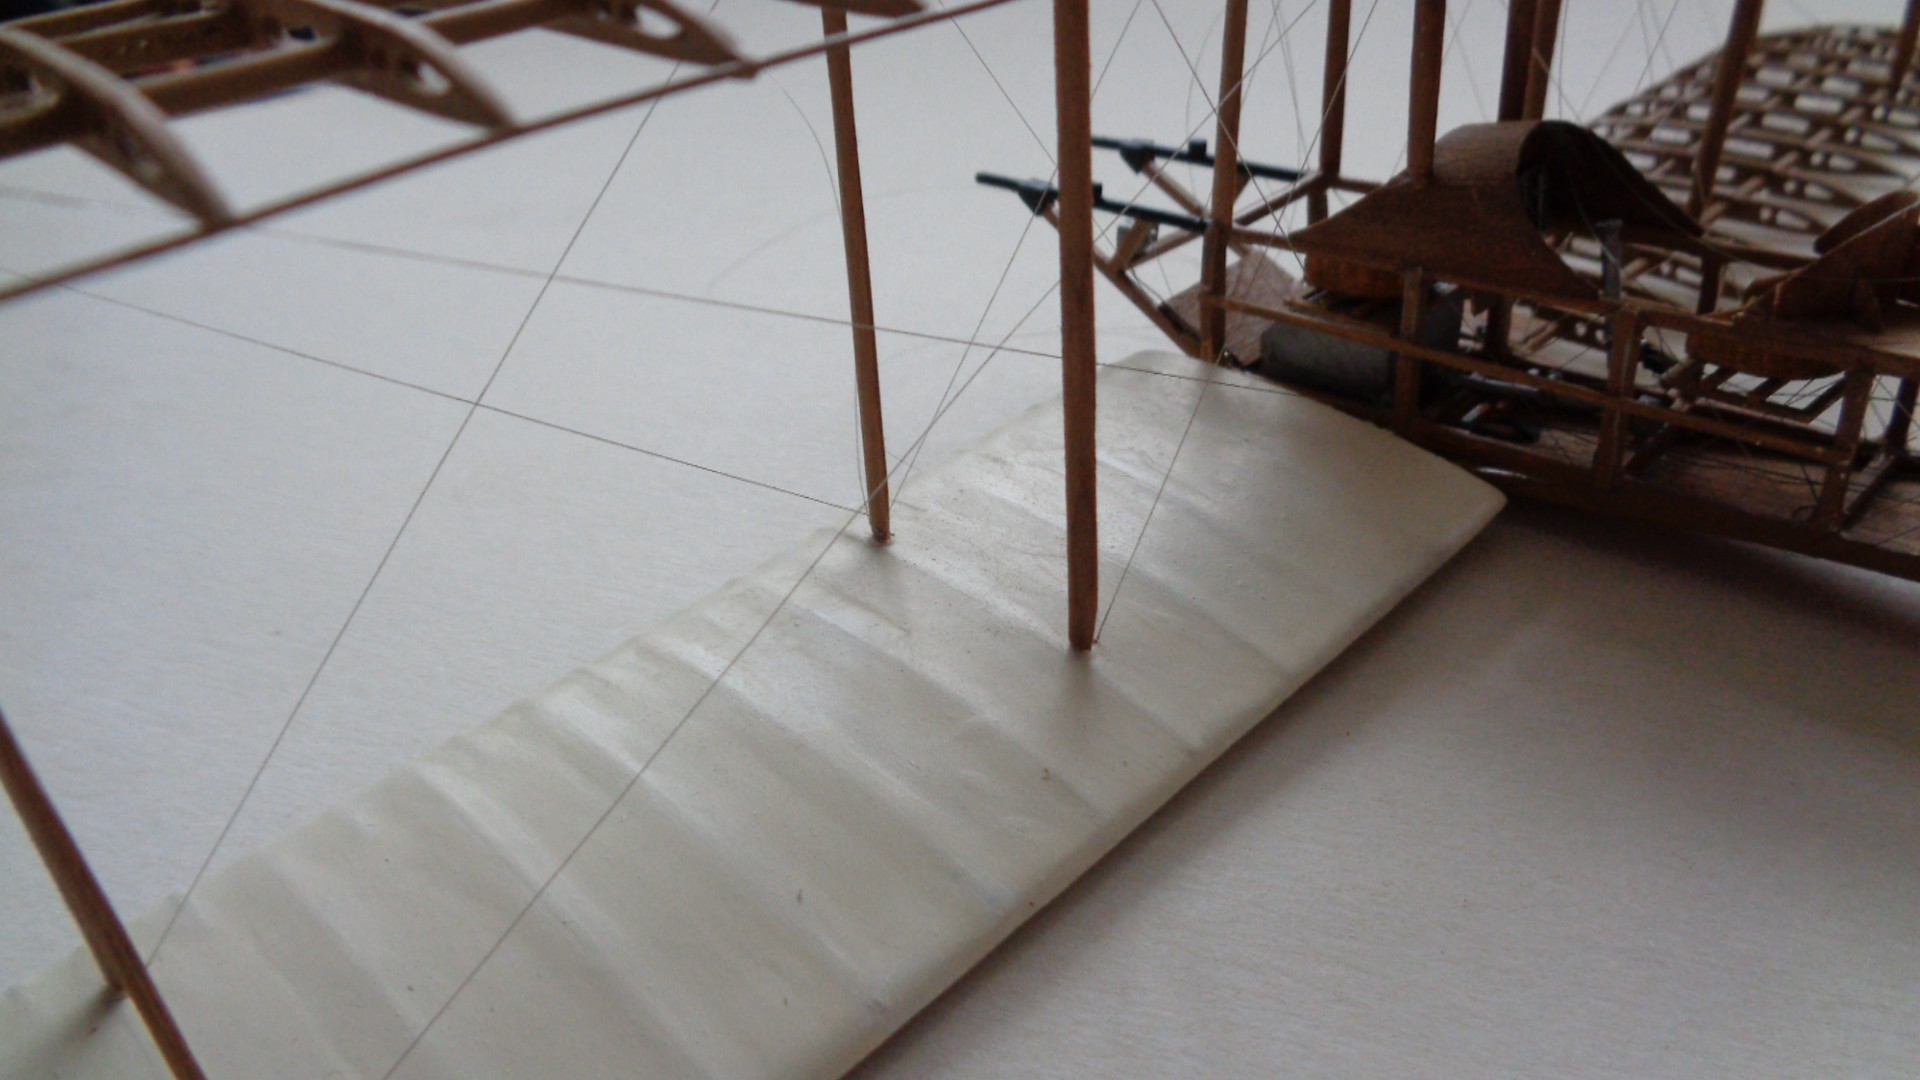
   There were lots of threads sticking/hanging from the wings so these were sorted out and the wing rigging and warping wires put into place and the ends trimmed. I had made life a bit easier by wherever possible attaching one end into the covered wing sections - it meant that those ends were firmly anchored and all I had to do was attach the opposite end to the relevant part of the exposed wing. The pulleys for the warping wires had already been put into place. (This aircraft, like many early types, did not have ailerons but used a technique called wing warping. The outer trailing edges of the main planes were distorted using wires attached to the control column. This meant that there was no fore-aft bracing between the wing struts and no lateral bracing in the rear outer strut bays). Having fixed the strut and control threads there still remain many drag wires hanging from the wings...but at least there are fewer loose ends than previously.


   The horizontal tail stabilizer and bracing struts were added to the rear fuselage. This was a simple exercise in applying CA and holding in place while it set, followed by two pieces of 25 thou rod to represent the underside bracing:


The next stage will involve fixing the engine and exhaust pipes and the undercarriage.

Thanks for looking.

Stephen.

Offline RichieW

  • Hero Member
  • *****
  • Posts: 1966
Re: 1/32 Royal Aircraft Factory BE 2a
« Reply #106 on: March 06, 2023, 09:16:50 AM »
Another fantastic update from the master! Great save on the cockpit coaming, gluing  acetate sheet underneath should help make it more stable under varying temperatures and humidities.

Another great save getting the instrument panel in too, close enough is definitely good enough and nobody would even notice if it is a little out of place. I certainly hope so anyway because mine is in the wrong place too!

I love that wing assembly jig. I have been contemplating all manner of complex solutions but as you have shown it really does not need to be complicated.

Very much looking forward to seeing the engine mounted, not much oeft to do now!

Richie

Offline lcarroll

  • Administrator
  • Hero Member
  • ******
  • Posts: 8547
Re: 1/32 Royal Aircraft Factory BE 2a
« Reply #107 on: March 06, 2023, 12:18:30 PM »
Stephen,
     I have been following your progress since you started this project almost three months ago, and am most impressed with your patience, skill, and improvisation as always with your Builds. I believe this Build Log could well provide a perfect example of "How to Scratch Build a model aeroplane", this is really great content and a wonderful  tutorial ! I'll also add that many of the techniques and valuable tips that can be found in your work here are of great benefit to those of us that build Kits as opposed to those who prefer the rewards of the Scratch Build art form.
    Great work, and many thanks for sharing your knowledge here ....... wonderful stuff!
Cheers,
Lance

Offline Rookie

  • Hero Member
  • *****
  • Posts: 925
  • No guts, no glory...
Re: 1/32 Royal Aircraft Factory BE 2a
« Reply #108 on: March 06, 2023, 06:16:21 PM »
Stephen,

I reread your complete build log for the 3rd or 4th time, only now realizing what Lance put into words. This is a perfect example of "How to Scratch Build a model aeroplane".

I learn something from every update you post and I secretly I take notes of everything that looks remotely usable for my own project. And there is a lot.

Great work again and I see the finish line is near.

I wonder if you have already been thinking what to build next…

Willem

Offline DaveB

  • Hero Member
  • *****
  • Posts: 988
Re: 1/32 Royal Aircraft Factory BE 2a
« Reply #109 on: March 06, 2023, 09:55:04 PM »
Nearly missed this latest update, Steve -

This is really 'taking off' now and you seem to be 'flying along' ........   Sorry mate, could not resist that with my mad humour!!

Really excellent work all round and also agree with Lance's comments on your build - impressive work

Regards

Dave
As we say in fencing, what's the point!

Offline lone modeller

  • Hero Member
  • *****
  • Posts: 5300
Re: 1/32 Royal Aircraft Factory BE 2a
« Reply #110 on: March 07, 2023, 03:00:40 AM »
Richie, Lance, Willem. Dave: thank you very much for the very generous comments - I really do appreciate them.

Lance: I have written before that when I joined this forum I considered that my models were pretty run-of-the-mill and looked on in awe of some of the models presented on this site, not least from Des. I still look on in awe of other modellers work here, but I am really pleased that I am able to offer some ideas and tips on how scratch build, because it really is not as difficult as some think. I used to think that scratch building was well beyond me too, but I hope that by showing others that simple, basic techniques is all that is required will encourage others to have a try. If they do then my contributions to this site will have been worthwhile and I will have given something back to a community who have given so much to me - not least the confidence to keep trying new things.

Stephen.

Offline KiwiZac

  • Global Moderator
  • Hero Member
  • *****
  • Posts: 2589
    • My Linktree
Re: 1/32 Royal Aircraft Factory BE 2a
« Reply #111 on: March 07, 2023, 07:39:40 AM »
Lance sums up my feelings rather well, too. I read each update thoroughly and really enjoy seeing the attendant photos. It's wonderful to see each step in such detail.

Offline RichieW

  • Hero Member
  • *****
  • Posts: 1966
Re: 1/32 Royal Aircraft Factory BE 2a
« Reply #112 on: March 07, 2023, 08:12:08 AM »
Stephen, your contribution to this site has certainly been incredibly worthwhile. I am surely not the only one who has been inspired by the your craft to have a bash at scratch building. Without your encouragement, advice and inspiration I would still be dreaming that one day I would like to try to make something from scratch.

Richie

Offline Borsos

  • Hero Member
  • *****
  • Posts: 3315
Re: 1/32 Royal Aircraft Factory BE 2a
« Reply #113 on: March 07, 2023, 10:28:33 PM »
What a great step forward. It looks quite close to the end now. And it doesn’t stop looking amazing!
Andreas
"Deux armées aux prises, c'est une grande armée qui se suicide."
Barbusse.
"Ein Berg in Deutschland kann doch einen Berg in Frankreich nicht beleidigen. Oder ein Fluß oder ein Wald oder ein Weizenfeld."
Remarque.

Offline kensar

  • Hero Member
  • *****
  • Posts: 2503
  • Reshaping the world - one piece at a time.
Re: 1/32 Royal Aircraft Factory BE 2a
« Reply #114 on: March 14, 2023, 10:12:14 PM »
Hello Stephen.  Its been awhile since I looked in on this thread and I must say I'm quite impressed with your perseverance and motivation for this build.  It's quite impressive, scratch building all the major parts, including the engine - something I haven't done yet.  I would like to encourage you to keep going, as the finished product will be very impressive!

Offline lone modeller

  • Hero Member
  • *****
  • Posts: 5300
Re: 1/32 Royal Aircraft Factory BE 2a
« Reply #115 on: March 21, 2023, 06:49:04 AM »
Evening All,

Thanks Zac, Richie, Andreas and Ken for your kind comments - as always I very much appreciate them. I can assure you Ken that scratch building inline engines is relatively simple once the details have been properly examined. I am not too sure about rotary engines as they present rather different issues but I do think that in theory at least they should be relatively straightforward. I have made both in God's Own Scale and they were not too difficult.

The gravity tank in these machines was placed on a bracket in front of the observer - I represented this with laminated card and made the brackets from 20 x 30 strip:


I made the exhaust pipes in sections from 30 thou rod with 60 thou rod filed to shape to represent the silencers. A heater box was attached to one of the pipes to direct the exhaust gases to the carburetor to stop the latter from icing. The heater box was made from 80 thou card filed to shape and a heater pipe added to the rear of the box:


The image above also shows the propellor hub, which when painted black was added to the propellor:


The exhaust pipes were assembled and painted and added to the ends of the manifolds on the engine and fixed to pieces of rod under the fuselage:


I made control horns for the rudder and elevators from scrap wood left over from other parts of the build. Here one has been fitted to the rudder:


The undercarriage consisted of two skids (to protect the propellor in case of a heavy landing),  and supporting struts. All of these were made from wood and varnished, and the axle was made from brass rod. The axle was CA'd to the skids and the bungy cords represented with thread:


I drilled the ends of the struts and inserted thin wire to strengthen the joints: the legs were CA'd into place starting with the front and rear struts on both sides, followed by the centre struts:


I rigged the undercarriage with a mixture of EZ line for the cross pieces on the front and middle struts, and monofilament thread for the remainder. The cross pieces had small rings in the centre so to represent them I used some small bezels from the HGW bezel set and attached the EZ line with CA:


I have started to put on the upper fuselage longeron structure. The bulkheads were cut from wood and varnished. Some of these had holes on the original aircraft while others were solid:


The remaining parts to add are the wing skids, wheels, tail control surfaces, tail skid and some rigging. I hope to be able to complete that shortly and show photos of the completed model in the next post.

Thanks for looking.

Stephen.

Offline RichieW

  • Hero Member
  • *****
  • Posts: 1966
Re: 1/32 Royal Aircraft Factory BE 2a
« Reply #116 on: March 21, 2023, 07:03:19 AM »
Magnificent Stephen, just magnificent! Your mini woodworking skills are amazing and the way you manipulate styrene into whatever shape you want is like witchcraft. Hugely inspiring!

Richie

Offline DaveB

  • Hero Member
  • *****
  • Posts: 988
Re: 1/32 Royal Aircraft Factory BE 2a
« Reply #117 on: March 21, 2023, 07:49:48 PM »
Steve -

This really is moving along beautifully now - good to see the positive progress and your work on this is top notch.

Looking forward to seeing this one completed soon

Regards

Dave
As we say in fencing, what's the point!

Offline KiwiZac

  • Global Moderator
  • Hero Member
  • *****
  • Posts: 2589
    • My Linktree
Re: 1/32 Royal Aircraft Factory BE 2a
« Reply #118 on: March 22, 2023, 05:49:55 AM »
Truly exquisite work, Steve.

Online FAf

  • Hero Member
  • *****
  • Posts: 1057
Re: 1/32 Royal Aircraft Factory BE 2a
« Reply #119 on: March 23, 2023, 12:52:00 AM »
Fantastic progress and level of detail. I really like the idea to use photo etch bezels for those small rings - one to keep stored for the future!

Cheers
Fredrik