Evening All
Many thanks to you all for your wonderful reception of this project: I really appreciate the support that you all give to my efforts. Carving the propellor was actually much less difficult than I thought that it might be - and it has proved to be easier than making the engine as I describe below.
I commented above that I intend to use a Proper Plane resin boss but did not provide a picture, so here is one:

Ideally I would like to make one of these, but I do not have the right materials and tools to do so, so I am opting for the [strk]easy[/strk] lazy route.
In between other activities I made the main and gravity fuel tanks from laminated card and painted them:

The filler caps may look large but that is partially an exaggeration caused by the lens, and partially because the originals were actually quite large.
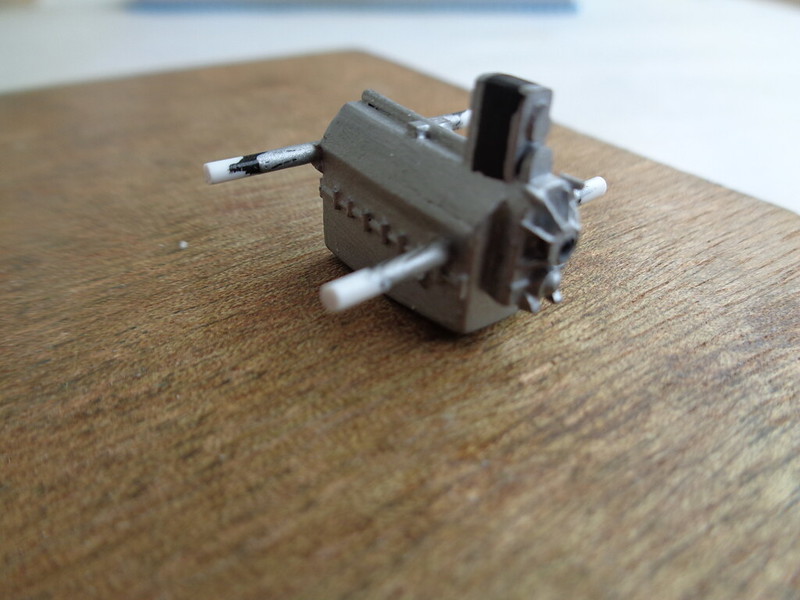
I have shaped the engine block and made the timing cover for the front. All is from laminated card and strip with the circular plate and prop shaft support from rod: not difficult to make but fiddly and time consuming:

"Bolts" were added to the sides and rear of the engine block to represent the joint between the sump and head of the engine, the front was glued to the engine block and all painted in aluminium:

The arms sticking out of the sides are mounts which will rest on the fuselage frame later. The protrusion at the front is the magneto. I have also made a flywheel cut from a disc of card. The disc for the wheel was scribed using a pair of dividers and then the centre was shaped to a cross:


The arms are a little too wide but I cannot thin them much more or they will be so small that they will be too weak to handle.
Finally I am struggling with the cylinders. I have filed down the end of a piece of sprue to make the cylinder shape and then cut each length in turn:

The top of the cylinders was wider than the trunk because the inlet valve was positioned here. To make this wider part I cut and shaped some 60 x 180 thou strip:

The cylinders were bolted to the engine block via 4 long bolts. The bolts passed through cruciform clamps on the top of the cylinders so I shaped the latter from 40 thou card. First I cut a disc of card, then I marked a cross and finally I cut out the arms. On the right of the image is a cylinder with the head and arm in place:

There are still many more details to add before a cylinder is complete but I am having second thoughts about this method as I am not able to represent the cooling fins very well: scribing the plastic with the end of a scalpel is not as effective as I had hoped. In addition I will need to mount a small piece of aluminium strip to the top of one set of cylinders to represent the cowling and cover of the engine. This will need to abut the back plate of the engine which in turn must be made to exactly fit the fuselage frame.... In short I am of the opinion that the final engine assembly, including the bolts, push rods and valve springs, (which I intend to make from copper wire), and other assorted delicacies are best left until I have the fuselage frame and possibly lower wings completed. I can of course change my mind at any time and continue with the engine manufacture and assembly, but for the time being I will start to make ribs for the exposed parts of the wings, and the fuselage structure and interior details.
Thanks for looking.
Stephen.