Evening All,
Many thanks Willem, Will, Marc, Dave, Frank, Richie, Alexis, Ermeio, Ken and Ian for your very kind comments all of which are much appreciated.
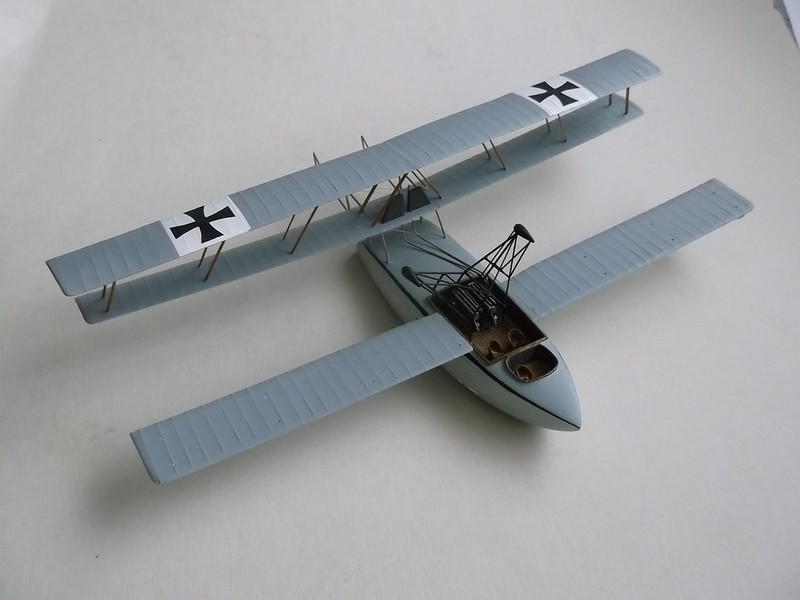
William - pushers rule as far as I am concerned. The only real aeroplanes are pushers with more than one wing.....!
Alexis - no this one will not float! Apparently the original floated very well indeed and had good water handling characteristics. I like it because of its steampunk qualities!
I have mounted the rear wing and rigged it.
Before proceeding with the wings I had to put in the radiator pipes between the engine bay and the lower rear wing - the radiators were mounted on the lower wing. I used 30 thou Evergreen rod for the pipes and put them into holes which I had drilled in the wing:

The white marks on the wing are where the radiators were to be fixed. These were glued in place with supports from stretched sprue behind them. I forgot to photograph them before I mounted the upper wing but they can be seen in photos below.
I have made some simple jigs to support the wings while I put the struts in. The problem with the strut arrangement on this aircraft is that they are angled sideways and forwards, so simple vertical jigs of the type I have used before will not work. However Marklo used a clever jig in his build which was a simple pyramid with the angle of the sides the same as the angle of the struts where they lean towards the hull. The forward angle was marked with a pencil on the side of the jig, and a tab was left on the front or rear edge of the jig to hold the jig on the wing. By placing 2 jigs on each pair of wings and then placing the upper wings on the jigs I could see how the overall structure would look:


Note that the jigs in the images above were part of a trial so the radiators were not fixed at the time. The lines on the side of the front jig which show where the struts will be can be seen in the third photo.
After I had fixed the radiators I put the jigs in place on the rear wing only. To stop the jigs from sliding around I put small pieces of masking tape on the sides and across the top: this prevented sideways and front to rear movement and held the top wing steady. The centre section struts which form a V were put in first and allowed to harden for an hour. Then I could take out a jig on one side, invert the model and put in the outer pair of struts:

Note the centre V struts, the wing jig at the front of the image and the sophisticated supports to hold everything up and square while I was putting struts in place and allowing them to harden. The remaining struts on the port side could then be inserted relatively easily:


Repeat the above process for the other side and all the struts were mounted:
As usual I rig the fore-aft wires between the struts first:
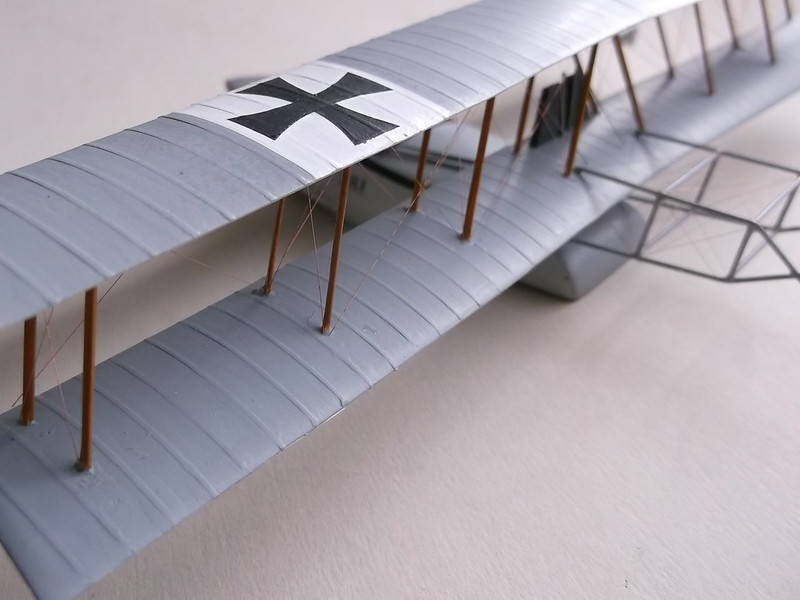
The main wires in the bays between the struts followed:

Now that one wing is in place I can get on with the other and then start on the tail unit and control wires.
Thanks for looking.
Stephen.

