Author Topic: Meng Fokker Dr.I  (Read 18162 times)

Offline Gisbod

  • Hero Member
  • *****
  • Posts: 2438
Re: Meng Fokker Dr.I
« Reply #15 on: September 08, 2020, 05:55:28 PM »
With all the reviews and comments about this kit it will be great to see one built. When I finally get to mine I'll be painting the streaking for the first time. I worry the decals would be too hard to make look realistic.


Yep, me too!


I thought you would have this finished by now!

 ::) ::) ::)

Looking forward to seeing your rapid progress.
Cheers,
Bob


I can see I’m getting a reputation Bob!


I am impressed so far - definitely Wingnuts quality. It’s the perfect kit really; beautifully moulded, easy WW1 kit, great subject - that will sell. It does make you wonder why they didn’t crack out kits like these rather than the eclectic subjects like the UWD.

I’ve started to colour in some of the cockpit parts:


Guy
“Oh! I have slipped the surly bonds of Earth -
Put out my hand, and touched the face of God.”

P.O. John Gillespie Magee 1941

Offline GazzaS

  • Hero Member
  • *****
  • Posts: 1193
Re: Meng Fokker Dr.I
« Reply #16 on: September 08, 2020, 07:38:29 PM »
Nice and quick start, Guy!
There are only two states to be in:  Queensland and blotto.

Offline Mike Norris

  • Hero Member
  • *****
  • Posts: 2214
  • RAF Old and Bold
    • Mikes WW1 Aircraft Models
Re: Meng Fokker Dr.I
« Reply #17 on: September 08, 2020, 07:53:20 PM »
There's some nice detailing on the parts.
The linen 'bulkhead' behind the seat - that's great with the shoulder straps attached to the frame rail.

Mike

« Last Edit: September 08, 2020, 08:01:43 PM by Mike 'Sandbagger' Norris »


Retired - 27 years RAF service then 20 years Military Aerospace Technical Author/editor.

Offline Alexis

  • Hero Member
  • *****
  • Posts: 7947
  • Love the self
Re: Meng Fokker Dr.I
« Reply #18 on: September 08, 2020, 09:55:21 PM »
Really nice job on the rear panel Guy  :)


Terri
Hurra ! , Ich Leben Noch
Body and life is a vessel we use to travel the planet . Femininity is the gift , The miracle comes from what we do with it .

Offline eclarson

  • Hero Member
  • *****
  • Posts: 611
Re: Meng Fokker Dr.I
« Reply #19 on: September 08, 2020, 11:31:38 PM »
IMHO, the best way to replicate the Fokker streaking is the way the real ones were done - paint applied with broad brushes.  My first attempt at a WWI aircraft was a 1/48 DML Fokker Dr.1 and after studying photos of the real ones decided I'd take a crack at the streaking with artists oil paints.  It took several tries before I got results I could live with but I learned a lot about working with oil paints in the process which led to success I've had doing wood effects with them.   I used Olive Green oil paint over Lifecolor acrylics.


Cheers,
Eric

Offline macsporran

  • Hero Member
  • *****
  • Posts: 1669
Re: Meng Fokker Dr.I
« Reply #20 on: September 09, 2020, 12:59:09 AM »
Have you tried fitting the lower wing as yet, Guy? Worth trying it before you close everything up.
On mine, the fuselage to wing joint is quite clumsy. Not too bad on the port side, but the starboard required a lot of fettling and trimming to get the wing spar to bed down properly into the fuselage slot. Nothing any modeller couldn't handle, but just one of the small areas that perhaps a final revision of the moulds would have picked up.
Sandy

Offline Gisbod

  • Hero Member
  • *****
  • Posts: 2438
Re: Meng Fokker Dr.I
« Reply #21 on: September 09, 2020, 01:13:32 AM »
Thanks  :D

Eric, thanks for that  :)
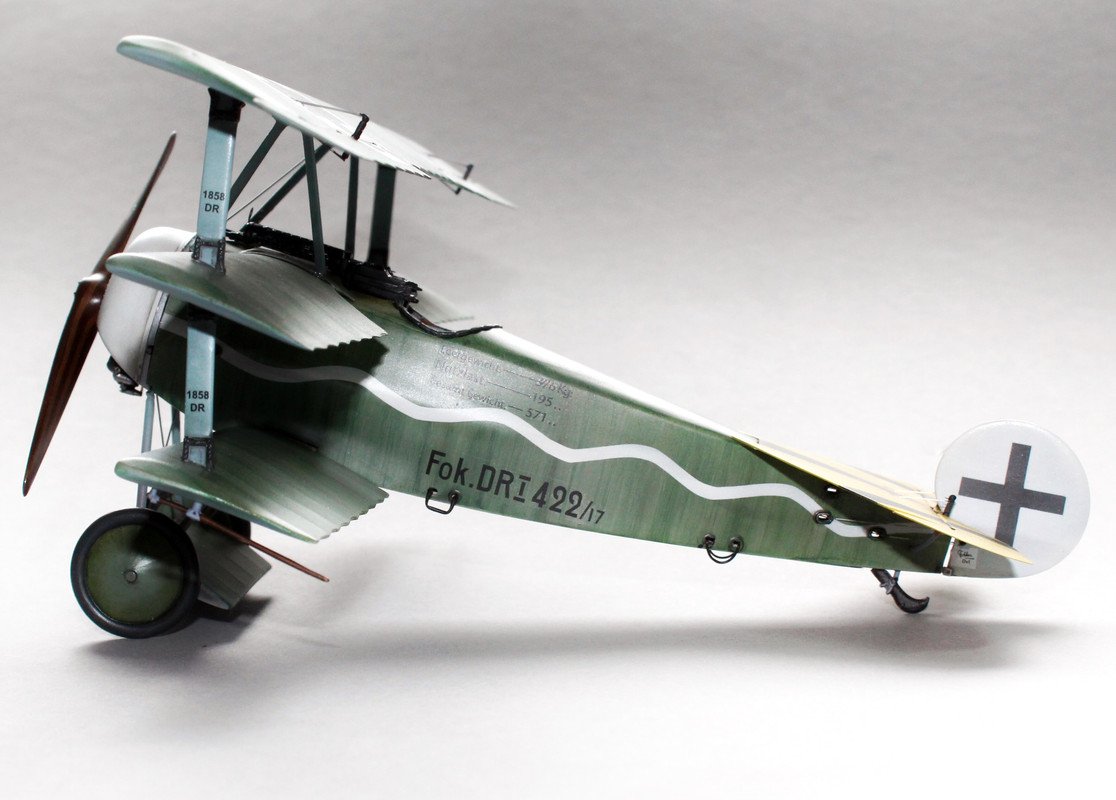
. I’m going to experiment first I think. I have a notion of how it may look with an airbrush, but I’m planning on using a test card with airbrush against oils (brush applied). The decals are quite pricey, but I may resort to that if I’m not happy with the initial experiments. I did do Fokker steaking using oils on my 1/28 Revell build, which was ok, but I wasn’t blown away with the results...


Mike - Thanks for the picture, that shows the area well...


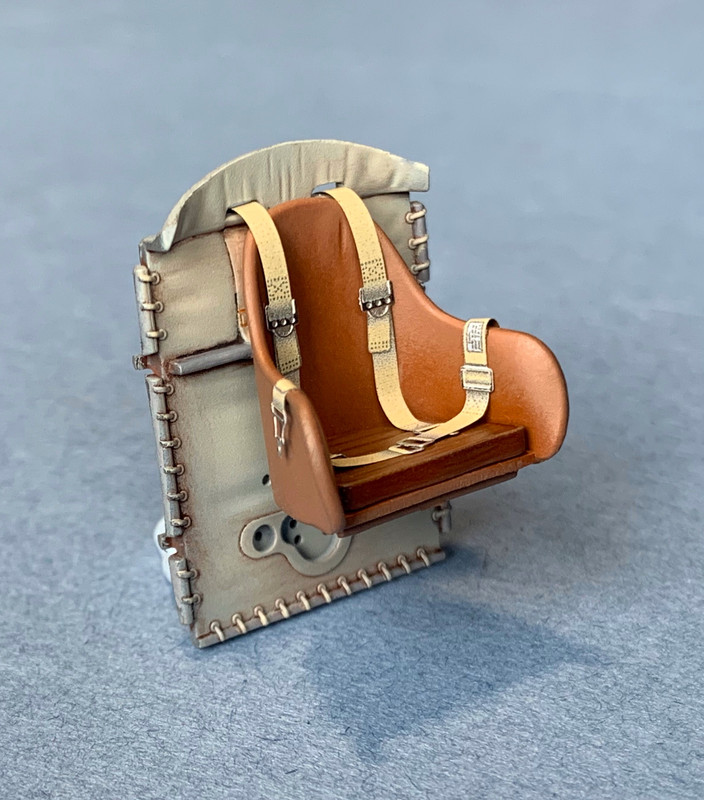
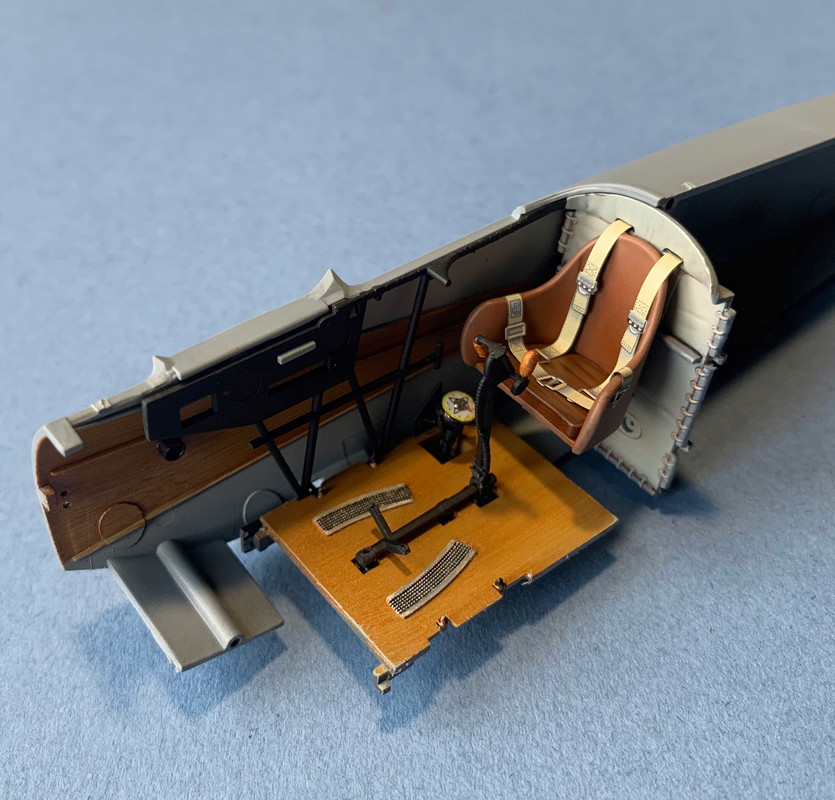
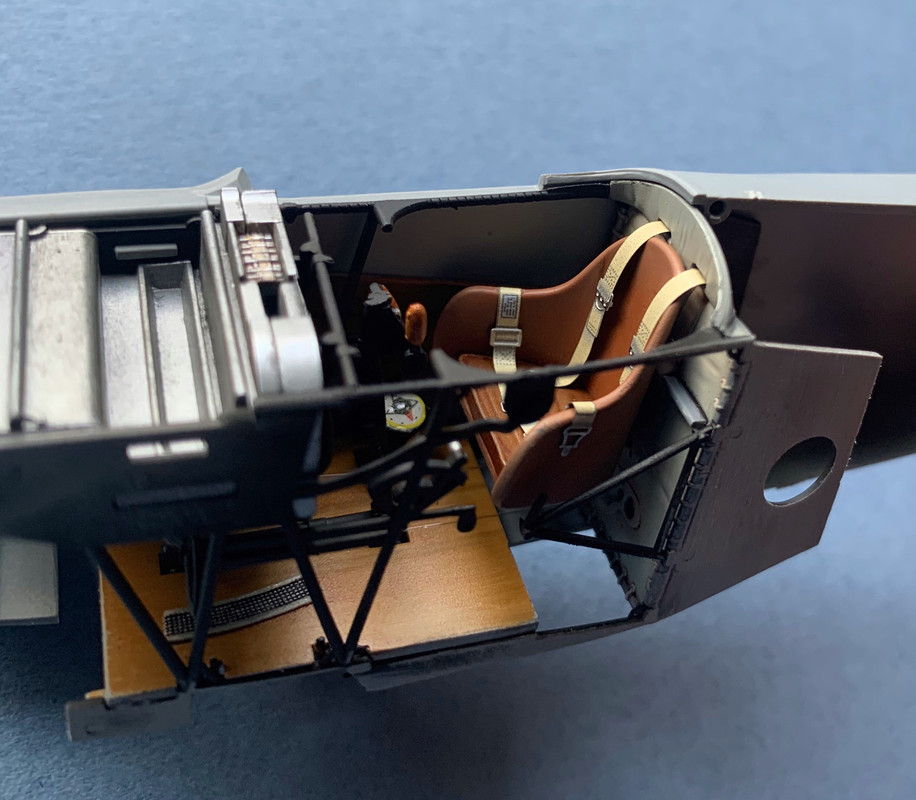
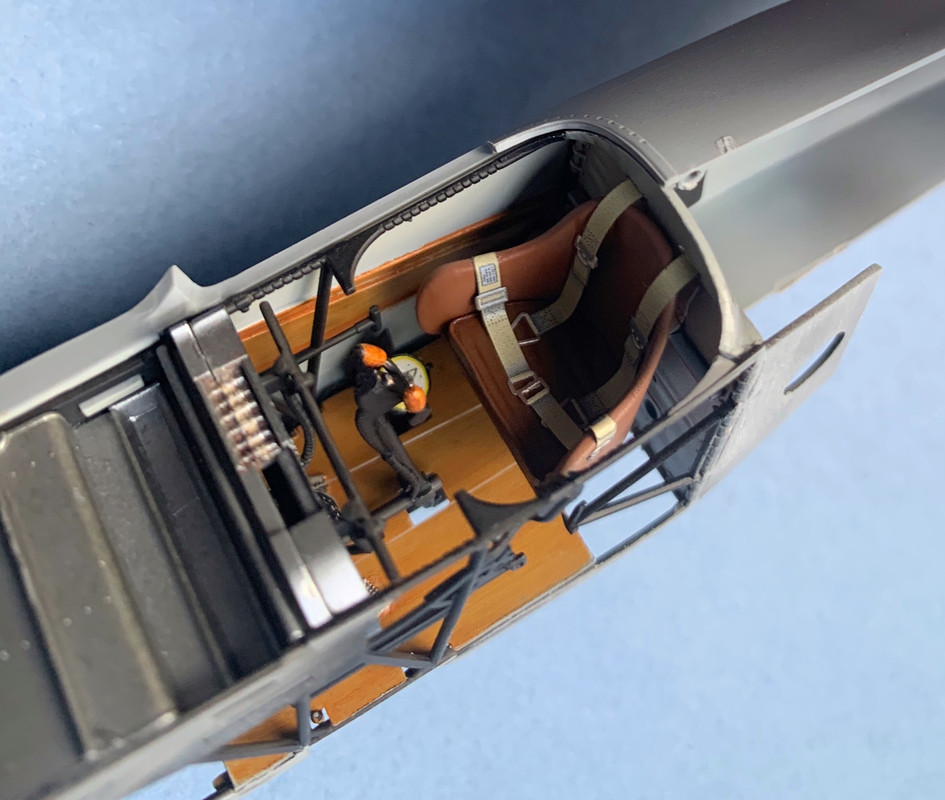
So I’m a bit further along. I’m not really intending to add much - out of the box effectively - only the control run wires. The belts are (I’m ashamed to say) generic Luftwaffe WW2  ::) In my defence, they do look very similar to the kit PE belts, but these sure are pretty being pre coloured. My apologies to the purists.


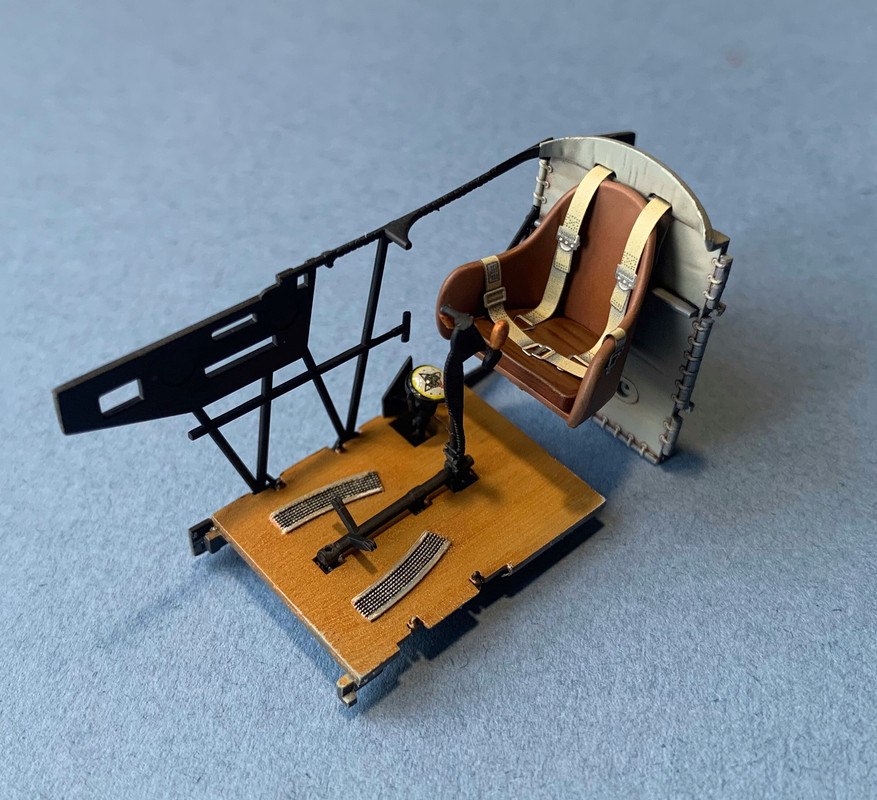
The fit so far is excellent and I’m really enjoying myself. Almost time to close up...


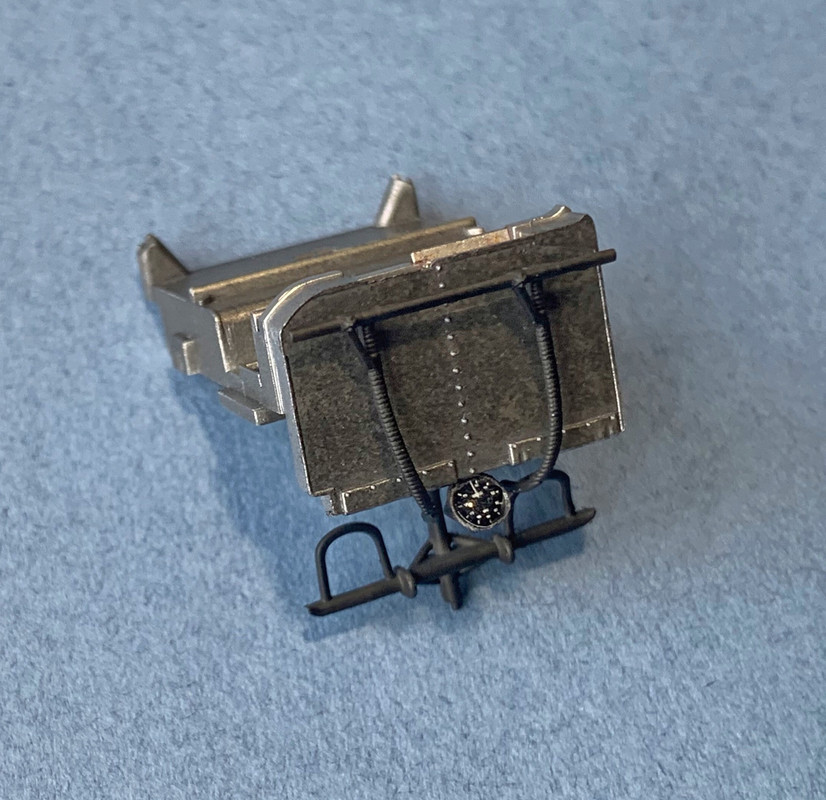
I’ve tried to add some kind of patina to the ammunition box - it looked a bit stark being just aluminium:


Have you tried fitting the lower wing as yet, Guy? Worth trying it before you close everything up.
On mine, the fuselage to wing joint is quite clumsy. Not too bad on the port side, but the starboard required a lot of fettling and trimming to get the wing spar to bed down properly into the fuselage slot. Nothing any modeller couldn't handle, but just one of the small areas that perhaps a final revision of the moulds would have picked up.
Sandy


Sandy, just saw your post as I type. Many thanks, I will do that. I haven’t fitted anything yet.


Any top tips for how to straighten the wings? Hot water?


Thanks,


Guy
“Oh! I have slipped the surly bonds of Earth -
Put out my hand, and touched the face of God.”

P.O. John Gillespie Magee 1941

Offline macsporran

  • Hero Member
  • *****
  • Posts: 1669
Re: Meng Fokker Dr.I
« Reply #22 on: September 09, 2020, 01:56:38 AM »
Hi Guy
So far, I've only bent the wings with gentle hand pressure, but that seems quite sufficient to straighten them out. I'll leave them for a few days to see if they stay fixed. If not a little hot water should be all that's needed.
Lovely job you're making of yours. Not sure what version I'll make - probably the appropriate model for the WNW MvR decals in the Alb box.
I'll keep following your progress with great interest.
Cheers
Sandy

Offline Flute

  • Newbie
  • *
  • Posts: 30
Re: Meng Fokker Dr.I
« Reply #23 on: September 09, 2020, 02:13:41 AM »
If you go the streaky decal route, Richard of Aviattic is redesigning his set to fit the Meng kit (and will include instrument decals) according to his Facebook page. I have a set for the Roden kit (because there was a tiny fault and he was selling them really, really cheap) just so I can say I've done it. His decals are brilliant but I normally paint streaky camo, and once you get into it it's kind of therapeautic..............

Paul.

Offline RAGIII

  • Hero Member
  • *****
  • Posts: 18843
Re: Meng Fokker Dr.I
« Reply #24 on: September 09, 2020, 02:14:48 AM »
Your painting of the interior and subsequent assembly looks awesome! I am glad I am almost finished with the SPADs as your build is tempting me to add another Dual Build to MY current one.!
RAGIII
"A man has to know his limitations": Harry Callahan

"Don't slop it on" Lynda Geisler

Offline RichieW

  • Hero Member
  • *****
  • Posts: 1966
Re: Meng Fokker Dr.I
« Reply #25 on: September 09, 2020, 05:02:21 AM »
Following this with great interest now I'm back, the interior looks amazing. I have one on back order so you are showing the way!

Offline rhallinger

  • Hero Member
  • *****
  • Posts: 1976
Re: Meng Fokker Dr.I
« Reply #26 on: September 09, 2020, 08:03:46 AM »
Guy, your finishes look amazingly real.  What paints are you using and how are they applied?  Beautiful work thus far.

Best,

Bob

Offline Whiteknuckles

  • Hero Member
  • *****
  • Posts: 1334
Re: Meng Fokker Dr.I
« Reply #27 on: September 09, 2020, 08:36:24 AM »
Lovely work Guy :)

Andrew
Eternal Apprentice

Offline AlbertD

  • Full Member
  • ***
  • Posts: 116
Re: Meng Fokker Dr.I
« Reply #28 on: September 09, 2020, 09:35:26 AM »
Looking great so far. Thanks for taking the time to share your build.

Offline Alexis

  • Hero Member
  • *****
  • Posts: 7947
  • Love the self
Re: Meng Fokker Dr.I
« Reply #29 on: September 09, 2020, 10:03:38 AM »
Awesome Guy !


Terri
Hurra ! , Ich Leben Noch
Body and life is a vessel we use to travel the planet . Femininity is the gift , The miracle comes from what we do with it .