Evening All,
My sincere thanks to EBF, Fredrik, Ken, Steve, Rick, OM, Richie and Frank for your very generous and supportive comments which I really appreciate. Frank, the biplane very nearly took control of the master since the last post as I will explain below....
I started to rig the wings which was a pleasure at it was getting rid of a lot of dangly threads which at times were a nuisance. As already explained I had drilled holes in the ribs under the struts so that I could pass the threads through them and hold them in place with CA. (I do not like turnbuckles as I think that they are too large even in this scale). I had rigged the inner bay on one side and was three quarters of the way to completing the outer bay when I managed to knock the tail unit with my hand....and all of the struts collapsed. I was left struggling to keep a single cabane in almost its correct position while I carefully set the fallen and now loose struts in order around the model. I do not mind admitting that for a few moments I thought that I was going to have to abandon this model. However after I had regained my composure I decided that a recovery operation would at least be worth a try so I set about replacing the struts one by one using the card jigs to hold the wings apart while I did so. An hour later and things were back to where they had been - and I stopped working on the model for a couple of days, which caused some of the delay. Having completed rigging the wings I put in the remaining pieces on the spars: these hold the ends of the rigging wires and block the holes in the ribs.


The plastic fillers were painted with the wood mixture that I concocted for this model. Next up was the propellor boss. I had ordered a resin boss but when it arrived it was too small. I am working from the DataFile drawings and I assume that they are correct and the resin boss is too small for this particular aircraft - certainly from the point of view of quality I have no problems with the resin boss and back plate. However I had to make my own from 20 thou card. I cut the discs by using a pair of dividers to score them out, drilled the holes and added the central bolt and smaller retaining bolts from plastic rod:

This is a bespoke fitting on the propellor - shown here as a dry fit prior to fixing permanently to the model.
The next delay resulted from trying to make the undercarriage legs and wing skids from wood. For the first attempt I laminated two sheets of pear and cut the legs of the undercarriage along the grain and tried to join them at the bottom. This was not going to work - the joint face was too small and I could see the whole lot collapsing just as I was about to finish the model. On the second attempt I cut out two sets of legs as V's ready to shape, and indeed did shape them and varnished them. All was going really well - actually too well because the legs started to warp! B......r. By now I was getting more than a little fed up so I turned to the wing skids. My original plan was to make them in three parts - two sloping legs and a cross piece along the bottom. I looked at the tiny pieces of wood and decided to save time and revert to plastic instead. So I laminated some plastic card to get sufficient thickness to be able to take the weight of the model and shaped two undercarriage legs and two wing skids. The spreader bar for the undercarriage has been shaped in pear wood and varnished as it will not take any weight and I was able to shape it along the grain of the wood. Two small pieces of thin wire were inserted into the ends of the spreader bar - these attach to the undercarriage legs as per the original aircraft. The axle will sit on top of the spreader bar and will be made from brass rod. The undercarriage legs and wing skids have been painted as per the spar additions described above. I had already made the tail skid which is also shown in the photo.
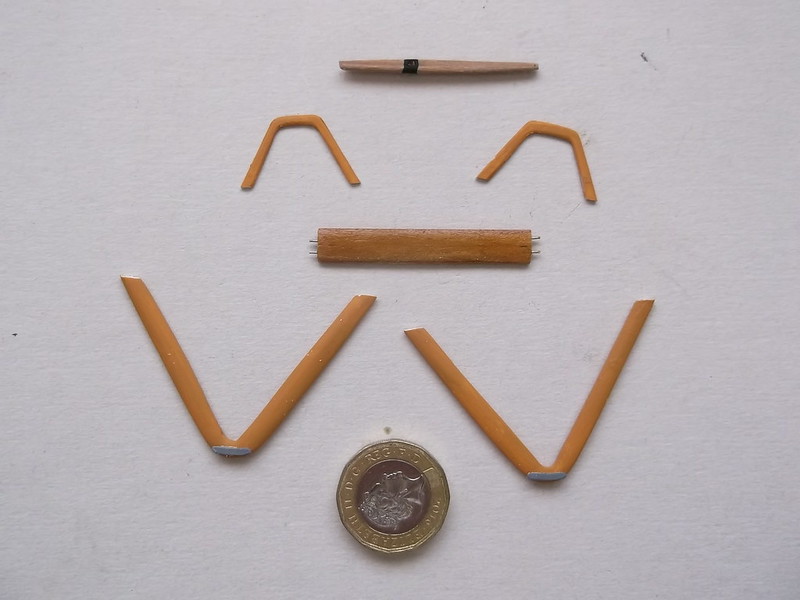
I drilled the ends of the undercarriage legs so that I could also insert small wire pins where they are attached to the fuselage nacelle. Now the joint is CA'd where the pins are inserted into pre-drilled holes, and the plastic has cement where it is in contact with the fuselage frame. Hopefully these joints will be strong enough. The cockpit step on the starboard front leg is also a short piece of wire. The extra dangly bits in the photos are control cables for the elevators: I have had to put the pulleys in place at the tops of the rear inner bay struts and I needed to put the cables on (they are EZ line) because I will not be able to do so later. Just more things to get in the way.......


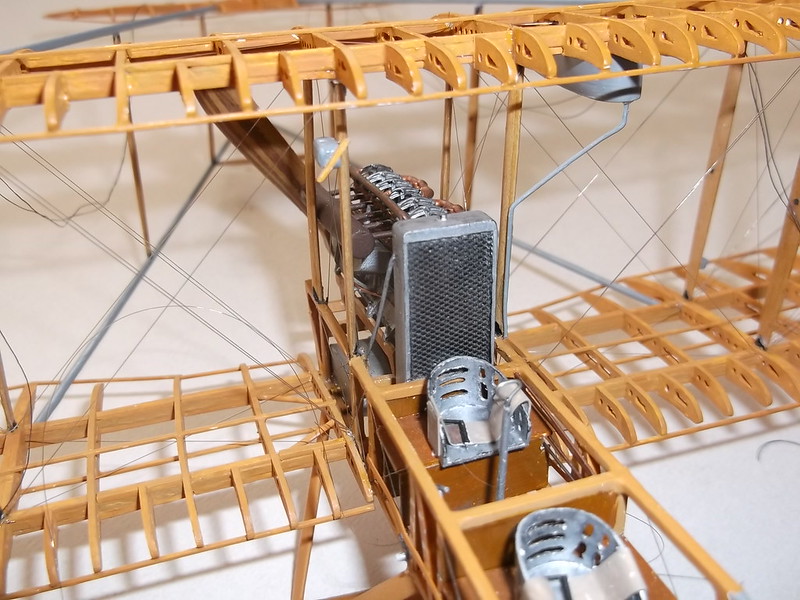
Two other small details have been added: the wind generator and cable on the port forward cabane strut and the fuel pipe from the gravity tank on the starboard forward cabane strut:

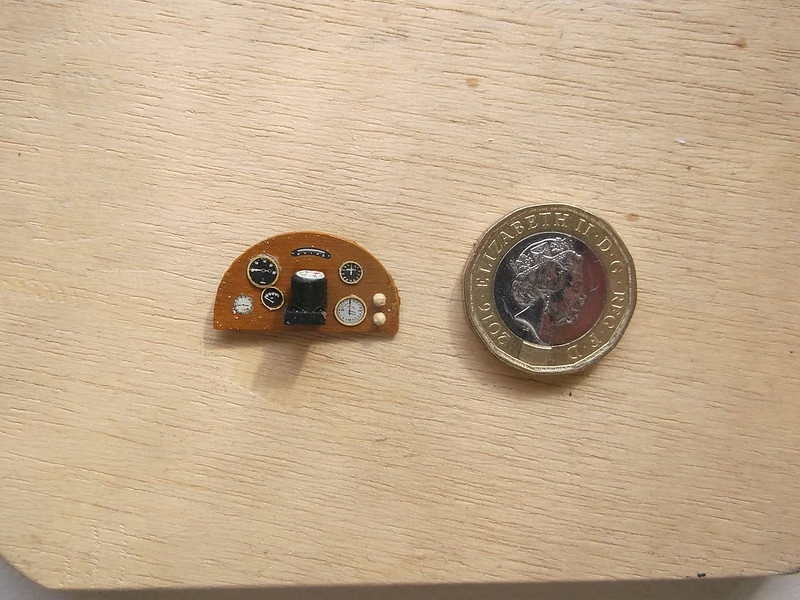
Finally I finished the instrument panel. This had been started as I had cut the semi-circle from card and painted it with oils some time ago. I made a compass from a piece of thick sprue and card and fixed a transfer to the top. The instruments came from the same Airscale sheet as the compass. The bezels were from HG models PE set. The backs of the instruments were small pieces of rod suitably shaped and painted and the ASI pipe and other wires CA'd into place. This will be one of the last parts to be fitted to the model but I had become so frustrated with lack of progress that I wanted to do something straightforward and have something to show the time taken!

I am hoping that the next post will be of a completed model: there is much time consuming work to do with very little of photographic interest, but I will keep a record of sorts and hope that I will not be too long. However I do have to visit family for a week shortly, so the next update may be a while coming.
Thanks for looking.
Stephen.

