Fellow Modelers,
I stated in another thread I am an experienced plastic model builder, but this my first attempt at building a WWI airplane kit. The subject is the Rumpler C.IV Early, and my build will be pretty much box stock. The Wingnut Wings kit (in the box) is beautiful, and probably one of the best model airplanes I have ever seen. Although not a beginner kit, it is certainly designed, engineered and manufactured to be as simple as possible. I know there are many very talented and knowledgeable WWI airplane model builders who post on this site, so hopefully the omissions and mistakes you see on my build can be taken with a grain of salt. Below are photos of what I have done so far. I hope you enjoy them.
1st Image: Here is the box top (with outstanding art work).
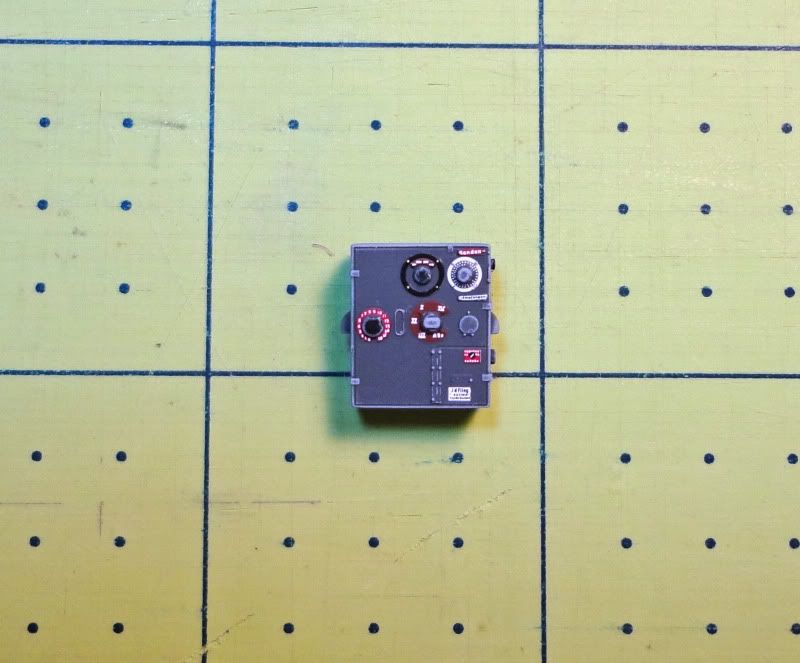
2nd and 3rd Image: Several of the small fuselage parts are shown painted and decaled.
4th and 5th Image: The basic fuselage is shown. I did not to use the “faux wood method” when painting the cockpit floor. I understood the steps to doing it but did not think I would be happy with the finish, so I painted it Model Master Wood and accented it with pastel dust and drybrushing.
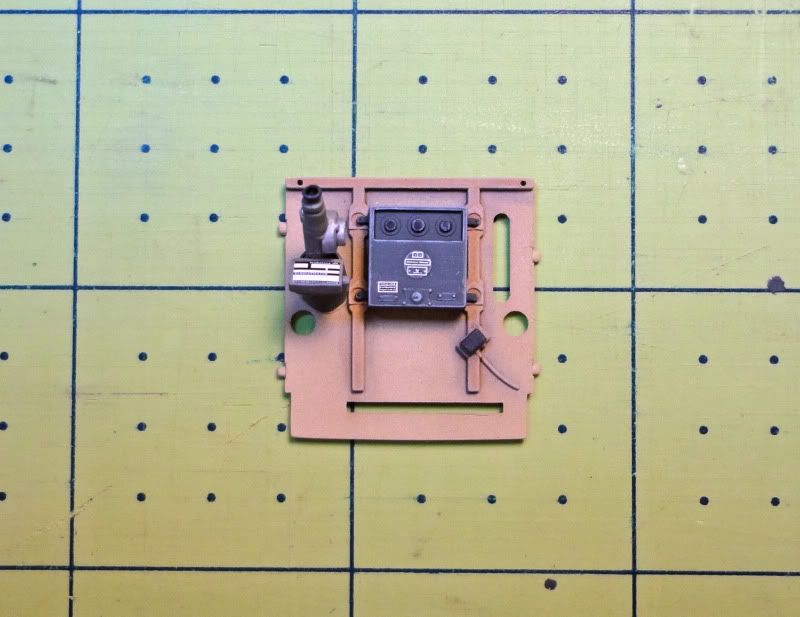
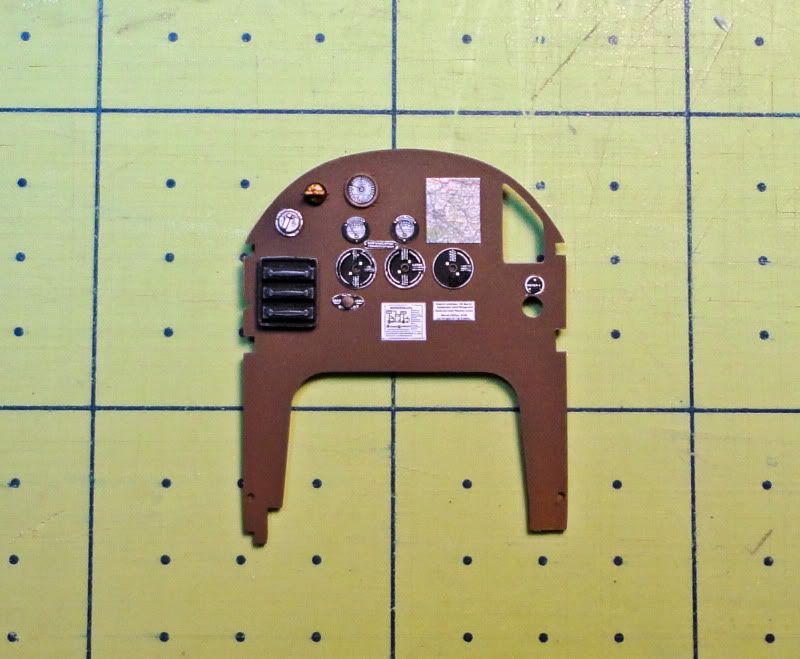
6th Image: The instrument panel is shown ready to added to the cockpit.
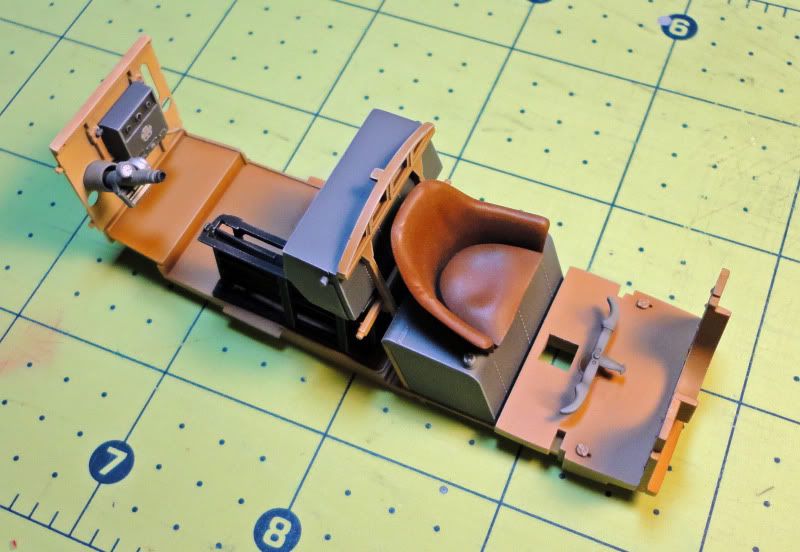
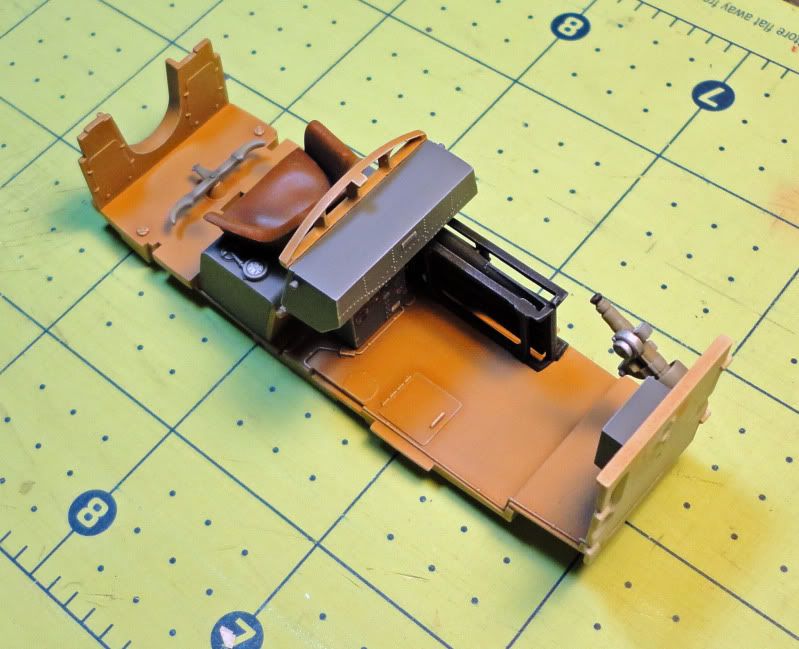
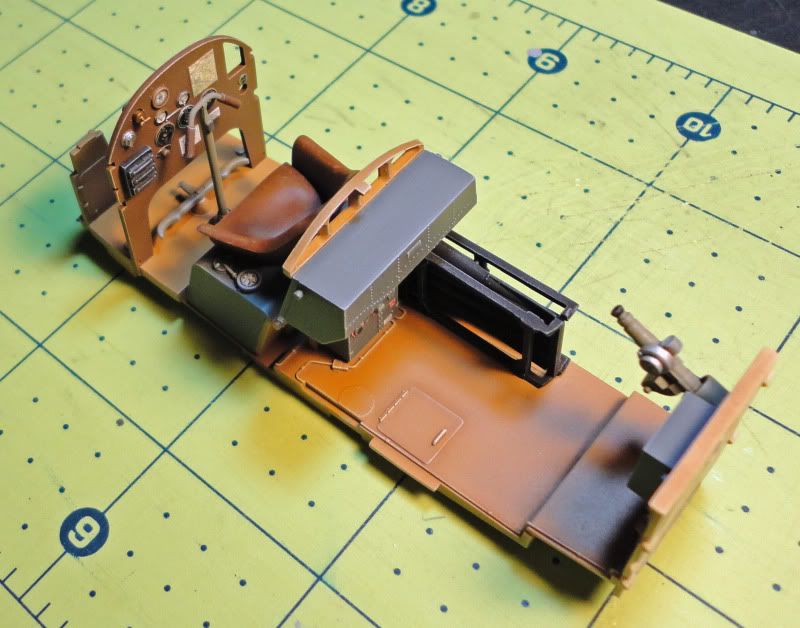
7th and 8th Image: More progress on the cockpit.
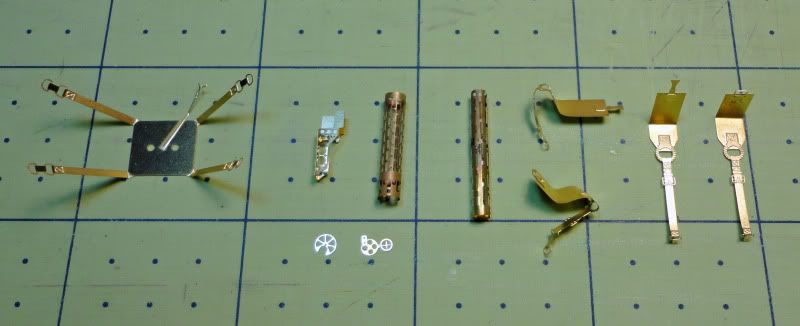
9th Image: The cockpit photo-etched parts are shown after they have been “shaped” but before painting.
10th Image: The photo-etch seatbelts are shown in place along with one half of the outside framing.
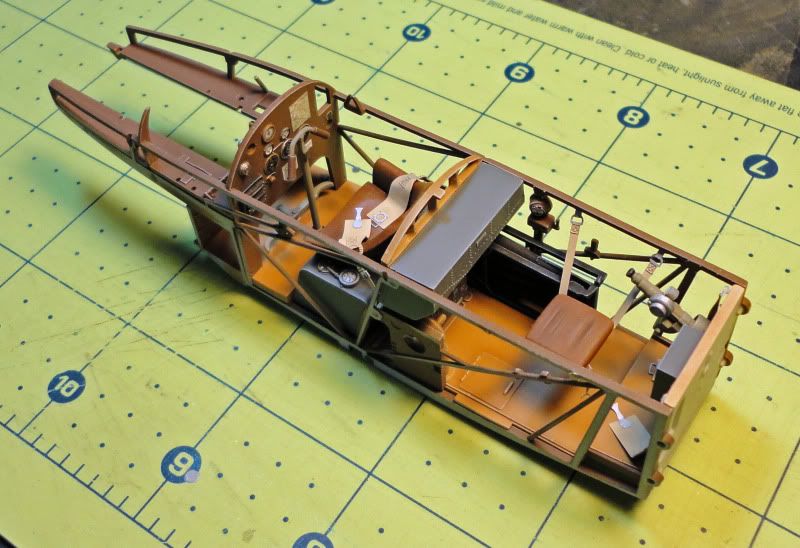
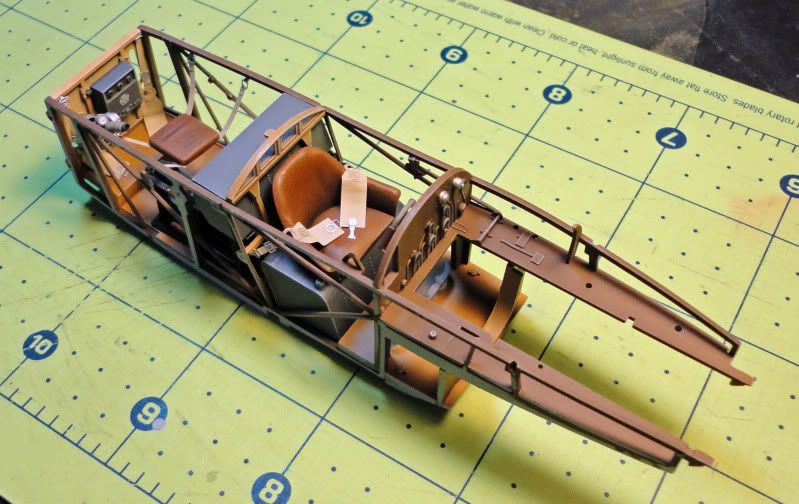
11th and 12th Images: Two views of the completed cockpit, lacking only some small diameter thread added to represent the control cables.
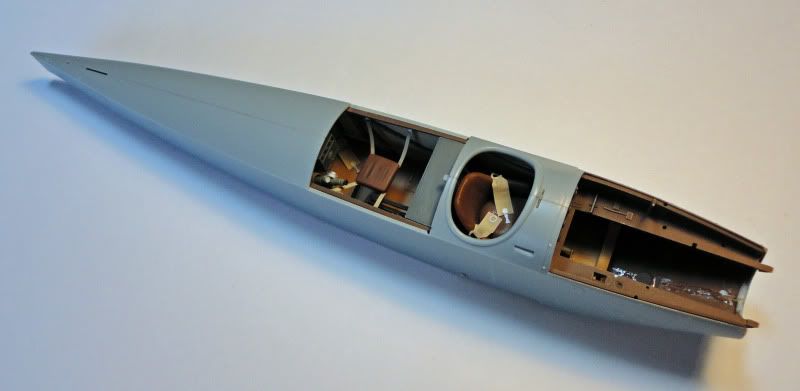
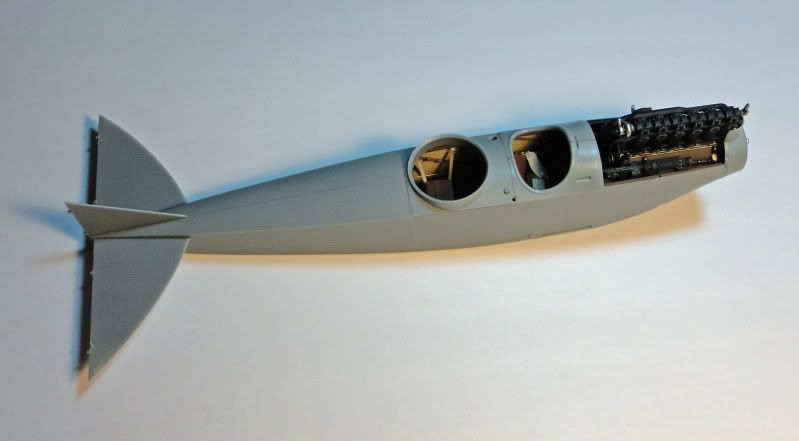
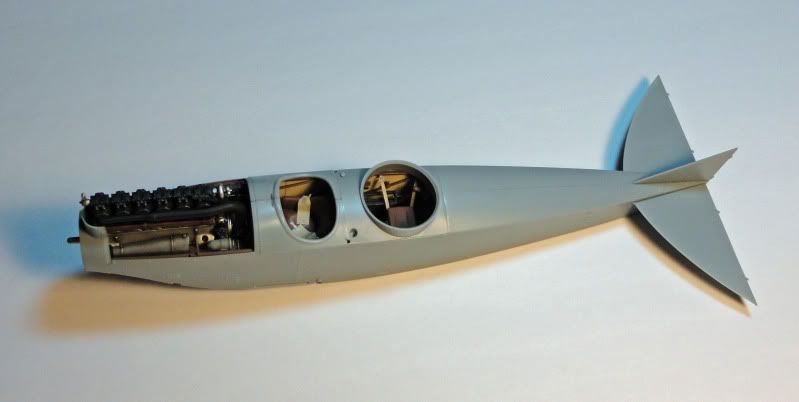
13th Image: The cockpit is shown inside the fuselage. The instructions called for the engine to be built and glued in place before the installation into the fuselage but I opted not to do this.
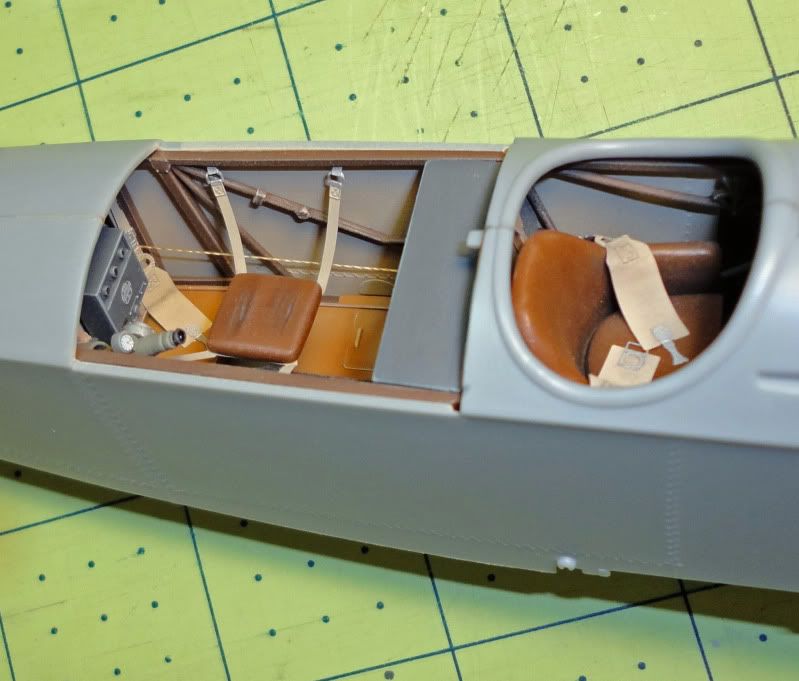
14th Image: Close up view of the cockpit showing a control cable.
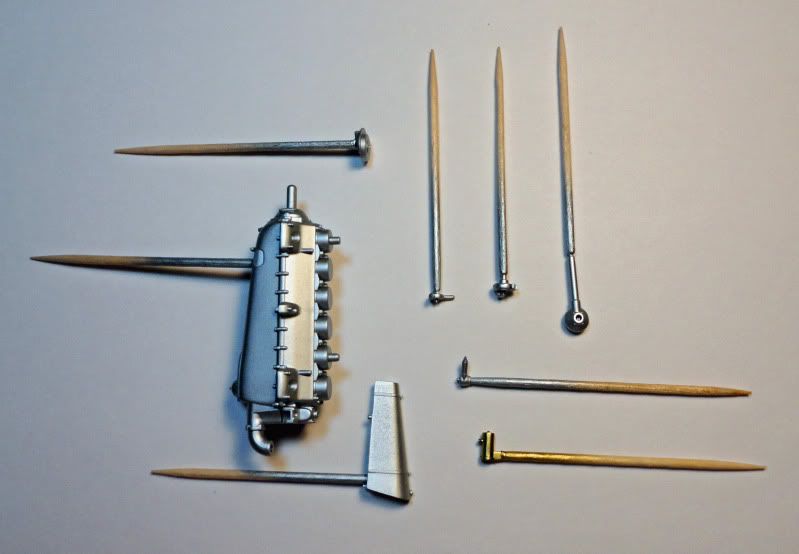
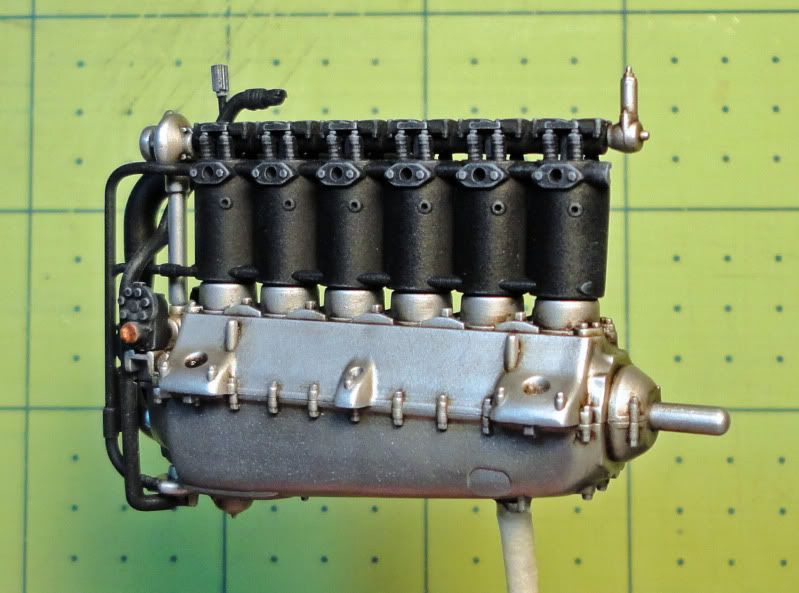
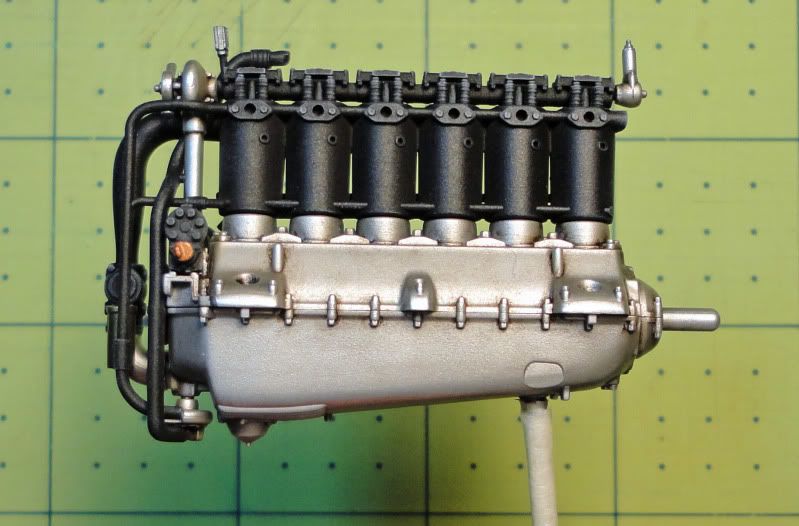
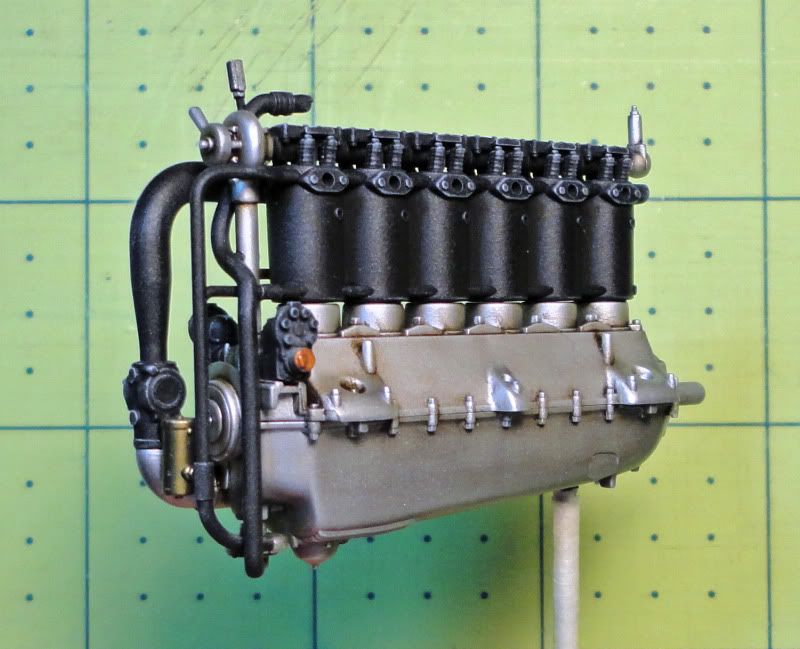
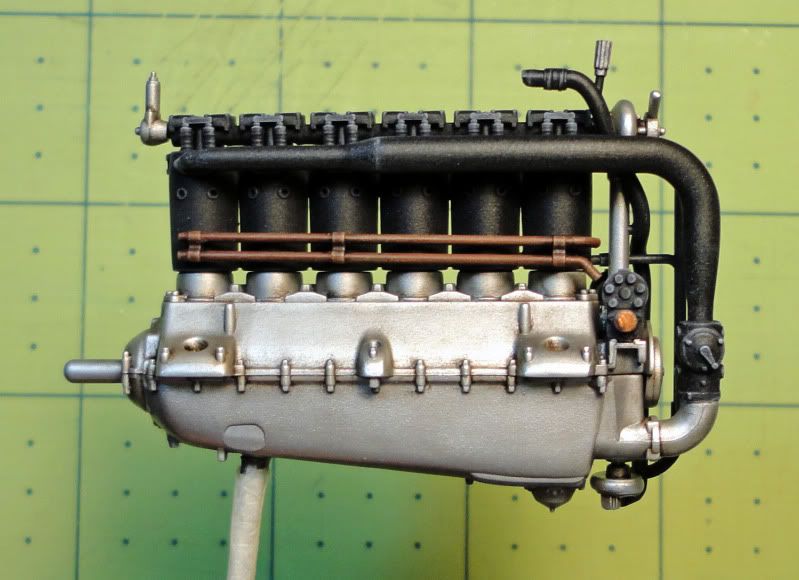
15th Image: All of the engine parts were painted Model Master Aluminum, Testors Flat Black and Model Master Brass.
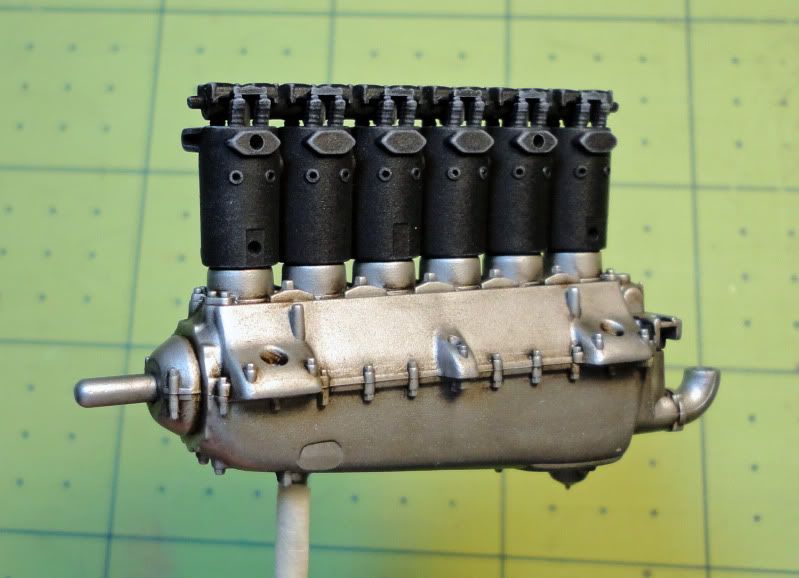
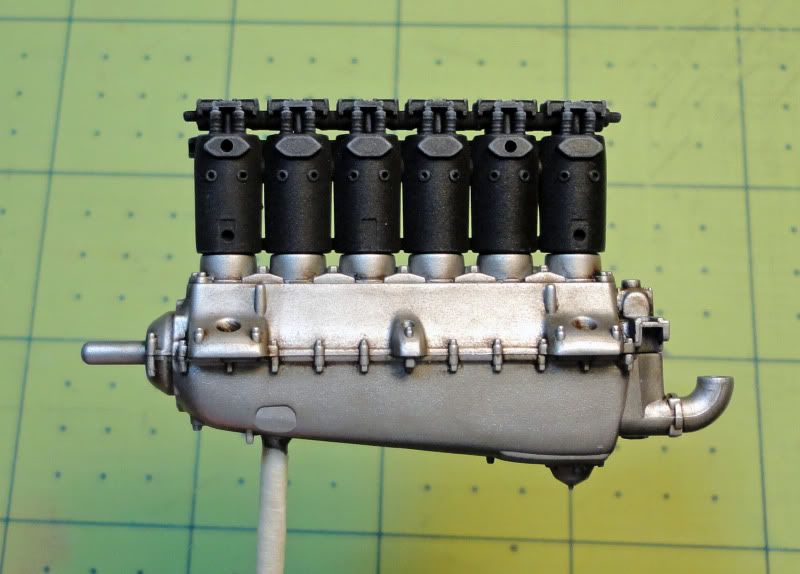
16th and 17th Image: The basic engine parts are shown. To make the aluminum parts look worn and realistic I applied dark gray pastel dust, then Winsor & Newton’s Raw Umber oil paint. The black parts were drybrushed with Model Master Light Ghost Gray.
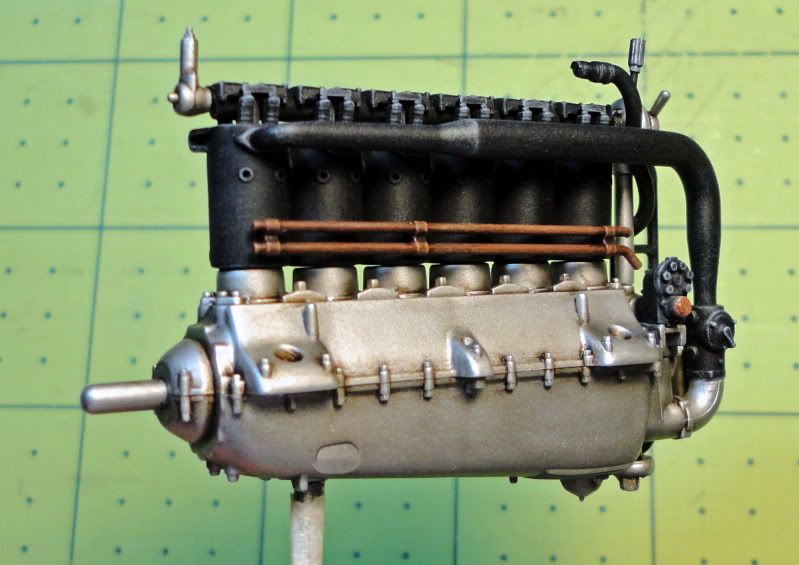
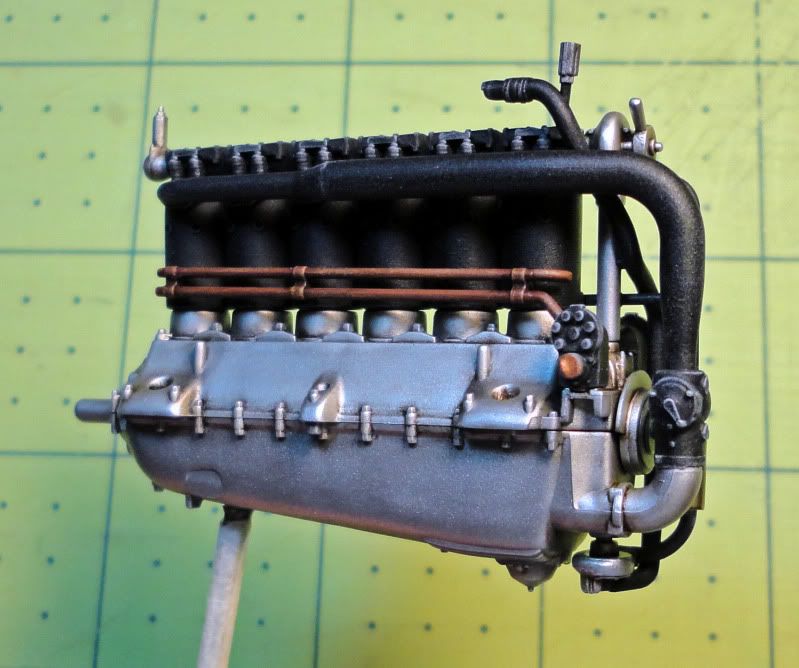
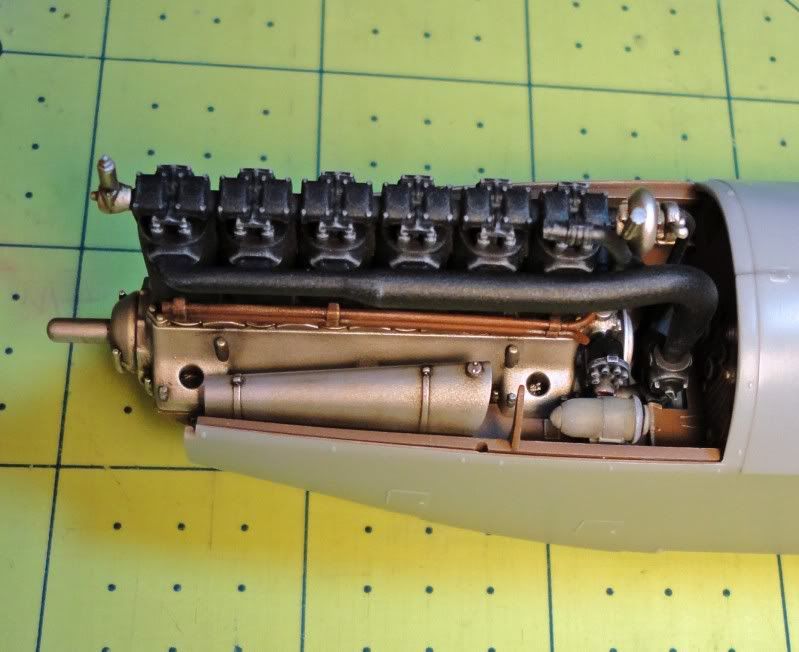
18th to 23rd Image: Photos of the finished engine assembly.
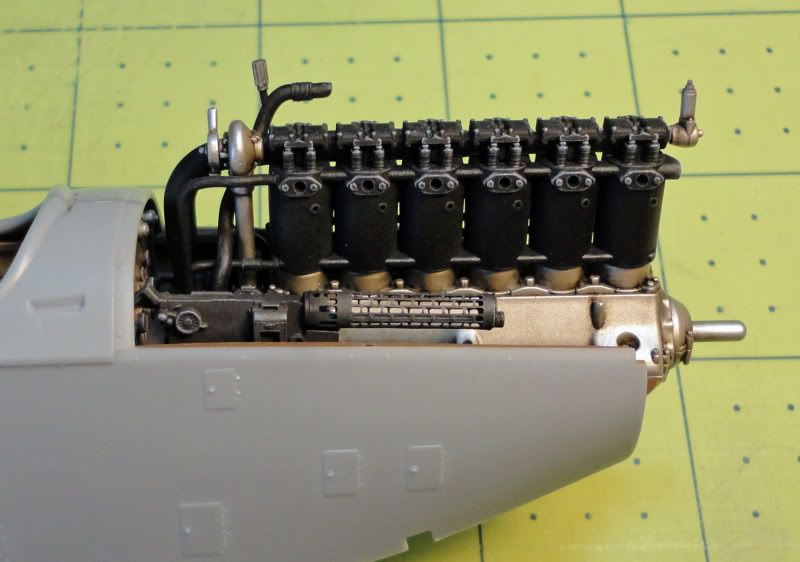
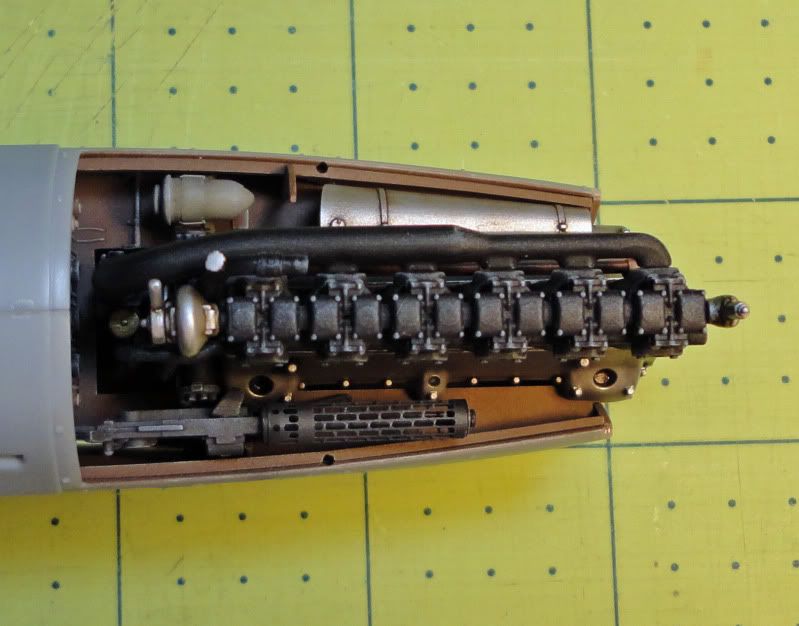
24th and 25th Image: The engine, oil tank and generator are shown after being glued into place.
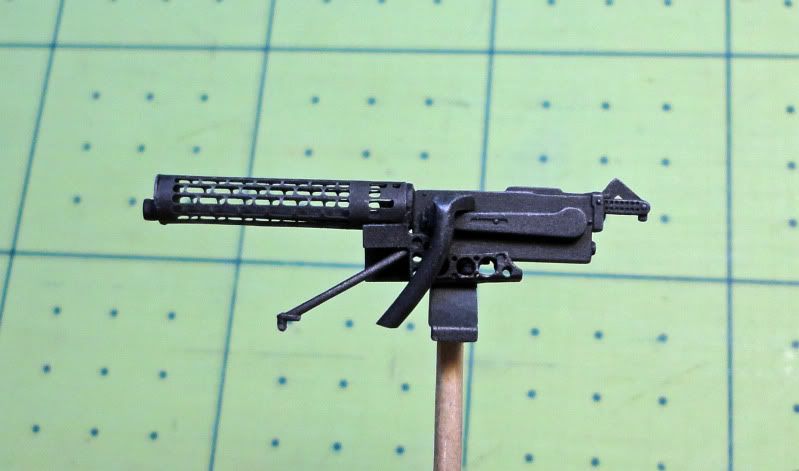
26th Image: The assembled IMG 08 Spandau is shown. The parts were painted Flat Black, and then pencil lead powder was brushed on to give it a gun metal look. Finally, it was drybrushed with Light Ghost Gray.
27th and 28th Image: I had a good bit of trouble getting the machine gun glued in place, which made me almost regret installing the engine when I did. But I was eventually successful and happy with the way it looks.
29th and 30th Image: Photos of the basic fuselage ready to be masked off and painted.


Until nex time...
Phillip1

