Author Topic: WNW Rumpler C.IV Early  (Read 9613 times)

Offline Flip Hendrickx

  • Jr. Member
  • **
  • Posts: 88
Re: WNW Rumpler C.IV Early
« Reply #30 on: December 27, 2012, 07:44:42 AM »
Can't add a lot to what already has been said... Beautiful Rumpler Philip! Love the paint scheme.

Grtz

Flip

Offline Phillip1

  • Newbie
  • *
  • Posts: 40
Re: WNW Rumpler C.IV Early
« Reply #31 on: December 31, 2012, 02:05:54 PM »
Fellow Modelers,

1st through 9th Image: More progress photos showing the top wing has been added.  No rigging is in place yet, but to tell the truth I had my hands full just making sure the top and bottom wings were aligned properly.  I hope you enjoy the photos.


Happy New Year!

Until next time…

Offline rhallinger

  • Hero Member
  • *****
  • Posts: 1976
Re: WNW Rumpler C.IV Early
« Reply #32 on: December 31, 2012, 09:33:05 PM »
She's beautiful Phillp! ;D  The paint really looks great!  That's a very sharp scheme.

You mentioned problems with wing alignment.  Can you describe those and how you overcame them?  I have this kit in the stash and I'd like to have the benefit of your experience.  I've built two of the smaller WNW fighters and had no problems with the wings, but I've never tackled anything as large as the Rumpler.  Thanks!

Good luck with the rest of the build.  She'll look fabulous when done!

Regards,

Bob

Offline Chris Johnson

  • Hero Member
  • *****
  • Posts: 1959
Re: WNW Rumpler C.IV Early
« Reply #33 on: December 31, 2012, 11:23:08 PM »
I'll second what Bob has posted. After seeing your work here, this is definitely a model I want to build myself. I'd sure like to hear more about that wing alignment issue too. Whatever the case, you did a marvelous job with it as the wings look good to me.

Cheers,

Chris
You can have it good; You can have it fast; you can have it cheap. Pick any two, but all three are impossible.

Offline coyotemagic

  • Hero Member
  • *****
  • Posts: 7710
  • "Here's to not buggering it up." -Winston Chuchill
    • My Models
Re: WNW Rumpler C.IV Early
« Reply #34 on: January 01, 2013, 01:32:44 AM »
She's beautiful Phillp! ;D  The paint really looks great!  That's a very sharp scheme.
Good luck with the rest of the build.  She'll look fabulous when done!
Regards,
Bob
My thoughts, exactly.
Cheers,
Bud
"All men dream: but not equally. Those who dream in the dark recesses of the night awake in the day to find all was vanity. But the dreamers of day are dangerous men, for they may act their dreams with open eyes, and make it possible." -T. E. Lawrence

Offline gcn

  • Sr. Member
  • ****
  • Posts: 425
Re: WNW Rumpler C.IV Early
« Reply #35 on: January 01, 2013, 05:22:37 AM »
Well this is helping bring mine to the top of the pile, excellent work to date.

Offline Phillip1

  • Newbie
  • *
  • Posts: 40
Re: WNW Rumpler C.IV Early
« Reply #36 on: January 03, 2013, 11:35:34 AM »
Fellow Modelers-Thanks for the continued compliments. 

rhallinger/Chris Johnson-Concerning adding the upper wing, I apologize if I gave the impression there was a kit “problem” with how this assembly goes into place.  Any shortcomings are on me (due to my lack of experience in building biplanes) and not Wingnut Wings.  Since it has been asked, I will explain how I went about attaching the upper wing.  First, I glued all of the struts to the lower wings (per the instructions).  I aligned them as close as possible, but knew there would be some bending required when the upper wing was attached.  Next, the upper wing was glued to the fuselage center struts.  Since this connection needed to be strong, I used a generous amount of 5-minute epoxy and let it set up overnight.  Minor touch up paint was applied to this area later with my airbrush.  I found gluing the center struts first was the best way to make sure alignment stayed true.  Lastly (working with one side at a time), the struts were bent to line up with the upper wing locating holes and glued in place.  Doing this insured there was no “twist” misalignment between the upper and lower wing.  I will not know if the lower wings stayed even until I add the landing gear and can measure the wings tips from the ground, but I did the best I know how.

Phillip1

Offline pepperman42

  • Hero Member
  • *****
  • Posts: 4503
  • Sergeant, my brown pants.......
Re: WNW Rumpler C.IV Early
« Reply #37 on: January 03, 2013, 11:10:39 PM »
Nice work. Thanks for the wing alignment advice, you seem to have achieved a successful assembly.

Steve

Offline Phillip1

  • Newbie
  • *
  • Posts: 40
Re: WNW Rumpler C.IV Early
« Reply #38 on: January 10, 2013, 10:30:39 PM »
Fellow Modelers,
Here are photos of the work I was able to get done this past weekend.  Most of the time was spent adding the rigging to the wings and landing gear.   

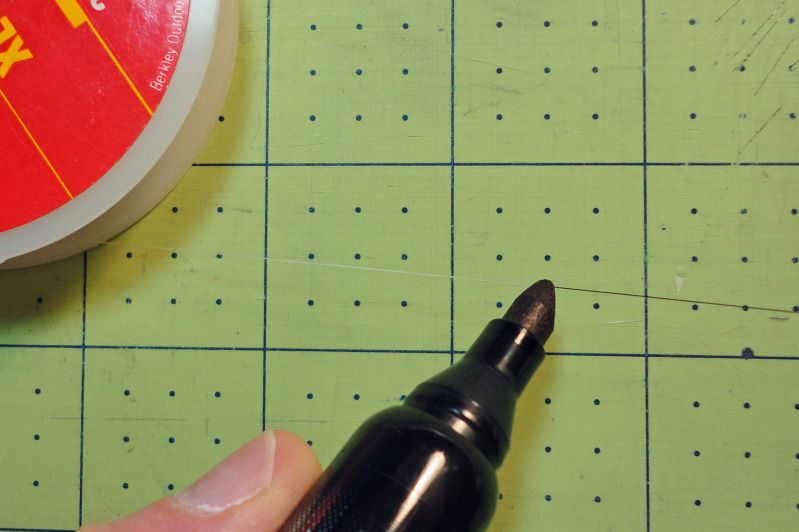
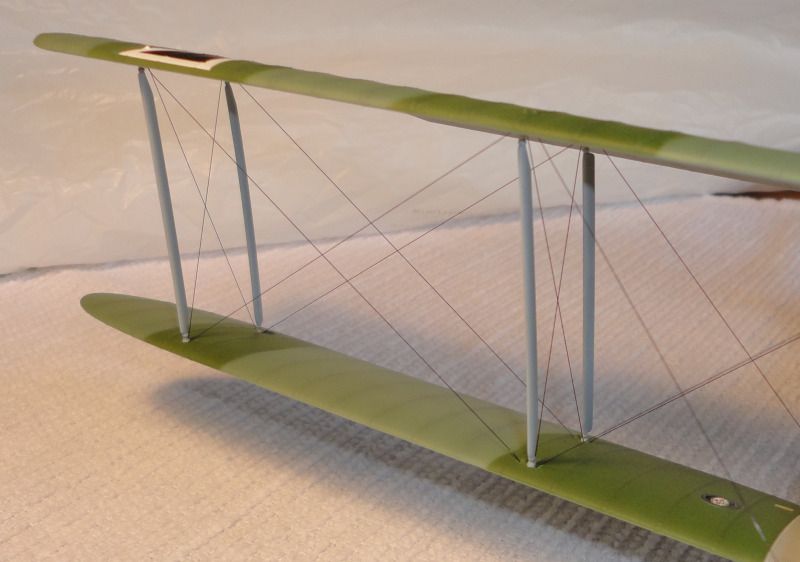
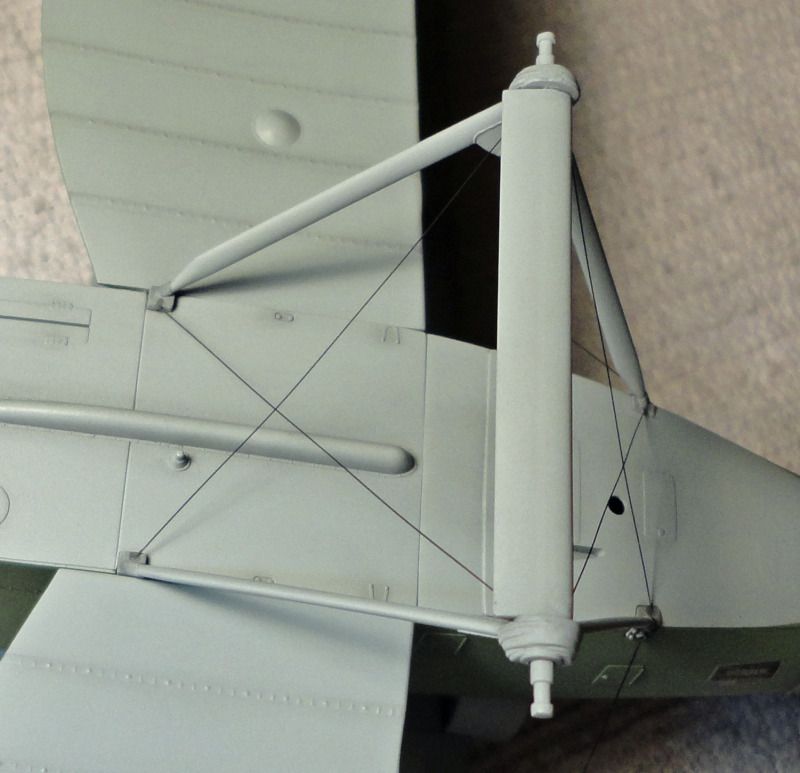
1st Image: I used .005” diameter fishing line for the wing rigging.  From what I have read on this website, this may be a little small, but it was all I had and I thought it looked okay.  The first thing I did was to color the line with a black marker to make it stand out more. 

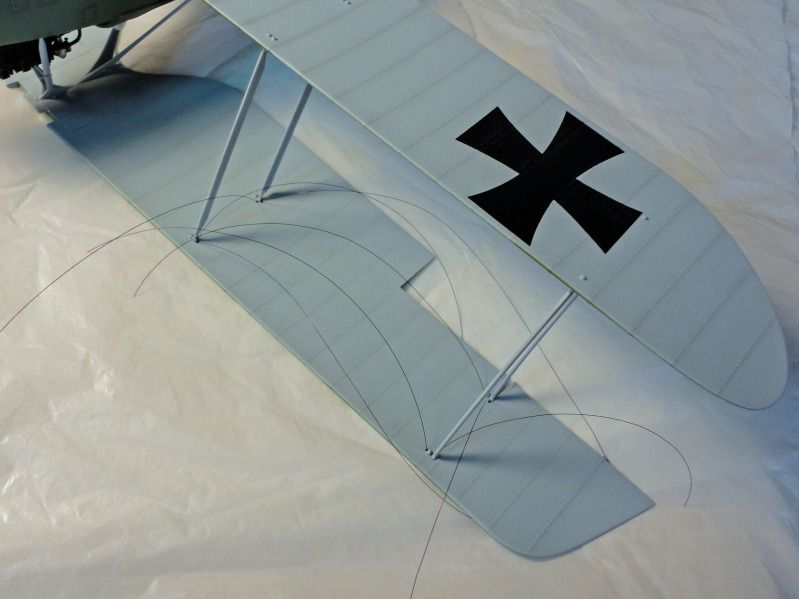
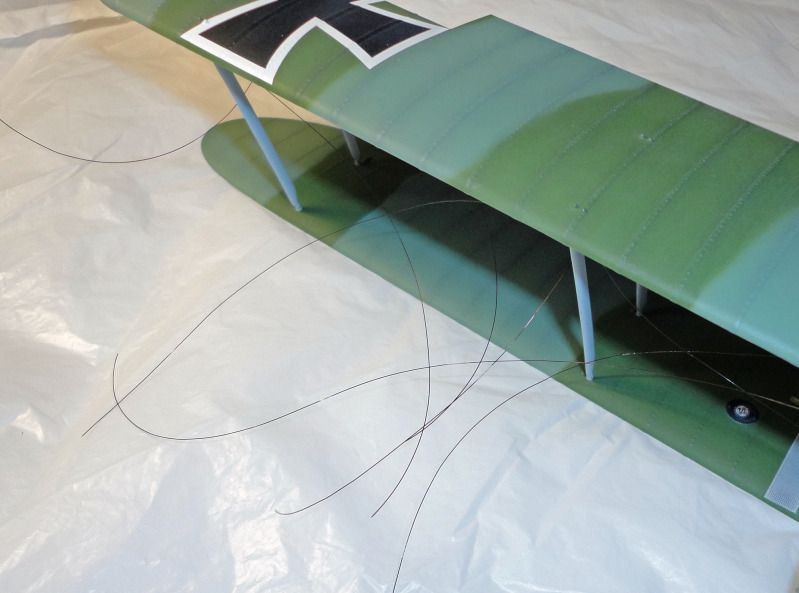
2nd and 3rd Image: Each line was super glued into the holes in the upper wing. CA accelerator was used to lock the lines in place and speed up the glue drying process.  At first I tried gluing the bottom end of the lines to the lower wings per Wingnut Wings’ website recommendation (i.e. cutting the length a little short and holding the line in place with tweezers while the superglue set up).  After making a mess with two failed attempts, I decided this method was NOT going to work for me.  I decided to drill holes through the lower wings and bring the lines through them.  Drilling the holes was awkward since having the top wing in place required drilling some of the holes at a sharp angle.  This method also required extra cleanup on the lower wings where the glue attachments were made.  I don’t want to come across like a cry-baby, but this part of the project was frustrating and no fun at all.

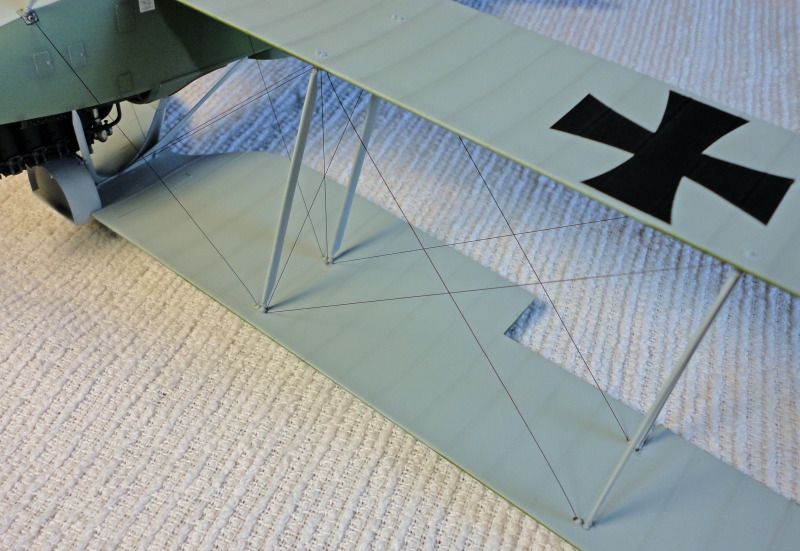
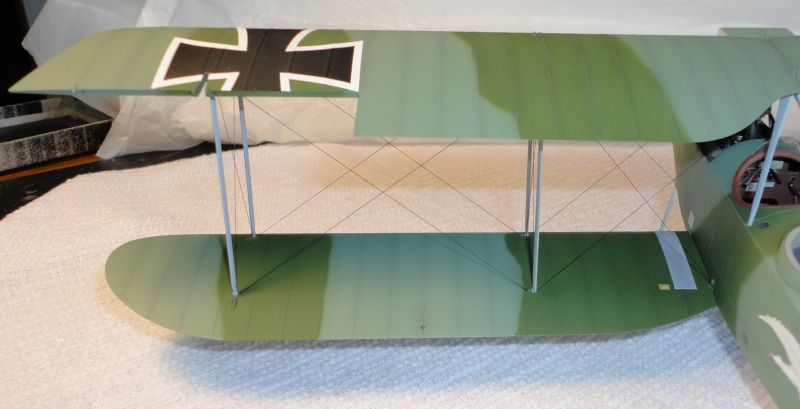
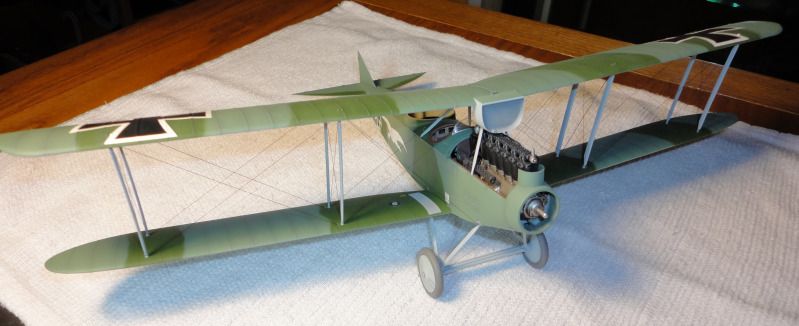
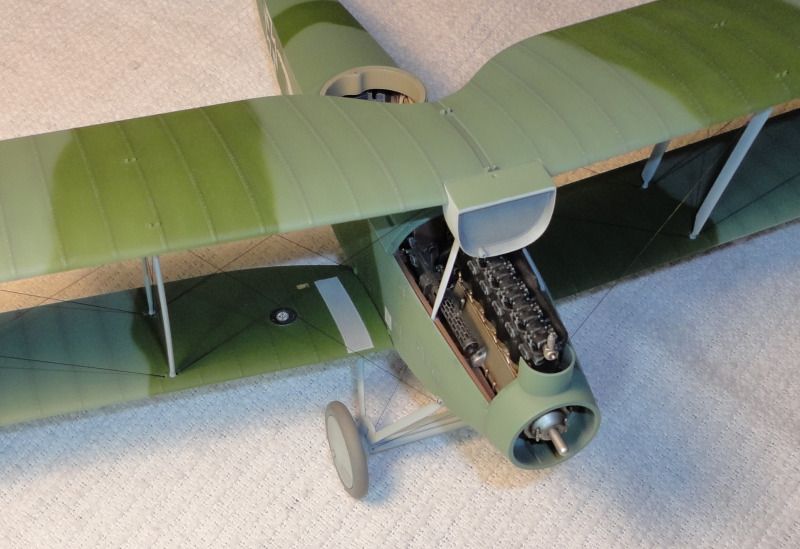
4th through 7th Image: These photos show the completed wing rigging.  I will say that although it was difficult, I am happy with the way it turned out and the rigging really adds a delicate touch to the model’s appearance.

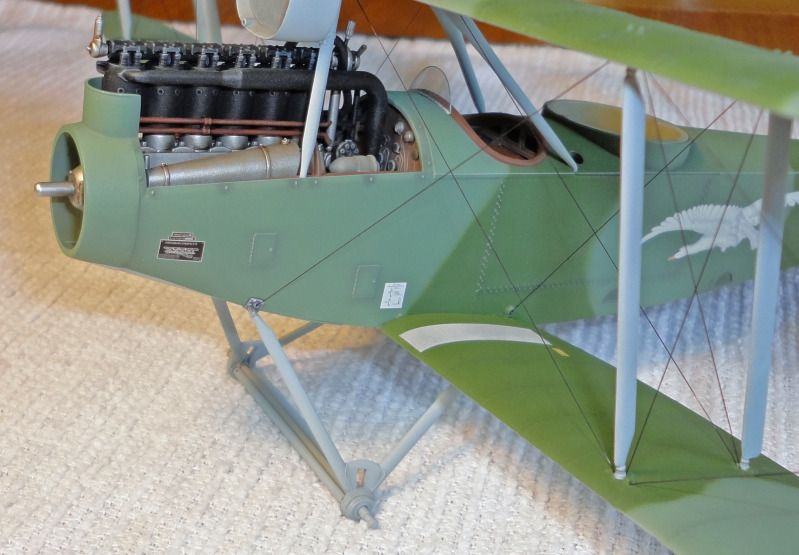
8th Image: This photo shows a topside overview featuring the Windhoff radiator, which is a large part of the aircraft’s distinctive look.

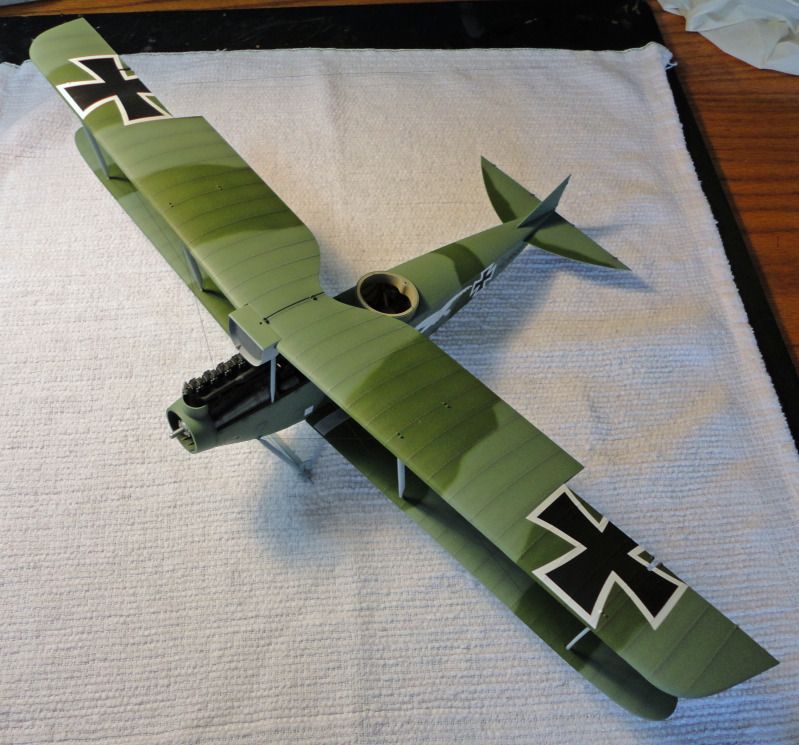
9th Image: The landing gear rigging is shown after installation.  For these lines I was able to use the “stretch and hold until dry” method described above.  My wife applied the CA accelerator while I did my best to hold the proper tension on the lines.

10th and 11th Image: Two views with the wheels and tail skid attached.


Until next time…

Offline rhallinger

  • Hero Member
  • *****
  • Posts: 1976
Re: WNW Rumpler C.IV Early
« Reply #39 on: January 11, 2013, 12:41:33 AM »
Phillip, that's one sweet looking bird! ;D  Fantastic job!  The rigging really does bring her to life, and the overall impression is simply excellent.  Very well done. :D  Nice that you could get your wife involved too! ;) 

Regards,

Bob

Offline Chris Johnson

  • Hero Member
  • *****
  • Posts: 1959
Re: WNW Rumpler C.IV Early
« Reply #40 on: January 11, 2013, 12:46:31 AM »
You've done a very nice job with the rigging. It looks nice and taut, and super clean too. Well done indeed! After all those trials long the way, if you're anything like me, I'll bet you felt a great deal of satisfaction when it was done.

Cheers,

Chris
You can have it good; You can have it fast; you can have it cheap. Pick any two, but all three are impossible.

Offline GAJouette

  • Hero Member
  • *****
  • Posts: 3579
  • " Beware of the Spanish Inquisition"
Re: WNW Rumpler C.IV Early
« Reply #41 on: January 11, 2013, 12:53:23 AM »
   Philip,
She's one awesome beauty my friend. Congratulations your extra efforts in her rigging certainly paid off well.
Highest Regards,
Gregory Jouette
" What Me Worry"

Offline pepperman42

  • Hero Member
  • *****
  • Posts: 4503
  • Sergeant, my brown pants.......
Re: WNW Rumpler C.IV Early
« Reply #42 on: January 11, 2013, 03:51:35 AM »
Beautiful. Very clean professional build. The rigging is perfect as others have said.

Steve

Offline Whiteknuckles

  • Hero Member
  • *****
  • Posts: 1335
Re: WNW Rumpler C.IV Early
« Reply #43 on: January 11, 2013, 04:40:08 PM »
As those above have said - beautiful work Philip. I like the scheme and the colours you chose, they look excellent ;)

Andrew
Eternal Apprentice

Offline LindsayT

  • Hero Member
  • *****
  • Posts: 844
  • "Somehow it didn't seem like war at all..."
Re: WNW Rumpler C.IV Early
« Reply #44 on: January 11, 2013, 11:07:40 PM »
Wow, that turned out nice and tight, didn't it? Well done!

LT