Author Topic: The Tommy  (Read 19725 times)

Offline RLWP

  • Hero Member
  • *****
  • Posts: 1494
  • Bodger
Re: The Tommy
« Reply #60 on: January 30, 2020, 04:03:28 AM »
As mine have all been simple boxes so far, make the sides, fit spacers to the top and bottom skin, then stick that lot together

That leaves the space over the cockpit open, and things go in that way. I'm finding that a better way of building than the usual injection moulded 'two halves' method

And whatever you do, it has to work for you!

Have you added holes/grooves to your vac forming setup?

Richard
Hendon for flying - the fastest way to the ground!

Offline kensar

  • Hero Member
  • *****
  • Posts: 2505
  • Reshaping the world - one piece at a time.
Re: The Tommy
« Reply #61 on: January 30, 2020, 05:34:26 AM »
No, I haven't fixed that yet, but I will.  I found I didn't need to vac form the turtledeck.
I am thinking about re-doing the fuse bottom to try to get a better part.

Offline kensar

  • Hero Member
  • *****
  • Posts: 2505
  • Reshaping the world - one piece at a time.
Re: The Tommy
« Reply #62 on: February 03, 2020, 10:42:03 AM »
Next update here...

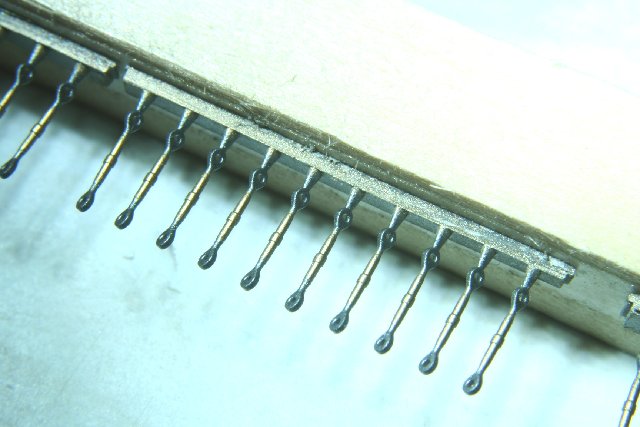
I'm going to try some Gaspatch resin turnbuckles (1/32) on this one.  I've seen that some people think they are too big, but I think they look reasonable.  If anything, the loops on each end are too thick, otherwise, the brass part is about 5" in length and about 3/4" in diameter at the middle, the thickest part, in scale.  I first planned to use some 1/48 metal turnbuckles, but the loops are too small for my rigging line and I couldn't drill them out - my hardened drill bits kept breaking!  Painted with Alclad colors.


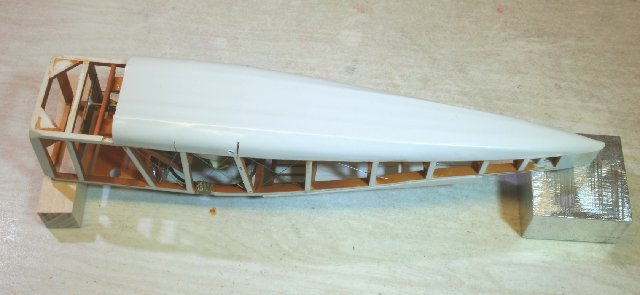
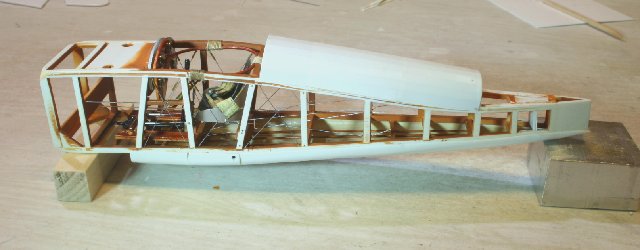
Mixed up some color.  It looks close to the restored planes I've come across on the net, but I wonder if it shouldn't be more brown?


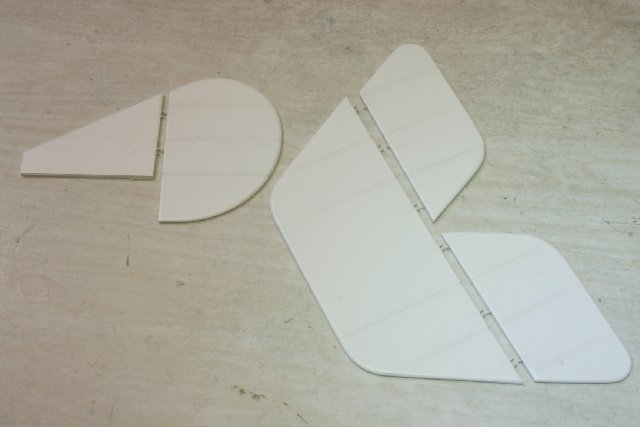
Tail parts primed and ready for drilling some holes for the rigging parts.


I've glued on the bottom covering and still working the finer points on it.


Thanks for dropping by!  Your comments are most welcome.


Offline FAf

  • Hero Member
  • *****
  • Posts: 1075
Re: The Tommy
« Reply #63 on: February 03, 2020, 08:16:19 PM »
Lots of stuff on these forums are very impressive, but the schratchbuilds are possibly one step above the rest when it comes to impressiveness! Fantastic work! Very inspiring!
/Fredrik

Online RAGIII

  • Hero Member
  • *****
  • Posts: 18842
Re: The Tommy
« Reply #64 on: February 04, 2020, 03:03:33 AM »
The covering looks awesome! Simply stunning build!
RAGIII
"A man has to know his limitations": Harry Callahan

"Don't slop it on" Lynda Geisler

Offline kensar

  • Hero Member
  • *****
  • Posts: 2505
  • Reshaping the world - one piece at a time.
Re: The Tommy
« Reply #65 on: February 04, 2020, 04:09:51 AM »
Thanks for the comments, Fredrik and Rick.
It's coming along, little by little.

Offline lone modeller

  • Hero Member
  • *****
  • Posts: 5317
Re: The Tommy
« Reply #66 on: February 04, 2020, 05:13:53 AM »
Sorry to have been remiss in dropping in lately Ken: my energy and mojo levels have been very low of late and I have not been visiting sites as I would normally do.

Anyway I have caught up and as per usual am blown away by what you are doing. The details and precision are just mind blowing - the cowling is something that I wish I could make in this scale (I can in the True Scale but this is much larger). Excellent scratch building.

Stephen.

Offline gbrivio

  • Hero Member
  • *****
  • Posts: 1682
Re: The Tommy
« Reply #67 on: February 04, 2020, 06:56:46 AM »
Impressive scratchbuild, I've notiticed just now. You did a great work on engine and cockpit areas, and the fuselage is coming very nice.
Looking forward for next, final steps.
Ciao
Giuseppe

Offline Alexis

  • Hero Member
  • *****
  • Posts: 7947
  • Love the self
Re: The Tommy
« Reply #68 on: February 04, 2020, 10:57:56 AM »
Moving forward with the skinning really well Ken  8)


Terri
Hurra ! , Ich Leben Noch
Body and life is a vessel we use to travel the planet . Femininity is the gift , The miracle comes from what we do with it .

Offline kensar

  • Hero Member
  • *****
  • Posts: 2505
  • Reshaping the world - one piece at a time.
Re: The Tommy
« Reply #69 on: February 04, 2020, 10:29:45 PM »
Thank you all for the encouraging comments.
Stephen - I think taking a break from time to time is necessary.  I have already started and completed a resin sailplane model since starting this one, just for a temporary distraction from this build.
Giuseppe - Thanks for the comments.  The 'final steps' are quite a long way off, but I am still motivated to finish this.
Terri - The skinning goes forward step by step.

I have remixed some paint for a more brown color and I think its more suitable - at least its the color I envisioned these planes to be.  I also have sanded the sides of the loops on a Gaspatch resin turnbuckle, and I think it will go a long way to making them look better.  They are still plenty strong enough to hold the rigging.  Now there's a lot more turnbuckles to sand.  The forward fuselage is getting attention now.

Offline RLWP

  • Hero Member
  • *****
  • Posts: 1494
  • Bodger
Re: The Tommy
« Reply #70 on: February 05, 2020, 04:47:19 AM »
This is looking really nice, Ken

Richard
Hendon for flying - the fastest way to the ground!

Bughunter

  • Guest
Re: The Tommy
« Reply #71 on: February 08, 2020, 10:32:40 AM »
Thanks for commenting, Frank.  I enjoy these discussions.
Thanks for the explanations, Ken. Me too :)

You made a really good progress.

I heard, that the resin turnbuckles are brittle, at least the 1/48 ones, so I stay with the metal ones.
But I own the new Palmer cord aero wheels in 1/48 form Gaspatch - that ones are simply U - N - B - E - L - I - E - V - A - B - L - E !

Cheers,
Frank

Offline kensar

  • Hero Member
  • *****
  • Posts: 2505
  • Reshaping the world - one piece at a time.
Re: The Tommy
« Reply #72 on: February 11, 2020, 10:45:42 PM »
Thanks for commenting, Richard and Frank.

I have sanded the sides of the loops on some turnbuckles as shown below.  I'm hoping they will work okay.  I usually put a minimum of tension on the rigging lines, so hopefully they won't break.  The 2 upper turnbuckles were sanded with 400 grit sandpaper.  The bottom one is original.


Paper pattern and one side made from 0.015" styrene.


Painting and weathering done before gluing.  The darker oil stains are AK Interactive 'engine grime', and the lighter discoloration is pastel chalk.


Despite what seems like heavy weathering, the sides hardly look weathered at all after installing.


Until next time.

Online RAGIII

  • Hero Member
  • *****
  • Posts: 18842
Re: The Tommy
« Reply #73 on: February 12, 2020, 12:18:01 AM »
Brilliant Modeling Ken! Once closed up No One could tell, or believe, it was scratch built! Make sure you take photos to the contest  8)
RAGIII
"A man has to know his limitations": Harry Callahan

"Don't slop it on" Lynda Geisler

Offline Radarman

  • Hero Member
  • *****
  • Posts: 687
Re: The Tommy
« Reply #74 on: February 12, 2020, 03:09:28 AM »
Ken,
Thanks for sharing your techniques. This is another great learning experience for us all

                                                                                      Kevin
We are all victims of history!